KiSS Classic EXPLORER User manual

1 MSL 72.140 Jetsam/Explorer R.1
Classic KISS, EXPLORER
DURABLE
RELIABLE
FLEXIBLE

2
READTHISMANUAL&THECLASSIC
MANUAL!!!!
KISSEXPLORERDIVERSMUSTREADBOTHTHEEXPLORERMANUALANDTHE
CLASSICMANUAL.THEYGOTOGETHER.THEEXPLORERMANUALONLYCOVERS
THEFEATURESWHICHDIRECTLYRELATETOTHEEXPLORER.
INORDERTOFULLYUNDERSTANDYOURNEWREBREATHER,THECOMPONENTS,
HOWTHEYWORK,HOWTOHANDLEANDTREATTHEM,YOUMUSTREADTHE
MANUALINFULL,FORYOURREBREATHER.
SPORTKISSOWNERSSHOULDREADTHESPORTKISSMANUAL.CLASSICKISS
OWNERSSHOULDREADTHECLASSICKISSMANUAL.EXPLOREROWNERS
SHOULDREADBOTHTHEEXPLORERANDCLASSICMANUALS.CLASSICOWNERS
WHOHAVEUPGRADEDTOSOMEOFTHEEXPLORERCOMPONENTSSHOULDREAD
BOTHTHECLASSICANDEXPLORERMANUALS.
THISSHOULDBEDONEPRIORTODIVINGORSERVICINGTHISUNIT!!!SPECIALAT-
TENTIONSHOULDBEPAIDTOALLNOTES&/ORWARNINGS;THEYMUSTBEREAD
ANDUNDERSTOOD!!!!FAILURETODOSO,MAYCAUSESERIOUSINJURYOR
DEATH!!!!
THEKISSEXPLORERGIVESDIVERSOPTIONSONHOWTORIGTHEIRUNIT.THIS
MANUALINNOWAYREPLACESTHETRAININGREQUIREDFOREXPLORATIONDIV-
ING&/ORTECHNICALDIVING.PROPERTRAININGISEXTREMELYIMPORTANTAS
ISGATHERINGPROPEREXPERIENCEPRIORTOATTEMPTINGADVANCEDDIVING.
YOUMUSTBEALEGALADULTINTHEAREAINWHICHYOULIVEINORDERTO
PURCHASEANDDIVEAKISSREBREATHER.
Aswithallscubadivingequipment,yourKISSrebreathercomponentsshouldbe
servicedannuallybyatrainedtechnician.Forthosedivingfrequently,servicing
mayberequiredmoreoften.
ALLINFORMATIONINTHISMANUALISSUBJECTTOCHANGE.
PLEASEVISITOURWEBSITE,www.kissrebreathers.com/manuals.html,
FORUPDATEDMANUALS.

3 MSL 72.140 Jetsam/Explorer R.1
THISISNOTAJOKE!!
Participationinrebreatherdivingcanresultinseriousin-
juryordeathtoyou,thediver!
ThewarningontheClassicKISSrebreatherisnotajoke.Beforebeginningyour
dive,youmustconsidertherisksinvolved.TheClassicKISSconsistsofmany
parts.Allofthesecomponentswilleventuallyfail.Carefulmaintenance,assembly,
andtestingwillnotpreventthisfromhappening.Atbest,itwilldelaythefailure.
TheClassicKISSisnotautomaticinanyway.Itrequiresconstantmonitoring,a
completeawarenessofthepotentialproblemslikelytobeencountered,andfull
knowledgeofhowtodealwithwhateverproblemsmayoccur.Ifyoudonothave
adequatetraining,equipment,physicalconditioning,andapropermindset,donot
getinthewater.
Thediver,YOU,hasthefinalresponsibilityforhisorherownsafetyandactions
whileusingthisrebreather.AllcomponentsoftheClassicKISSmustbeingood
workingorderandbeproperlyassembledandtestedtoreducetheriskoffailure.
Regardlessofthetrainingandexperienceofthediverandthereliabilityofthere-
breathertheriskofseriousinjuryand/ordeathcanneverbereducedtozero.
Thismanualisnotacompletetextonthemaintenanceandoperationofthe
ClassicKISSExplorer.Thedivermustcompleteapropertrainingcoursecovering
themaintenance,testingandoperationoftherebreatherbeforedivingthisequip-
ment.Therebreathercanmalfunctionwhiledivingevenwhenproperlyassem-
bledandhavingpassedallpre-divetests.Onlycarryingadequatebailoutgasand
havingthetrainingandskillsnecessarytoutilizethebailoutsystemcanreduce,
butnevereliminate,theriskofequipmentfailure.

4
CLASSIC KISS, EXPLORER
THE ORIGINAL KISS REBREATHER, MECHANICALLY CONTROLLED, MANUALLY
ASSISTED, IS NOW AVAILABLE IN AN ENHANCED PACKAGE!
TheClassicKISSrebreatherhasalwaysbeenknowntobe
DURABLE,
RELIABLE
and
FLEXIBLE.
WiththeExplorer,wetaketheoriginalversionandaddthefeaturesthatdivershavebeenaskingfor:a
unitbetterequippedforexplorationbutwhichdoesnotcompromiseonqualityandkeepstotheKISS
philosophy.
Alsodesiredbydiversistheabilitytomodifytheriggingoftheunittobetterworkwiththeenvironment
athand,theplanneddive,orgearavailableatthedestination.And,theywouldliketobeabletodothis
quicklyandeasily!
TheExplorerdoesallthis;itcanberiggedseveraldifferentways!
TABLE OF CONTENTS
EXPLORERpartslist Page5
Set-up options and components Page 7
Counterlung case and KISS wing Page 9
Harness Page12
Cylinderstraps Page13
Offboardaccessory Page14
Left side gas addition valve & Miflex hoses Page 16
Left side gas addition valve trouble shooting Page 18
EXPLORER with on board oxygen only Page 19
EXPLORER with on board oxygen & diluent Page 20
EXPLORERfortravel Page21
21” manifold to diluent first stage hose Page 23
Add valve quick connect system Page 24

5 MSL 72.140 Jetsam/Explorer R.1
EXPLORER PARTS LIST
Congratulations on purchasing the KISS Explorer. This is a unit for divers who want options when configuring
their rebreather; rigging can be personalized to suit the divers personal style or to suit specific diving require-
ments. It is up to you, the diver to ensure that the system is rigged properly for the diving that you are plan-
ning on executing and also to ensure that you are properly trained and have the appropriate gear and bail out
gas.
• 1 Explorer counterlung case with detachable front plate and webbing harness. Also included are 2 attachment
screws for securing front plate to case; screw sets for securing the cover plate, if the KISS wing is not used; de-
tachable manifold; spine; detachable tank rails
• Custom KISS wing. Includes over pressure valve as well as inflation hose and inflator
• 1 scrubber head with all required parts (CL attachments and rings, towers, 2 elbows (left side with appropriate
tube), exhaust valve, draw nut)
• 1 scrubber head hat
• 2 counterlungs: includes a 2 liter and a 4 liter unless otherwise specified - no charge for different combination
• 1 diluent first stage with, OPV, and 2 swivel elbows
• 1 oxygen first stage with delrin plug, OPV, and swivel elbow
• 1 right side oxygen manual add valve with constant flow orifice, filter and 2 yellow Miflex hoses
• 1 left side gas addition valve; choose either no-flow oxygen valve or no-flow diluent valve.. With filter and 2 black
Miflex hoses
• 1 ADV assembly: cover, diaphragm, valve bolt, valve stem, LP swivel elbow
• 1 LP diluent hose with hose adapter (ADV swivel to manifold)
• 1 LP diluent hose with hose adapter (Manifold to diluent first stage)
• 1 Scrubber canister with protective coating. Also includes the base & inner tube, which is packed with:
4 small lined hose clamps - to attach quick connect system to loop hoses
2 O-ring sets - One is a spare
1 nut driver
1 KISS tool - for draw nut
1 back plate attachment kit: 2-1 inch hex bolts, 2-1 1/2 inch hex bolts, 2 fender washers, 2 lock washers
1 counterlung ring, spare
8 SS ballast rings
2 scrubber head plugs. For use if the left side elbow is removed
• 1 bailout mouthpiece with LP hose
• 2 sets (four straps) webbing for on-board cylinders
• 2 loop hoses: 22” included unless otherwise specified - no charge to replace with 17” hoses
• 1 complete off-board accessory kit (rebreather side and cylinder side)
• 4 quick connect hose stubs for loop hoses
• 1 CD - Manuals

6
DISPLAYOPTIONS,IFORDERED:
• Jetsam triple wrist display with attachment plate, 2 wrist straps and jewelers screw driver set
• Jetsam dual wrist display with VR3 cable, 2 wrist straps and jewelers screw driver set (cable will read one sen-
sor)
• VR pendent display with dual fischer attachment plate
• Dual fischer attachment plate only
• No display
• Optional Shearwater HUD - attaches to dual fischer plate
NOTINCLUDED:
• AI PSR-11-39-MD sensors (3), pressure gauges (2). Sensor warranty periods start from the moment they are ship-
ping from the Teledyne warehouse. As such, it is best that they are ordered directly from the distributor or a
dealer so that you get the freshest sensors possible. This way you know they have not been sitting on our shelf
for some time. Most divers have pressure gauges which can be used. Additional LP and HP swivels.
EXTRAS:
• We are happy to supply you with additional LP swivel elbows and off-board gas accessories. HP swivel elbows
are also available.
• Quick connects for the right side oxygen manual add valve and the left side gas addition valve. These quick con-
nect sets are for those who wish to dive their Explorer with no on-board gas, also known as the Travel Explorer.
A quick connect is required as this system allows divers to put their rebreathers on separately from the cylinders.
Large side mount cylinders can be attached while in the water. Please see page 21 for a full description of this
method of diving.

7 MSL 72.140 Jetsam/Explorer R.1
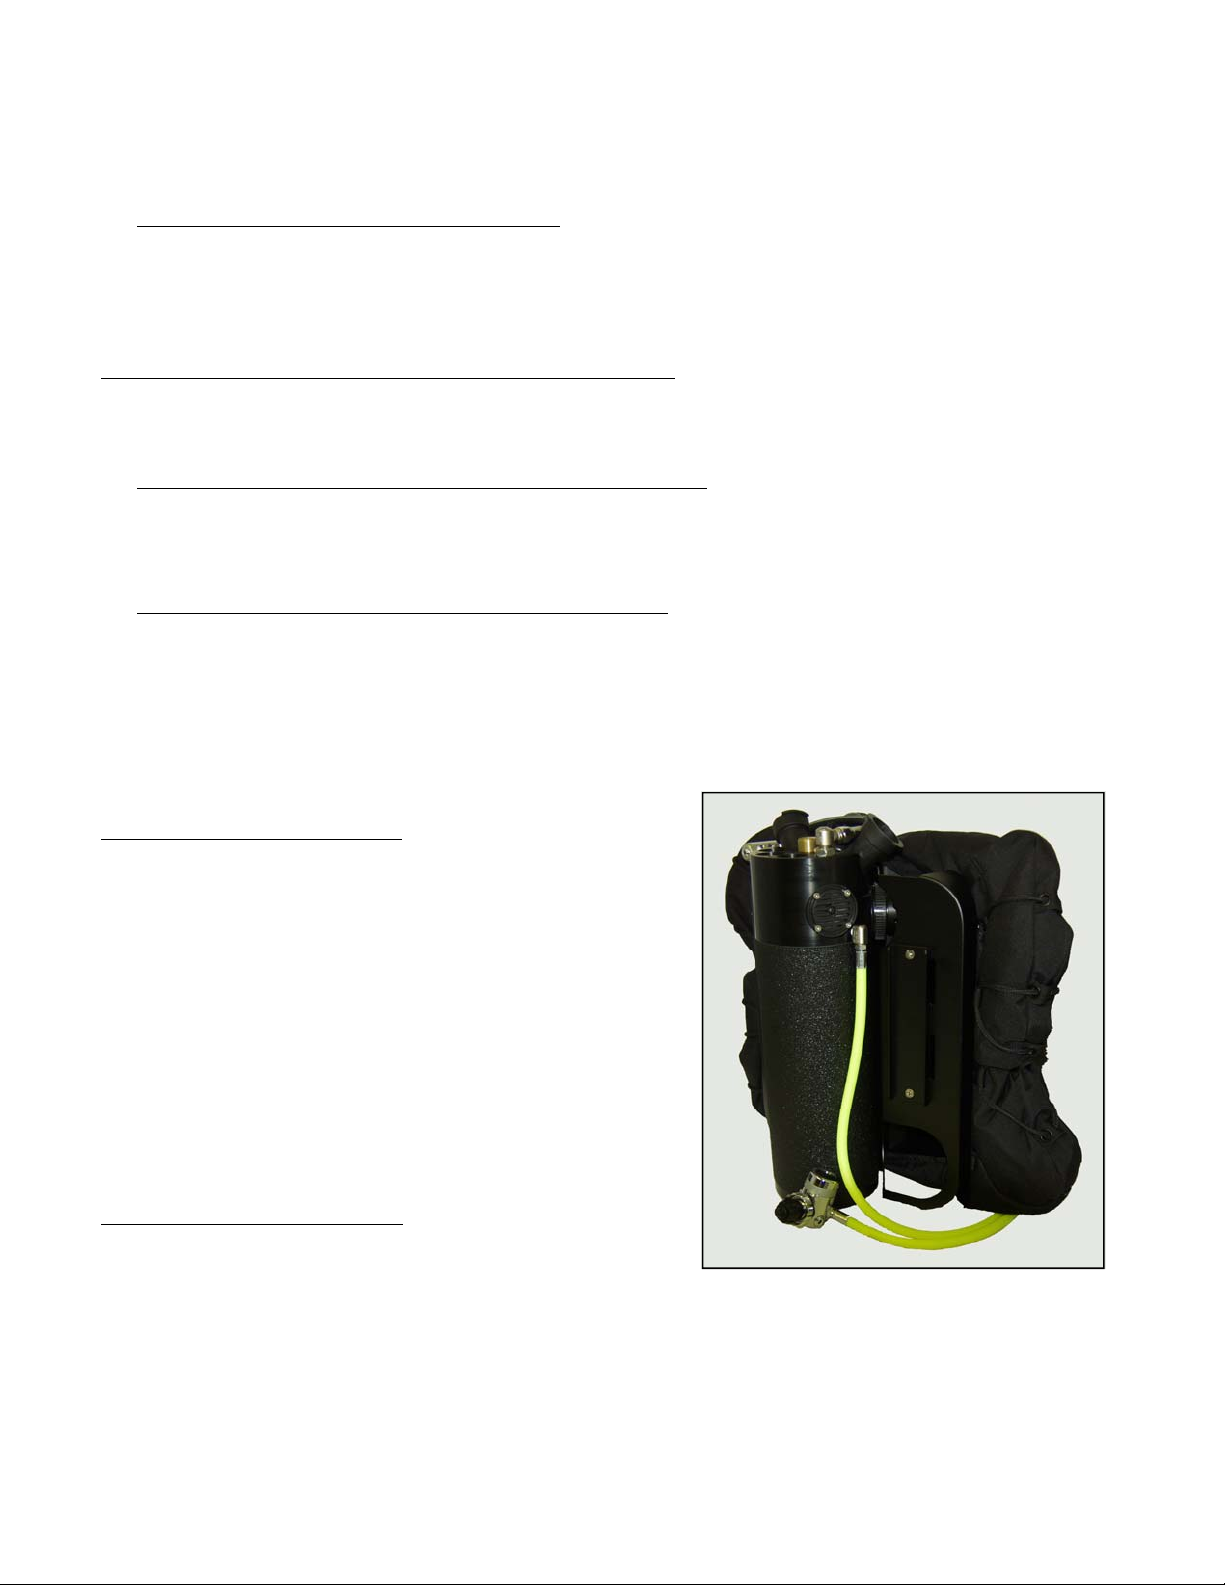
SET-UPOPTIONS&COMPONENTS
This section of the manual discusses the various options for rigging the KISS Explorer. Explorer owners should
read carefully the sections below to determine which rigging methods are appealing. There are some compo-
nents which are not included in the Explorer package, which are required for some of these methods. We
chose not to include all the parts for every rigging style, as not every diver will require them. This helps to
keep the cost of the unit down, and divers can then purchase what they need.
Once you determine which style suits you, turn to the appropriate section in the manual for further explana-
tion of that rigging system.
CYLINDERRIGGINGOPTIONS
1.ON-BOARDCYLINDERS:Standard,diluentandoxygen;withadditionaldiluent/bailoutasside-mount.
With this system, divers can choose any mix they like for the left side cylinder. With this system, divers
would plumb their side mount cylinders into the Explorer using the off-board accessory. Extra full off-
board kits or cylinder side whips can be purchased.
Divers need to decide which left side gas addition valve they would like to use. They can choose either
the no-flow oxygen valve or the no-flow diluent valve. See below for full add valve descriptions.
The right side oxygen manual add valve with flow is standard.
2.ON-BOARDCYLINDERS:Oxygenonly;withdiluent/bailoutasside-mount.With this system, divers
would plumb their side mount cylinders into the Explorer using the off-board accessory. One off-board
accessory kit (rebreather side and cylinder side) is included with the Explorer. It attaches to the Explorer
through the manifold. The Explorer can easily be rigged with 2 full off-board kits, if desired. This way, 2
side mount cylinders can be plumbed into the rebreather, and no disconnecting of the off-board is neces-
sary. Or just 1 off-board rebreather side whip can be used. With this set up, the quick disconnect would
be utilized when switching to other cylinders. Divers can purchase extra cylinder side whips, if desired.
For those that wish to dive with 2 on-board oxygen cylinders, the left side gas addition valve should be the
oxygen valve with no flow. Please see the gas addition valve section below for a full description of this
valve. The diluent add valve should not be used; the flow is too high!!
The right side oxygen manual add valve with flow is standard.
3.OFF-BOARDCYLINDERSONLY:diluentandoxygenasside-mountonly. This method, also known as the
Travel Explorer, does not use on-board cylinders. Cylinders of any size can be used, as they are side-
mounted.
With this rigging method, divers will have their diluent cylinder plumbed to the off-board accessory and
they will also have use of a left side gas addition valve, if you choose to dive with it. Divers will need to
decide which left side gas addition valve they would like to use. They can choose either the no-flow oxy-
gen valve or the no-flow diluent valve. See below for full add valve descriptions.
The right side oxygen manual add valve with flow, is standard. it does not require an off-board accessory.
GASADDITIONVALVES
1. Rightside,oxygenmanualaddvalvewithflow.Thisis standard and is included in all Explorer packages.
This is the original manual add valve which is used on all KISS rebreathers.
2. Leftsidegasadditionvalve,oxygenno-flow.This valve is the same as the right side valve, but it DOES
NOT HAVE AN ORIFICE! Instead it is plugged. Gas will only go into the rebreather from this valve if the
button is pushed.

8
This valve is shipped oxygen clean. It can be used with either oxygen or any other type of gas. Divers
should be aware that if they use this valve for diluent, it will NOT have enough flow (when the button is
pushed) to do a quick diluent flush.
3.Leftsidegasadditionvalve,diluentno-flow.This valve has been modified from the original O2 manual
add valve; the flow has been increased. Also, IT DOES NOT HAVE AN ORIFICE; it is plugged. This means
that the only way this valve will deliver gas into the rebreather, is by pushing the button. As this valve has
a higher flow, it should NOT be used with oxygen.
GASADDITIONVALVES WITHQUICKDISCONNECTFITTINGS
(the quick disconnect fittings are an optional product and not included with the EXPLORER package.)
1. QDfittingsnotattachedtothemanualgasadditionvalves:Unless the KISS Explorer is set up for the
no on-board cylinder/travel version, these fittings are not required. While they can be used, divers should
remember that the more fittings on the rebreather, the more failure points it has.
2. QDfittingsattachedtothemanualgasadditionvalves:The QD fittings enable the diver to dive without
on-board cylinders, using side mounted cylinders only. (the QD fittings must be ordered extra). With this
rigging method, the rebreather first stages are used as the side mount first stages. These QD fittings are
required if the diver wishes to use heavy cylinders which must be attached in the water. The QD allows
the add valve hose system to split, making this possible. This method would require the diver to attach
the bailout regulators to these first stages. Please see page 21 and page 24 for full details on diving this
rig.
GASADDITIONVALVEROUTING
The Explorer ships with the add valves sitting over the divers
shoulders. You may choose to route the valve so that the hoses
wrap around your waist with the valve clipped on the lower part
of your harness. To do this, you will need to turn the scrubber
head elbow so that it turns down. Then attach the longer Miflex
hose to the elbow, and the shorter hose to the first stage. Basi-
cally, you are switching them from how they are shipped. Re-
member, the hose from the first stage should be attached to the
filter on the add valve.
LEFTSIDEGASADDITONVALV E
It’s worth noting that this valve does not need to be used on
every dive. It is included in the Explorer kit as it is a feature that
some divers require on their technical dives. If you find that it isn’t a feature that you need at this point in
your diving, it can be removed.
The easiest way to do this is to remove the miflex hose from the elbow and use a standard LP first stage port
plug to close the elbow. This way, it doesn’t need to be removed and the add valve can easily be reinstalled
when required.

9 MSL 72.140 Jetsam/Explorer R.1
COUNTERLUNGCASE&KISSWING
ThenewExplorercounterlungcaseshipswiththefrontplateattached,andthewingNOTattached.You
willnoticethatwithoutthewingattached,theplateissecuredinthefouroutercornerswithscrewsets.
Also,thetopcentrescrewhasaspacerinbetweenthespineandthebackofthefrontplate.Thisspacer
andthe4screwsetsareNOTrequiredwhendivingwiththeKISSwing.
AstheKISSwingsitsbetweenthefrontplateandbackbox,theplatewillsitsnuglyandtheirwillbeno
gappinginbetweentheparts.Thecornerscrewsetsareusedtotakeupthegappingifthecaseisdived
withoutthewing.Thosedivingwithoutthewing,maychoosenottousethecornerscrewsets,butadd
athirdspinescrewatthebottom.Orasyourwingattacheswithascrewinthisareaanyway,itwould
alsobesufficient.Thechoiceisreallythedivers;thescrewsetsareincludedforthosewhowishtouse
them.Pleaseseethenextpageformoreinformationonthecornerscrewsets.
Thespacer(blackplasticwasher)whichislocatedinbetweenthespine
andtheplate,atthetopisalsooptional.Itistheretoremindyouto
NOTovertightenthattop(orbottomscrew,ifused)allthewaydown,if
theKISSwingisnotused.Ifyouchoosetonotusethiswasher,orif
youloseit,justdon’ttightenthescrewdownalltheway.Leaveasmall
gap.Ifthescrewistighteneddownalltheway,itwillputstressonthe
case.
TheKISSExplorercounterlungcaseattachestothescrubberheadinthesamemanneroftheClassic
KISS;withtwo,2-inchflatheadscrews.ForthoseupgradingolderClassicKISSunits,theexistingscrews
canbeused.Ifforsomereason,newscrewsarerequiredtocompletetheupgrade,theyshouldbeor-
deredwiththecase.Whenswappingcases,donotforgettoinsertthespacerbetweentheheadandthe
case.Newunitsshipwitheverythinginplace.
Afterattachingthebackpartofthecounterlungcasetothescrubberhead,thevariousfittingscanbe
reattachedtothehead.Again,thosebuyinganewExplorerwillfindeverythingattached.
Atthispoint,thecounterlungscanbeattachedtotheunit.Please
seetheClassicKISSmanualforproperCLinsertioninstructions.
ThenextstepwouldbetoattachthecustomKISSwingandfront
plate.Thewingissituatedbetweenthebackpartofthecounter-
lungcaseandthefrontplate,ThispositioningkeepstheExplorer
verytighttothediversbackandprovidesalowprofile.Asthiswing
wasdesignedfortheKISSExplorer,itbestprovidesliftwherere-
quiredandhasexcellenttrim.Ithasa360degreedonutstyleblad-
derassemblyandmaximumliftisapproximately40lb.Tightening
thebungeeswilllowertheprofileandreducethelift.
ToattachtheKISSwing,youwillneedthe4barrelnutswhicharepartofthepackage.Positionthewing
sothattheinflatorandthedumpvalveareontherightside.Thetopofthewingisnarrowerthanthe
bottom.Thetopalsohasatabinthemiddleofthetopportion.Seephotototheright.Thissideisalso
thesidewhichshouldbefacingyouwhenthewingisattached.

10
Withthewingproperlypositioned,itcan
nowbeattachedusingthe4barrelnuts.
Thewingattachestothefourcornersof
thecounterlungcase.Onthebacksideof
thewing,thereareloopsineachcorner
whichhavealargestainlesssteelgrommet.
Pushthefemalepiecethroughtheloopso
thattheopensideisfacingthecase.Then
pushthemalepiecethroughtheholeinthe
cornerofthecase,sothatthethreaded
endisfacingthewing.Securethem,fingertight.Thebarrelnutsaremeanttobehandtightenedonly.
Dothisforeachofthefourcorners.Tosecurethebarrelnutbythemanifoldmount,firstpushthemale
piecethroughtheholeinthecase,thenlineitupwithitsmatingpiece.
When the wing is attached at all four corners, you will notice that it
seems loose. This is normal. When the top plate is fitted, every-
thing will be positioned properly and will be snug.
Position the top plate as shown in the right hand photo, with the
crotch strap slot at the bottom. The photo at the right shows the
case assembled without the wing. Arrows are pointing to the 2 se-
curing screws and the crotch strap slot at the bottom of the case.
When using the wing, the 4 attachment screws for the outer cor-
ners of the top plate, are not used.
Slide the plate under the top flap of the wing first. Then pull the
bottom flap over the bottom of the plate.
Line up the plate with the spine and attach the 2 pan head screws.
It is best to tighten the plate while the unit is laying down. With one hand, apply pressure to the plate push-
ing it into position, and tighten the screws with the other. Ensure that it is properly secured. The screws for
this application are 5/16-18 x 5/8.
The wing has both an inflator hose and a dump valve.
Both are on the left side (when wearing the unit).

11 MSL 72.140 Jetsam/Explorer R.1
The Explorer counterlung case can be dived without the KISS wing. To do this 4 screws/4 washers/4 nuts
which are included with the kit, can be used. As mentioned on the previous page, this is up to you, as a third
spine screw at the bottom will also help secure the plate. You may feel that your wing/harness attachment
screws will anchor the plate properly.
The spine screws for this method are still the 5/16-18 x 5/8”. If you are planning on diving with the corner
screw sets, be certain to attach the spine screws first. Otherwise, they will be difficult to line up.
The four outer corners will require each, a screw, washer and nut. The washer acts as a spacer to take up
room where the wing would normally sit. To assemble, place the screw through the plate, the washer be-
tween the plate and the back counterlung case, and the nut on the inside of the counterlung case. Secure.
See the photos below. The corner screws are 5/16-18 x 5/8”, using a 5/16 hex nut. As mentioned on the previ-
ous page, if the wing is not used, the top (and bottom, if used) screw should not be tightened all the way, if
the spacer is not used.
To attach the cord, thread it through the top,
back grommet with the knot on the outside.
See photo to the far right, top red arrow.
Thread the cord through the grommets on the edge of the wing, and then through the webbing on the front of
the wing. Continue threading the cord, alternating from one side to the other, and utilizing the grommets on
the edge of the wing.. See photos above. Once the cord has been threaded, pull it through the last grommet
at the bottom back of the wing, and secure it with a knot. Any left over cord, can be threaded through the
slots to secure it.

12
KISSWINGHARNESS
TheKISSExplorerfrontplateisdesignedtoworkasabackplate;slots
havebeencutforastandardwebbingharness.
TheharnessisshippedwithaSSbuckle,2D-rings/slidespershoulder
strap,1D-ring/slideperwaiststrap(1oneachhip),adjustablecrotch
strapwithscooterringandD-ring/slide,11feetofwebbing,and4web-
bingprotectors.Shouldanymoreringsoraccessoriesbedesired,they
caneasilybeadded.
WhiletheExplorershipswithourwebbingharness,youmaydecideto
threadyourownharnessintotheExplorer’sfrontplate,oralternatively,
toattachastandardharnesssystemusingthethreadedholesonthe
plate.(similartotheClassicKISS).Theboltsforthisapplicationare
included.
THREADINGTHEHARNESS:
1.Threadthewebbingthroughtheshoulderstrapslots.Positionthewebbingsothatthegrommetis
positionedtotherightorleftofthecenter.Ifthegrommetisinthecenter,youwillnotbeableto
tightenthetopscrewproperly.Asthereisplentyofwebbingthisshouldn’tbeanissue.Seethe
photototheright.Beforeyouslidethewebbingthroughtheslots,pushtwoofthewebbingprotec-
torsoverthewebbing.Theprotectorsshouldsitsothattheycoverthewebbingwhichgoesthrough
theslots.Thiswillhelppreventwear&tearontheharness.
2.Position2D-rings/slidesoneachshoulder.Seethetopphotoforpo-
sitioning.Notethatthetopringshouldsitfairlyhigh;approximately
3”to5”fromthetopoftheplate.Remember,therebreatherneedsto
sitashighonyourbackaspossibleforthebestworkofbreathing.
THISISVERYIMPORTANT!!
3.Next,threadtheendofthewebbingthroughthewaistslot.Pushtheendthroughthefrontofthe
platetowardstheback,andthenforwardthroughthenextslot.Seephotototheright.Repeatthis
stepwiththe2ndpiece.Again,twoofthewebbingprotectorsshouldbeusedtoprotecttheharness.
4.Position1D-ring/slideoneachwaiststrap.Seetopphoto.
5.Installthecrotchstrap.Majoradjustmentsshouldbedoneonthebackpartofthe
webbing.Minoradjustmentsshouldbedoneonthefrontpartofthewebbing.
Thefrontloopwillbethreadedoverthewaistwebbingontherightside.
6.Attachthewaistbuckletothewebbingontherightside.
Forthosethathaveneveradjustedawebbingharness,itwilltakea
fewattemptsinordertoachievethedesiredfitandtoensurethat
therebreatherissittinghighenough.Bepreparedandgiveyourself
plentyoftime.
Worthnotingisthatthewaiststrapisprobablybestadjustedsothatit
sitsoveryourhips;loweronyourbody,ratherthenhigher.Keeping
thewaiststraplow,andthecrotchstrapsnug,willensurethatthe
harnesssitssecurelyanddoesnotshift.Adjustingyourharnessthis
way,willalsohelpkeeptherebreatherhigheruponyourback.
The Explorer plate has several additional holes drilled into it. They are there for attaching various accessories
such as butt plates or side-mount bungee for tank valves.

13 MSL 72.140 Jetsam/Explorer R.1
CYLINDERSTRAPS
The KISS Explorer is shipped with 2 sets (4 straps) of the webbing straps. They are a standard feature for the
Explorer.
These straps can be locked under the tank mount brackets on the case. Loosen the tank mount brackets, and
instead of sliding the straps through the slots on the case, slide them under the tank mount bracket instead.
Position the strap so that the buckle is located where you want it and then tighten the tank mount bracket
again. This will keep the straps from sliding around while you attach your cylinders.

14
OFF-BOARDACCESSORY
TheKISSExplorerpackageincludesonefullsetoftheoff-boardaccessory.
ThisaccessoryisusedtoplumbthesidemountgasintotheKISSExplorer
throughthemanifold.Thekitincludestherebreathersidewhipandthe
sidemountcylindersidekit.
Somediverschoosetodivewithtwocompleteoff-boardaccessories.Using
twosetsmeansthatiftwosidemountcylindersarehookedup,thediver
doesnotneedtodetachthequickconnectsfromonecylindertoanother.
Thisversion,whilepracticaldoesaddextraO-ringstotherig.
Alternatively,thedivercanchoosetopurchaseonlyadditionalcylinderside
whips.Ifthediverhasthiswhiponeachsidemountcylinder,theninorder
tobringthegasintotherebreatherloop,thedivermustconnecthisre-
breathersidewhiptothatparticularcylinder.Thisversioncutsdownon
thenumberofO-ringsontherigandalsoiscleaner.
Theoff-boardaccessoryrebreathersideincludes:1swivelelbow,130inchLP
hose,1shut-offvalve,1checkvalvewithquickdisconnectmale.
Theoff-boardaccessorycylinder
sideincludes:1swivelelbow,16inch
LPhose,1quickdisconnectfemale.
Theshutoffvalveisopenwhenitis
pushedup,followingthedirectionof
thearroworpushingittowardsthe
LPhose.Itisclosedwhenitis
pusheddownorawayfromtheLP
hose.Thevalvehasbeendesigned
thiswaysothedivermustmakeaconsciousdecisionto
openthevalve.Whendoingyourpositive&negativepres-
suretests,remembertoclosethisvalveoryourtestswill
fail!!
Priortoconnectingtherebreathersidewhiptotheoffboardcylinder,youmustopentherebreatherson-
boarddiluentcylindertopressurizethewhip.Ensurethattheshutoffvalveisopen,withthearrow
pusheduptowardsdiver.Thisconfirmsthattheonewaycheckvalvehasseated.Nogasshouldexitthe
offboardwhip.Thecheckvalvehasthreeinternalparts;aspring,apoppet,andanO-ring.Thisprocess
insuresthepoppethasseatedintheO-ring.Makethispartofyourpre-divechecklist.
Withthissystem,thedivercanhavetheoff-boardcylindersopenthroughoutthedive.Evenifthequick
disconnectisnotconnected.Thecheckvalveinthemanifoldwhipwillpreventanywaterfromentering
thesystem.

15 MSL 72.140 Jetsam/Explorer R.1
ASWITHANYNEWDIVINGEQUIPMENT,USINGTHISACCESSORYWILLREQUIRETHEDIVER
TOLEARNNEWSKILLSANDCREATENEWMUSCLEMEMORY.
WITHANYTYPEOFDIVING,REBEATHEROROPENCIRCUIT,THEREISRISK.WHENUSING
NEWEQUIPMENTSUCHASTHEOFF-BOARDACCESSORYONAKISSREBREATHER,THEDIVER
MUSTACCEPTTHISRISKANDTHATTHEABOVEMENTIONEDNEWSKILLSWILLNEEDTOBE
LEARNED.FAILURETOLEARNTHEPROPERUSEOFTHEOFF-BOARDACCESSORYCAN
CAUSETHEDIVERSERIOUSINJURYORDEATH.

16
LEFTSIDEGASADDITIONVALVE&MIFLEXHOSES
The KISS Explorer ships standard with a left side gas addition valve. Either an oxygen valve or a diluent valve
can be used. One valve is included with the Explorer. Additional valves can be purchased, if desired.
This means that we now have 3 gas additional valves.
1. The original oxygen manual add valve which is located on the right side of the rebreather. This valve deliv-
ers oxygen in two ways. First through the constant flow orifice and second when the button is pushed.
2. Left side diluent gas addition valve: this valve delivers gas only when the button is pushed. It does NOT
have an orifice; it is plugged. The flow for this valve, when the button is pushed, is higher than the oxygen
valves. While this valve is oxygen clean, it should not be used for oxygen mixtures as the flow is high.
3. Left side oxygen add valve: this valve delivers gas only when the button is pushed. It does NOT have an
orifice; it is plugged. This valve has a similar flow as the right side valve, when the button is pushed. This
valve can be used for any gas mixture.
In order to determine which valve is which, we have engraved the larger fitting on the valves. The fitting which
is secured into the housing on the button side, will be engraved. Also, we have labelled the filter on each
valve assembly.
*WARNING:Ifyouremoveyourvalvefromtheunit,keepsparevalves,orkeepdifferent
valvesinyourkit,becertainthatyouknowwhattheyarefor!Readtheinscriptionsanduse
thecorrectvalveforyourplanneddive.
As the left side valve does not have an orifice, the left side first stage is not modified. It is a standard first
stage. This means that the left side valve will add gas at any depth. This is especially handy for those divers
who prefer to run their right side valve at a lower flow, and are unable to add oxygen at depth.
For those upgrading older Classic KISS units to a left side valve, note that both
an elbow and tube are required. When installing the elbow and tube on the
left side, the outer brass plug and inner stainless steal plug must be removed.
Once removed, put them someplace safe; if you ever want to remove the elbow
assembly, then BOTH of these plugs must be reinserted. In the event that you
don't’ want to use the elbow, it may be easier to remove the hoses, and plug the
elbow using a standard 3/8 first stage plug.
*WARNING:IFTHETWOPLUGSAREREMOVED,ITISIMPORTANT
THATTHETUBEISUSEDWITHTHEELBOW.THISISCRITICALFOR
PROPERGASROUTING.ALSO,IFTHEELBOWASSEMBLYISREMOVED,ITISALSOCRITICAL
THATBOTHPLUGSARERE-INSTALLED!FAILURETODOSOWILLALSOCAUSEINCORRECT
GASROUTING.EITHEROFTHESEPROBLEMS,COULDCAUSEINJURYORDEATH!

17 MSL 72.140 Jetsam/Explorer R.1
Those that are installing the elbow themselves, should first apply Teflon tape to the threads. While this is not
a pressure fitting and tape really isn’t required, it will help protect the threads. When attaching the elbow, en-
sure that it is not cross threaded. Also, do not over tighten. It is not required. Four to five turns is enough.
The best tool to tighten the elbow is a 5/8 wrench. Use it to cup the bottom of the elbow to help turn it into
position. You should only need the wrench on the last turn. The first few turns can be done by hand.
*NOTE:Therightandleftsideelbows,whichattachtotherebreatherhead,areNPTorpipe
thread.Thisisataperedthread,NOTastraightthread.Ifyouscrewafittingwithastraight
thread,suchasaswivelelbow,intothisportitwilldamagetherebreatherhead!Ifthishap-
pens,itisNOTrepairable.Priortomodifyingyourrebreather,pleasebecertainthatyouun-
derstandwhatfittingsarerequired.
*NOTE:SeetheClassicKISSmanualforinstructionsondisassemblingandservicingthegas
additionvalves.
*NOTE:Remember,whenattachingthegasadditionvalvetothehosesorotherfittings,al-
waysputonewrenchonthefittingwhichattachestotheplasticvalve.Usethiswrenchto
ensurethatthisfittingdoesnotspinwhileyouareeitherattachingorremovingthevalve
fromotherfittingsorhoses.Ifyouneedtoremoveorattachanyfittingswhichgodirectly
intotheplastic,becarefultonotovertighten.Useonlytwofingersonthewrench!
The hoses for the left side gas addition valve are both Miflex hoses which are rated for oxygen use. As the Ex-
plorer has two similar gas addition valves, it is important to differentiate between them. Therefore, the right
side valve hoses which have always been for pure oxygen, remain a bright yellow colour. The new hoses will
be black.
WARNINGFORRIGHT&LEFTSIDEADDVALVES!
Theoxygeninjector,isaconvenience.Itisnotacontrollerinanyway.Theonlydeviceregu-
latingtheoxygenpartialpressureisyourbrain.Theautomaticoxygenadddoesnotreduce
theneedtomonitorthethreepartialpressuredisplays.Itonlyreducesthenumberoftimes
youhavetopresstheoxygenaddbutton.Aswithanyrebreather,thedisplaysshouldbe
checkedconstantlyduringthedive.Theoxygenregulatorcanfailandstopdelivering02or
itcanfailandincreasetheflowdrastically.Theorificecanbecomepluggedandstopdeliv-
eringoxygen.TheaddvalveO-ringscanfailandincreasetheamountof02beingaddedto
thebreathingloop.Anyofthesethingscankillyoubutanyoftheseproblemscanbeover-
comeifyouareawareoftheconditionsinthebreathingloop.
KNOWYOURPO2ATALLTIMES!

18
LeftSideGasAdditionValveTroubleshooting
If the gas addition rate is lower than it should be, the following has happened:
• The filter has become clogged and should be replaced.
If the gas addition rate is higher than it should be, then one of the following things has happened:
• The plug has become loose where it screws onto the valve.
• The valve o-ring is worn or damaged.
• The spring is broken or weakened and is not holding the valve closed.
The regulator should be serviced regularly and maintained in an oxygen clean condition.
*WARNING:Itisveryimportantthatthisvalveisingoodworkingorder,withgoodO-rings.
Ensurethatyourinseyourgearafterdivinginsaltwater,andifyoufloodyourrebreather,
andyouthinkwaterhasgottenintothevalve,serviceit!!Ifyoupayattentiontohowoften
youusuallyaddoxygentoyourrebreatherduringatypicaldive,itwillbeeasierforyouto
noticeaproblem.
*NOTE:TheMiflexhosesareratedforoxygenuse.Astheyhavestandardregulatorhosefit-
tings,theycanbereplacedwithotherrubberLPhoses.Ifyoudoso,pleaseensurethatthe
hosesyouuseareratedforoxygenuse!
Also,alllowpressurehosesontheKISSExplorershouldbeinspectedperiodicallytoensure
thattheyarenotdamagedandingoodworkingorder.Thisincludestheoxygenhoses,dilu-
enthoses,mouthpiece2ndstageregulatorhoseandADVhose.

19 MSL 72.140 Jetsam/Explorer R.1
EXPLORERWITHON-BOARDOXYGENONLY
Thissystemisfordiverswhowishtohaveredundantoxygen.Thesediversfeelthathavingonlyone
oxygencylinderforatechnicaldive,istheweaklinkofthesystem.Withthisconfiguration,thedivers
diluentgasisthesidemount/bailoutgas.
*WARNING:Asalways,alldivesshouldbeconductedwiththeappropriategear,trainingand
mindset.Ifanyoneoftheseislacking,deathcouldresult!
With this system, divers would plumb their side mount cylinders into the Explorer using the off-board acces-
sory. With the side mount cylinders attached to the loop via the off-board accessory, gas can be added to the
loop in two ways. First by using the ADV and second by using the mouthpiece. Also, open circuit gas can be
breathed via the rebreather mouthpiece. As the side mount cylinder is also the bail out cylinder, divers should
have a bail out regulator attached to these cylinders.
*WARNING:Divingthebailout/sidemountcylindersWITHOUTsecondstagesshouldnot
bedone.Iftherebreathermouthpieceforanyreasonfails,thenthebailoutgaswouldnot
beaccessible.Also,diversshouldensurethattheyplantheirdivesappropriatelyandtakein
considerationtheirgearconfigurationaswellastheirbuddiesgearconfiguration.Ensure
thatalldiversareproperlytrainedfortheplanneddivesandthattheyunderstandeachoth-
ersgear.Failuretodoso,mayresultininjuryordeath!
*WARNING:Ifyouaregoingtodivethissystem,
withtwoon-boardoxygencylinders,
you
MUSTremovethe21”LPhoseandadapter,whichrunsfromthemanifoldtothediluentfirst
stage.Ifyoudonotdothis,youwillbeaddingbothpureoxygenfromthelefton-boardcyl-
inderandalsodiluentfromyoursidemountcylinderthroughtheADV!!TheADVshould
ONLYaddthegasfromthesidemountdiluentcylinder!!Ifoxygenisintheleftsidecylin-
der,itmustONLYbeaddedtotherebreatherusingtheleftoxygengasadditionvalve.Div-
inginthismannerpresentschallengesandthereforeitisonlyforthosewithadvanceddiv-
ingexperienceandadequatetraining!!!Ifdiversareusinglargesidemountcylindersthat
areattachedtothesysteminthewater,
theyneedtounderstandthattheADVwillnot
workuntilthesidemountcylinderisattached,
usingtheoff-boardaccessory.SEEPAGE13.
Havingtwoon-boardoxygencylindersmeansthatdiversneedtopayspecialattentionto
theirPPO2’s!!ThePPO2willcreepupifnodiluentisbeingadded!
TheADVandthe
mouthpiece/open-circuitwillnotworkuntiltheoff-boardaccessoryisconnected!
The
KISSExplorerwasmeanttobeusedwiththeoff-boardaccessoryinplace.Divingwithout
itmeansthatnotallthecomponentswillwork!!Ifyouareplanning
ondivingthisconfiguration,ensurethatyouhavethepropertraining
andskills.Thisisnotmeantforbeginnerrebreatherdivers!Itisfor
experiencerebreatherdiverswithpropertrainingandexperience!
Those that wish to dive this configuration should choose the left side oxygen gas
addition valve with no flow. It is oxygen clean. The diluent valve should not be
used as the flow is high for oxygen! This valve is similar to the right side oxygen manual add valve, but it
DOES NOT HAVE AN ORIFICE. It is plugged. The only way the oxygen goes into the breathing loop is by push-
ing the button. This is a multi purpose valve as it can be used with other gas mixtures.

20
EXPLORERWITHON-BOARDOXYGENANDDILUENT
This system is for divers who wish to have both on board diluent and side mount diluent/bail out gas. These
divers prefer to dive the rebreather in a similar manner as the Classic KISS, with a breathable on-board gas in
the diluent cylinder. With this configuration, the divers on-board gas and side mount/bail out gas can be any
mixture which is appropriate for the dive.
*WARNING:Asalways,alldivesshouldbeconductedwiththeappropriategear,trainingand
mindset.Ifanyoneoftheseislacking,deathcouldresult!
With this system, divers would plumb their side mount cylinders into the Explorer using the off-board acces-
sory. With the side mount cylinders attached to the loop via the off-board accessory, gas can be added to the
loop in two ways. First by using the ADV and second by using the mouthpiece. Also, open circuit gas can be
breathed via the rebreather mouthpiece.
As the side mount cylinder is also the bail out cylinder, divers should have a bail out regulator attached to
these cylinders.
*WARNING:Divingthebailout/sidemountcylindersWITHOUTsecondstagesshouldnot
bedone.Iftherebreathermouthpieceforanyreasonfails,thenthebailoutgaswouldnot
beaccessible.Also,diversshouldensurethattheyplantheirdivesappropriatelyandtake
intoconsiderationtheirgearconfigurationaswellastheirbuddiesgearconfiguration.En-
surethatalldiversareproperlytrainedfortheplanneddivesandthattheyunderstandeach
othersgear.Failuretodoso,mayresultininjuryordeath!
Those that wish to dive this configuration may choose either the no flow oxygen valve or the no flow diluent
valve. The diluent valve, while it is oxygen clean, has a higher flow and therefore should not be used with oxy-
gen mixtures. This valve is plugged; it has NO orifice. The gas enters the loop when the button is pushed. The
diluent valve has a higher flow so that loop flushes may be conducted using this valve. Of course, diluent
flushes can still be done using the mouthpiece/ADV as with the Classic KISS.
The oxygen valve can also be used, but divers should remember that when the button is pressed, the gas en-
ters the loop much slower. This means that it shouldn’t be used for a diluent flush as it will take too long. If
this valve is used, do the diluent flush using the Classic KISS method of mouthpiece and ADV.
Table of contents
Other KiSS Diving Instrument manuals