Kitchen Idea K1621 User manual
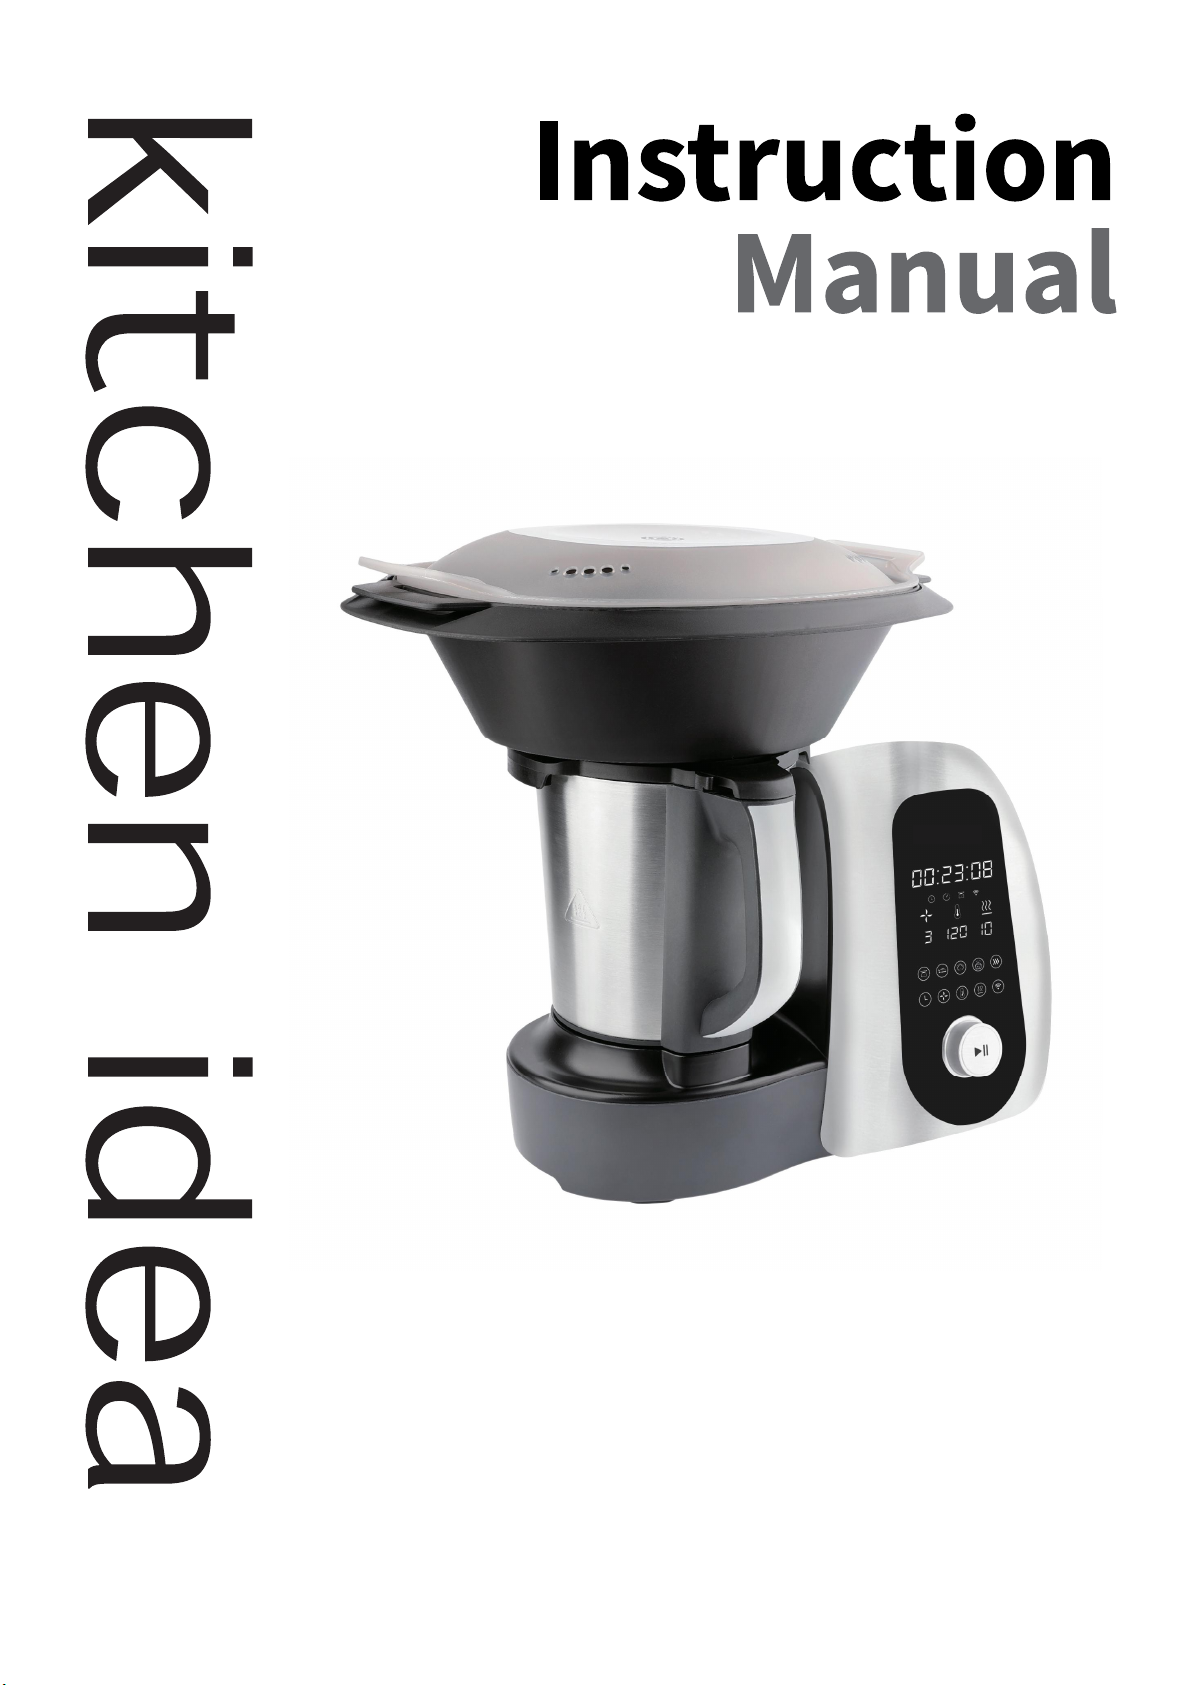
Cooking Master
Õïêîï

I- SECURITY INSTRUCTIONS
I.1 GENERAL SAFETY INSTRUCTIONS
1. Inspect the appliance for visible signs of damage before use. Do
not use a damaged device.
2. This appliance is intended for private a nd non- commercial use.
Any use other than previously stated is considered as improper use.
No claims of any kind will be accepted for damage resulting from use
of the appliance for other than its intended purpose. The risk must be
borne solely by the user.
3. This appliance is intended to be used in household and similar ap-
plications such as:
-
ments;
–farm houses
–bed and breakfast type environments.
4. This appliance complies with the standards in force for this type of
product.
5. Place the product on a stable surface. Do not slot it in.
6. Always connect the appliance to an accessible power outlet.
Read these instructions thoroughly before using
the appliance. Keep this instruction manual for
future reference or new users.
1
pull on the cord.
8. Do not run the appliance with an empty jug.
9. Do not use the appliance without the lid being securely clipped in
place.
10. Do not move the appliance whilst in use.
-
ance when it’s in use.
-
vided.
13. Do not use the appliance outdoors.
14. Do not use the appliance :
–if the plug or the power cord are damaged
–if the appliance is in anyway damaged
–if it fell down
15. Do not let the power cord hang over the edge of a table or the
work surface and make sure it does not come into contact with hot
surfaces.
16. Do not place and do not use this product near by any heat source
17. Avoid wrapping the cord around the appliance and do not bend it.
18. Use only the accessories supplied with the appliance.
or any other liquid.
20. Do not handle the cord or appliance with wet hands
21. Make sure to unplug the unit when you do not use it.
2
-
risks. This particularly applies to replacing a damaged connection
user.
-
avoid a hazard.
26. Keep the appliance out of the reach of children when it is plugged
in or cooling.
27. Do not use the plastic lid cap for carrying food or hot liquids.
liquid that could cause burns.
29. Do not remove the lid when the water is boiling.
30. Always leave the appliance to cool down before cleaning.
sensory or mental capabilities or lack of experience and knowledge if
they have been given supervision or instruction concerning use of the
appliance in a safe way and understand the hazards involved. Chil-
dren shall not play with the appliance.
32. Do not allow children to use this appliance. Keep the appliance
and its cord out of the reach of children.
33. Regarding the detailed information on how to use the accesso-
34. It is essential to keep this appliance clean since it is in direct con-
tact with food.
35. Regarding the instructions for cleaning surfaces in contact with
manual.
3

36. Children must be kept under supervision to ensure that they do
not play with the appliance.
37. Great care must be taken when handling the blades when empty-
ing the bowl and during cleaning.
before changing the accessories or handling or getting near to any of
the parts that move during operation.
39. Always unplug the appliance from the power supply if left unat-
40. Improper use may result in injury.
41. Be careful when pouring a hot liquid into the cooking processor
or blender to avoid any splashes escaping from the appliance caused
by sudden boiling.
42. Warning: avoid spillage on the connector.
-
vided.
45. The heating element surface is subject to residual heat after use.
emptying the bowl and during cleaning.
47. Be careful when you touch front grip when you open the lid (when
-
ance before removing the food responsible for blocking.
-
51. The appliance must not be immersed.
4

the steamer.
the correct place.
9. Do not expose any body part to the steam produced during op-
eration.
10. Make sure the vents on the product’s back are not covered or
blocked to avoid the appliance from damaging.
52. Warning: potential injury from misuse.
I.2 SPECIAL SAFETY INSTRUCTIONS
-
-
pliance.
2. The hole on the Jar lid can only be covered with the measuring
cup. Do not use clothing or other objects.
3. Do not exceed the MAX mark on the Jar body.
4. The Jar’s surface may reach high temperature when operating
5. The instructions for food processors and blenders warm
against misuse.
6. Be careful if hot liquid is poured into the food processor or
blender as it can be ejected out of the appliance due to a sudden
steaming.
5

II-CHARACTERISTICS OF THE PRODUCT
1
13
24
5
3
9
8
7
6
10
12
11
6

II.2PACKAGE CONTENTS
1. Main body 2. Jar
3. Jar lid 4. LCD display
5. Start / pause / reset knob 6. Big steamer body
7. Big steamer rack 8. Big steamer cover
9. Spatula 10. Kneading blade
11. Mixing blade 12. Filter basket(small steamer)
14. Fixing support
15. Measuring cup
·1 Cooking Robot
·1 Measuring cup
·2 Steam baskets
14
15
7
2 Blades
1 Spatula
1 Instruction manual
II.3 TECHNICAL CHARACTERISTICS OF THE PRODUCT
The Robot will help you to create great recipes to share with your family and
sub programs
Reset function : press the start/pause knob for 2 seconds
Start / pause button
4 non-slip feet
Several accessories included
II.4 POSSIBLE FUNCTIONS
1. : chop vegetables and meat to the desired size.
2. Mince
even crushes ice for you to prepare cocktails and smoothies.
3. Grind
texture.
4. Mill
-
8
5. Pulverize: pour sugar inside the jar and create your own icing sugar to decorate
the most delicious desserts.
6. Grate
7. Beat
omelette.
8.
or cream and cook delicious sweets in the most quick and simple way.
9. Emulsify: Kneading blade homogeneously prepares amazing salad dressings such
10. Mixes
way.
11. Cook
-
12. Stir: Kneading blade stirs food while it cooks it ensuring uniform heating. This
achieving professional consistence and texture thanks to its motor’s innovating su-
perpower.
13. Steam:
14.
without having to worry about stirring it or controlling time.
15. Candy: candy with aromatized oils without burning them and preserving all the
16. Knead: You can prepare bread dough in big quantities in just 1 piece. Thanks to
17. Boil


