Spinach & Parmesan Dip
Ingredients:
1 small white onion, peeled and cut in half
6 large cloves of garlic, peeled
1 10-ounce bag of prepackaged fresh spinach
leaves, washed
1 cup grated or shredded parmesan cheese
1/2 cup chicken broth
1/2 cup whipping cream
1/4 cup sour cream
2 tablespoons (1/4 stick) salted butter
2 tablespoons of extra virgin olive oil
2 tablespoons of all purpose flour
Salt and pepper to taste
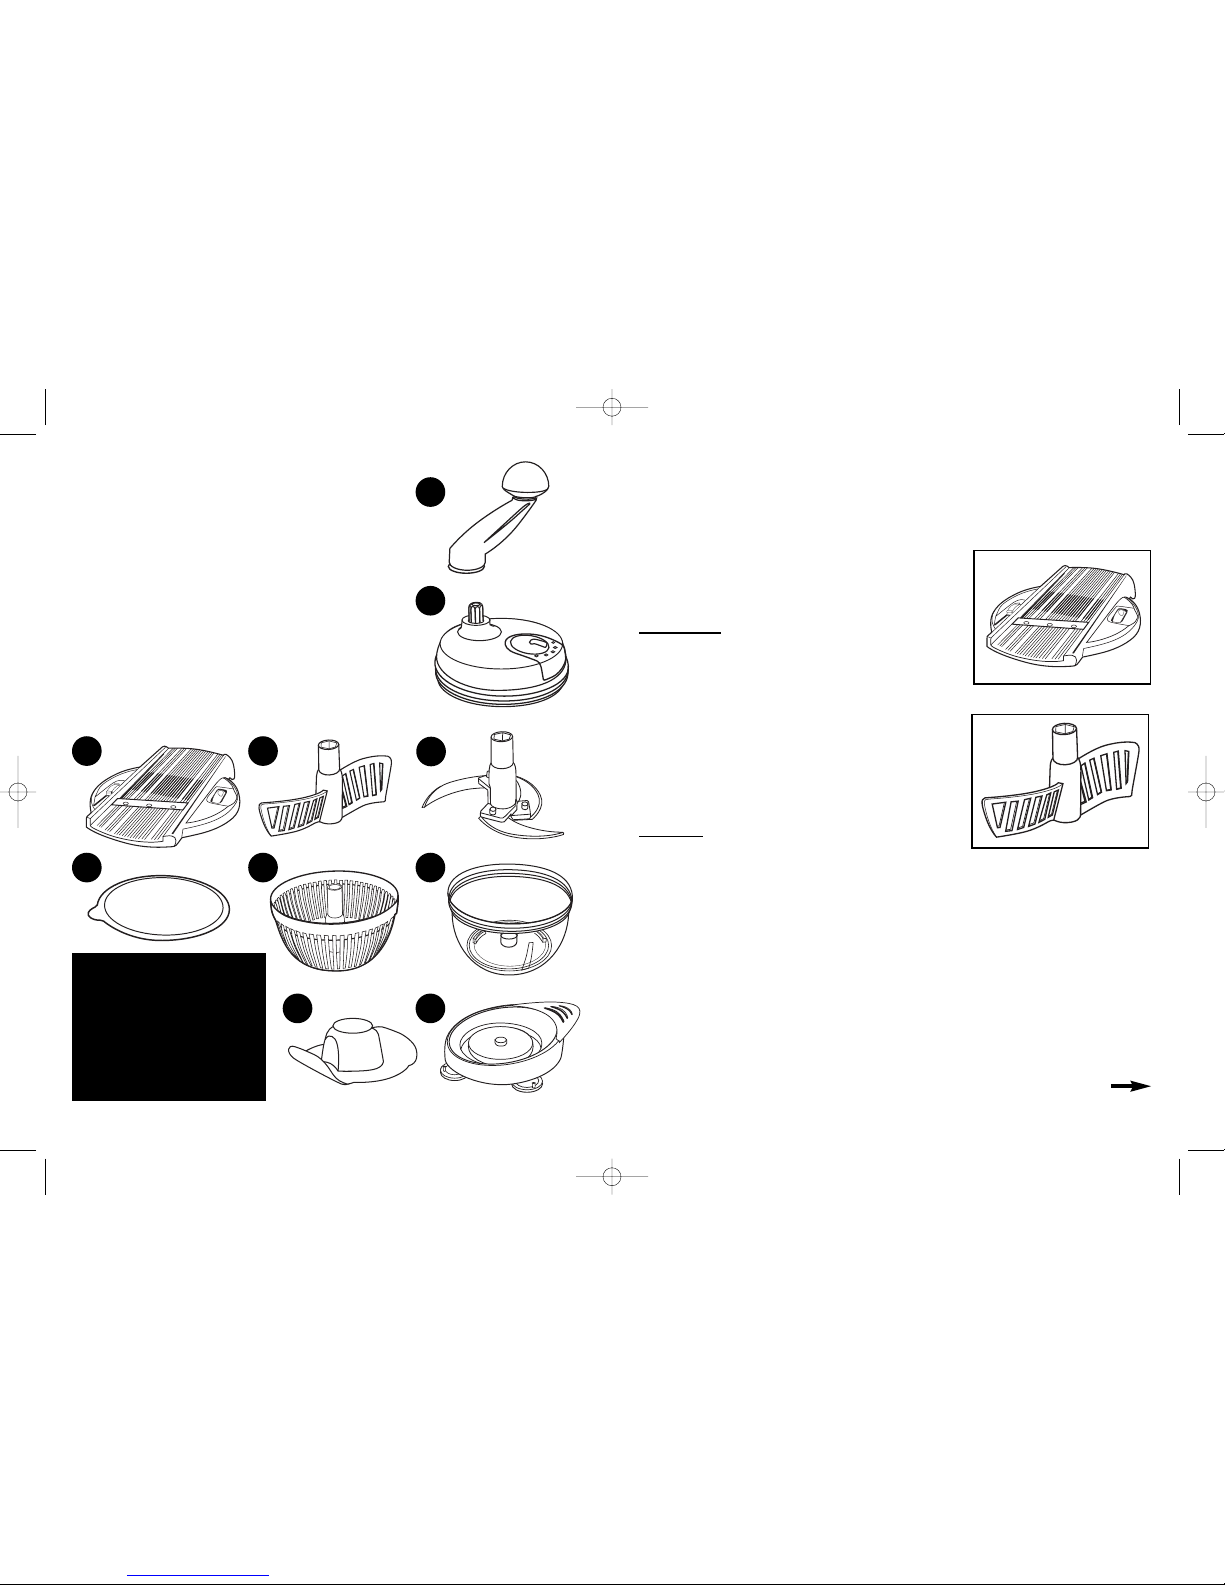
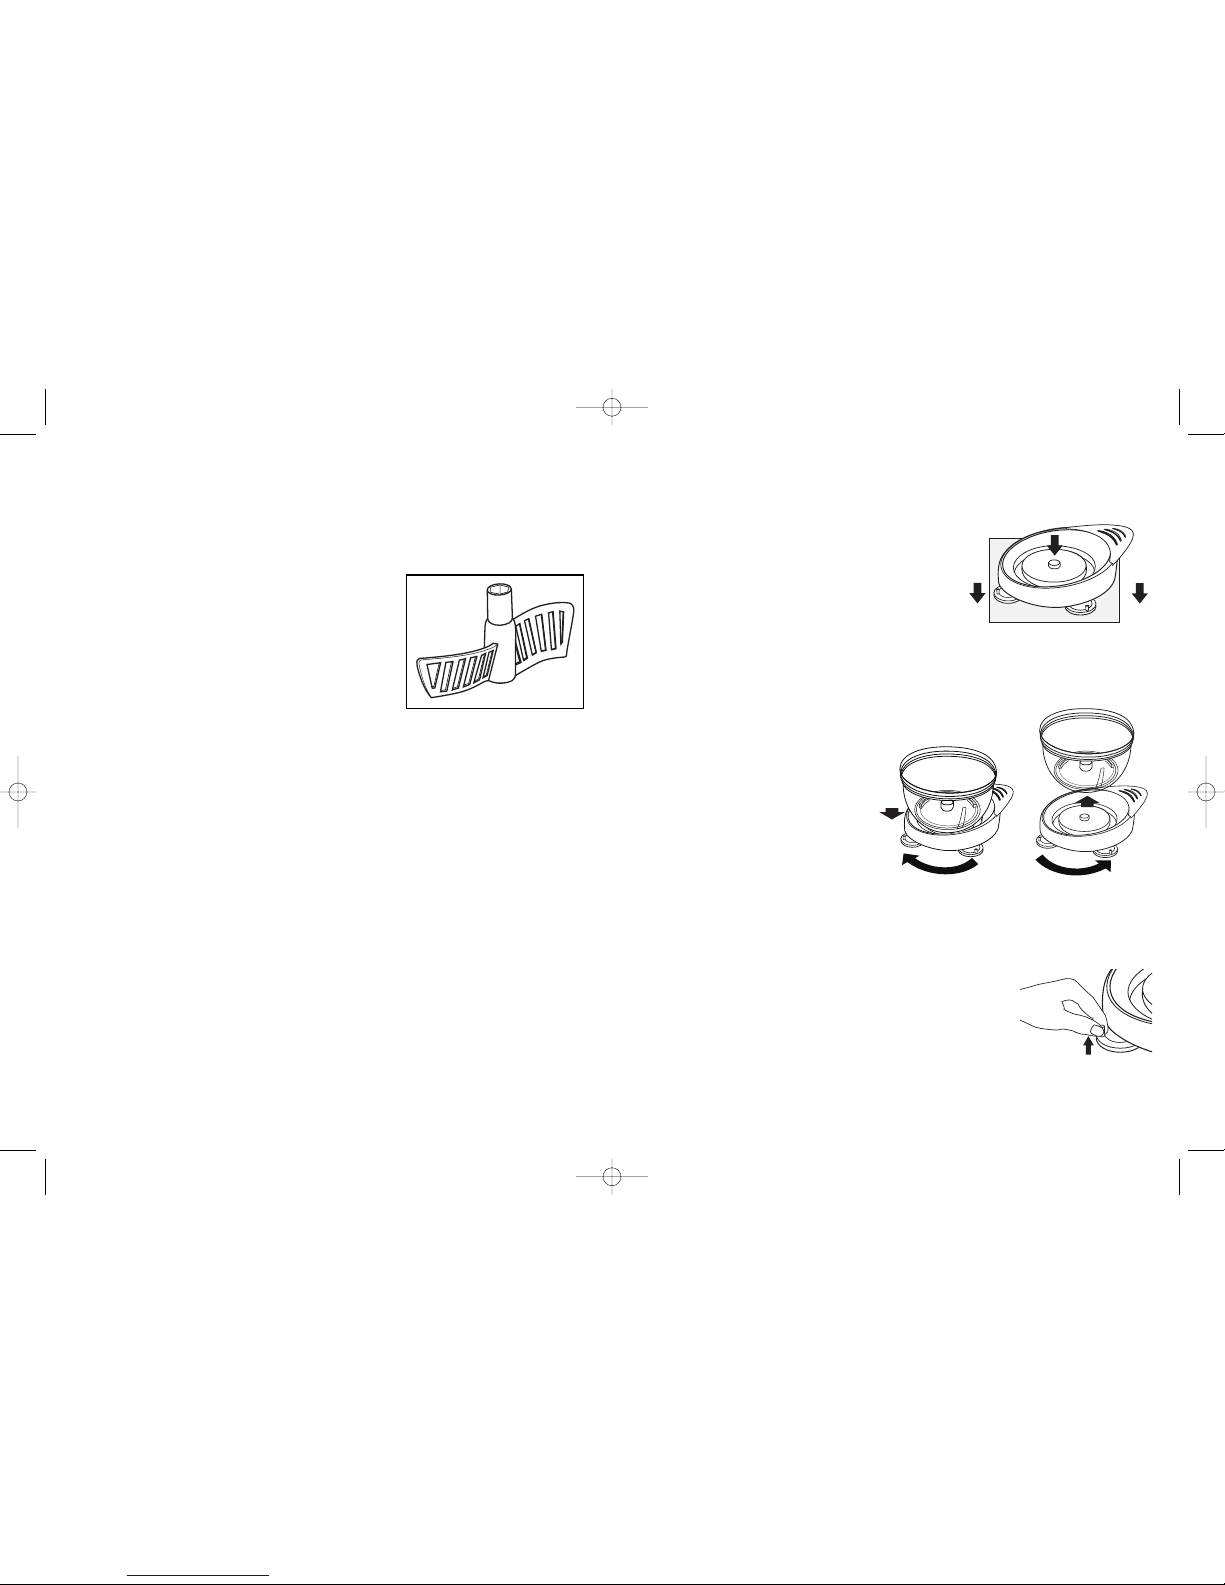
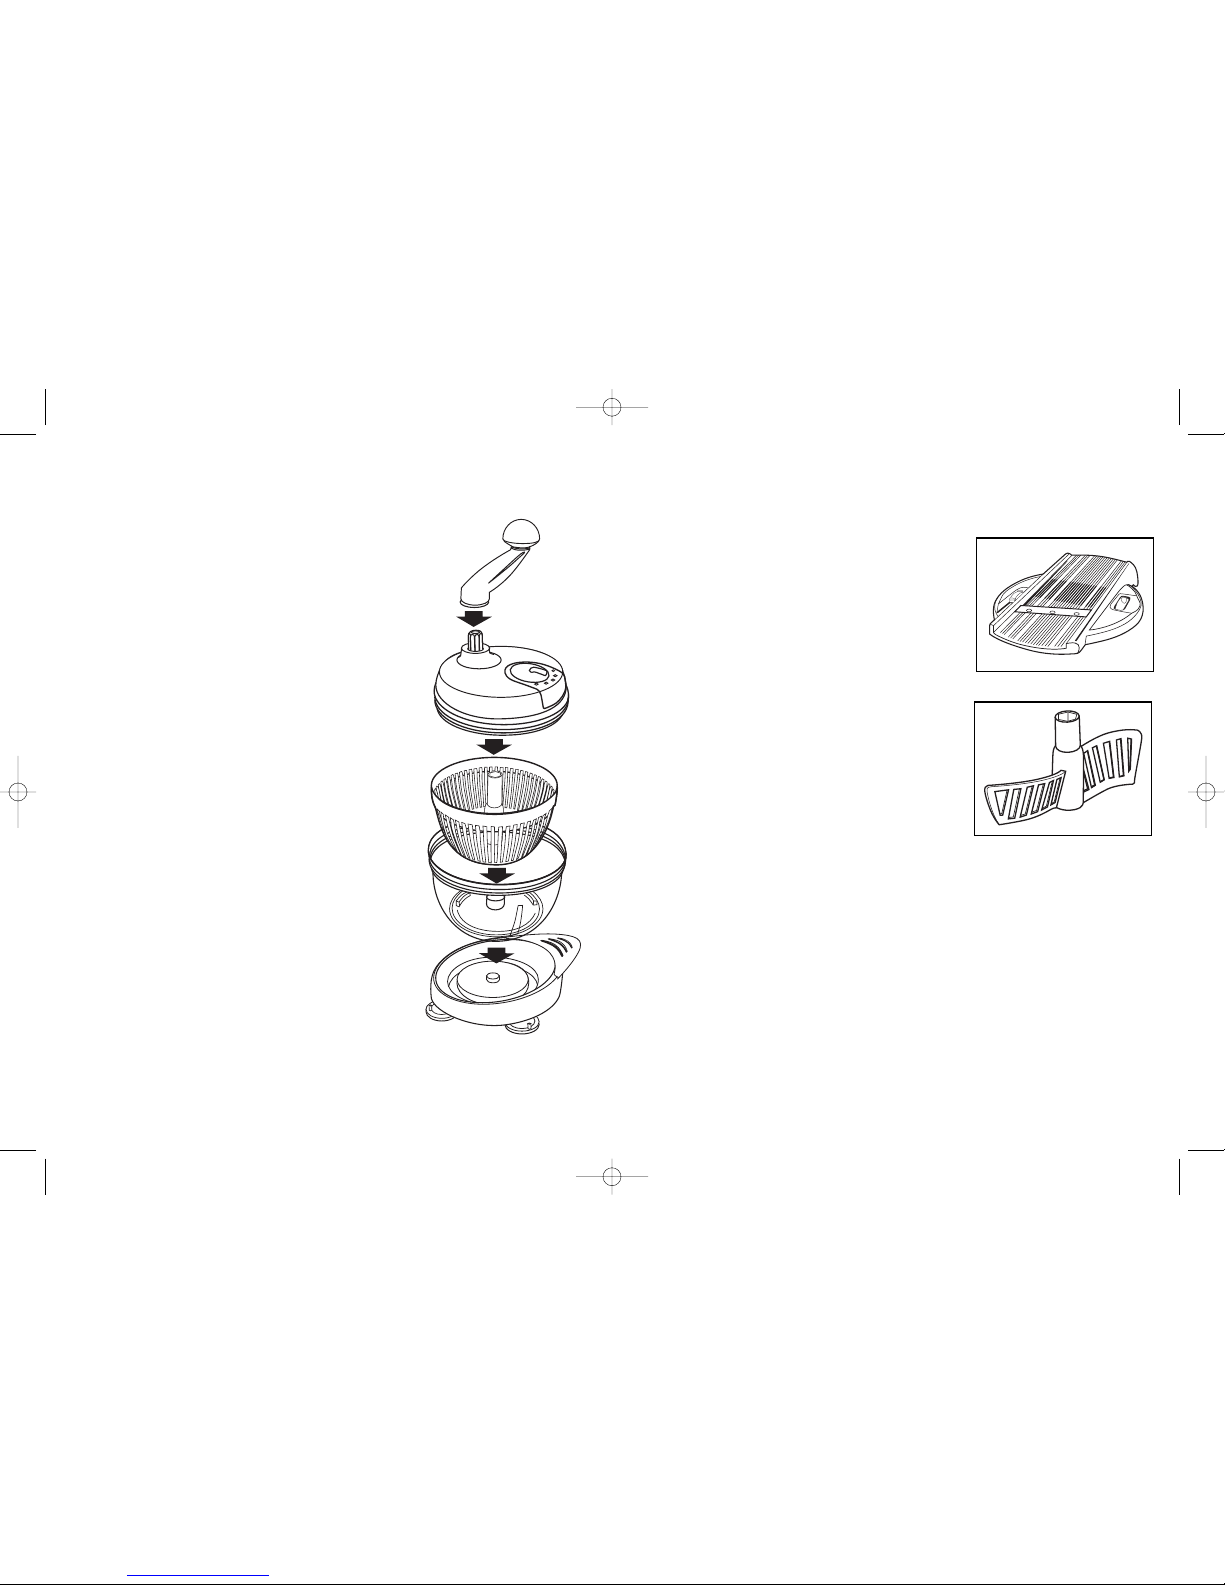
Insert "Tri-Blade" into itchen ing ProTM "Bowl". Add onion and garlic into
bowl and attach "Safety Lid". Turn handle until finely chopped. Transfer
into another bowl.
Rinse itchen ing ProTM "Bowl" and "Tri-Blade" under running water. Put
"Tri-Blade" back into the "Bowl". Add a portion of fresh spinach leaves into
"Bowl" and attach "Safety Lid". Turn handle until spinach is chopped.
Transfer to a large bowl. Repeat until all spinach is chopped.
Melt butter with oil in a large pot over medium heat. Add onion and garlic.
Sauté until onion is tender. Add flour and stir for 2 minutes. Add stock and
cream and bring to a boil, stirring constantly. Cook until mixture thickens,
stirring frequently, about 2 minutes. Remove from heat and stir in spinach,
cheese, sour cream, salt and pepper to taste. Transfer to a serving bowl.
Serve with tortilla chips or bagel chips.
QUICK & EASY RECIPES
21
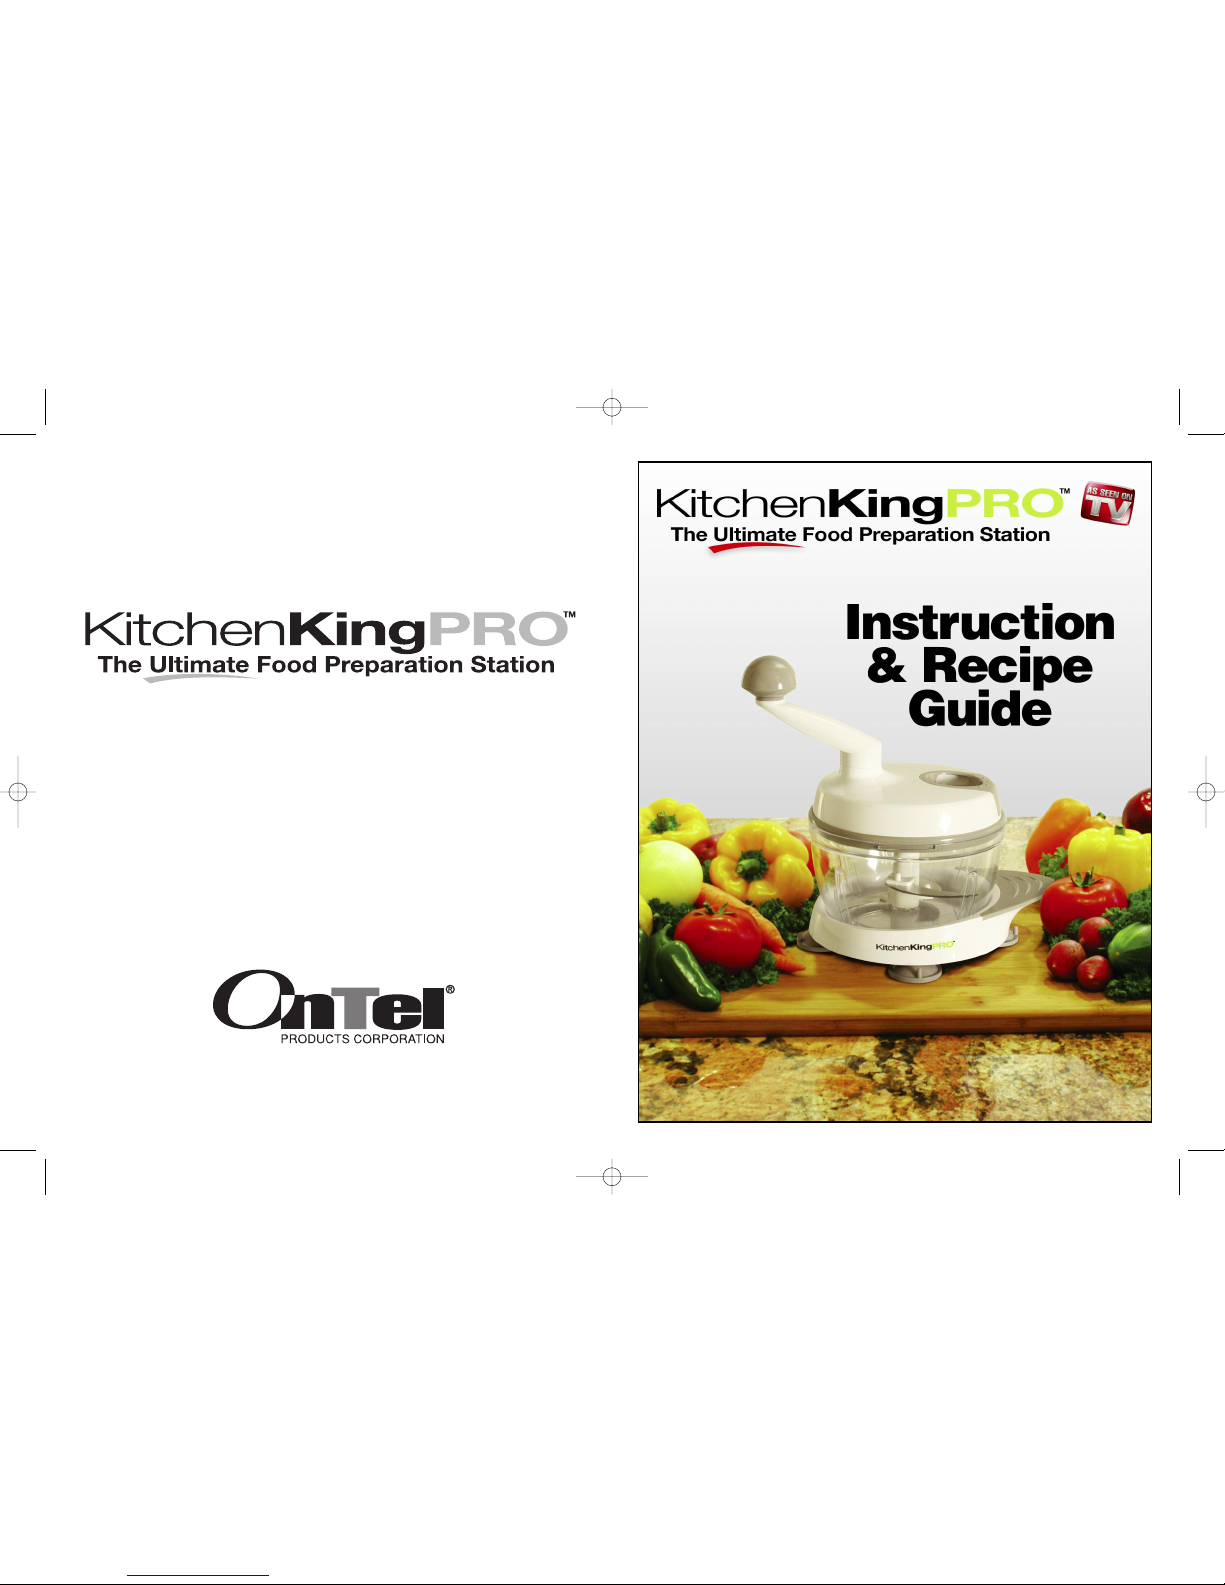
You will need:
Tri-Blade
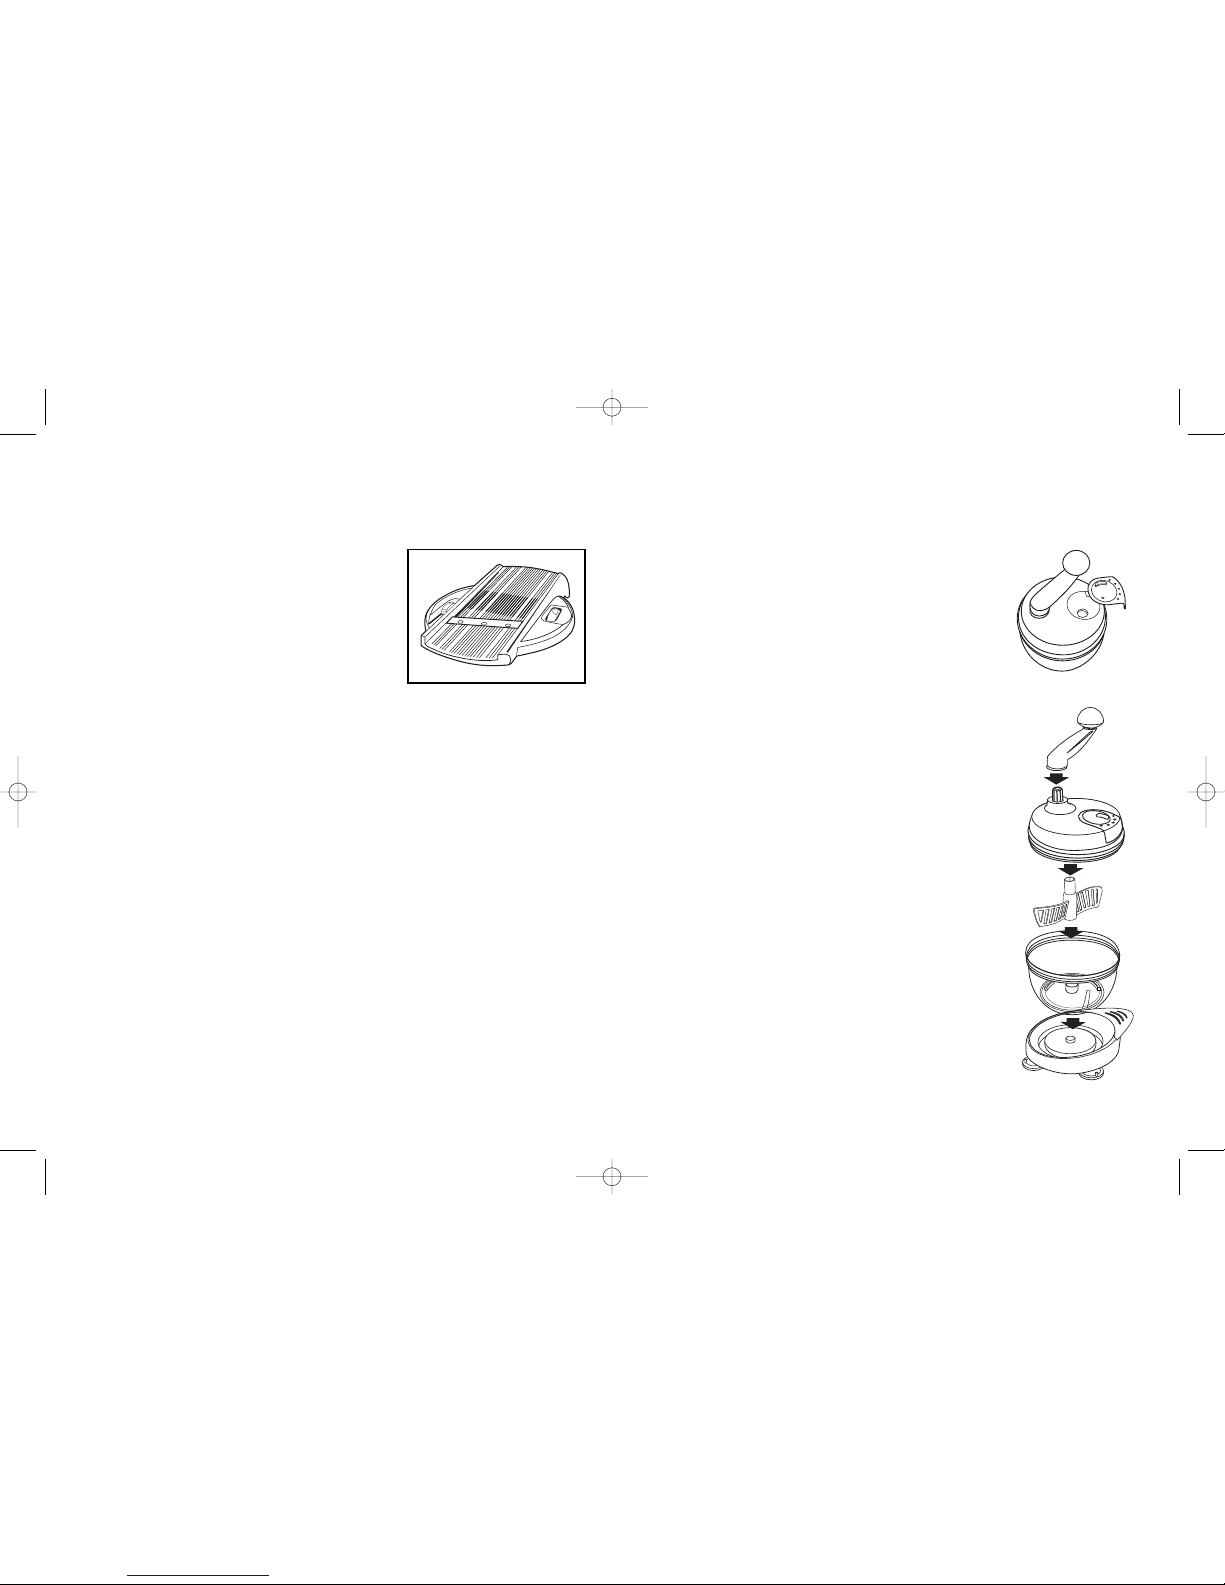
USING KITCHEN KING PROTM
6
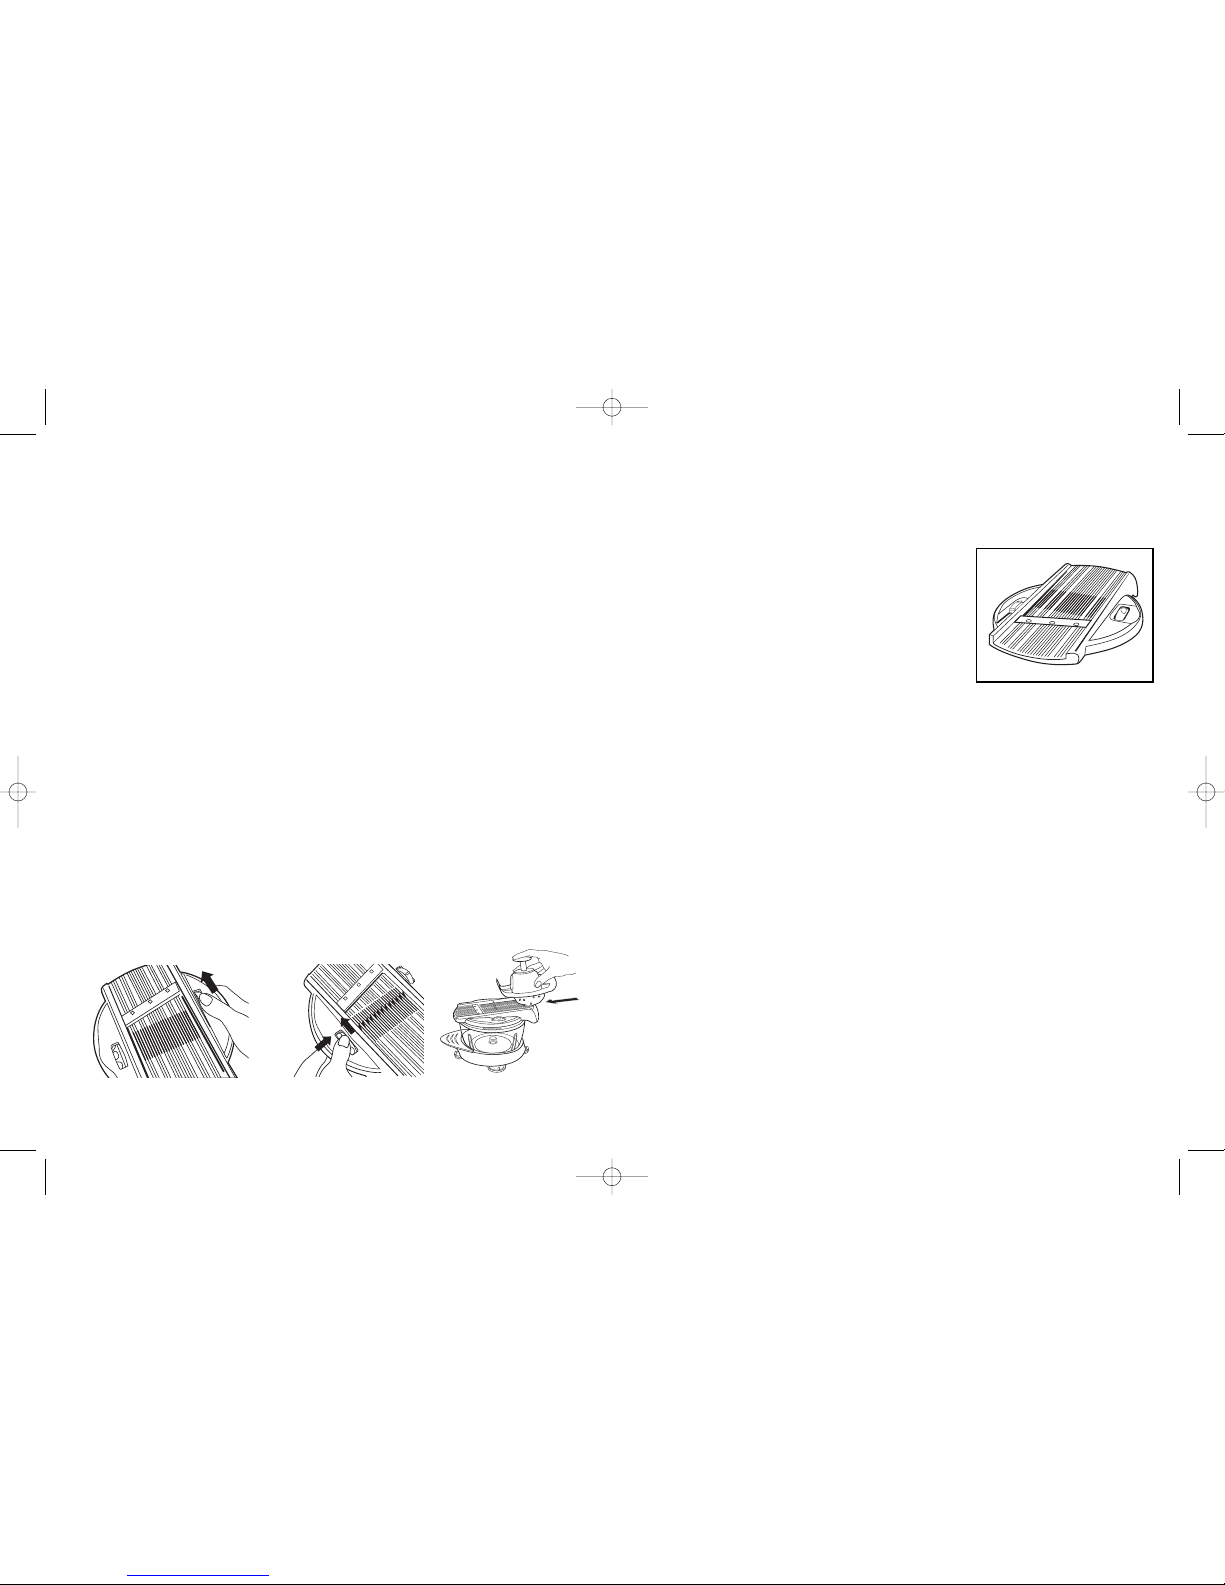
FIG. 7 FIG. 8 FIG. 9
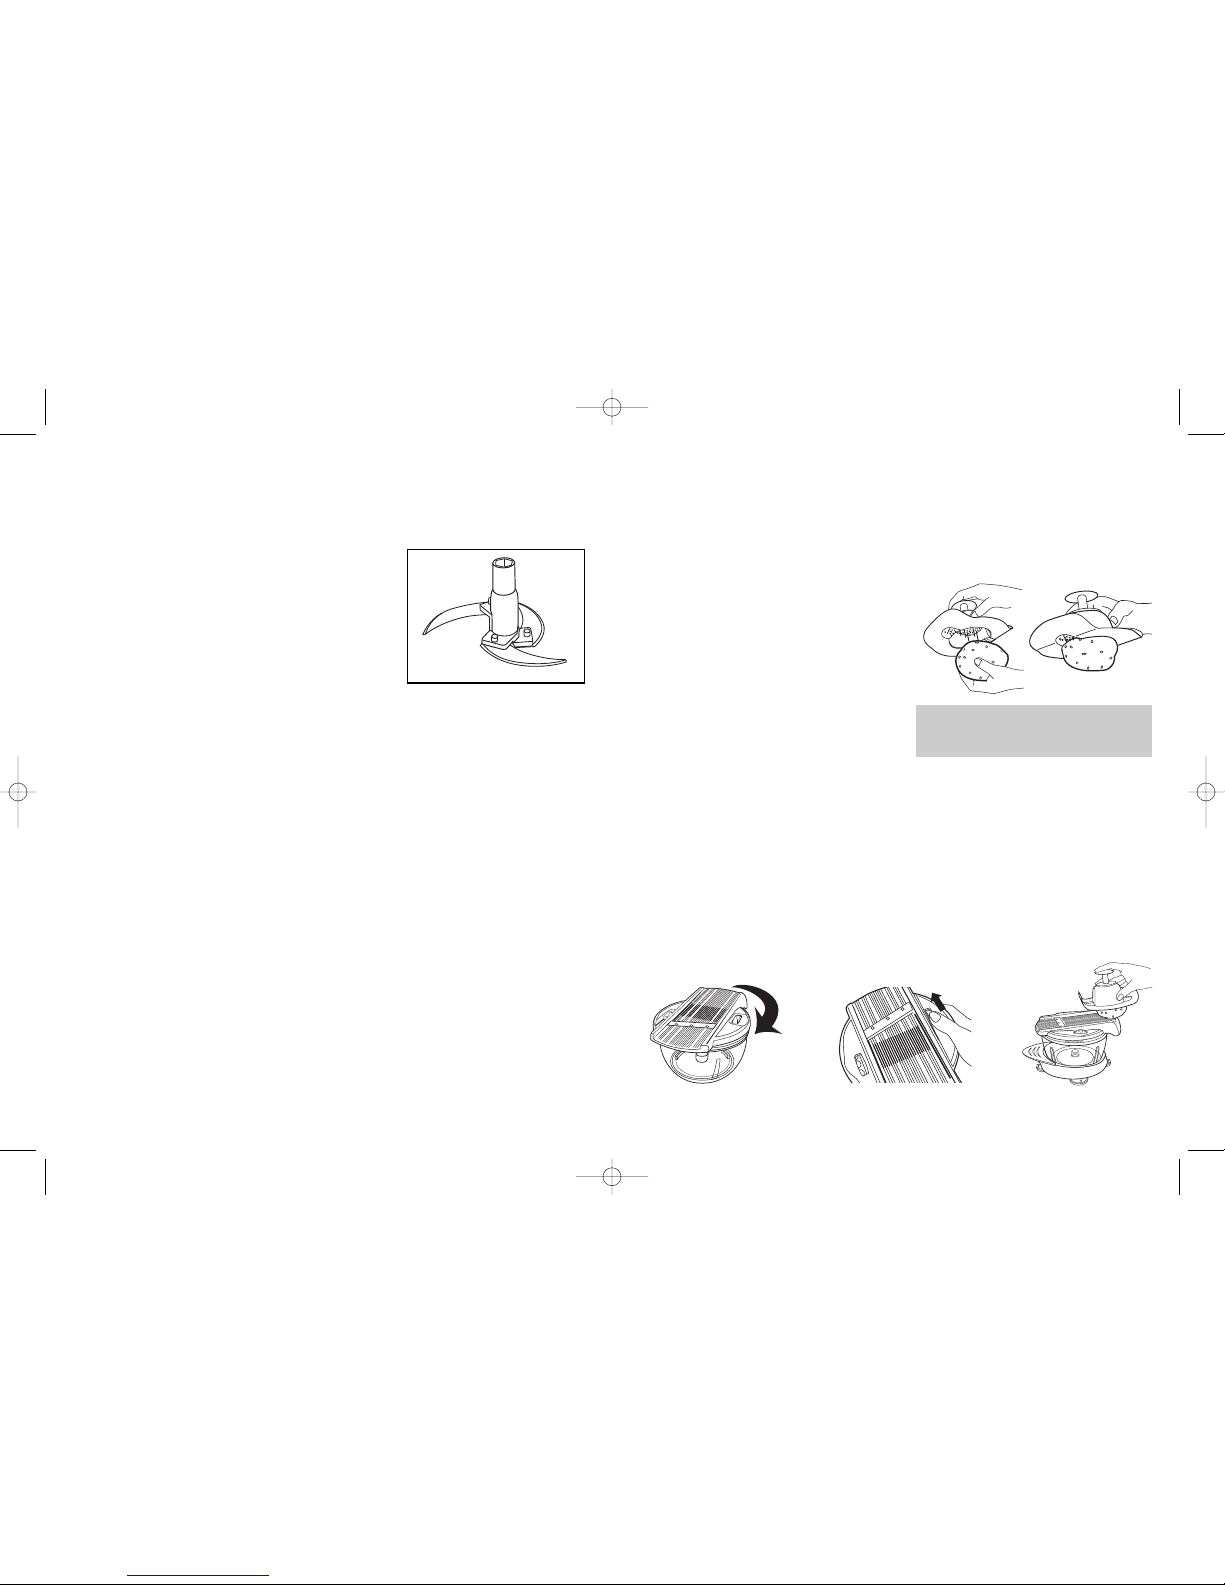
Using "Mandolin Lid" & " ulienne Blades"
CAUTION: To avoid serious injury, always use Hand Guard
when using "Mandolin Lid" and " ulienne Blades".
Using the "Hand Guard"
1. Push the food item onto the
metal spokes located on the
underside of the "Hand Guard"
until secure (SEE FIG. 6).
NOTE: To slice longer slices, attach the
food item lengthwise against the metal
spokes of the bottom of the "Hand Guard".
FIG. 6
CAUTION: The "Hand Guard"
is not intended for long food items
such as carrots, celery, etc.
Using "Mandolin Lid" (for slicing)
1. Place "Mandolin Lid" flat on top of "Bowl", then turn clockwise to
lock into place (SEE FIG. 7).
2. To adjust the thickness of the slices, raise or lower the blade by
turning the dial to the desired setting (thick, medium, thin). Make
sure the dial locks into place (SEE FIG. 8).
3. Using the "Hand Guard", place the food on the platform then slice
by moving the guard up and down the platform (SEE FIG. 9). As you
slice, slowly press the center button of the "Hand Guard" so you can
slice the entire food item.
Turn
clockwise
Kitchen_King_Pro_Instr R1:KKP Inst 6/5/08 2:51 PM Page 13