Kitchen Master EPI-MC003 User manual

MINI FOOD PROCESSOR USER MANUAL

1.
Feeding Chute
Plunger
2. Cover (A)
3. Disc Blade
4. Transfer Disc.
5. Container
6. Cover (B)
7. Connecting Set
8. Blade
9. Driveshaft
10. Bottom Cover
11. Switch
12. Main Body
13. Power Cord
14. Mixing/Whipping
Paddle
(14)
- 1 -

Specifications
Model 300CM-IPE
Rated Voltage 120V~
Rated Wattage150W
Frequency 60Hz
Genera
l
Safety Precautions
Please read these instructions carefully before use and save for future reference.
l.
Always switch off and unplug the appliance from the main electrical supply BEFORE cleaning and when
not in use.
2. To avoid damage and other hazards, never immerse the appliance, cord or plug into water or other liquid.
3. Do not operate appliance with hot food or ingredients.
4. To prevent overheating, each operation should not exceed 2 minutes continuous use.
5. Do not leave appliance unattended when plugged in. Switch off the power and unplug when appliance
is not in use.
6. Do not place the appliance on or near a hot gas or electric burner, in a heated oven or near easily
flammable materials.
7. Always place appliance on a flat sturdy surface. When moving appliance, always take precautions not
to touch hot surface.
8. Use of accessories or equipment not supplied by the manufacturer may cause damage or result in the
malfunctioning of your appliance or bodily injuries.
9. Close adult supervision is necessary when operating appliance.
10. Do not operate the appliance with a damaged cord or plug. Any repairs should be carried out by the
Customer Service Center or an Authorized Service Center.
11. This appliance is intended for household use only.
- 2 -

- 3 -
How to Use Your Appliance
ASSEMBLY DIAGRAMS
For Slicing (A) For Chopping (B)
For mixing/whipping:
(14)

Assembly and Operation:
1. Place the container onto the base and lock in place by turning container clockwise.
2. To assemble for slicing or shredding (Page 3, Diagram A): Fit the Transfer Disc (4) and Disc Blade (3)
together and attach using the Connecting Set (7).
Notes:
The Disk Blade has two configurations - positive and negative. Blade facing up
(positive) is the slicing position; Blade facing down (negative) is for shredding.
When the Transfer Disk or cutter assembly is used, food will be exported through
the chute in the Cover (2). Make sure you have a container positioned below the
chute to catch the food.
When the Transfer Disk is not used with the cutter assembly, chopped food will be
automatically stored in the container.
- 4 -

3. To assemble for chopping (Page 3, Diagram B): Place the container cover component (6) onto the base
and lock in place.
4. Plug in the power cord.
5. Unlock the container cover (6-A) by turning counter clockwise and lock the container cover (B) onto the
base for chopping.
6. Do not attempt to chop meat with bones and skin.
7. Do not exceed 3.5 oz of food in the unit at one time.
- 5 -

Care and Cleaning
Before cleaning your appliance, ensure that the main power supply is switched OFF and the power cord is
unplugged from the electrical outlet. Wait until the appliance cools down before cleaning.
1. Do not overheat or the appliance will turn itself off. If this happens, turn off the power immediately and let
the appliance fully cool down before resuming use.
2. To prevent possibility of electric shock, make sure the appliance is turned OFF when cleaning the body.
3. Clean the base of the unit with a damp cloth. DO NOT submerge in water or put in dishwasher.
4. When the appliance is not in use, store it in a dry and well ventilated environment. Never store the
appliance with wet or damp parts.
5. Removable parts are dishwasher safe on top rack only.
- 6 -

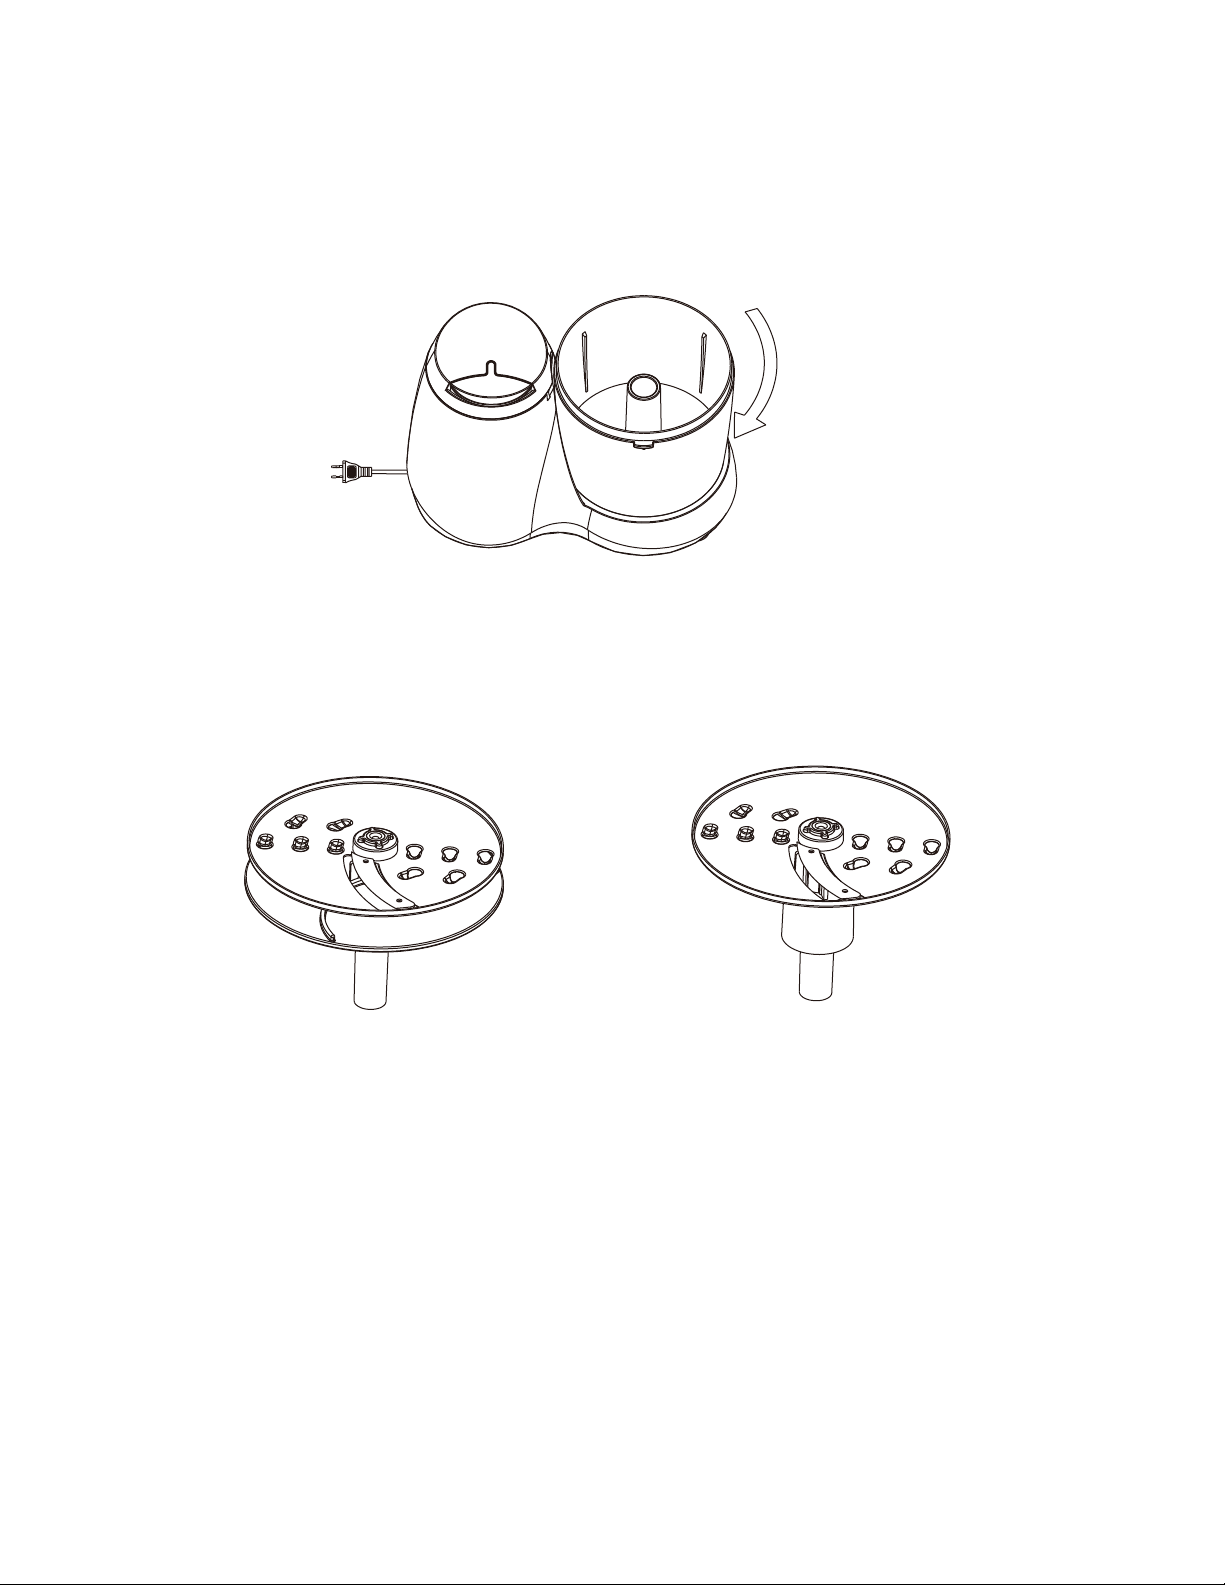
Chopping Instructions
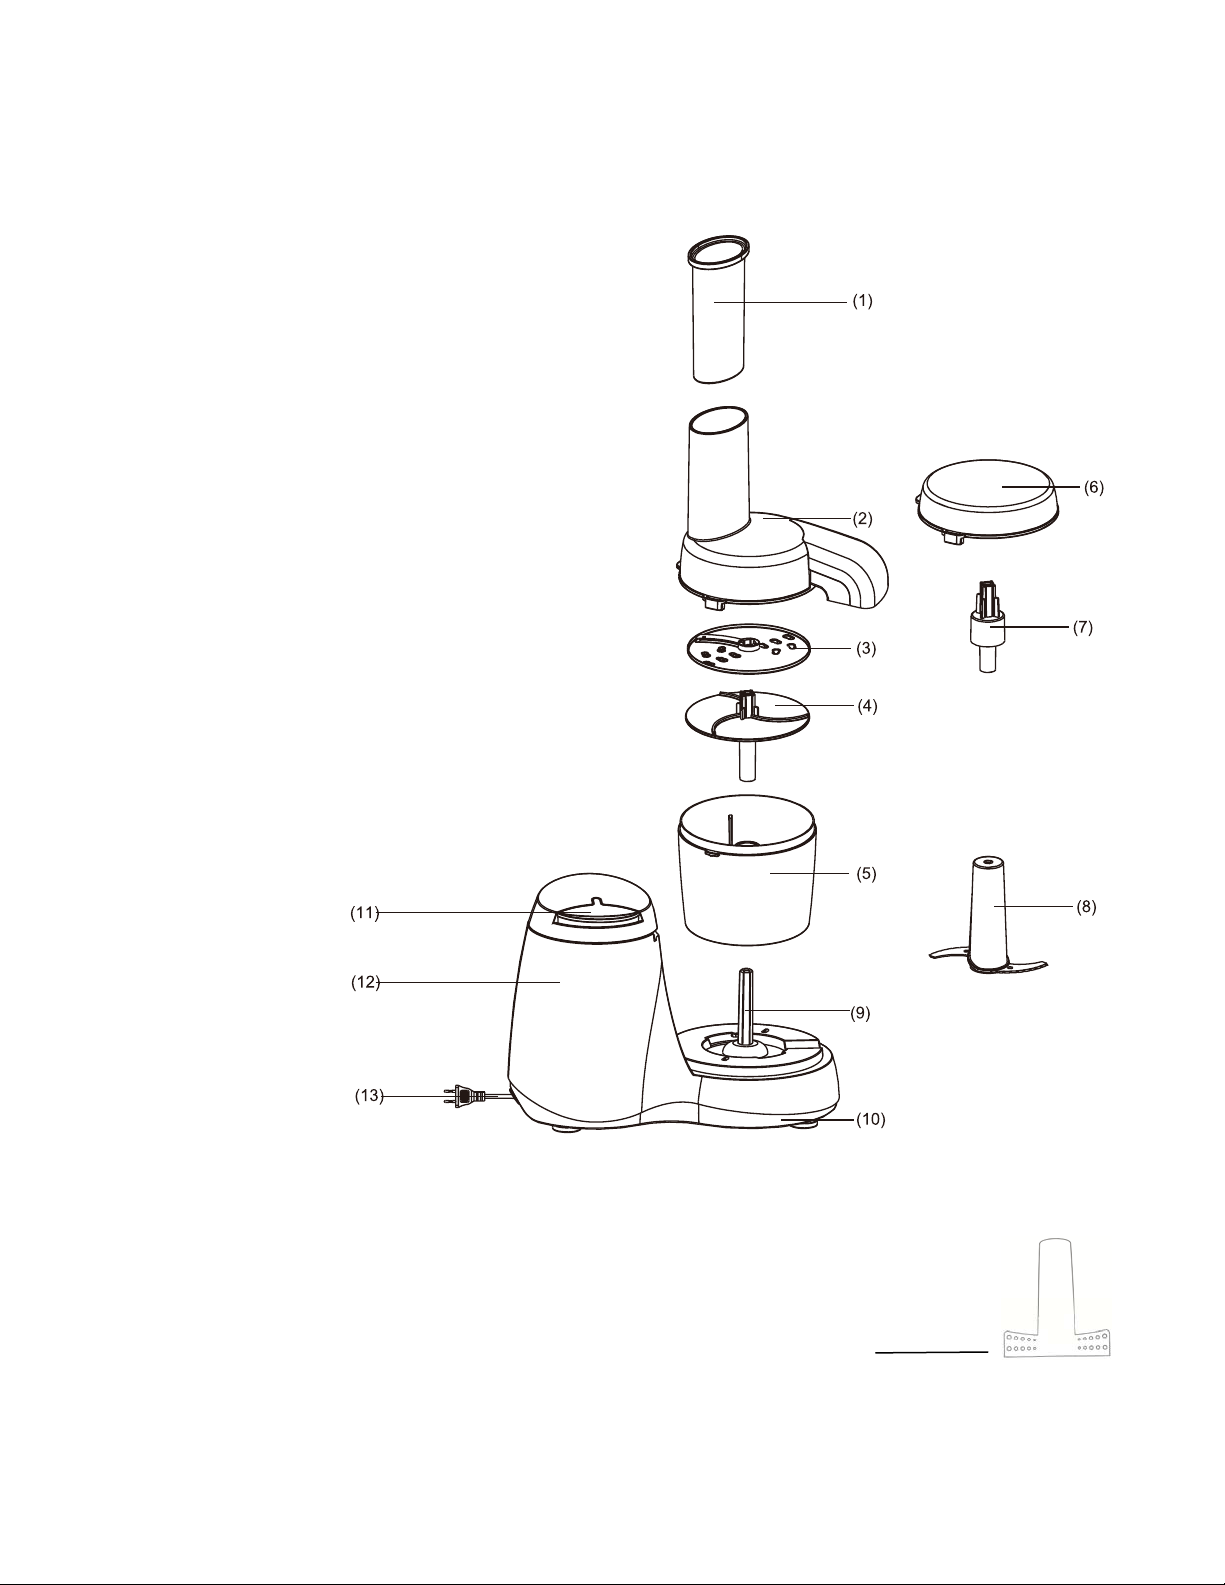
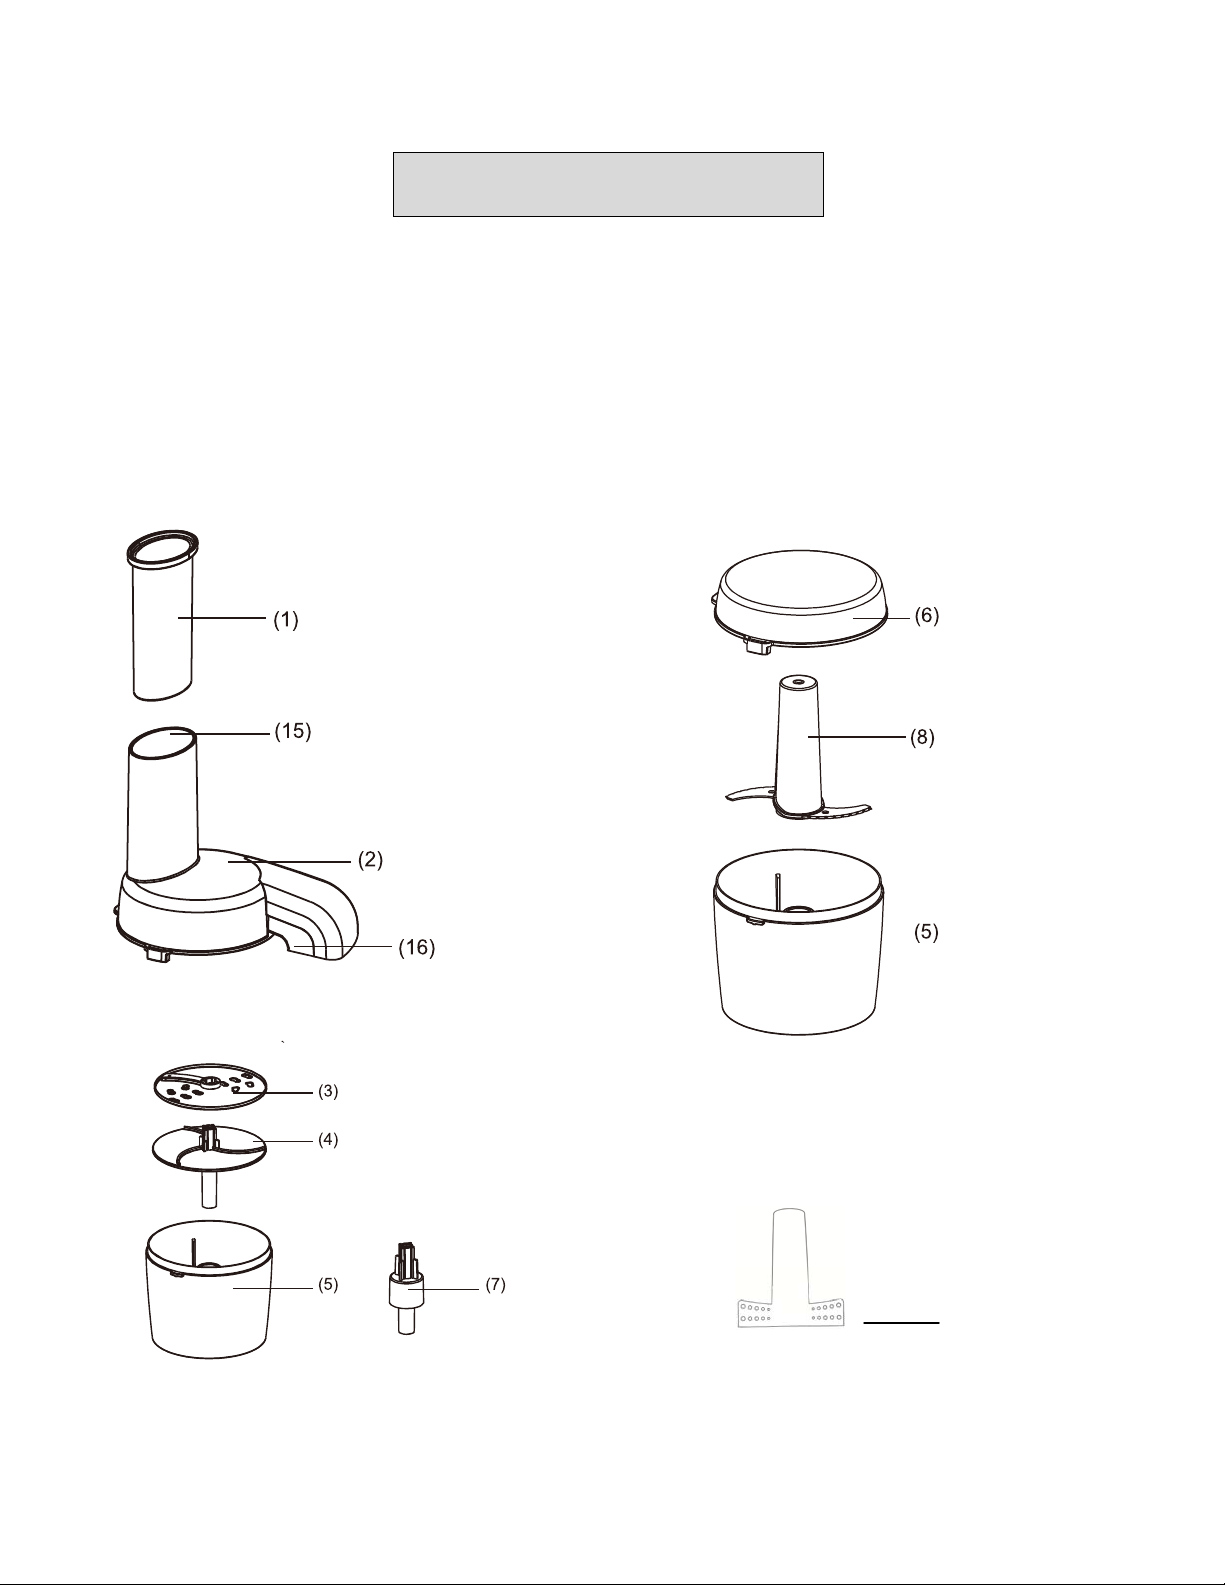
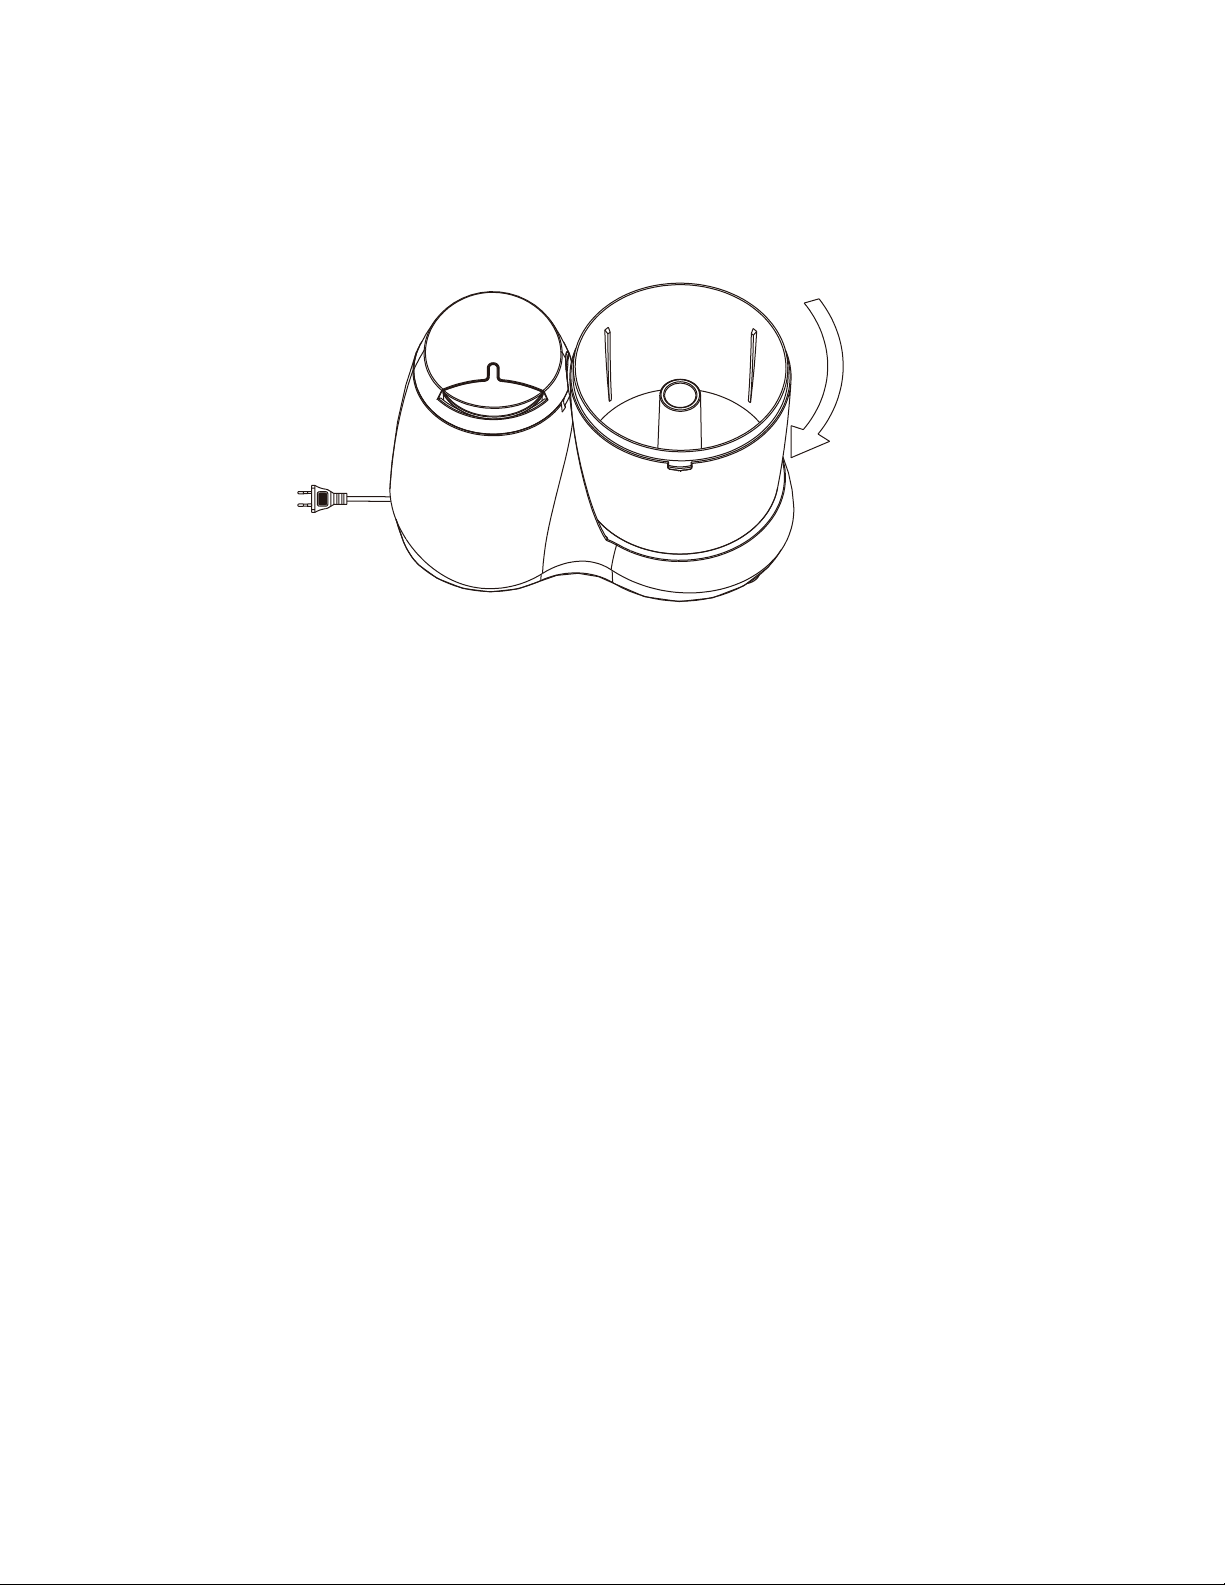
Place the processing bowl (5) onto the base and lock into place. Insert the chopping blade (8).
Prepare the food by cutting into manageable pieces that will easily fit into the bowl; we recommend
keeping pieces under 2” x 2” cubes.
Load the chopper by layering the ingredients, hardest to lightest, and top with liquid and seasonings.
Secure the lid onto the bowl. Pulse the power button in short bursts until the food is chopped to your
liking. Be careful not to over-process!
Whipping Instructions
Place the processing bowl (5) onto the base and lock into place. Insert the whipping paddle (14).
Pour up to 1/2 very cold cream or other liquid into bowl, attach lid and pulse to whip.
Whip lighter foods such as eggs, pancake mix and puddings but DO NOT try to mix heavy batters like
bread dough, brownie mix, etc.
Although the lid is a snug fit, it is not uncommon for a small amount of liquid to leak out while in the high-
speed whipping mode; it is recommended to have a clean dishtowel handy!
Slicing Instructions
Place the processing bowl (5) onto the base and lock into place. Attach the slicing/shredding blade onto
the blade holder with the slicing blade in the up position. Lower the blade unit into the bowl.
Place the slicing lid with food chute onto the machine by turning the lid clockwise so that the center tab
clicks into the unit. The food will exit the machine to the right so be sure to place a bowl underneath!
Prepare the food by trimming the ends flat and, if necessary, trim lengthwise to comfortably fit into the
chute.
Place the food in the chute BEFORE TURNING UNIT ON and rest the plunger on top with light pressure.
Press the Start button with your left hand while gently pushing the food into the chute.
Tips:
When slicing long, thin foods such as celery and carrots, group the food tightly to fill the chute vertically.
This helps to keep the slices consistent.
When slicing round foods such as mushrooms and radishes, fill the chute entirely to help keep the food
from “bouncing” on the blades.
When slicing cheeses, the colder, the better! If you are slicing a soft cheese, freeze for 10 minutes
before slicing. Be careful not to apply too much pressure on the plunger while slicing; let the machine do
the work!
Avoid slicing dense, greasy meats such as pepperoni and hard salami.
-7-

Shredding Instructions
Place the processing bowl (5) onto the base and lock into place.
Attach the slicing/shredding blade onto the blade holder with the shredding blade in the down position.
Lower the blade unit into the bowl.
Place the processing lid with food chute onto the machine by turning the lid clockwise so that the center
tab clicks into the unit. The food will exit the machine to the right so be sure to place a bowl underneath!
Prepare the food by trimming the ends flat and, if necessary, trim lengthwise to comfortably fit into the
chute.
Place the food in the chute BEFORE TURNING UNIT ON and rest the plunger on top with light pressure.
Press the Start button with your left hand while gently pushing the food into the chute.
Tips:
When shredding long, thin foods such as celery and carrots, group the food tightly to fill the chute
vertically. This helps to keep the slices consistent.
When shredding cheeses, the colder, the better! If you are shredding a soft cheese, freeze for 10
minutes before shredding. Be careful not to apply too much pressure on the plunger while shredding; let
the machine do the work!
Avoid slicing dense, greasy meats such as pepperoni and hard salami.
RECIPES
Salsa
2-3 small/medium, ripe tomatoes; cut into wedges
1/4 medium sweet onion; peeled and cut into a wedge
1/2 medium jalapeño pepper; remove stem, cut pepper in half length wise and scrape out seeds
1/2 cup packed fresh cilantro; washed, large stems removed
1 tsp cumin
1/2 tsp lime or lemon juice
1/4 tsp salt
1/4-1/2 cup Spicy V-8 (optional)
Place all ingredients, in order listed above, into the chopper bowl with blade affixed. Cover and pulse
until desired consistency.
-8-

Guacamole
1/4 medium sweet onion; peeled and cut into a wedge
1/2 medium jalapeño pepper; remove stem, cut pepper in half length wise and scrape out seeds
4 cherry tomatoes
2 small avocados; peeled, seed removed; lightly handled to avoid browning
1 tsp lemon juice; squeezed over the avocado
1/4 tsp salt
1/4 tsp cumin
Place all ingredients, in order listed above, into the chopper bowl with blade affixed. Cover and pulse
until desired consistency.
Chicken Salad
3 small gherkin dill pickles; optional.
2 small celery ribs; use the thin parts only and cut to 2” length
6 oz. Grilled chicken breasts cut into bite-sized pieces
¼ cup mayo; regular, light or flavored
Place all ingredients, in order listed above, into the chopper bowl with blade affixed. Cover and pulse
until desired consistency.
Strawberry Ice Cream
1 cup frozen, halved strawberries
1 cup heavy cream
Place the frozen strawberries into the chopper bowl with blade affixed. Pour in 1/4 Cup Cream or
other liquid.
Cover and pulse 3-4 times. Remove lid and add more liquid, 1/4 cup at a time, and continue
pulsing incrementally until you have achieved a creamy texture to your liking.
-9-
Table of contents