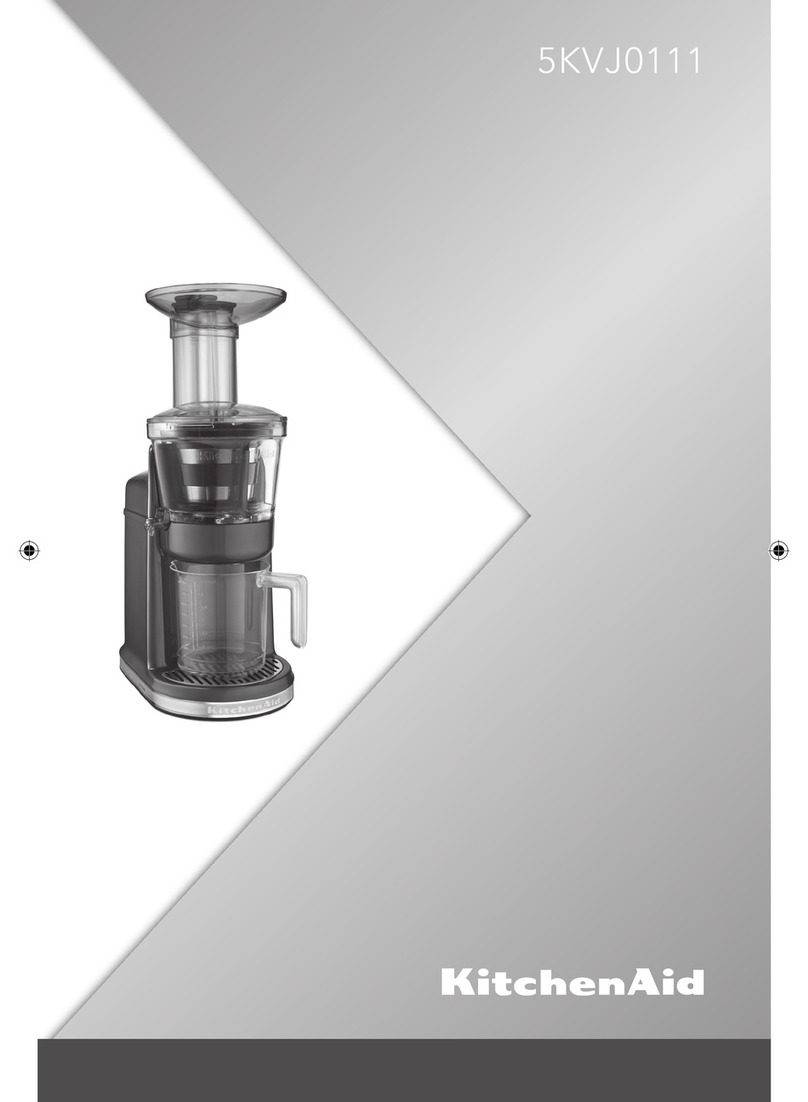
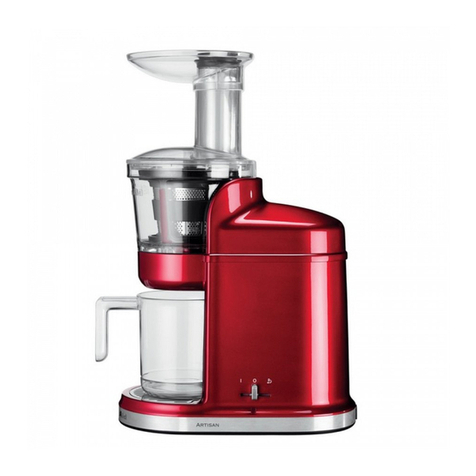
KitchenAid 5KVJ0333 User manual

5KVJ0333
W10673584B_ENv01.indd 1 9/18/14 9:44 AM

W10673584B_ENv01.indd 2 9/11/14 3:44 PM

English ................................................................................5
Deutsch ............................................................................19
Français ............................................................................33
Italiano..............................................................................47
Nederlands ......................................................................61
Español .............................................................................75
Português.........................................................................89
Ελληνικά.........................................................................103
Svenska ..........................................................................117
Norsk..............................................................................131
Suomi..............................................................................145
Dansk..............................................................................159
Íslenska...........................................................................173
Русский ..........................................................................187
Polski............................................................................... 201
Český ..............................................................................215
.............................................................................229
W10673584B_ENv01.indd 3 9/11/14 3:44 PM

4
CENTRIFUGAL JUICER INSTRUCTIONS
W10673584B_ENv01.indd 4 9/11/14 3:44 PM

English
5
CENTRIFUGAL JUICER INSTRUCTIONS
CENTRIFUGAL JUICER SAFETY
Important safeguards...........................................................................................6
Electrical Requirements.......................................................................................8
Electrical equipment waste disposal....................................................................8
PARTS AND FEATURES
Parts and accessories...........................................................................................9
ASSEMBLING THE CENTRIFUGAL JUICER
Beforerstuse ..................................................................................................10
Assembling the Centrifugal Juicer parts.............................................................10
OPERATING THE CENTRIFUGAL JUICER
Making juice.......................................................................................................12
TIPS FOR GREAT RESULTS
Speed selector table ..........................................................................................13
Quick tips ..........................................................................................................14
CARE AND CLEANING
Disassembling the Centrifugal Juicer .................................................................14
Cleaning the Centrifugal Juicer..........................................................................16
Cleaning tips ......................................................................................................17
TROUBLESHOOTING..........................................................................................17
WARRANTY AND SERVICE................................................................................18
TABLE OF CONTENTS
W10673584B_ENv01.indd 5 9/11/14 3:44 PM

6
CENTRIFUGAL JUICER SAFETYCENTRIFUGAL JUICER SAFETY
IMPORTANT SAFEGUARDS
When using electrical appliances, basic safety precautions
should always be followed, including the following:
1. Read all instructions. Misuse of appliance may result
in personal injury.
2. Always make sure Juicer lid is securely closed before
motor is turned on. Do not remove the lid while Juicer
is in operation.
3. Avoid contacting moving parts.
4. Donotputyourngersorotherobjectsintothefeedtube
while it is in operation. If food becomes lodged in opening,
use food pusher or another piece of fruit or vegetable
to push it down. Never push by hand. Always use the
food pusher provided. When this method is not possible,
turn the motor off and disassemble Juicer to remove
the remaining food.
5. The use of attachments not recommended or sold
byKitchenAidmaycausere,electricshockorinjury.
W10673584B_ENv01.indd 6 9/11/14 3:44 PM

English
7
CENTRIFUGAL JUICER SAFETYCENTRIFUGAL JUICER SAFETY
6. Be sure to turn the Juicer OFF and unplug from outlet
when not in use, before putting on or taking off parts,
and before cleaning. Make sure the motor stops
completely before disassembling.
7. Do not use outdoors.
8. Children should be supervised to insure they do not
play with the appliance. The appliance is not to be used
by children. The appliance and cord should be out of
reach of children. Children shall not clean or perform
user maintenance on the appliance without supervision.
9. This appliance is not intended for use by persons with
reduced physical sensory or mental capabilities, or lack
of experience and knowledge, unless they have been given
supervision or instructions concerning use of the appliance
in a safe way and understand the hazards involved.
10. Do not operate any appliance with a damaged cord
or plug or after the appliance malfunctions, or is dropped
or damaged in any manner.
11. Do not use the appliance if the disc or rotating parts
are damaged or the Juicer lid is damaged or has visible
cracks. Return appliance to the nearest Authorized Service
Facility for examination, repair, or electrical or mechanical
adjustment.
12. To protect against risk of electrical shock, do not put
Juicer’s main body in water or other liquid.
13. This appliance is intended to be used in household and
similar applications such as:
-staffkitchenareasinshops,ofcesandotherworking
environments
- farm houses;
- by clients in hotels, motels and other residential type
environments;
- bed and breakfast type environments
SAVE THESE INSTRUCTIONS
W10673584B_ENv01.indd 7 9/11/14 3:44 PM

8
PARTS AND FEATURESCENTRIFUGAL JUICER SAFETY
Volts: 220-240 VAC
Hertz: 50-60 Hz
Wattage: 500 Watts
NOTE: If the plug does not fit in the
outlet, contact a qualified electrician. Do
not modify the plug in any way. Do not use
an adapter.
Do not use an extension cord. If the power
supply cord is too short, have a qualified
electrician or serviceman install an outlet
near the appliance.
Electrical requirements
Electrical equipment waste disposal
Disposal of packing material
The packing material is 100% recyclable
and is marked with the recycle symbol .
The various parts of the packing must
therefore be disposed of responsibly
and in full compliance with local authority
regulations governing waste disposal.
Scrapping the product
- This appliance is marked in compliance
with European Directive 2012/19/EU, Waste
Electrical and Electronic Equipment (WEEE).
- By ensuring this product is disposed of
correctly, you will help prevent potential
negative consequences for the environment
and human health, which could otherwise
be caused by inappropriate waste handling
of this product.
- The symbol on the product or on the
accompanying documentation indicates
that it should not be treated as domestic
waste but must be taken to an appropriate
collection center for the recycling of
electrical and electronic equipment.
For more detailed information about
treatment, recovery and recycling of this
product,pleasecontactyourlocalcityofce,
your household waste disposal service or the
shop where you purchased the product.
W10673584B_ENv01.indd 8 9/11/14 3:44 PM
English
9
PARTS AND FEATURESCENTRIFUGAL JUICER SAFETY
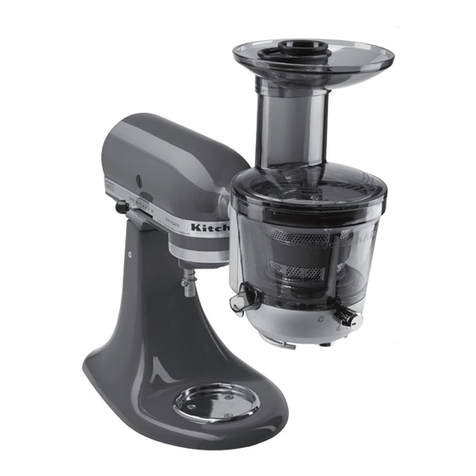
Parts and accessories
Juicing bowl
Bowl
housing
2-speed dial and
Power button
Juicer lid
Main (motor) body*
Cleaning brush
(for juice screen)
Juice
screen
Disc
Pulp exit
chute
Feed chute
Food pusher
Large capacity
pulp container
1000 ml juice
pitcher with
foam control lid
Adjustable
pulp control
collar
*Wipe clean only. See “Care and cleaning” section for more information.
Drip stop
juice spout
(Bottom view)
W10673584B_ENv01.indd 9 9/11/14 3:44 PM

10
ASSEMBLING THE CENTRIFUGAL JUICERASSEMBLING THE CENTRIFUGAL JUICER
Before rst use
Assembling the Centrifugal Juicer parts
Your Centrifugal Juicer will come fully
assembled in the box. Before using your
Juicer for the first time, remove the pulp
container first, and then disassemble the
rest of the unit. The pulp container must
be pulled out from the juicer before the lid
can be removed. Once disassembled, wash
all parts and accessories either by hand or
in the dishwasher. See “Care and Cleaning”
section for more detail.
NOTE: This product is designed for
household use only.
IMPORTANT: Place Juicer on a dry, level countertop with the 2-speed dial facing you. Do not
plug in the Juicer until it is completely assembled.
Remove pulp container. Grasp the feed chute
on the Juicer lid and turn it counter-clockwise
to remove it from the Juicer.
1Place the juicing bowl inside of
the bowl housing.
2Adjust the pulp control collar to the
appropriate pulp setting for High,
Medium or Low pulp flow. To adjust,
push in button on collar and rotate
until you hear it lock into place at the
desired setting.
Low pulp
High pulp
Medium pulp
W10673584B_ENv01.indd 10 9/11/14 3:44 PM

English
11
ASSEMBLING THE CENTRIFUGAL JUICERASSEMBLING THE CENTRIFUGAL JUICER
NOTE: The lid of the juice pitcher comes
equipped with a foam guard. To include the
foam with your juice, simply remove the lid
before pouring juice into your glass.
6Slide the pulp basket into position under
the long lid section until it rests against
the motor body.
5Slide the food pusher down the feed
chute, aligning the groove in the food
pusher with the protruding rib on the
inside of the feed chute.
7Place juice pitcher under the juice spout.
Make sure juice spout is in the down
position.
Rotating
hub
3Place the disc inside the juicing bowl on
top of the rotating hub. Rotate the disc
until the tabs on the inside of the collar
match up with the notches on the hub
and the disc settles easily into place.
4Place the juicer lid over the bowl
housing so that the long lid section
is slightly to the right of the pulp exit
chute. Grip the feed chute, turning the
lid clockwise until it locks into place.
W10673584B_ENv01.indd 11 9/11/14 3:44 PM

12
OPERATING THE CENTRIFUGAL JUICER
TIPS FOR GREAT RESULTS
OPERATING THE CENTRIFUGAL JUICER
Making juice
Before operating your Centrifugal Juicer,
make sure the Juicer is assembled correctly,
and the adjustable pulp collar is set to the
appropriate pulp level for your recipe (see
“Assembling the Centrifugal Juicer”).
Plug the power cord into a grounded outlet.
1Adjust the speed dial to the desired
setting. See the Speed Selector Table in
the “Tips for great results” section for
more information. Press POWER ( )
to turn on Juicer.
2With motor running, place food
into feed chute using the food pusher.
As food is processed, the extracted
juice will flow into the juice pitcher,
and the separated pulp will flow into
the pulp basket.
W10673584B_ENv01.indd 12 9/11/14 3:44 PM

English
13
OPERATING THE CENTRIFUGAL JUICER
TIPS FOR GREAT RESULTS
OPERATING THE CENTRIFUGAL JUICER
NOTE: Do not allow the pulp basket to overfill while juicing, as it may affect operation of
the Juicer.
To empty pulp basket while juicing, first turn off Juicer by pressing the Power button. Once
the power is off, remove the pulp basket and empty its contents. Make sure to replace the
empty pulp basket before turning power back on and continuing to juice.
TIP: To prevent drips to your counter, turn up the juice spout when removing
the juice pitcher.
Speed selector table
Food Item Dial Speed
Apples
Apricots (pit removed)
Beets (trimmed)
Blueberries
Broccoli
Brussels sprouts
(trimmed)
Carrots
Cauliower
Celery
Cucumber (peeled)
Fennel
Grapes (seedless)
Kale
Kiwi Fruit (peeled)
Food Item Dial Speed
Mangoes (peeled, pit
removed)
Melons (peeled)
Nectarines (pit
removed)
Oranges (peeled) or
Peaches (pit removed)
Pears (stalks removed) for hard or
for soft
Pineapple (peeled)
Plums (pit removed)
Raspberries
Spinach
Strawberries
Tomatoes
Watermelon (peeled)
TIP: When juicing hard foods, the recommended maximum quantity is 3 kg with a
maximum operating time of 2 minutes. Some very hard foods may make the juicer slow
down or stop. If this happens, turn off the juicer and unblock the screen.
W10673584B_ENv01.indd 13 9/11/14 3:44 PM

14
CARE AND CLEANINGTIPS FOR GREAT RESULTS
Quick tips
Before juicing:
• Thoroughly wash your fruits and
vegetables, making sure they are free
of soil, leaves, and stems. Small leaves,
such as on strawberries, do not have
to be removed.
• To avoid damaging the juicer, do not
juice frozen fruits or vegetables. For
optimal performance, always use fresh
fruits and vegetables.
• Large seeds or pits must be removed
prior to juicing to avoid damage to
the disk. This includes fruits such as;
nectarines, peaches, mangoes, apricots,
plums, cherries, etc.
• Always peel fruits with hard or inedible
skins. Examples include mangoes, citrus
fruits, melons, and pineapples.
• Some vegetables, such as cucumbers or
yellow squash, do not have to be peeled
rst,dependingonthesoftnessofthe
skin and recipe requirements. Leaving the
peelsonwillchangethecolorandavour
ofthenishedjuices.
After juicing:
• There may be pieces of fruit or vegetables
remaining in the pulp after juicing. These
should be removed prior to using the pulp
in any recipes.
• Saved pulp can be used for other
recipes, as compost for your garden,
or can be discarded.
For easy cleanup:
• As you juice, clean parts to avoid dried
on juice and pulp.
• After each use, immediately rinse
removable parts in hot water to remove
pulp and juice. It may be necessary to use
the cleaning brush to remove pulp from
the screen. Let parts air dry.
CARE AND CLEANING
Disassembling the Centrifugal Juicer
1Turn off Juicer by pressing POWER
( ) . Unplug the power cord. 2Remove pulp basket by sliding it away
from the Juicer.
W10673584B_ENv01.indd 14 9/11/14 3:44 PM

English
15
CARE AND CLEANINGTIPS FOR GREAT RESULTS
CARE AND CLEANING
3Grasp the feed chute on the Juicer lid
and turn it counter-clockwise to unlock
and remove it from the Juicer.
4There may be pulp stuck to the
underside of the lid. Use the flat side of
the cleaning brush to carefully scrape
the stuck pulp into the pulp container.
5Gently lift juicing bowl out of bowl
housing with disc still in place.
NOTE: For easy cleanup, it is
recommended to remove the
disc from the juicing
bowl over a sink.
6Lift disc out of juicing bowl.
7Remove adjustable pulp collar from
the juice screen for cleaning:
Turn collar to “unlock.” Press spring
button and pull collar down, removing
it from the screen.
W10673584B_ENv01.indd 15 9/11/14 3:44 PM

CMD + SHIFT CLICK TO CHANGE COPY
16
CARE AND CLEANINGCARE AND CLEANING
Cleaning the Centrifugal Juicer
2Soak juice screen in hot, soapy water
for 10 minutes. Hold screen under
running water and use cleaning brush to
clean out any stuck food or residue in
the screen.
1Wipe the motor body and power cord
with a soft, damp cloth. Dry thoroughly.
Do not use abrasive cleansers or
scouring pads.
IMPORTANT: To avoid damaging the Juicer, do not wash or immerse the motor body in
water or other liquids. All other parts are top rack dishwasher safe.
Before cleaning, make sure Juicer has been turned off, unplugged, and disassembled
correctly. See “Disassembling the Centrifugal Juicer.”
NOTE: The fine mesh of the juice screen may become clogged if pulp is left to dry on it.
Clean immediately after usage.
After cleaning the juice screen, check to see if the mesh holes are clear of debris by holding
it up towards a light. If debris remains, repeat Step 2.
TROUBLESHOOTING
3Disc and all parts other than motor body may be washed in warm, sudsy water
or placed in the top rack of the dishwasher for cleaning.
W10673584B_ENv01.indd 16 9/11/14 3:44 PM

CMD + SHIFT CLICK TO CHANGE COPY
English
17
CARE AND CLEANINGCARE AND CLEANING
TROUBLESHOOTING
Juicer does not operate when turned on
Motor sounds strained during operation
Build-up of excess pulp in the disk
Pulp is too wet; not enough juice being extracted
Juice is spraying out of the spout
Cleaning tips
• Check to make sure the Juicer has been
assembled correctly, and the lid is in the
locked position.
• Stop the juicing process and follow the
directions in the “Care and cleaning”
section to disassemble and clean the
juicer lid. Scrape off pulp, reassemble,
and resume juicing.
• Try a slower speed and push ingredients
more slowly through the feed tube.
• The wrong speed was selected for
ingredients being juiced, putting
excess strain on motor.
• After each use, immediately rinse all
removable parts in hot water to remove
pulp and juice. It may be necessary to use
the cleaning brush to remove pulp from
the screen. Let parts air dry.
• To prevent staining of plastic parts from
brightly coloured fruit and vegetables,
wash parts immediately after use.
• If discoloration from ingredients occurs,
soak plastic parts in a solution of water
and 10% lemon juice. You can also clean
them with a non abrasive cleanser. Do
not soak plastic parts or disc in bleach to
remove stains.
• Refer to the Speed selector table in
the “Tips for great results” section to
determine the correct juicing speed for
your ingredients.
• Once excess pulp is removed, try
alternating between soft and hard
vegetables and fruit.
• Juicing screen may be clogged. Follow
directions in the “Care and cleaning”
section to disassemble Juicer and clean
the screen.
• Check your pulp setting. You may need
to change it based on your preferred
juice thickness.
• Make sure juice pitcher is pushed close
tothejuicerandtssnuglyagainstit.
W10673584B_ENv01.indd 17 9/11/14 3:44 PM

18
WARRANTY AND SERVICE
Length of
Warranty: KitchenAid Will
Pay For: KitchenAid Will Not
Pay For:
Europe, Middle East
and Africa:
Two years full warranty
from date of purchase.
The replacement
parts and repair
labor costs to
correct defects
in materials or
workmanship.
Service must
be provided by
an Authorized
KitchenAid Service
Center.
A. Repairs when Juicer is used
for operations other than
normal household
food preparation.
B. Damage resulting from
accident, alterations,
misuse, abuse, or
installation/operation
not in accordance with
local electrical codes.
KITCHENAID DOES NOT ASSUME ANY RESPONSIBILITY FOR INDIRECT
DAMAGES.
KitchenAid Centrifugal Juicer warranty
Customer service
© 2014. All rights reserved.
Specicationssubjecttochangewithoutnotice.
In U.K. and Ireland:
For any questions, or to find the nearest KitchenAid Authorized Service Center, please find
our contact details below.
NOTE: All service should be handled locally by an Authorized KitchenAid Service Center.
Contact number for U.K. and Northern Ireland:
Tollfree number 0800 988 1266 (calls from mobile phones are charged standard network
rate) or call 0194 260 5504.
Contact number for Ireland:
Tollfree number +44 (0) 20 8616 5148
E-mail contact for U.K. and Ireland:
Go to www.kitchenaid.co.uk, and click on the link “Contact Us” at the bottom
of the page.
Address for U.K. and Ireland:
KitchenAid Europa, Inc.
PO BOX 19
B-2018 ANTWERP 11
BELGIUM
In other countries:
For all product related questions and after sales matters, please contact your dealer
to obtain the name of the nearest Authorized KitchenAid Service/Customer Center.
For more information, visit our website at:
www.KitchenAid.co.uk
www.KitchenAid.eu
W10673584B_ENv01.indd 18 9/11/14 3:44 PM
19
Deutsch
ANLEITUNG FÜR ZENTRIFUGAL-ENTSAFTER
SICHERHEITSHINWEISE FÜR ZENTRIFUGAL-ENTSAFTER
Wichtige Sicherheitshinweise ����������������������������������������������������������������������������20
Elektrische Anforderungen��������������������������������������������������������������������������������22
Entsorgung von Elektrogeräten�������������������������������������������������������������������������22
TEILE UND MERKMALE
Teile und Zubehör ���������������������������������������������������������������������������������������������23
MONTIEREN DES ZENTRIFUGAL-ENTSAFTERS
Vor dem ersten Verwenden ������������������������������������������������������������������������������24
Montieren der Teile des Zentrifugal-Entsafters�������������������������������������������������24
BEDIENEN DES ZENTRIFUGAL-ENTSAFTERS
Entsaften������������������������������������������������������������������������������������������������������������26
TIPPS FÜR TOLLE ERGEBNISSE
Wählen der richtigen Geschwindigkeitsstufe ����������������������������������������������������27
Kurztipps �����������������������������������������������������������������������������������������������������������28
PFLEGE UND REINIGUNG
Demontieren des Zentrifugal-Entsafters�����������������������������������������������������������28
Reinigen des Zentrifugal-Entsafters�������������������������������������������������������������������30
Tipps zum Reinigen �������������������������������������������������������������������������������������������31
PROBLEMBEHEBUNG �����������������������������������������������������������������������������������������31
GARANTIE UND KUNDENDIENST������������������������������������������������������������������32
INHALTSVERZEICHNIS
W10673584B_02_DE.indd 19 9/11/14 2:33 PM

20
SICHERHEITSHINWEISE FÜR ZENTRIFUGAL-ENTSAFTERSICHERHEITSHINWEISE FÜR ZENTRIFUGAL-ENTSAFTER
WICHTIGE SICHERHEITSHINWEISE
Beim Gebrauch von Elektrogeräten müssen immer folgende
grundlegende Sicherheitsmaßnahmen beachtet werden:
1. Lesen Sie alle Instruktionen� Verletzungsgefahr bei falscher
Verwendung des Geräts�
2. Vergewissern Sie sich vor dem Einschalten, dass der
Deckel des Entsafters sicher geschlossen ist� Öffnen Sie
den Deckel nicht, während der Entsafter benutzt wird�
3. Berühren Sie keine sich bewegenden Teile�
4. Stecken Sie keine Finger oder Objekte in den Einfüllstutzen,
während das Gerät benutzt wird� Falls Zutaten die Öffnung
blockieren, schieben Sie mit dem Stopfer ein weiteres Stück
Obst oder Gemüse nach unten, um die Zutaten zu entfernen�
Verwenden Sie keinesfalls einen Finger oder die ganze Hand�
Verwenden Sie stets den mitgelieferten Stopfer� Ist das nicht
möglich, halten Sie den Motor an und demontieren Sie den
Entsafter, um die Zutaten zu entfernen�
5. Die Verwendung von nicht von KitchenAid empfohlenem
Zubehör kann zu einem Brand, Stromschlag oder zu
Verletzungen führen�
Ihre Sicherheit und die Sicherheit anderer sind von großer Wichtigkeit.
Im vorliegenden Handbuch und an Ihrem Gerät sind zahlreiche Sicherheitshinweise zu nden.
Lesen und beachten Sie bitte immer alle diese Sicherheitshinweise.
Dies ist das Warnzeichen.
Dieses Zeichen weist Sie auf mögliche Gefahren hin, die zum Tode oder
zu Verletzungen führen können.
Alle Sicherheitshinweise stehen nach diesem Zeichen oder dem Wort „GEFAHR“
oder „WARNUNG“. Diese Worte bedeuten:
Sie können schwer oder tödlich verletzt
werden, wenn Sie diese Hinweise nicht
unmittelbar beachten.
Sie können schwer oder tödlich verletzt werden,
wenn Sie diese Hinweise nicht beachten.
Alle Sicherheitshinweise erklären Ihnen die Art der Gefahr und geben Hinweise, wie Sie die
Verletzungsgefahr verringern können, aber sie informieren Sie auch über die Folgen, wenn Sie
diese Hinweise nicht beachten.
GEFAHR
WARNUNG
W10673584B_02_DE.indd 20 9/11/14 2:33 PM
Table of contents
Languages:
Other KitchenAid Juicer manuals

KitchenAid
KitchenAid 5KVJ0111 User manual

KitchenAid
KitchenAid KVJ0333 User manual

KitchenAid
KitchenAid 5KVJ0111ECA User manual

KitchenAid
KitchenAid 5JE User manual

KitchenAid
KitchenAid KSM1JA User manual

KitchenAid
KitchenAid KVJ0111 User manual

KitchenAid
KitchenAid JE User manual

KitchenAid
KitchenAid KSM1JA User manual

KitchenAid
KitchenAid KVJ0333OB User manual