Klarstein 10031343 User manual

10031343
Luftentfeuchter

2
Sehr geehrter Kunde,
wir gratulieren Ihnen zum Erwerb Ihres Gerätes. Lesen Sie die folgenden Hinweise sorgfältig durch und befol-
gen Sie diese, um möglichen Schäden vorzubeugen. Für Schäden, die durch Missachtung der Hinweise und
unsachgemäßen Gebrauch entstehen, übernehmen wir keine Haftung.
Inhaltsverzeichnis
Technische Angaben 2
Sicherheitshinweise 2
Aufbau 3
Gerätenutzung 4
Aufstellung / Reinigung / Aufbewahrung 6
Fehlersuche und Fehlerbehebung 8
Hinweise zur Entsorgung 8
Konformitätserklärung 8
Technische Daten
Bitte konsultieren Sie hierzu das das Kennschild auf dem Gerät selbst.
Sicherheitshinweise
• Trennen Sie das Gerät vor der Reinigung / Aufbewahrung vom Stromnetz.
• Wählen Sie einen trockenen, vor Spritzwasser und ähnlichem geschützten Aufstellort.
• Tauchen Sie das Gerät nicht unter Wasser.
• Stellen Sie das Gerät nicht in der Nähe von Hitzequellen, entflammbaren oder anderen gefährlichen Ma-
terialien auf.
• Stecken Sie Ihre und andere Körperteile nicht in die Geräteöffnungen.
• Stellen Sie keine schweren Gegenstände auf das Gerät.
• Leeren Sie den Wassertank regelmäßig.
• Betreiben Sie das Gerät nicht in einem abgeschlossenen Raum.
• Achten Sie darauf, den Abflussschlauch so zu verlegen, dass das Wasser ohne Probleme ablaufen kann.
• Ist das Gerät defekt, wende Sie sich an einen Fachmann.

3
Aufbau
1 Abdeckung
2 Luftfilter
3 Display
4 Vorderseite
5 Bedienpanel
6 Griff
7 Luftaustritt
8 Rückseite
9 Wassertank
10 Stromkabel
11 Räder
Das Display (3) zeigt 3 Funktionen an:
A) Sobald das Gerät eingeschaltet wird, wird die aktuelle Luftfeuchtigkeit angezeigt.
B) Wird eine Zielluftfeuchtigkeit gewählt, wird diese auf dem Display eingeblendet.
C) Wird ein Abschaltzeitpunkt gewählt, wird dieser auf dem Display eingeblendet.
D) Sobald die Luftfeuchtigkeit 35% unterschreitet, zeigt das Display „Lo“ (niedrig) an.
E) Sobald die Luftfeuchtigkeit 95% überschreitet, zeigt das Display „Hi“ (hoch) an.
Bedienfeld

4
1 Betriebsanzeige
2/3 Niederleistung-/Hochleistungsbetrieb-Anzeige
4 Betriebsmodus-Anzeige
5 Timer-Anzeige
6 Oszilallations-Anzeige
7 Ionisations-Anzeige (optional; bei vorhandener Ionisationsfunktion)
8 Anzeige „Wasserbehälter voll“
A An-/Ausschalter
B Leistungsauswahl-Schalter
C Luftfeuchtigkeitsauwahl-Schalter
D Timer-Schalter
E Oszillationsauswahl-Schalter
F Ionisiererfunktionsauswal-Schalter (optional; bei vorhandener Ionisationsfunktion)
Gerätenutzung
Bedienfeld und Tastenfunktionen
1 Die Betriebsanzeige leuchtet grün, sobald das Gerät mit dem Stromnetz verbunden ist.
2Drücken Sie die Taste, um das Gerät in Betrieb zu nehmen. Die voreingestellte Zielluftfeuchtigkeit
beträgt 60%. Wenn Sie die Taste erneut drücken, schaltet das Gerät ab.
3Drücken Sie die Taste, um die Geräteleistung zu bestimmen. Es stehen zwei Leistungsstufen zur
Auswahl.
4Drücken Sie die Taste wiederholt, um die Zielluftfeuchtigkeit zu definieren. Sobald die Zielluft-
feuchtigkeit erreicht ist, schaltet sich das Gerät automatisch ab.
5
Drücken Sie die Taste wiederholt, um einen An- und Abschaltzeitpunkt zu wählen. Sie können
zwischen den Werten 00 bis 24 wählen, um die An- und Abschaltzyklen auf Werte zwischen 0
und 24h zu setzen.
6Drücken Sie die Taste, um die Oszillation zu- oder abzuschalten.
7Drücken Sie die Taste, um die Ionisationsfunktions zu- oder abzuschalten.

5
Wassertank wechseln
Sobald der Wassertank voll ist, wird die entsprechende LED aufgeblendet, das Gerät stellt seinen Betrieb ein
und – für 15 Minuten – ein akustisches Signal ausgesendet. Wechseln Sie in diesem Fall den Wassertank fol-
gendermaßen:
Drücken Sie sanft auf die Flanken des Wassertanks und ziehen Sie die-
sen vorsichtig aus seiner Positon.
Kippen Sie das gesammelte Wasser weg.
WICHTIG: Das Flott nicht aus dem Wassertank entfernen. Dieses spielt
eine zentrale Rolle bei der Füllstandsmessung. Ist das Flott nicht vor-
handen oder falsch positioniert, kann es zu Wasserschäden zu durch
überlaufendes Wasser kommen. Ist der Wassertank verschmutzt rei-
nigen Sie diesen mit warmen Wasser, einer milder Seifenlauge und ei-
nem weichen Lappen etc. Nutzen Sie keine ätzenden Reinigungsmittel
und/oder spitze/harte Reinigungshilfen.
Setzen Sie den Wassertank vorsichtig in seine angestammte Position
zurück Ist der Tank nicht korrekt eingesetzt, kann das Gerät nicht in Be-
trieb genommen werden.

6
Dauerentfeuchtung
Das Gerät verfügt über einen Anschluss zur Auifnahme einer 10mm (In-
nendruchmesser) – Schlauches, um unterbrechungslos zu entfeuchten.
Aufstellung / Reinigung / Aufbewahrung
Gehäusereining (außen)
Wischen Sie das Gerät mt einem feuchten Lappen oder ähnlichem ab.
Luftfilter reinigen
Entfernen Sie die Abdeckung und entnehmen Sie den Luftfilter wie
abgebildet.
Saugen Sie den Filter behelfs eines Staubsaugers ab. Bei einem hohen
Verdreckungsgrad waschen Sie das Gerät mit warmen Wasser und ei-
ner milden Seifenlauge aus. Setzen Sie in diesem Fall den Filter nicht
wieder ein, bevor er nicht völlig getrocknet ist.
Setzen Sie den Filter wie abgebildet ein und bringen Sie die Abdeckung
an.

7
Gerät bei Nichtnutzung verstauen
1. Wassertank leeren, trocknen und wieder einsetzen
2. Stromkabel wie abgebildet aufrollen und im Wassertank verstauen
3. Luftfilter reinigen
4. Einen kühlen und trocknen Abstellort nutzen
Standort wählen
Achten Sie bei der Aufstellung auf ausreichende Seiten- und Rückseitenabstände wie abgebildet.

8
Fehlersuche und Fehlerbehebung
Problem Mögliche Ursache Fehlerbehebung
Gerät arbeitet nicht Gerät nicht mit Stromnetz
verbunden
Prüfen Sie die Steckverbindung
mit der Steckdose
Wassertank voll oder nicht korrekt
eingesetzt
Wassertank leeren und/oder
wieder einsetzen
Raumtemperatur übersteigt 35°C
oder unterschreitet 5°C
Gerät kann aufgrund der
Sicherheitsprogrammierung nicht
betrieben warden,
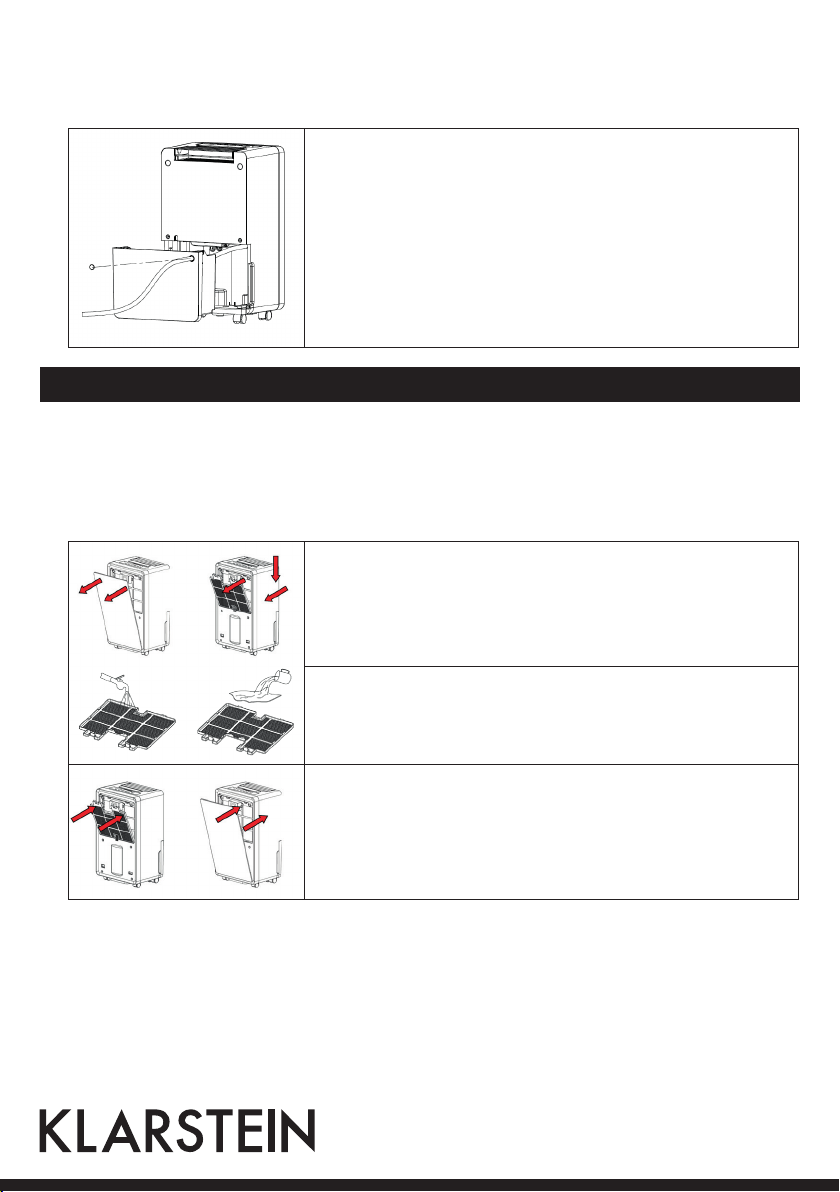
Keine Luftentfeuchtung Luftfilter verstopft Luftfilter reinigen
Luftzufuhr-/abfuhrschlauch
blockiert
Blockierung der Schläuche
beheben
Kein Luftaustritt Luftfilter verstopft Luftfilter reinigen
Lautes Betriebsgeräusch Steht das Gerät ebenerdig und
stabil?
Gerät ebenerdig und stabil
auftstellen
Luftfilter verstopft Luftfilter reinigen
Hinweise zur Entsorgung
Befindet sich die linke Abbildung (durchgestrichene Mülltonne auf Rädern) auf dem Pro-
dukt, gilt die Europäische Richtlinie 2012/19/EU. Diese Produkte dürfen nicht mit dem nor-
malen Hausmüll entsorgt werden. Informieren Sie sich über die örtlichen Regelungen zur
getrennten Sammlung elektrischer und elektronischer Gerätschaften. Richten Sie sich nach
den örtlichen Regelungen und entsorgen Sie Altgeräte nicht über den Hausmüll. Durch die
regelkonforme Entsorgung der Altgeräte werden Umwelt und die Gesundheit ihrer Mit-
menschen vor möglichen negativen Konsequenzen geschützt. Materialrecycling hilft, den
Verbrauch von Rohstoffen zu verringern.
Konformitätserklärung
Hersteller: Chal-Tec GmbH, Wallstraße 16, 10179 Berlin, Deutschland.
Dieses Produkt entspricht den folgenden Europäischen Richtlinien:
2014/30/EU (EMV)
2014/35/EU (LVD)
2011/65/EU (RoHS)
206/2012/EU (ErP)

9
Dear Customer,
Congratulations on purchasing this equipment. Please read this manual carefully and take care of the following
hints to avoid damages. Any failure caused by ignoring the mentioned items and cautions mentioned in the
instruction manual are not covered by our warranty and any liability.
Contents
Technical Data 2
Safety Instructions 2
Components 3
Operation 4
Installation / Cleaning / Storage 6
Troubleshooting 8
Hints on Disposal 8
Declaration of Conformity 8
Technical Data
Please refer to the rating label on the item.
Safety Instructions
• Unplug the power supply cord before cleaning or storage.
• DO not submerge the unit in water, or place the unit close to water.
• Do not put the unit close to heat-generating devices or near flammable and dangerous materials.
• Never put your fingers or objects into the intake or discharge ducts.
• Do not sit or stand on the unit.
• Discard water that has collected in the tank as required
• Do not operate the dehumidifier in a closed area such as inside a closet, as it may cause a fire
• Install drain piping at a downhill grade to make sure that condensed water can be drained continuously.
• If the power supply cord is damaged it must be replaced by the manufacture or a qualified service agent.

10
Components
1 Frontpanel
2 Air filter
3 Adjustable humidity setting
and timer indication
4 Front
5 Controlpanel
6 Handle
7 Air outlet
8 Rear
9 Water tank
10 Supply cord
11 Wheels
The indicator features 3 functions:
A) When the unit is plugged in, it will indicate the room humidity level.
B) When you set the humidity, it will indicate the humidity that you have selected
C) When you program the time for the unit to turn on and off, it will show the hours.
D) When the environment humidity is lower than 35%, it will show “LO”
E) When the environment humidity is higher than 95%, it will show “HI”
User Panel

11
1 POWER-LED - Power Led
2 LF-LED - Low-fan Led
3 HF-LED - High-fan Led
4 SET-LED - Set-Led
5 TIM-LED - Time-Led
6 SW-LED - Swing-Led
7 ION-LED - Ion-Led (Optional)
8 W.F-LED - Water full-Led
A Power Push Button
B Fan Speed Push Button
C Adjustable Humidity Push Button
D Timer Push Button
E Louver settings Button
F ION Button (Optional)
Operation
User Panel
1The Power indication light will turn on in green when the unit is plugged in, regardless of whether
the unit is operating or not.
2Press the button once to start operation, the default humidity level is 60%. Press it again to stop
operation.
3Press button as follows: Press to set the desired fan speed. It can be adjusted between high speed
and low speed.
4Press to set the desired humidity level in the room. When the relative humidity in the room is
lower than the selected humidity, the operation of the unit will stop automatically.
5
Press the button to program the time when the unit turns on and turns off. If you want to cancel
the timer programming, press the button to adjust the time at 00, and press the button ,it will be
circulate from 00-01-02……23-24. It is the programmed time to switch the machine. The pro-
grammed time will be cancelled when to switch compressor manually each time. The program-
med time remains unchanged if the machine stops to wok due to water full or during defrosting
6Press to set the louver settings the indication light.
7Whenpressbutton theIonfunctionwillbeopenandtheindicationlight.(Optional)

12
Draining the collected water
When the drainage tank is full, the tank full indicator light will turn on, the operation will stop automatically
and the buzzer will beep 15 times to alert the user, that the water need to be emptied from the drainage tank .
Lightly press on the sides of the tank with both hands and pull the tank
out gently.
Discard the collected water.
NOTE: 1. Do not remove the float from the water tank. The water full
sensor will no longer be able to detect the water level correctly without
the float and water may leak from the water tank. If the drainage tank is
dirty, wash it with cold or lukewarm water. Do not use detergent, scou-
ring pads, chemically treated dust cloths, gasoline, benzene, thinner,
or other solvents, as these can scratch and damage the tank and cause
water leakage
When replacing the drainage tank, press the tank firmly into place with
both hands. If the tank is not positioned properly, the “TANK FULL”
sensor will be activated, and the dehumidifier will not operate.

13
Continuous Water Drainage
The unit features a continuous drainage port .Using a plastic pipe (with
an inner diameter of 10mm). The water in the drainage tank can be
continuously drained out from the continuous port on the unit.
Installation/ Cleaning / Storage
To clean the body
Wipe it with a soft damp cloth.
To Clean the Air Filter
Remove the front panel firstly and remove the air filter.
Run a vacuum cleaner lightly over the surface of the air filter to remove
dirt. If the air filter is exceptionally dirty, wash it with warm water and a
mild cleanser and dry thoroughly.
Insert the filter into the unit in smoothly, and insert the front panel into
right place.

14
Storing the Dehumidifier
When the unit is not being used for a long period of time and you want
to store it note the following steps:
1. Empty any water left in the drainage tank.
2. Fold up the power supply cord and put it in the water tank.
3. Clean the air filter
4. Discard in a cool and dry place.
Installation
Maintain the minimum clearance around the dehumidifier when the unit is operating as shown in the drawing.

15
Troubleshooting
Problem Possible Cause Solution
The unit doesn't operate Has the power cord been
disconnected?
Plug the power cord into the
outlet.
Is the tank full indication lamp
blinking? (The tank is full or in a
wrong position.)
Empty the water in the drainage
tank and then reposition the tank.
Is the temperature of the room
above35 orbelow5 ?
The protection device is activated
and the unit cannot be started.
The dehumidifying function
doesn't work
Is the air filter clogged? Clean the air filter as instructed
under Cleaning the dehumidifier".
Is the intake duct or discharge duct
obstructed?
Remove the obstruction from the
discharge duct or intake duct.
No air is discharged Is the air filter clogged? Clean the air filter as instructed
under "Cleaning the dehumidifier".
Operation is noisy Is the unit tilted or unsteady? Move the unit to a stable, sturdy
location.
Is the air filter clogged? Clean the air filter as instructed
under "Cleaning the dehumidifier".
Hints on Disposal
According to the European waste regulation 2012/19/EU this symbol on the product
or on its packaging indicates that this product may not be treated as household waste.
Instead it should be taken to the appropriate collection point for the recycling of electrical
and electronic equipment. By ensuring this product is disposed of correctly, you will help
prevent potential negative consequences for the environment and human health, which
could otherwise be caused by inappropriate waste handling of this product. For more de-
tailled information about recycling of this product, please contact your local council or your
household waste disposial service.
Declaration of Conformity
Producer: Chal-Tec GmbH, Wallstraße 16, 10179 Berlin, Germany.
This product is conform to the following European Directives:
2014/30/EU (EMC)
2014/35/EU (LVD)
2011/65/EU (RoHS)
206/2012/EU (ErP)

16
Estimado cliente,
Le felicitamos por la adquisición de este producto. Lea atentamente el siguiente manual y siga cuidadosamen-
te las instrucciones de uso con el fin de evitar posibles daños. La empresa no se responsabiliza de los daños
ocasionados por un uso indebido del producto o por haber desatendido las indicaciones de seguridad.
Índice
Datos técnicos 16
Indicaciones de seguridad 16
Montaje 17
Utilización del aparato 18
Colocación / Limpieza / Conservación 20
Detección y resolución de problemas 22
Indicaciones para la retirada del aparato 22
Declaración de conformidad 22
Datos técnicos
Consulte la placa de especificaciones técnicas situada en el aparato.
Indicaciones de seguridad
• Antes de limpiar o guardar el aparato, desconéctelo de la red eléctrica.
• Seleccione un lugar de instalación seco y alejado de salpicaduras o similares.
• No sumerja el aparato en agua.
• No coloque el aparato cerca de fuentes de calor, materiales inflamables ni peligrosos.
• No introduzca ninguna parte del cuerpo en las ranuras de ventilación.
• No coloque objetos pesados encima del aparato.
• Vacíe el depósito de agua regularmente.
• No ponga en marcha el aparato en una estancia cerrada.
• Asegúrese de colocar el conducto de desagüe de tal manera que el agua pueda drenarse sin problemas.
• Si el aparato está averiado, contacte con un servicio técnico.

17
Montaje
1 Cubierta
2 Filtro de aire
3 Display
4 Parte delantera
5 Panel de control
6 Asa
7 Salida de aire
8 Parte trasera
9 Depósito de agua
10 Cable de alimentación
11 Ruedas
El display (3) muestra 3 funciones:
A) Tan pronto como encienda el aparato, se mostrará la humedad actual del aire.
B) Si se selecciona una humedad determinada, esta aparecerá en el display.
C) Si se selecciona un momento de apagado determinado, este aparecerá en el display.
D) Cuando la humedad del aire no supere el 35 %, el display muestra «Lo» (bajo).
E) Cuando la humedad del aire supere el 95 %, el display muestra «Hi» (alto).
Panel de control

18
1 Indicador de funcionamiento
2/3 Indicador de funcionamiento a potencia baja/alta
4 Indicador de modo operativo
5 Indicador del temporizador
6 Indicador de oscilación
7 Indicador de ionizador (opcional, si existe función de ionización disponible)
8 Indicador «depósito de agua lleno»
A Interruptor de encendido/apagado
B Interruptor selección de potencia
C Interruptor selección de humedad
D Interruptor de temporizador
E Interruptor selección de oscilación
F Interruptor selección de función ionizador (opcional, si existe función de ionización disponible)
Utilización del aparato
Panel de control y funciones de los botones
1El indicador de funcionamiento se ilumina en color verde cuando conecte el aparato al suministro
eléctrico.
2Pulseelbotónparaponeren marchael aparato.Lahumedad seleccionadapor defectoesdel 60 %.
Si pulsa de nuevo el botón, el aparato se apaga.
3Pulse el botón para determinar la potencia del aparato. Existen dos niveles de potencia disponi-
bles.
4Pulse varias veces el botón para definir el grado de humedad. Cuando se haya alcanzado la hume-
dad seleccionada, el aparato se apaga automáticamente.
5
Pulse varias veces el botón para seleccionar el punto de encendido y apagado. Puede elegir entre
los valores 00 a 24 para establecer los ciclos de apagado y encendido en los valores entre 0 y
24 horas.
6Pulse el botón para apagar o activar la oscilación.
7Pulse el botón para apagar o activar la función se ionización.
Table of contents