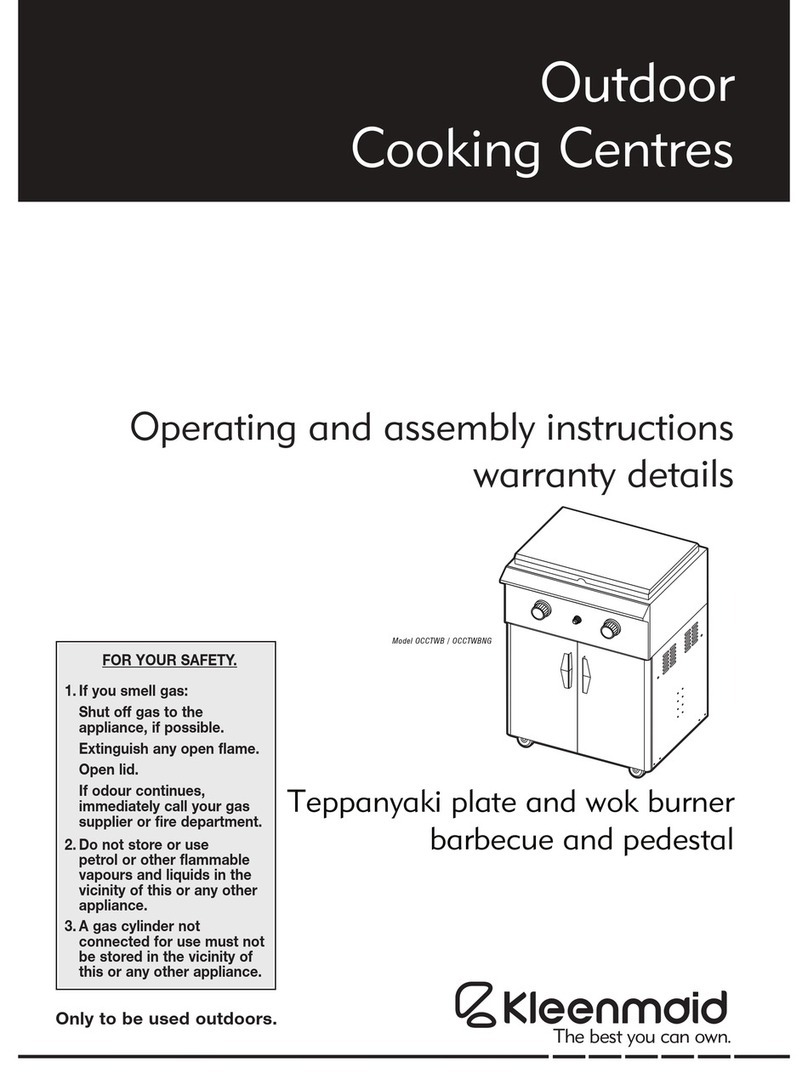
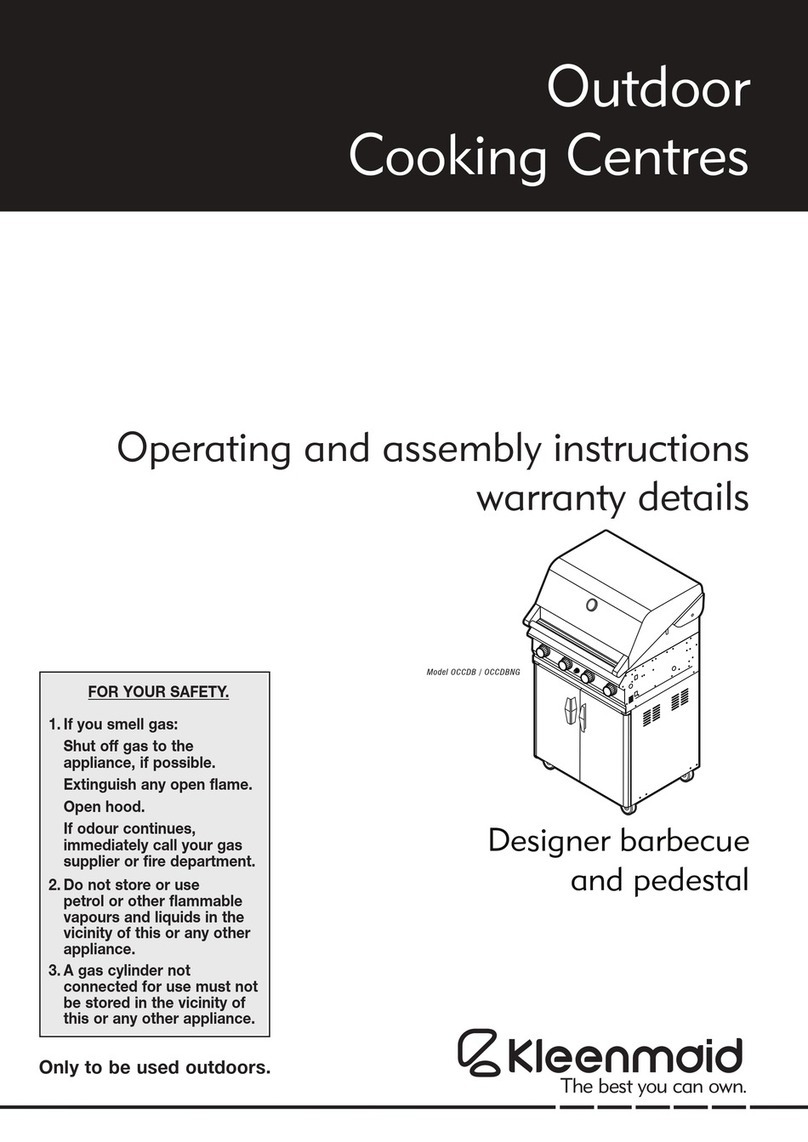
Kleenmaid OCCPB Product guide

Outdoor
Cooking Centres
Operating and assembly instructions
warranty details
Professional crossfire barbecue
and pedestal
Only to be used outdoors.
FOR YOUR SAFETY.
1. If you smell gas:
Shut off gas to the
appliance, if possible.
Extinguish any open flame.
Open hood.
If odour continues,
immediately call your gas
supplier or fire department.
2. Do not store or use
petrol or other flammable
vapours and liquids in the
vicinity of this or any other
appliance.
3. A gas cylinder not
connected for use must not
be stored in the vicinity of
this or any other appliance.
Model OCCPB / OCCPBNG

the best you can own.
Congratulations on the purchase of your new Kleenmaid outdoor cooking centre. This
appliance has been designed and manufactured to give you years of reliable performance.
the kleenmaid story.
More than one million Australians enjoy using Kleenmaid appliances daily. Selected because of
their unique design, outstanding performance, excellent quality and unquestionable reliability,
each one is value-for-money, 100 per-cent guaranteed and at the top of its class.
attention to detail.
We are proud of our reputation for product innovation and service excellence. By dealing direct, we
can ensure that you consistently receive a high standard of customer service.
Free delivery, dedicated customer and after-sales service plus free kitchen design including
planning seminars are just a few of the ways we are setting new benchmarks for customer service
and experience.
satisfaction guaranteed.
Your new outdoor cooking centre is covered by a written five-year parts and labour warranty,
no lemon guarantee and a unique best value guarantee.
best results.
For best results, carefully read the enclosed instructions on how to assemble your new barbecue.
Correct assembly will avoid delays and unnecessary service calls.
This booklet provides you with comprehensive information to help you get to know the controls and
the features of your new outdoor cooking centre.
congratulations


SAFETY
44
FOR YOUR SAFETY:
•DO NOT STORE OR USE PETROL OR
OTHER FLAMMABLE VAPOURS AND
LIQUIDS IN THE VICINITY OF THIS OR ANY
OTHER APPLIANCE.
•DO NOT STORE EMPTY OR FULL SPARE
GAS CYLINDERS UNDER OR NEAR THIS
OR ANY OTHER APPLIANCE.
•KEEP THE GAS HOSE AWAY FROM HOT
SURFACES. PROTECT GAS HOSE FROM
DRIPPING GREASE.
AVOID UNNECESSARY TWISTING OF
HOSE. VISUALLY INSPECT HOSE PRIOR TO
EACH USE FOR CUTS, CRACKS, EXCESSIVE
WEAR OR OTHER DAMAGE. REPLACE
HOSE, IF NECESSARY.
•NEVER TEST FOR GAS LEAKS WITH A LIT
MATCH OR OPEN FLAME.
•NEVER LIGHT BARBECUE WITH LID ON OR
HOOD CLOSED.
•NEVER LEAN OVER COOKING
SURFACE WHILE LIGHTING BARBECUE.
•USE GOOD QUALITY INSULATED OVEN
MITTS WHEN OPERATING BARBECUE.
•NEVER ALTER OR MODIFY THE
REGULATOR OR GAS SUPPLY ASSEMBLY.
•THIS BARBECUE MUST NOT BE USED
INDOORS.
DANGER –IF YOU SMELL OR HEAR
THE HISS OF ESCAPING GAS FROM
THE GAS CYLINDER:
•KEEP CLEAR OF THE GAS CYLINDER.
•TURN ALL CONTROLS ON THE BARBECUE
TO ‘OFF’.
•EXTINGUISH ANY OPEN FLAME.
•REMOVE HOOD OR OPEN HOOD.
•IF ODOUR CONTINUES, IMMEDIATELY
CALL YOUR GAS SUPPLIER OR FIRE
DEPARTMENT.
READ CAREFULLY BEFORE
ASSEMBLING AND OPERATING
YOUR BARBECUE.
NEVER CONNECT AN UNREGULATED
GAS CYLINDER TO YOUR BARBECUE.
•NEVER STORE YOUR
GAS CYLINDER INDOORS.
•FOR STORAGE AND CYLINDER
EXCHANGE, DISCONNECT HOSE AT THE
CYLINDER ONLY –
DO NOT DISCONNECT HOSE FROM
THE APPLIANCE.
DO NOT use your barbecue in garages, porches, breezeways, sheds or
other enclosed areas. Your barbecue is to be used OUTDOORS ONLY.
Refer to page 6. The barbecue is not intended to be installed in or used
on recreational vehicles and/or boats and should not be placed under
any surface that will burn. Do not obstruct the flow of combustion and
ventilation air around the barbecue housing while in use.
LOCATION OF YOUR BARBECUE
Keep children away from barbecue during use and until barbecue has
cooled after you are finished. Do not allow children to operate barbecue
or to swing on handle.
PROTECT CHILDREN
The gas cylinder should be filled by a reputable gas dealer, or
exchanged at a reputable gas cylinder exchange outlet. Gas cylinders
should be visually inspected and re-qualified periodically.
Always keep gas cylinder in an upright position. Always close the
cylinder valve when the barbecue is not in use.
Do not subject the gas cylinder to excessive heat.
If you store your barbecue indoors, ALWAYS disconnect and remove gas
cylinder FIRST, and store gas cylinder safely outside. Gas cylinders
must be stored outdoors in a well ventilated area out of reach of children,
and must not be stored in a building, garage or any other enclosed area.
This is a low pressure barbecue and must only be used with the hose and
regulator supplied.
Your barbecue is designed for use with a 9 kg gas cylinder. Ensure
gas cylinder conforms to Australian Standards and is less than 10 years old.
DO NOT CONNECT YOUR BARBECUE TO A GAS
CYLINDER LESS THAN OR EXCEEDING THIS CAPACITY.
GAS CYLINDER USE AND SAFETY
SERVICING
ANY OF THE FOLLOWING SIGNS MAY
INDICATE THAT THE APPLIANCE IS NOT
OPERATING PROPERLY AND MAY NEED
SERVICING:
•EXCESSIVE YELLOW FLAME.
•IRREGULAR SIZE OF FLAME
ACROSS BURNER.
•‘POPPING’OF FLAME.
•SOOTING.
•ABNORMAL NOISE(S).
•HISSING SOUND.
NOTE: Before requesting service,
please refer to page 16 ‘Fault finding’.
NEVER TEST FOR LEAKS WITH A FLAME.
Prior to first use, and at the beginning of each new season (or, if using
bottled gas, whenever gas cylinder is changed), you must check for gas
leaks. Follow these steps:
1. Make soap solution by mixing one part liquid detergent and one
part water.
2. Turn burner control(s) to ‘OFF’, then turn on gas at source.
3. Apply the soap solution to all visible and accessible gas connections
including the gas cylinder. Bubbles will appear in the soap solution
if connections are not properly sealed. Tighten or rectify as necessary.
Refer to page 5 for further details.
4. If you have a gas leak you cannot rectify, turn off the gas at the
source. Contact the manufacturer for assistance. Refer to back cover.
CHECKING FOR GAS LEAKS

SAFETY
55
NEVER CHECK FOR LEAKS WITH
A FLAME.
IF YOU HAVE A GAS LEAK YOU
CANNOT RECTIFY, TURN OFF THE GAS
AT THE SOURCE. CONTACT THE
MANUFACTURER.
ALWAYS CHECK FOR GAS LEAKS
EACH TIME YOU USE YOUR BARBECUE.
1. Make liquid detergent solution by mixing one (1) part liquid
detergent and four (4) parts water.
2. Turn burner control knob(s) to ‘OFF’, then turn on gas at
source.
CHECKING FOR GAS LEAKS
You should follow this procedure after any of the following:
•Not having used the barbecue for an extended period of time,
•Initial assembly of barbecue,
•Any disconnection and reconnection of hose assembly,
•Changing gas cylinder,
•Upon re-connecting gas cylinder after it has been disconnected for storage.
4 parts water
Open
1 part liquid
detergent
3. Apply the liquid detergent solution to all visible and
accessible gas connections, including the connection to
the gas cylinder. Bubbles will appear in the liquid detergent
solution if connections are not properly sealed. Tighten
or rectify as necessary.
OFF
IGN HI
LO

The following diagrams are examples of outdoor areas.
These same principles apply to canopy or shaded cloth areas.
THIS APPLIANCE SHALL ONLY BE USED IN AN ABOVE GROUND OPEN AIR SITUATION WITH NATURAL
VENTILATION, WITHOUT STAGNANT AREAS, WHERE GAS LEAKAGE AND PRODUCTS OF COMBUSTION
ARE RAPIDLY DISPERSED BY WIND AND NATURAL CONVECTION.
ANY ENCLOSURE IN WHICH THE APPLIANCE IS USED SHALL COMPLY WITH ONE OF THE FOLLOWING:
OUTDOOR AREAS
66
•AN ENCLOSURE WITH WALLS
ON ALL SIDES, BUT AT LEAST
ONE PERMANENT OPENING AT
GROUND LEVEL AND NO
OVERHEAD COVER
•WITHIN A PARTIAL
ENCLOSURE THAT INCLUDES
AN OVERHEAD COVER AND NO
MORE THAN TWO WALLS
•WITHIN A PARTIAL
ENCLOSURE THAT INCLUDES
AN OVERHEAD COVER AND
MORE THAN TWO WALLS, THE
FOLLOWING SHALL APPLY:
(i) AT LEAST 25% OF THE TOTAL
WALL AREA IS COMPLETELY
OPEN: AND
(ii) AT LEAST 30% OF THE
REMAINING WALL AREA IS
OPEN AND UNRESTRICTED
•IN THE CASE OF BALCONIES,
AT LEAST 20% OF THE TOTAL
OF THE SIDE, BACK AND FRONT
WALL AREAS SHALL BE AND
REMAIN OPEN AND
UNRESTRICTED
•DO NOT USE YOUR BARBECUE
IN GARAGES, PORCHES,
BREEZEWAYS, SHEDS OR
OTHER ENCLOSED AREAS.
YOUR BARBECUE IS TO BE
USED OUTDOORS ONLY.
Refer below.
•THE BARBECUE IS NOT
INTENDED TO BE INSTALLED IN
OR USED ON RECREATIONAL
VEHICLES AND/OR BOATS AND
SHOULD NOT BE PLACED
ADJACENT TO OR UNDER ANY
SURFACE THAT WILL BURN.
•DO NOT OBSTRUCT THE FLOW
OF COMBUSTION AND
VENTILATION AIR AROUND
THE BARBECUE HOUSING
WHILST IN USE.
Both ends
open
30% or more in total of
the remaining wall area
is open and unrestricted
30% or more in total of
the remaining wall area is
open and unrestricted
Open side at
least 25% of total
wall area
Open side at
least 25% of total
wall area


ASSEMBLY
88
LEFT
SIDE
Phillips flat-head screw 1/4" x 1/2"
Qty: 4
Phillips flat-head screw 3/16" x 3/8"
Qty: 4
Attach side panels to bottom shelf.
2
Phillips-head screw 1/4" x 1/2"
Qty: 16
Attach castor seats to side panels.
NOTE: Castor seats are labelled for
correct location
Repeat for right side.
1
Door magnets
to front
LF
LR
Attach castor wheels to castor seat.
Attach door guide
3
Phillips-head screw 3/16" x 3/8"
Qty: 2
Door guide
A
B
A
B
B
B
B
B
AA
B
B
A


A S S E M B L Y
10 10
Attach body support brackets.
7
RIGHT
SIDE
Phillips-head screw
3/16" x 3/8"
Qty: 6
Flange nut
3/16"
Qty: 6
Screw
Nut x3
Phillips-head screw
3/16" x 1/4"
Qty: 4
Phillips-head screw
3/16" x 3/8"
Qty: 4
Insert the bottom door hinge pin into the lower door hinge
bracket holes. Depress the spring loaded top door hinge
pin and line up with the top hinge bracket holes, and release
the pin. Attach door handles and towel rack to the inside
panel of doors.
8
A
A
A
B
B
Towel rack
Locate spice rack into
slots inside left door
Note: Change of screws for securing Towel Rack:
4 x self tapping screws have been attached to original hardware
pack to replace original 4 x metal threaded 3/16”screws. Please
use self tappers to secure towel rack. Original screws may still
be enclosed in hardware pack and will remain after assembly.

ASSEMBLY
11 11
Install lighting stick.
10
Install grease tray / water tray.
NOTE: The grease tray is also designed to
hold water for certain cooking methods.
Refer to pages 19 - 22 for further information.
11
Attach barbecue body to trolley.
Remove all loose components from the head assembly
before lifting / installing. This step will require two people.
Release regulator from underneath the body by cutting
the cable tie. Feed regulator through the hole in the trolley
separation panel. After assembly is complete close the
hatch (located underneath) around the gas hose.
9
Phillips-head screw 1/4" x 13/16"
Qty: 4

ASSEMBLY
12 12
TEST FOR LEAKS WITH A
SOAP SOLUTION, NEVER WITH AN
OPEN FLAME (Refer to pages 4 and 5).
CONNECTING TO, AND DISCONNECTING
FROM GAS SOURCE –propane model
CONNECTING TO GAS SOURCE
1. Place the gas cylinder into the gas cylinder tray and face
the gas cylinder valve to the left front corner. Secure with
the wing bolt.
2. Attach cylinder connection
device of regulator and hose
assembly to cylinder
valve outlet.
Tighten firmly.
3. Open the gas
cylinder valve fully
to allow gas to flow.
4. Leak test all accessible
connections thoroughly
using a soapy water
solution prior to lighting the barbecue.
Refer to Safety information, pages 4 and 5.
5. If a leak is found, turn gas cylinder valve off and do not use
barbecue until repairs or replacement can be made.
DISCONNECTING FROM GAS SOURCE
1. Turn the burner control ‘OFF’.
2. Turn the gas cylinder valve off fully.
3.
Detach the regulator assembly from gas cylinder
valve.
IMPORTANT: Before connecting and disconnecting
barbecue to gas source, ensure burner controls are
in ‘OFF’position.
NOTE: The ‘OFF’position on the control panel is
identified by either a small black dot, a short vertical
black line, or the word ‘OFF’.
When the marking, or the word ‘OFF’printed on
the control knob, aligns with the printed marking on
the control panel, then the burner is in the fully off
position.
CAUTION: When the appliance is not in use, the gas
must be turned off at the gas cylinder.
Familiarise yourself with the general information and safety guide-
lines located at the front of this booklet. Check to see that gas
cylinder is filled and that end of each burner tube is properly
located over each valve orifice. Set burner controls to ‘OFF’
position.
ENSURING BURNER CONTROLS ARE OFF
Direction for
tightening
Gas
cylinder
Gas cylinder
pull-out tray
Cylinder valve
outlet
Unscrew igniter cap from control panel. Place supplied AA battery
into the igniter slot with positive pole facing you. Position the cap
and spring over the AA battery and tighten onto control panel.
INSTALL IGNITER BATTERY
Spring
AA battery
Igniter slot
Igniter
cap
Barbecues for use on natural gas must be installed by an
authorised person. This appliance is not readily converted from
propane to natural gas. Natural gas units are factory assembled.
NATURAL GAS INSTALLATION
1. Connect a manometer to the test point located at the
manifold connection.
2. Light all burners and set at maximum rate. Refer to page 14
for lighting instructions.
3. Adjust the regulator to an operation pressure of 0.95 kPa.
SETTING APPLIANCE TEST POINT PRESSURE

•DISCONNECT AND REMOVE GAS
CYLINDER WHEN MANOEUVRING THE
BARBECUE OVER UNEVEN SURFACES
OR CARRYING UP AND DOWN STAIRS.
•IF THIS INFORMATION IS NOT
FOLLOWED EXACTLY, A FIRE
CAUSING DEATH OR SERIOUS INJURY
MAY OCCUR!
•DO NOT STORE A SPARE GAS
CYLINDER UNDER OR NEAR THIS
APPLIANCE.
•THIS BARBECUE IS ONLY TO BE
USED OUTDOORS.
ASSEMBLY
13 13
INSTALLING COOKING COMPONENTS
DO NOT COVER ENTIRE COOKING
SURFACE WITH SOLID PLATES,
AS THIS WILL RESULT IN POOR
COOKING PERFORMANCE, OR THE
BURNERS MAY GO OUT, CREATING A
HAZARDOUS SITUATION.
Place grill plates on front and rear bowl ledges. Place the secondary
cooking rack into the slots on the barbecue bowl side panels.
Slots for secondary
cooking rack
Grill plates
Secondary cooking rack
•CHECK PERFORMANCE OF
BURNERS PRIOR TO INSTALLING
BARBECUE PLATE COMPONENTRY.
Refer to page 14 for lighting instructions
•DO NOT SMOKE WHEN ATTEMPTING
TO IGNITE BARBECUE.
•NEVER USE VOLCANIC ROCK,
HEAT BEADS OR OTHER MATERIAL.
•ALWAYS USE PROTECTIVE GLOVES
WHEN HANDLING HOT COMPONENTS.
Before first use and at the beginning of each barbecue season:
1. Please read Safety, Lighting and Operating
instructions carefully.
2. Check gas valve orifices, burner tubes and burner ports for
any obstructions. eg. spiders, webs, insects.
3. Check and ensure the gas cylinder is full.
4. Ensure all connections are securely tightened.
Check for gas leaks. Refer to pages 4 and 5.
NOW YOUR BARBECUE IS READY TO USE
The temperature gauge is used as a guide to cooking temperatures
when cooking with the hood closed. When an opening is provided
in the hood, this allows for the installation of the temperature
gauge. Install as shown in the diagram, if not factory fitted.
TEMPERATURE GAUGE

NOTE: Burners are fitted with a thermal shut-off
feature. After ignition, the control knob must
continue to be depressed at the ‘HI’position.
Refer to step 5.
1. Open the hood before attempting to
light burners.
2. Set burner control knobs to ‘OFF’
and open gas source.
3. Push and turn required burner control
knob to ‘IGN’.
4. Push the control knob in and hold to
ignite the burner. The burner should
light within 15 seconds.
5. Once the burner is ignited,
continue to depress the control
knob and rotate to ‘HI’position.
Hold for 10 seconds to bypass the
thermal shut-off.
6. If burner does not light, turn burner
control knob to ‘OFF’, wait 5 minutes
for gas to clear, then retry.
7. Once one burner is lit, the adjacent burner pairs can be lit
by turning its control knob to ‘HI’.
BURNER IGNITION
7. Once one burner is lit, the adjacent burner pairs can be lit
by turning its control knob to ‘HI’.
OFF
IGN
HI
LO
OFF
IGN HI
LO
Lighting hole
Lighting stick
Lit match
To light your gas barbecue by match, insert a match into
the lighting stick and follow steps 1 through 6 of the Lighting
instructions. Then, light the match and place lighting stick through
the lighting hole on the left side of the barbecue as shown below.
Position the lit match on the face of either the rear-left or
front-left burner. Turn the appropriate control knob to ‘HI’. Refer
to diagram at step 7 of ‘Burner Ignition’.
The burner should light
immediately.
MANUALLY LIGHTING YOUR BARBECUE
BY MATCH
OPERATION
14 14
NOTE: Cross lighting is not applicable between
front and rear burner.
8. Adjust burner control knobs to
the desired cooking
temperature.
9. If ignition cannot be achieved refer to page 16, ‘Fault Finding’.
•THE HOOD MUST BE IN THE OPEN
POSITION FOR LIGHTING.
•DO NOT SMOKE AT ALL TIMES
WHEN ATTEMPTING TO IGNITE THE
APPLIANCE.
•CAUTION: DO NOT MOVE TROLLEY
WHILE APPLIANCE IS IN OPERATION.
•CAUTION: DO NOT LEAVE THIS
APPLIANCE UNATTENDED WHEN
BURNER/S IS ALIGHT.
LIGHTING PROCEDURES
Rear-left Rear-right
Front-left Front-right
Rear-left Rear-right
Front-left Front-right

OPERATION
15 15
NOTE: The following is only a guide. Refer to pages
19 - 22 for more detailed information on cooking with
this appliance.
‘HI’setting –Use this setting only for warm up, for searing steaks
and chops, and for burning food residue from the grill plates after
the cooking is over. Rarely, if ever, do you use the ‘HI’setting for
extended cooking.
‘MEDIUM’setting (mid-way between ‘HI’and ‘LO’). Use this setting
for most grilling, and for cooking hamburgers and vegetables.
‘LO’setting –Use this setting when cooking very lean cuts such
as fish.
Actual cooking surface temperatures vary with outside
temperature and the wind conditions.
COOKING TEMPERATURES
BURN-OFF
Before cooking on your barbecue for the first time, burn-off any
residual oils or foreign matter from the cooking plates.
ENSURE THE HOOD OPEN, and operate at ‘HI’setting for
approximately 15 minutes. Allow to cool then wash
grill/plate/pan thoroughly with soap suds and scrubbing
brush. Rinse thoroughly and wipe clean with a cloth. Your
grill/plate/pan is ready to use.
PRE HEATING
With the hood open, ignite burners. Once ignition is established,
close the hood. Leave burners on ‘HI’for 10 minutes or until the
temperature reaches a suitable level for cooking. DO NOT
EXCEED 250ºC. Modulate the required temperature by turning left
and right burners progressively to ‘LO’.
OPERATING PROCEDURE
Cooking with the hood in the closed position helps to cook food more
quickly than in conventional barbecues with a simple lid. The hood
(when closed) helps to retain the heat more evenly and conserves
energy.
IMPORTANT: Never use any burner or combination of
burners on ‘HI’for extended periods when cooking
with the hood down.
High direct heat when the hood is down may result in burnt
food, or damage to the appliance.
When roasting in your barbecue, food should be positioned
centrally over a roasting rack with the cooking pan underneath, or
directly in the cooking pan, or placed in a disposable aluminium
foil dish on top of a grill plate. Any combination of burners may
be used generally on a ‘LO’setting.
If more heat is required, other burners can be used on ‘LO’.
Do not exceed 250ºC cooking temperature.
The heat circulates gently throughout the barbecue, cooking
the meat or poultry without any direct flame touching it.
COOKING WITH THE HOOD DOWN

FAULT FINDING
16 16
•SHOULD A FLASHBACK FIRE OCCUR
IN OR AROUND THE BURNER TUBES,
FOLLOW THE INSTRUCTIONS BELOW.
FAILURE TO COMPLY WITH THESE
INSTRUCTIONS COULD RESULT IN
•A FIRE OR EXPLOSION THAT COULD
CAUSE SERIOUS BODILY INJURY,
DEATH, OR PROPERTY DAMAGE.
•SHUT OFF GAS SUPPLY TO THE GAS
BARBECUE.
•TURN THE CONTROL KNOBS TO OFF
POSITION.
•OPEN THE BARBECUE HOOD.
PUT OUT ANY FLAME WITH A FIRE
EXTINGUISHER.
•ONCE THE BARBECUE HAS COOLED
DOWN, CLEAN THE BURNER TUBES
AND BURNERS ACCORDING TO THE
CLEANING INSTRUCTIONS IN THIS
OPERATION MANUAL.
1. Turn gas off at source and turn burner control knobs to
‘OFF’. Wait at least five (5) minutes for gas to clear, then
retry.
2. If your barbecue still fails to light, check gas supply and
connections.
3. Repeat lighting procedure. If your barbecue still fails to
operate, turn the gas off at source, turn the control knobs to
‘OFF’, then check the following:
•OBSTRUCTION IN GAS LINE
Correction: Remove fuel line from barbecue. Do not
smoke! Open gas supply for one second to clear any
obstruction from fuel line. Close off gas supply at source
and reconnect fuel line to barbecue.
•MISALIGNMENT OF IGNITER ON BURNER
Correction: Check for proper position of the electrode tip. The
gap between the spark electrode tip and spark receiver
should be approximately 4 - 5 mm. Adjust if necessary.
With the gas supply closed and all control knobs set to
‘OFF’press the electric igniter cap and check for the presence
of a spark at the electrode.
•DISCONNECTED ELECTRIC WIRES
Correction: Inspect the igniter junction box found behind the
control panel. Connect loose electric wires to junction box
and try to light the barbecue.
•WEAK AA BATTERY
Correction: Unscrew the igniter cap and replace the battery.
IF THE BARBECUE FAILS TO LIGHT
CAUTION: If burners go out during operation, close
gas supply at source, and turn all gas valves off.
Open hood and wait 5 minutes before re-attempting
to light (this allows accumulated gas fumes to
clear).
CAUTION: Should grease fire occur, close gas supply
at source, turn off all burners and remove food until
fire is out.
KEEP THE VENTILATION OPENINGS OF THE
CYLINDER ENCLOSURE FREE AND CLEAR FROM
DEBRIS.

MAINTENANCE
17 17
Before initial use, and periodically, wash your cooking plates in a
mild soap and warm water solution. You can use a wash cloth or
vegetable brush to clean your cooking plates.
It is recommended the cooking plates be coated with a thin
layer of cooking oil on a regular basis to prevent rusting. Slight
rusting can be removed with a scrubbing brush before use.
CLEANING THE COOKING PLATES
Proper care and maintenance will keep your barbecue in top
operating condition and prolong its life. Follow these cleaning
procedures on a timely basis and your barbecue will stay clean
and operate with minimum effort.
CAUTION: Be sure your barbecue is off and cool
before cleaning.
CLEANING AND MAINTENANCE
Before initial use, and periodically thereafter, we suggest you wash
your barbecue using a mild soap and warm water solution. You
can use a wash cloth or sponge for this process. Do not use a
stiff wire or brass brush. These will scratch stainless steel and
chip painted surfaces (varies by model) during the cleaning
process.
CLEANING EXTERIOR SURFACES
To reduce the chance of fire, the grease draining tray should be
visually inspected before each barbecue use. Remove any
grease and wash grease tray and receptacle with a mild soap and
warm water solution.
CLEANING THE GREASE TRAY
FAILURE TO READ AND FOLLOW THE
‘USE AND CARE INSTRUCTIONS’COULD
RESULT IN A FIRE OR EXPLOSION
THAT COULD CAUSE SERIOUS BODILY
INJURY, DEATH OR PROPERTY
DAMAGE.
The stainless steel over time will be affected by ‘tea staining’(the
brown discolouration of some stainless steel).
Tea staining can be reduced by washing the surface with
mild detergent and warm water. This should then be followed by
rinsing with clean cold water. We recommend the surface
then be wiped dry with a clean cloth.
CARE FOR STAINLESS STEEL
IN COASTAL AREAS, FREQUENT
CLEANING AND THE USE OF A COVER
IS RECOMMENDED TO PROLONG THE
LIFE OF THE APPLIANCE.
SALTY AIR WILL ADVERSELY AFFECT
EXPOSED PARTS.
DO NOT USE OVEN CLEANER TO CLEAN
THE BARBECUE.
SOME PROPRIETORY BARBECUE
CLEANERS MAY AFFECT / DAMAGE
SOME OF THE SURFACE COATINGS
USED ON THE APPLIANCE.
READ THE CLEANER INSTRUCTIONS
CAREFULLY.
IT IS RECOMMENDED TO TEST IN AN
INCONSPICUOUS PLACE FIRST.
GENERALLY WE RECOMMEND ONLY
WARM SOAPY WATER FOR CLEANING
THE APPLIANCE.

•KEEP BARBECUE AREA CLEAR AND
FREE FROM COMBUSTIBLE MATERI-
ALS, GASOLINE AND OTHER FLAMMA-
BLE VAPOURS AND LIQUIDS.
•DO NOT OBSTRUCT THE FLOW OF AIR
FOR COMBUSTION AND VENTILATION.
•KEEP THE VENTILATION OPENINGS OF
THE CYLINDER ENCLOSURE CABINET
FREE AND CLEAR OF DEBRIS.
•VISUALLY CHECK BURNER FLAMES
OCCASIONALLY TO ENSURE PROPER
FLAME PATTERN AS SHOWN BELOW.
•FAILURE TO COMPLY WITH THESE
INSTRUCTIONS MAY RESULT IN A
HAZARDOUS SITUATION WHICH, IF
NOT AVOIDED, MAY RESULT IN
INJURY.
Magnified view
of burner flame
through lighting
hole.
Burning-off excess food after every cookout will keep it ready for
instant use. However, at least every three months you must give
the entire barbecue a thorough cleaning to minimise your risk of
grease fire and keep the barbecue in top condition.
Follow these steps:
1. Turn all burner valves to the full ‘OFF’position.
2. Turn the gas off at the source.
3. Inspect hoses for cracking, cuts or any other damage, and
replace as necessary.
6. Scrape and wipe off excess fat and food particles from the
barbecue panels.
NOTE: Do not brush of scrape the burner
surfaces. This will cause damage.
If burners become blocked, contact place of
purchase or manufacture to arrange service.
ANNUAL CLEANING OF THE
BARBECUE INTERIOR
MAINTENANCE
18 18
•BEWARE OF SPIDERS.
BURNER TUBES SHOULD BE
INSPECTED AND CLEANED
PERIODICALLY.
•SPIDERS AND SMALL INSECTS CAN
OCCASIONALLY SPIN WEBS OR MAKE
NESTS IN THE BURNER TUBES.
THESE WEBS CAN LEAD TO A GAS
FLOW OBSTRUCTION WHICH COULD
RESULT IN A FIRE IN AND AROUND
THE BURNER TUBES.
•THIS TYPE OF FIRE IS KNOWN AS
‘FLASH-BACK’AND CAN CAUSE
SERIOUS DAMAGE TO YOUR
BARBECUE AND CREATE AN UNSAFE
OPERATING CONDITION FOR THE
USER.
•ALTHOUGH AN OBSTRUCTED BURNER
TUBE IS NOT THE ONLY CAUSE OF
‘FLASH-BACK’IT IS THE MOST
COMMON CAUSE AND FREQUENT
INSPECTION AND CLEANING OF THE
BURNER TUBES IS NECESSARY.
We recommend that you minimise the barbecue’s exposure to
the elements. High moisture content in the air (rain, mist, salt
spray etc.) can affect metal components and lead to material
breakdown. If left in an area subjected to high moisture
content, we strongly recommend that you observe the
cleaning procedure on a regular basis and cover the appliance
whilst not in use (covers are available as an optional extra).
Material breakdown from high moisture conditions can be
avoided if the appliance is well protected from the weather
and regular cleaning is carried out.
STORAGE

COOKING
19 19
GRILLING POULTRY
Half fill grease / water tray and turn the barbecue burners on ‘HI’.
Close hood and preheat your barbecue 2 - 3 minutes. Open hood
and place food on the mid section of a grill plate. Sear 2 - 3 minutes
on each side then adjust the infrared burners to ‘LO’and continue
cooking until desired preference.
To minimise flare-ups, use skinless poultry or use the indirect
method. Place the poultry on one side of the barbecue with the
opposing burners on ‘LO’heat, and lower the barbecue hood.
GRILLING PORK
Half fill grease / water tray and turn the barbecue burners on ‘HI’.
Close hood and preheat your barbecue 3 - 5 minutes. Open hood
and place food on the mid section of a grill plate. Sear 2 - 3 minutes
on each side then adjust the Infrared burners to ‘LO’and continue
cooking until desired preference.
Grilling times will vary according to meat thickness.
WHOLE FISH AND WHOLE FILLETS
Half fill grease / water tray and turn the barbecue burners on ‘HI’.
Close hood and preheat your barbecue 3 - 5 minutes. Open hood
and place food (skin down) on the mid section of a grill plate.
Sear two minutes on each side then adjust the Infrared burners to
‘LO’and continue cooking until fish is opaque but still moist.
VEGETABLES AND FRUIT
Half fill grease / water tray. Prepare your fruit or vegetables and
brush with butter or basting sauce if desired. In some instances,
you may want to barbecue vegetables and fruit directly over the
heat, using the supplied grill plates.
Foods that work best with direct heat are relatively soft and
require a short cooking time: mushrooms, zucchini, tomatoes
and skewered fruit such as apricots, peaches, pineapple,
strawberries and kiwis. Remember the barbecue hood must
remain up when cooking directly.
To cook indirectly, the food should be placed on the left or
right side of your barbecue (or secondary rack) with the burners
lit on the opposite side. Either way, indirect cooking must be
done with the hood down.
GRILLING STEAK AND RIBS
Half fill grease / water tray and turn the barbecue burners on ‘HI’.
Close hood and preheat your barbecue 3 - 5 minutes. Open hood
and place food on the mid section of a grill plate.
Sear 2 - 3 minutes on each side then adjust the infrared
burners to ‘LO’and continue cooking until desired preference.
You can also move the seared meat to the secondary cooking
rack to finish cooking. This method allows you to sear and prepare
larger amounts of meat and keep cooked food warm. Grilling
times will vary according to meat thickness.
GRILLING HAMBURGERS, BRATS AND SAUSAGES
Half fill grease / water tray and turn the barbecue burners on ‘HI’.
Close hood and preheat your barbecue 3 - 5 minutes. Open hood
and place food on the mid section of a grill plate. Sear 2 - 3
minutes on each side then adjust the infrared burners to ‘LO’and
continue cooking until desired preference is achieved.
Cooking times will vary according to meat thickness.
For very firm vegetables, particularly potatoes and yams, we
recommend that you boil or microwave until almost cooked,
before placing them on the barbecue.
CAUTION: Infrared cooking times will be much
shorter than traditional grilling so never operate
this appliance unattended.
NOTE: Do not use aluminum foil to wrap vegetables
and fruit. infrared heat does not cook through
aluminum foil and reflective pans.
Cut of meat Approx. total cooking times
T-bone steak Rare: 4 - 6 min
Sirloin steak Medium: 6 - 8 min
Beef spare ribs Well done: 8 - 10 min
Porterhouse steak
New York strip steak
Hamburgers Rare: 3 - 4 min
Brats Medium: 5 - 6 min
Sausages Well done: 6 - 8 min
Chicken breast Direct method:
(cook with bone down) approximately 6 - 8 min
Chicken wings Indirect method:
Drumsticks up to 30 minutes
Whole bird Indirect method:
(cook with breast up) approximately 1 hour
Chops Medium: 10 - 12 min
Loins Well done: 12 - 14 min
Cutlets
Whole fish Approx. 8 - 18 min or
Whole fish fillets until fish is opaque

COOKING
20 20
INFRARED HEAT SETTINGS
The suggested heat settings and cooking times shown are
approximate. Unlike the controlled environment inside your
kitchen, variables including outside temperatures, direction and
conditions of wind, as well as barbecue location will affect your
barbecue’s heat distribution. Because these condition vary, and
no two backyards are alike, we offer this guide as a convenience.
We recommend you monitor your barbecue closely and rotate
foods often to prevent over-cooking and ensure the most delicious
results every time.
PREPARING TO ROAST
Roasting uses the indirect cooking method. Therefore, the food
should be placed on the left or right side of your barbecue with
the burners lit on the opposite side. You can also use an optional
cast-iron pan underneath food allowing you to collect juices for
making gravies. Remember, indirect cooking requires the hood
of your barbecue to be down.
Half fill grease / water tray. Preheating your barbecue is not
required for slow cooking methods such as roasting. If you do
choose to preheat your barbecue before roasting, turn the burners
on ‘HI’and close hood for approximately two minutes.
Type of food How cooked Approx cooking times
Beef Rare 30 min / kg
Medium 40 min / kg
Well done 45 min / kg
Lamb Medium 30 min / kg
Well done 40 min / kg
Veal 50 min / kg
Pork 50-60 min / kg
Chicken 37-45 min / kg
Duck 45 min / kg
Fish 18 min / kg
Turkey, 7 kg 37-45 min / kg + 20 min
Turkey, 7 kg 30-40 min / kg + 10 min
Oven temperature Recommended
barbecue setting
Slow 150º- 170ºC Left or right two burners on ‘LO’
Moderate 180º- 200ºC All four burners on ‘LO’
High 210º- 250ºC LF + RR burners on ‘HI’and
LR + RF burners on ‘LO’
FOOD PREPARATION
Trim meat of excess fat. Truss meat and poultry with cooking
string to retain shape if desired. Bacon strips can be used to
cover the outside surface of lean meat and poultry to help prevent
it from drying out. To keep food moist during roasting be sure to
keep the water tray filled.
If using an optional cast-iron pan for cooking, you should
also add liquid to prevent burning the bottom of your food.
PREPARING TO BAKE
To bake in your new barbecue you’ll need a baking dish or cast-
iron cooking pan, and a pair of flame retardant barbecue mitts.
If the cooking pan is cast-iron be sure to season the pan before
use. Half fill grease / water tray. Preheat your barbecue three
minutes, then lower heat as needed. Baking uses the indirect
cooking method. To cook indirectly, the food should be placed
on the left or right side of your barbecue with the burners lit on
the opposite side. This is the slow cooking method. A faster
indirect method is to place your food in an optional cast-iron
cooking pan and place it in the centre of the barbecue with all
burners on ‘LO’. If higher heat is desired, turn Left Front (LF) and
Right Rear (RR) burners on ‘HI’with Left Rear (LR) and Right
Front (RF) burners on ‘LO’to create a crossray cooking pattern.
Either way, indirect cooking must be done with the hood down.
TIPS FOR BAKING
Prepare your favourite recipe as you would in the kitchen. You
will need to stir the food several times as it bakes, and add
additional liquid as required. Watch the temperature, and adjust
to cook according to your recipe directions.
BAKING TECHNIQUES
TIPS FOR ROASTING
Except when roasting with water in a roasting pan, the juices that
collect in the pan can be used as the base for a tasty sauce or
gravy. Place a cooking pan directly over the heat, add extra butter
if needed, then add several spoonfuls of flour to thicken sauce.
Finally, add sufficient chicken or beef stock to obtain the desired
consistency.
Once the meat is cooked, remove it from your barbecue and
cover with a piece of foil. Allow it to stand for 10 - 15 minutes
which allows the juices to settle. This will make carving easier
and ensure a tender, juicy roast.
NOTE: Do not exceed 250ºC cooking temperature as
this may damage the appliance.
This manual suits for next models
1
Table of contents
Other Kleenmaid Grill manuals
Popular Grill manuals by other brands

Princess
Princess 102320 Instructions for use

KitchenAid
KitchenAid 1500299 Installation Instructions and Use & Care Guide

La Hacienda
La Hacienda Murcia XL Chimenea User instructions

VIVESS
VIVESS MFG10001SW manual

Unold
Unold 8555 Instructions for use

Party King Grills
Party King Grills SWING’N SMOKE Quick setup guide

FireMagic
FireMagic Aurora C2-446 quick start guide

Outdoor Gourmet
Outdoor Gourmet 157872 Assembly instructions & user manual

Traeger
Traeger TFB38TCA owner's manual

Bartscher
Bartscher TB1100PF instruction manual

Cuisinart
Cuisinart GAS0256AS Assembly instructions

Napoleon
Napoleon PRESTIGE II PRESTIGE II 600 manual