Page 10 of 40 0901034 Rev: REL (09/13)
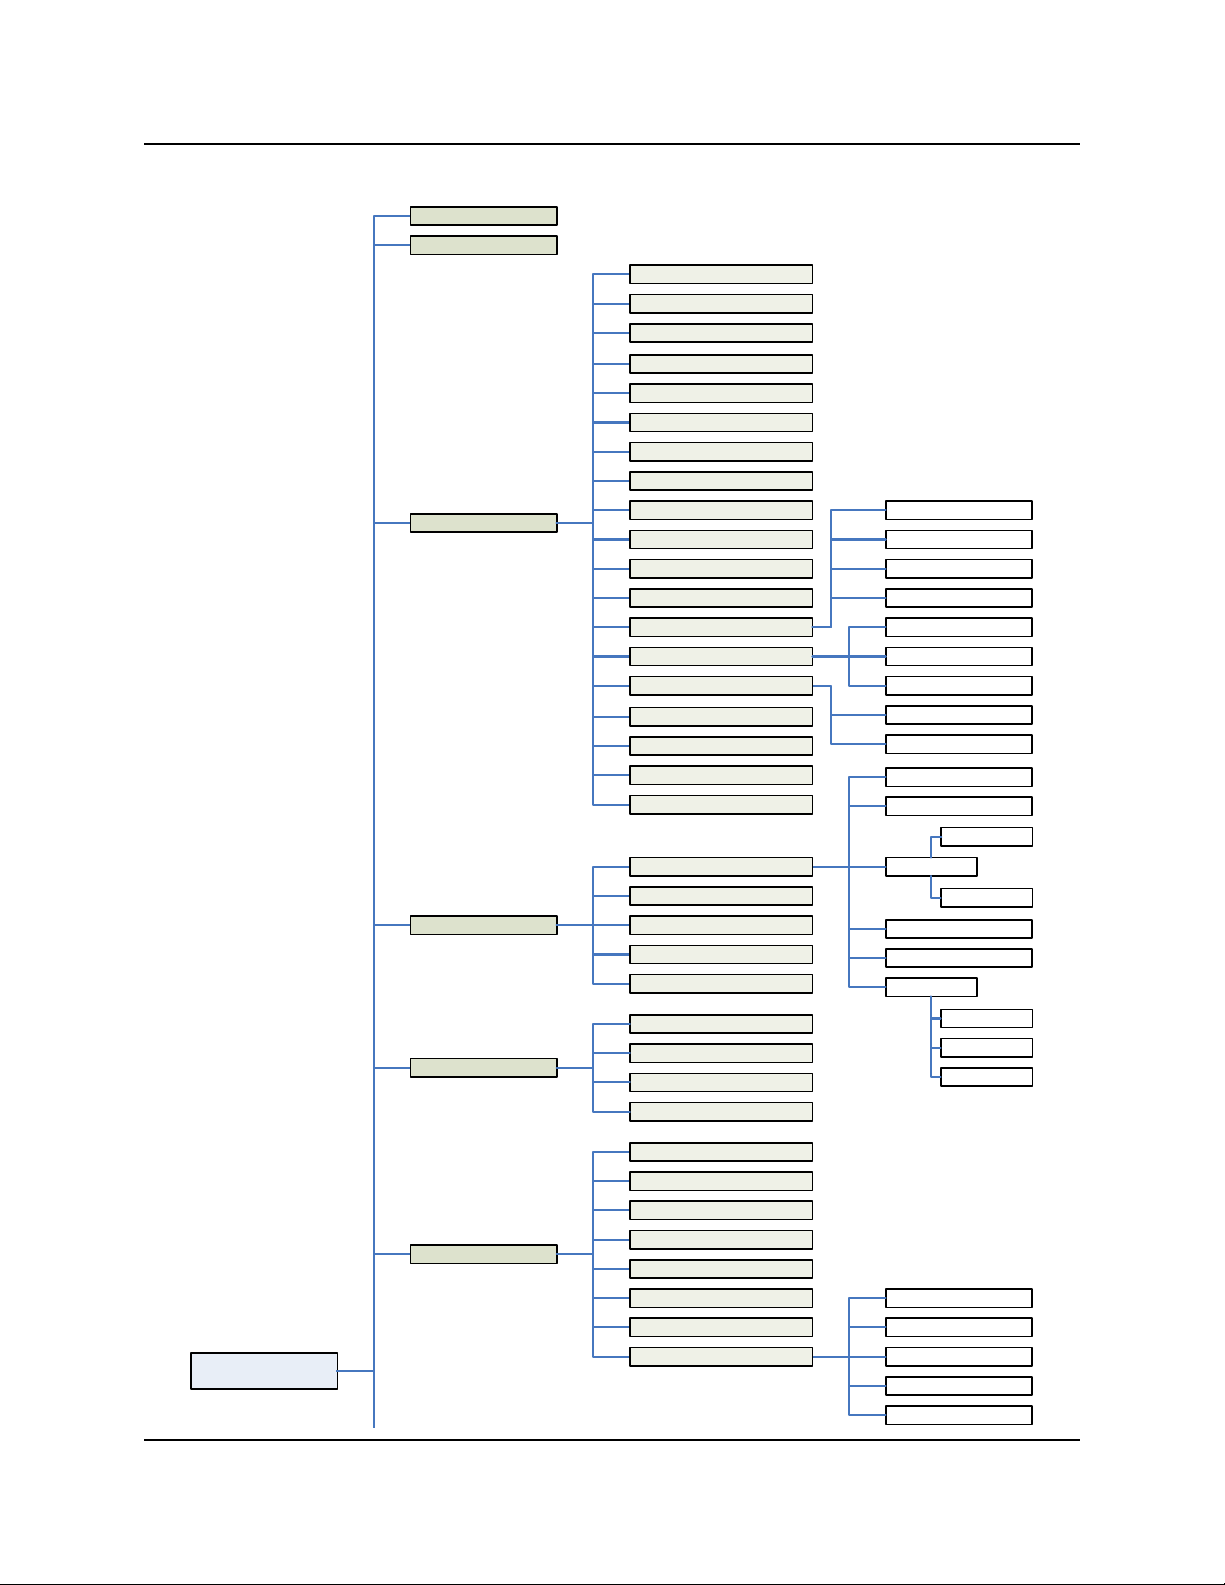
Use ▲/▼ buttons to move cursor to system settings and push
ENTER to open system settings menu options. Use ▲/▼
buttons again to move cursor through system settings options and
press ENTER to edit that option.
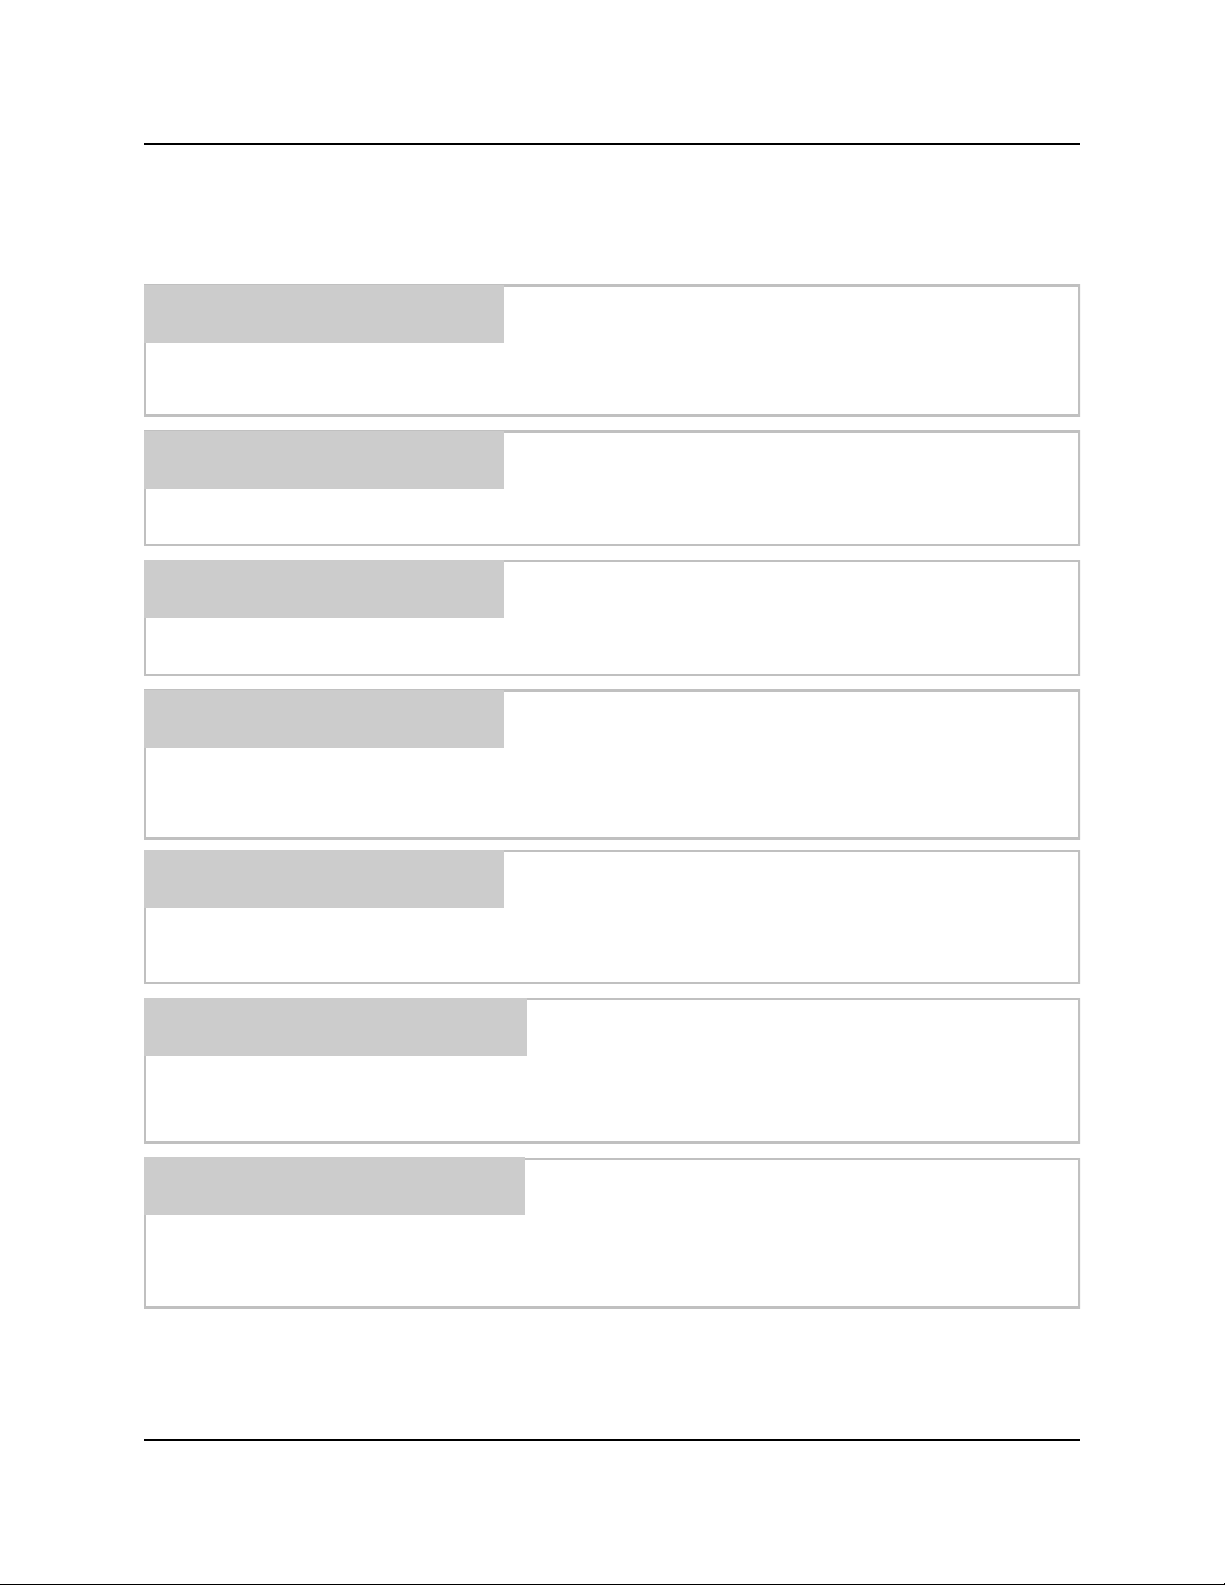
SYSTEM SETTINGS
This selection allows the ―main‖ access code to be
changed. The main access code allows entry into the
programming menus as well as report functions. Use the
▲/▼ buttons to change each individual number column
and ◄/► buttons to move the cursor to the next number
column. Once the new code number is set, then press
ENTER to continue.
NOTE: If the access code is changed, keep a record of the
new code in a safe place. If the new code is forgotten,
contact Knight.
CHANGE MAIN CODE
This selection allows the washer id number to be changed.
Use the ▲/▼ buttons to change each individual number
column and ◄/► buttons to move the cursor to the next
number column. Once the id number has been set, then
press ENTER to save.
WASHER ID
This selection allows the user access code to be changed.
Use the ▲/▼ buttons to change each individual number
column and ◄/► buttons to move the cursor to the next
number column. Once the new code number is set, then
press ENTER to save access code.
NOTE: The user access code allows access to a limited
number of menu selections.
CHANGE USER CODE
This selection allows the dispenser id number to be
changed. Use the ▲/▼ buttons to change each individual
number column and ◄/► buttons to move the cursor to the
next number column. Once the id number has been set,
then press ENTER to save the setting into memory.
NOTE: Set your dispenser IDs so that they correspond with
the washer numbers.
DISPENSER ID
This selection allows you to choose between US or Metric
units of measure. Use the ◄/► buttons to select the unit of
measure, then press ENTER to save.
UNITS OF MEASURE
This selection allows the washer name to be changed. Use
the ▲/▼ buttons to change each individual letter/number
column and ◄/► buttons to move the cursor to the next
letter/number column. Once the washer name has been
set, then press ENTER to save.
EDIT WASHER NAME