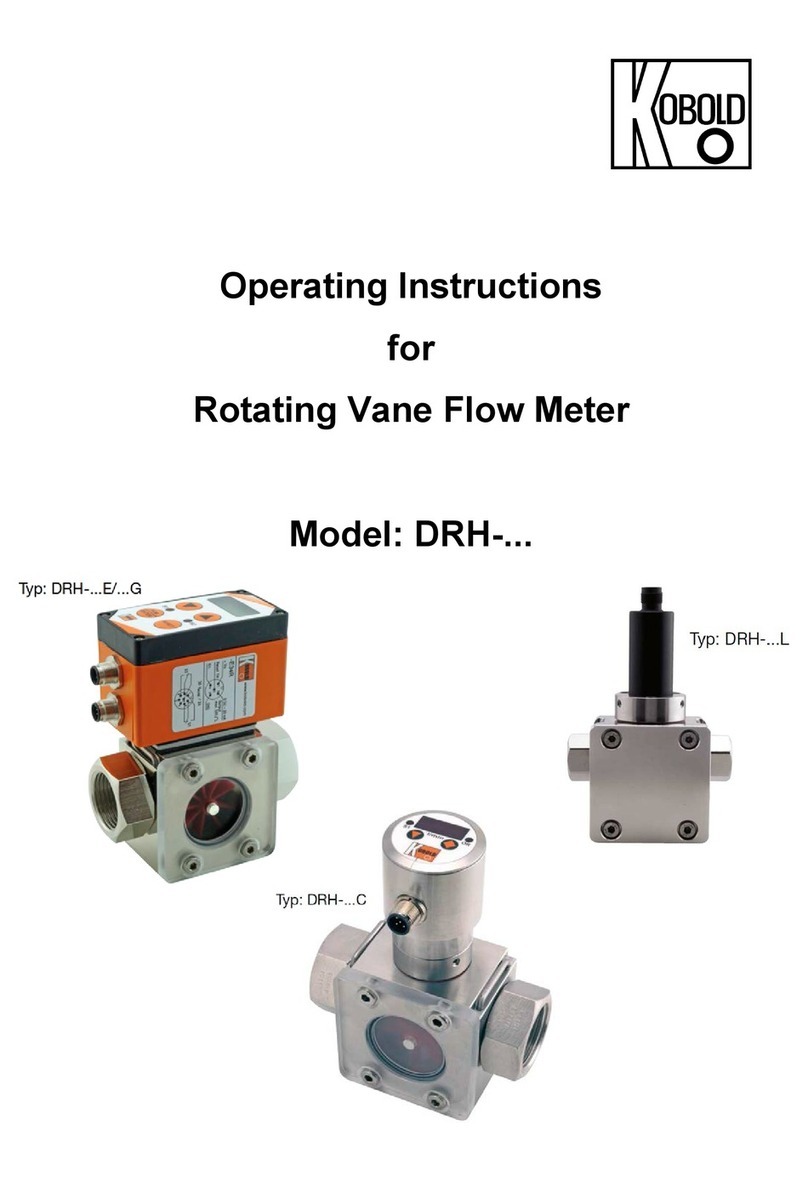
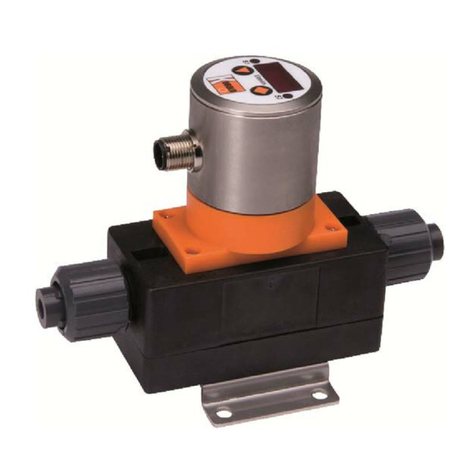
Kobold DON Series User manual

Operating Instructions
for
Oval Gear Flow Meter
Model:
DON-...

DON
page 2 DON K36/1222
1. Contents
1.Contents ........................................................................................................ 2
2.Note .............................................................................................................. 4
3.Instrument Inspection .................................................................................... 7
4.Regulation Use ............................................................................................. 7
5.Operating Principle ........................................................................................ 8
6.Mechanical Connection ................................................................................. 8
6.1General ................................................................................................ 8
6.2Orientation ........................................................................................... 9
6.3Flow Conditioning and Location ......................................................... 10
7.Electrical Connection .................................................................................. 11
7.1Connecting Cable .............................................................................. 11
7.2Electrical connection for integrated electronics options ..................... 11
7.3Internal wiring with electronic options –Zx ......................................... 15
7.4External wiring with electronic unit ZOK-Zx ....................................... 19
8.Commissioning............................................................................................ 21
9.Maintenance ............................................................................................... 22
9.1Disassembly of DON with Pulse meter .............................................. 23
9.2Demounting of the electronics mounted on a DON with option Zx or
1A…5A .............................................................................................. 30
9.3Spare Parts ........................................................................................ 30
9.4Inspection (refer Exploded View) ....................................................... 30
9.5Re-assembly of DON ......................................................................... 30
10.Technical Data ............................................................................................ 34
11.Pressure drop curves .................................................................................. 34
12.Order codes ................................................................................................ 34
13.Dimensions ................................................................................................. 34
14.Disposal ...................................................................................................... 35
15.Troubleshooting .......................................................................................... 36
16.Use in Ex areas ........................................................................................... 38
16.1General information ........................................................................... 38
16.2ATEX version Exi (electronics options xA) ......................................... 41
16.3ATEX Exd version (electronic options BE/HE/DE/GE/KE/LE) ............ 48
17.EU Declaration of Conformance ................................................................. 50
18.UK Declaration of Conformance ................................................................. 52
19.Statement of Conformity ............................................................................. 53
20.Exd Certificate ............................................................................................. 58
21.IECEx Certificate ......................................................................................... 61
22.State of safeness ........................................................................................ 65

DON
DON K36/1222 page 3
Manufactured and sold by:
Kobold Messring GmbH
Nordring 22-24
D-65719 Hofheim
Tel.: +49(0)6192-2990
Fax: +49(0)6192-23398
E-Mail: [email protected]
Internet: www.kobold.com

DON
page 4 DON K36/1222
2. Note
Please read these operating instructions before unpacking and putting the unit into
operation. Follow the instructions precisely as described herein.
The instruction manuals on our website www.kobold.com are always for currently
manufactured version of our products. Due to technical changes, the instruction
manuals available online may not always correspond to the product version you
have purchased. If you need an instruction manual that corresponds to the
purchased product version, you can request it from us free of charge by email
([email protected]) in PDF format, specifying the relevant invoice number and
serial number. If you wish, the operating instructions can also be sent to you by
post in paper form against an applicable postage fee.
Operating instructions, data sheet, approvals and further information via the QR
code on the device or via www.kobold.com
The devices are only to be used, maintained, and serviced by persons familiar with
these operating instructions and in accordance with local regulations applying to
Health & Safety and prevention of accidents.
When used in machines, the measuring unit should be used only when the
machines fulfil the EC-machine guidelines.

DON
DON K36/1222 page 5
as per PED 2014/68/EU
DON-1/3 Aluminum-Version
Model DON-1/3 DN Pmax [ba
r
diagram 8
group 1
dangerous liquids
diagram 9
group 2
no dangerous liquids
DON- x 04 ⅛ 64
art. 4, par. 3 art. 4, par. 3
DON- x 05 ⅛ 64
DON- x 10 ¼ 64
DON- x 15 ⅜ 64
DON- x 20 ½ 64
DON- x 25 25 64
DON- x 30 40 40
DON- x 35 50 40
DON- x 40 50 16
DON- x 45 80 16
DON- x 50 80 16
DON- x 55 100 16
DON- x 60 100 16
DON-2/4/8/9 Stainless steel version
Model DON-2/8 DN Pmax [ba
r
diagram 8
group 1
dangerous liquids
diagram 9
group 2
no dangerous liquids
DON- x 04 ⅛ 100 art. 4, par. 3
art. 4, par. 3
DON- x 05 ⅛ 100 art. 4, par. 3
DON- x 10 ¼ 100 art. 4, par. 3
DON- x 15 ⅜ 100 art. 4, par. 3
DON- x 20 ½ 100 art. 4, par. 3
DON- x 25 25 100 category II
DON- x 30 40 50 category II
DON- x 35 50 50 category II
DON- x 40 50 16 category II
DON- x 45 80 16 category II
DON- x 50 80 16 category II
DON- x 55 100 16 category II
DON- x 60 100 16 category II

DON
page 6 DON K36/1222
DON-1 M4 Aluminum version with mechanical totalizer
Option M4
Model DON-1/3 DN Pmax [ba
r
diagram 8
group 1
dangerous liquids
diagram 9
group 2
no dangerous liquids
DON- x 04 ⅛ - - -
DON- x 05 ⅛ - - -
DON- x 10 ¼ - - -
DON- x 15 ⅜ - - -
DON- x 20 ½ 40 art. 4, par. 3
art. 4, par. 3
DON- x 25 1 40 art. 4, par. 3
DON- x 30 1½ 40 category II
DON- x 35 2 30 category II
DON- x 40 2 16 category II
DON- x 45 3 16 category II
DON- x 50 3 16 category II
DON- x 55 4 16 category II
DON- x 60 4 16 category II
DON 2/8 Stainless steel with mechanical totalizer
Option M4
Model
DON -2/4/8/9
DN Pmax [ba
r
diagram 8
group 1
dangerous liquids
diagram 9
group 2
no dangerous liquids
DON- x 04 ⅛ - - -
DON- x 05 ⅛ - - -
DON- x 10 ¼ - - -
DON- x 15 ⅜ - - -
DON- x 20 ½ 40 art. 4, par. 3
art. 4, par. 3
DON- x 25 1 40 art. 4, par. 3
DON- x 30 1½ 40 category II
DON- x 35 2 30 category II
DON- x 40 2 16 category II
DON- x 45 3 16 category II
DON- x 50 3 16 category II
DON- x 55 4 16 category II
DON- x 60 4 16 category II

DON
DON K36/1222 page 7
3. Instrument Inspection
Instruments are inspected before shipping and sent out in perfect condition.
Should damage to a device be visible, we recommend a thorough inspection of the
delivery packaging. In case of damage, please inform your parcel service /
forwarding agent immediately, since they are responsible for damages during
transit.
Scope of delivery:
The standard delivery includes:
Oval Gear Flow Meter model: DON
Calibration Certificate
Each DON volume counter has been calibrated to function with mineral oil, which
means the remainder of the calibration oil still remains in the device.
The oil used is:
for measurement ranges x04/x05 for high viscosities: SHELL Morlina 10
for measurement ranges x10 to x60: EXXSOL D120
4. Regulation Use
The oval gear meter is a precise positive displacement flowmeter incorporating a
pair of oval geared rotors. These meters are capable of measuring the flow of a
broad range of clean liquids.
Stainless Steel flowmeters are suited to most water-based products and chemicals
and aluminium meters are suitable for fuels, fuel oils, & lubricating liquids. It is
important to ensure that the medium to be measured is compatible with the
materials used in the instrument. (See section 10 “Technical Data”) It is also
imperative to comply with the maximum permissible operating parameters
specified in the “Technical Data” section.
The flowmeter is available as a measurement transducer with pulse output or with
other forms of evaluation electronics. The operation of the offered electronics (Zx,
xA or ZE, ZB) is described in the separate operating instructions ZOK- (Ex) or ZOE.
These flowmeters DON can be installed within hazardous areas when ordered with
optional Exd approval, or by using the reed switch pulse output in Intrinsically Safe
loops or installing Intrinsically Safe certified Instruments.
Any use of the oval gear flow meter model: DON, which exceeds the
manufacturer’s specification, may invalidate its warranty. Therefore, any resulting
damage is not the responsibility of the manufacturer. The user assumes all risk for
such usage.

DON
page 8 DON K36/1222
5. Operating Principle
Oval gear flowmeters are categorized as positive displacement flow technology.
When liquid flows through this type of positive displacement flowmeter, two oval
geared rotors measure a constant volume per rotation within a precisely machined
measuring chamber. With each rotation, a constant volume of liquid is measured.
The rotation of the oval gears is sensed via magnets embedded within the rotors.
These magnets transmit a high-resolution pulse output. The output signal can be
process externally via a remote display controller or PLC or via a variety of
output/display options available as accessories attached to the flowmeters.
The positive displacement flow technology allows for precise flow measurement of
most clean liquids regardless of the media conductivity. Other liquid properties also
have a minimal effect on the performance of this type of meter. Flow profile
conditioning is not required as with alternative flow technology options making oval
gear installations simple to install in tight spaces and at an economical price.
6. Mechanical Connection
6.1 General
Points to verify before meter installation:
Chemical compatibility of the liquid. Be sure that all wetted parts are
identified and confirmed suitable for use with the media being measured. If
unsure, please contact a KOBOLD engineer for guidance in obtaining the
proper reference materials.
Verify that the operational pressure and temperature limits are within
capability of the fully specified meter. Verify that the operational flow rates
are within the specified flow range. Viscous liquids may limit the maximum
allowable flow based on the viscosity. The max allowable flow rate may
need to be limited to ensure the differential pressure across the flowmeter
does not exceed 1 Bar, (100 kPa, 15 PSIG).
Be sure that the flowmeter is not subject to any process temperatures and/or
pressures that can cause the measured liquid to freeze or flash inside the
meter.
OPERATION:
Liquid travels around the crescent
shaped chambers created by the
rotational movement of the rotors
liquid exits the
measuring chamber
liquid entering
measuring chamber
liquid in transit

DON
DON K36/1222 page 9
Incorrect installations will cause the
rotor weight to be felt on the bottom of
the measuring cavity.
6.2 Orientation
When installing the flowmeter, orientation must be considered. The rotor shafts
must be in a horizontal plane. To verify that the rotor shafts are in a horizontal
plane, electronic cover or optional digital display will be facing in a horizontal
direction. For modification in the field, the electronic cover or digital display can be
rotated in any 90 degree position. This accommodates access to the electrical entry
and allows the electronic display orientation to best suit the installation.
The DON flowmeter accommodates both horizontal and vertical flows. It is
recommended that for vertical flow installations that the liquid flow up through the
meter (i.e. bottom to top). This orientation assists in air or entrained gas removal.
The flow meter is bidirectional. To identify the flow direction, in which the flowmeter
was calibrated, the flowmeters are marked with arrows. These arrows are placed
on the lower side for models DON-x04 .. DON-x15 and on the top side for models
DON x20..DON-x60. The flowmeter calibration data refers to this arrow direction.
This is also the preferred flow direction.
C O R R E C T I N S T A L L A T I O N S
Note: orient the conduit entry downward
to avoid moisture migration into the
electronic cavity.
I N C O R R E C T
C O R R E C T I N S T A L L A T I O N S

DON
page 10 DON K36/1222
6.3 Flow Conditioning and Location
It is highly recommended to INSTALL a filter immediately before (prior to) the
meter. Filters are available and sold separately.
Recommended Filter (e.g. MFR-DO...):
DON-x04…DON-x15: < 75 µm particle size (200 mesh)
DON-x20…DON-x35: < 150 µm particle size (100 mesh)
DON-x40…DON-x60: < 350 µm particle size (45 mesh)
Flow conditioning: Flow conditions is not required since the DON flowmeter does
not require any straight pipe runs before or after the flowmeter.
Location: The recommended installation would be before of any flow control and/or
shut off valves, this installation prevents complete emptying of the meter. This
minimizes the risk of leakage and/or air entrapment which could result in damage
to the flowmeter or inaccurate initial readings.
A by-pass installation is recommended for process or safety critical meters.
Isolation valves enable the meter to be isolated from the system and serviced as
needed. System purging is also possible with a by-pass arrangement.
Accommodate all meter ratings and locate the meter on the discharge side of the
process pump.
For outdoor applications, be sure all electrical entries are sealed properly via the
proper glands, mounting, sealing or containment. For humid environments, mount
the instrument appropriately as to avoid condensation build up. Generally, these
installations have the conduit connection pointing downward as to drain any
condensate away from the electronics.
Liquid State: Liquid within the flowmeter must not freeze. If heat tracing is
necessary, please be sure to adhere to the temperature limits of the flow meter.
Ensure the liquid does not flash, do not exceed the max DP of the flowmeter.
Hydraulic shock: Surge dampeners or pressure relief valves must be installed if
hydraulic shock or pressure spikes are present. Highly pulsating flow can also
damage the DON flowmeter. Diaphragm pumps and specific application profiles
can cause high frequency pulsating flow. Proper pulsating dampers are highly
recommended.

DON
DON K36/1222 page 11
7. Electrical Connection
7.1 Connecting Cable
Proper shielded instrument cable is highly recommended. Low capacitance twisted
pair 7 x 0.3 mm (0.5 mm²) for use with the DON and any remote receiving
instrumentation. Typical cable would be Belden® 9363 or similar. Connect the
cable shield to DC common or designated grounding terminal at the receiving
instrument. Remember to only connect the end of the cable shielding at the
receiving instrument (not the DON) to ensure proper interference protection.
Please be sure not to run the connecting cable within a common conduit or in close
proximity to conduit with high inductive loads or power sources. This could result
in noise or inducted errors to the output signal or result in damage to the electronic
components. Always run the instrument cables in a separate conduit or within a
common conduit with other low power cables. Max cable length should be limited
to 3280 ft (1000 m).
7.2 Electrical connection for integrated electronics options
The electrical connection of the integrated electronics options always requires the
electronics cover to be dismantled. Models from size X05 to X20 incorporate the
cable inlet into the electronics cover, while models from the X25 size onwards
accommodate the cable inlet in the housing cover.
The connecting cable must be routed through the cable duct and connected in
accordance with 7.2.1 to 7.2.3. The connecting terminals are of the plug-in type,
and can be taken out of the terminal compartment to facilitate connection.
7.2.1 Hall-effect sensor with active pulse output
(H0/HE/HA/B0/BE/BA/G0/GE/GA/K0/KE/KA/HU options)
The electronics options combine a hall-effect sensor with an active push-pull output
stage. The B0/BE/BA options involve combining bipolar Hall sensors with
alternating polarised magnets. This option is particularly suitable for pulsating
currents, although the pulse rate is halved compared to the H0/HE/HA option. A
three-phase electrical connection is used. The output is actively switched, either to
the input terminal voltage +Vs or to GND. The external input terminal voltage is 8
to 30 VDC. No additional external wiring is required (e.g. pull-up resistor). The high
signal corresponds approximately to the +Vs input terminal voltage and the low
signal approximately to 0 V.
The electrical load can be connected to either the input terminal voltage or GND
Max. output current (power source or sink): 100 mA (short-circuit protected).

DON
page 12 DON K36/1222
The HU electronics option provides the NPN output with built-in 4.7 kΩ pull-up
resistor. The external supply voltage is 5-30 VDC and the max. switching current
is 200 mA (short-circuit protected).
Note!
The electronic options H0/HE/HA/HU are available with reed
switch output while all other options are equipped without
additional reed switch.
7.2.1.1.1
7.2.2 Reed Switch Pulse Output (Option H0/HE/HA)
The DON reed switch output is a SPST potential free N/O 2-wire output. This is a
passive output so no power is required.
Note: when using the reed switch output the liquid temperature must
not change at a rate greater than 10 ºC per minute (50 ºF per minute).
Average electrical endurance of switching contact (MTTF – Mean Time To First
Failure):
Max. switching voltage (30 V/10 mA) 5x10
5
switching cycles
Max. current load (20 V/10 mA) 5x10
6
switching cycles
Min. load (<5 V/10 mA) 5x10
8
switching cycles
Switching capacity: Max. 30 V
DC
, max. 20 mA
Hall sensor output connection for
H0/HE/HA/B0/BE/BA/G0/GE/GA/K0/KE/KA

DON
DON K36/1222 page 13
The individually specified maximum electrical values of the reed switch must never
be exceeded, even for a moment. Higher switching values may reduce the service
life or even destroy the contact.
For capacitive and inductive loads (e.g. via long lines), we recommend the following
protective circuits:
Lamp load with series or parallel Protection with a RC suppressor
resistance to the reed switch. For a.c. current and inductive load.
Protection with a diode Protection with an inductance or
for d.c. current and inductive load. Resistance for capacitive load.

DON
page 14 DON K36/1222
7.2.3 Quadrature Pulse Output (QUAD, Option D0/DE/DA)
For the D0/DE option, the DON devices come with 2 independent hall-sensor
elements. The hall-effect sensors are arranged so that they emit separate phase-
shifted signals to one another.
The QUAD output is best-suited for verified use with a redundant signal or for
counting bidirectional currents (detecting the current direction).
Max. output current per channel (power source or sink): 100 mA (short-circuit
protected).
The current direction of the medium is defined as follows:
a) Hx signal leading over Dx signal: Current flowing in the direction of the
marked arrow (positive)
b) Hx signal lagging behind Dx signal: Current flowing against the direction of
the marked arrow (negative)

DON
DON K36/1222 page 15
7.3 Internal wiring with electronic options –Zx
The -Zx electronic options are pre-configured ex works in connection with the
sensor boards. Reconfiguration is available on request.
7.3.1 For Z1/Z2/Z3/Z5 electronic options (reed switch and Hall sensor)
a) Wiring diagram with reed switch (ex works standard, mandatory
for supply with battery or in the 2-wire 4-20 mA operation)

DON
page 16 DON K36/1222
b) Wiring diagram with Hall sensor (not for battery operation,
recommended in connection with external supply)
7.3.2 For Z6/Z7 electronics options (bipolar Hall sensor)
The circuitry corresponds to 7.3.1 b.)
7.3.3 For 1A...5A electronics options
Refer operating instructions supplement ZOK-Ex wiring options 1A...5A

DON
DON K36/1222 page 17
7.3.4 For Z2/Z8/Z9 electronics options (2 Hall sensors for direction
detection)

DON
page 18 DON K36/1222
7.3.5 Analog output 4-20 mA, 2-line (L0/LE option)
The L0 and LE (explosion hazard) options include a loop-powered 4-20 mA output.
The loop is powered by an external voltage source 16 – 32 V
DC
. The maximum
working resistance of loads connected in series (PLC-analogue input / electronic
displays) depends on the supply voltage level, namely:
Max. working resistance (ohms) = (+Vs – 9 V
DC
) / 0.02 A [ohms]
Example: +Vs = 32 V
DC
=> max. working resistance = 1150 ohms
+Vs = 16 V
DC
=> max. working resistance = 350 ohms
The load can be coupled at any point of the current loop, provided the polarity is
correct.
All DON devices with L0/LE options are factory-calibrated to the respective
measurement range end value. This setting should only be modified by the
manufacturer.
7.3.6 Calibration Factor (scale or K Factor)
The DON flowmeter is delivered with a factory calibration certificate. Within this
certificate, a calibration factor is provided. The calibration factor is a specific
representation of pulses per unit volume. (i.e. pulses per liter) for that specific
meter.
Measurement devices with attached electronics are factory pre-configured to the
corresponding calibration factor. Depending on the model, the calibration protocol
is based on either the flow rate display or the analog output.
For further details on the operation and parameterization of the electronic option
Zx and 1A…5A see operating instructions ZOK- (Ex).

DON
DON K36/1222 page 19
7.4 External wiring with electronic unit ZOK-Zx
7.4.1 Wiring with ZOK-ZxK
a) Circuit with Hall sensor (not for battery operation)
b) Circuit with Reed switch (only for battery or 4-20mA loop operation,
shielded connection cable is recommended, shield on GND)

DON
page 20 DON K36/1222
7.4.2 Wiring with ZOK-ZxP
a) Circuit with Hall sensor
b) Circuit with Reed switch (shielded connection cable is recommended,
shield on GND)
This manual suits for next models
4
Table of contents
Other Kobold Measuring Instrument manuals

Kobold
Kobold DFT Series User manual

Kobold
Kobold NBK-01 User manual

Kobold
Kobold DAG-A34 User manual

Kobold
Kobold AFH-G User manual

Kobold
Kobold DAB User manual

Kobold
Kobold HND-P Series User manual

Kobold
Kobold HND-F205 User manual

Kobold
Kobold DUC-ZUWD User manual

Kobold
Kobold NBK-04 User manual

Kobold
Kobold URM User manual

Kobold
Kobold DAG-M35 Series User manual

Kobold
Kobold MS Series User manual

Kobold
Kobold KSV User manual

Kobold
Kobold NMF User manual

Kobold
Kobold DKF User manual

Kobold
Kobold OME User manual

Kobold
Kobold KAL-K User manual

Kobold
Kobold SWK User manual

Kobold
Kobold ZOE-ZB**FB series User manual

Kobold
Kobold MIS User manual