Kogan KAMHTDRY10A User manual

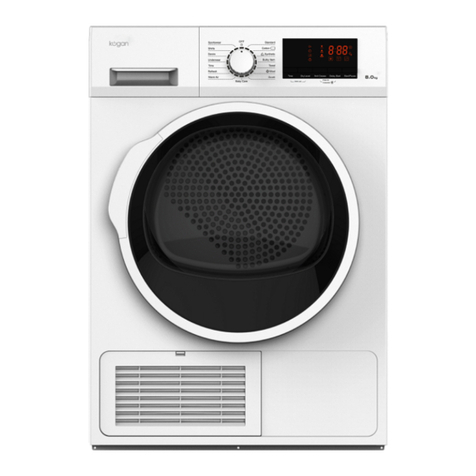
10KG SIGNATURE HEAT
PUMP DRYER
(WHITE)
KAMHTDRY10A

2
Safety & Warnings
3
Overview
8
Installation
11
Before First Use
14
Operation
15
Cleaning & Care
22
Specifications
25
Troubleshooting
26
Notes
28

3
Read this manual thoroughly before first use, the safety precautions listed below reduce the
risk of fire, electric shock and injury when correctly adhered to. Retain this user guide for
future reference. If applicable, pass these instructions on to the next owner.
WARNING
• The appliance can be used by children aged from 8 years and above and persons with
reduced physical, sensory or mental capabilities or lack of experience and knowledge
have been given supervision or instruction concerning use of the appliance in a safe
way and understand the hazards involved. Children should be supervised to ensure
that they do not play with the appliance. Cleaning and user maintenance shall not be
made by children without supervision.
• Children less than 36 months old should be kept away unless continuously supervised.
• The rear surface of the appliance shall be placed against a wall.
• Ensure the lint filter is cleaned after every cycle and whenever prompted by the dryer.
• The lint filter and filter drawer should be washed frequently.
• Ensure location of the dryer is well ventilated.
Possible Electric Shocks
• Disassembly, repair or modification must only be carried out by licenced trade
professionals.
• The household electrical supply system (the current, the voltage, the cable) such as a
fuse with suitable specifications should be provided and meet the electrical
requirements of the dryer under normal load.
• The power plug must be connected to a three-core socket with an earth wire which is
grounded properly.
• If the supply cord is damaged, it must be replaced. Cease use immediately and
contact help.Kogan.com for support.
• DO NOT disconnect the power plug by pulling the cord. Hold the power plug with your
hand.
• DO NOT touch the power plug with wet hands. Wipe dust or water drops from the
power plug using a dry cloth.
• DO NOT over-bend the power cord or place heavy objects on it.
• DO NOT use the power cord, socket or power plug if it is damaged or broken.
SAFETY & WARNINGS

4
Possible Explosions
• DO NOT put combustible liquid such as gasoline, petrol and alcohol into the appliance
or nearby. Don't put clothes with that liquid into the appliance.
• DO NOT connect or disconnect the power plug when leakage of gas or other
combustible gas occurs.
• Refrigerant R290
Preventing Fire Accidents and Electrical Hazards
• Do not install the appliance close to open flames or sources of heat.
• Do not place lit candles or cigarettes on the appliance.
• Do not install the appliance in areas prone to damp or water ingress as water on the
electrical components can damage the appliance and/or pose a hazard.
• Do not install the dryer in places exposed to direct sunshine. Prolonged exposure to
sunlight will age plastic and rubber components.
• To avoid danger of fires caused by excessive drying, do not use the appliance to dry the
following items: Cushions, quilts and the like (these items accumulate heat).
• If you have washed your laundry with stain remover, you must execute an extra rinse
cycle before loading your tumble dryer.
• Ensure that no gas lighters or matches have accidentally been left in pockets of
garments to be loaded into appliance.
• Items that have been soiled with substances such as cooking oil, acetone, alcohol,
petrol, kerosene, spot removers, turpentine, waxes and wax removers should be
washed in hot water with an extra amount of detergent before being dried in the
tumble dryer
• Ensure carpets does not obstruct the openings in the base.
• Ensure that exhaust air must is not discharged into a flue which is used for exhausting
fumes from appliances burning gas or other fuels.
General Warning
• Keep ventilation openings clear of obstructions.
• Do not damage the refrigerant circuit.
• Never stop a tumble dry before the end of the drying cycle unless all items are quickly
removed and spread out so that the heat is dissipated.
• The appliance must not be supplied through an external switching device, such as a
timer or connected to a circuit that is regularly switched on and off by a utility.

5
Personal Injuries
• The appliance can be used by children aged from 8 years and above and persons with
reduced physical, sensory or mental capabilities or lack of experience and knowledge
have been given supervision or instruction concerning use of the appliance in a safe
way and understand the hazards involved. Children should be supervised to ensure
that they do not play with the appliance. Cleaning and user maintenance shall not be
made by children without supervision.
• The package materials may be dangerous to children. Dispose of or store all packaging
materials (e.g. the plastic bag) to ensure they are out of reach of children.
• Children of less than 3 years should be kept away unless continuously supervised.
• Do not allow children or pets nearby when the dryer is being loaded as they may
become trapped inside the dryer. Always check the drum before closing the door.
Additional Safety Guidelines
• This appliance is designed for domestic use. It must not to be used for purposes other
than those for which it was designed.
• Only wash fabrics which are designed to be machine dried. Always follow the
instruction on each garment labels.
• Do not over-dry laundry. Over-drying can cause creasing and wastes energy.
• Any electrical work required to install this appliance should be carried out by qualified
electrician or authorised personnel.
• If the machine is situated on a carpeted floor, please adjust the feet in order to allow air
to circulate freely under the appliance.
• Do not climb onto the dryer or rest heavy objects / heating devices or items with water
or liquid leakage on the dryer.
• Any objects such as coins, safety pins, nails, screws, stones or any other hard, sharp
material can cause extensive damage and must not be placed into the machine.
• After having installed the appliance, check that it is not pressing or standing on its
power cable or water drain pipe.
• Items such as foam rubber (latex foam), shower caps, waterproof textiles, rubber
backed articles and clothes or pillows fitted with foam rubber pads should not be dried
in the tumble dryer.
• Always unplug the appliance after use and before cleaning and maintenance.
• Do not overload the appliance.
• Clothes which are dripping wet should not be placed in the dryer.
• Garments which have been in contact with volatile petroleum products should not be
machine dried. If volatile cleaning fluids are use, care should be taken to ensure that
the fluid is removed from the garment before placing in the machine.

6
• Never use the tumble dryer if the power cable, the control panel, the working surface or
the base is damaged. Cease use immediately and contact help.Kogan.com for
support.
• The tumble dryer is not to be used if industrial chemicals have been used for cleaning.
• Lint must not to be allowed to accumulate around the tumble dryer.
• Do not dry unwashed items in the tumble dryer.
• Fabric softeners or similar products should be used as specified by the fabric softener
instructions. The final part of a tumble dryer cycle occurs without heat (cool down
cycle) to ensure that the items are left at a temperature that ensures that the items will
not be damaged.
• The appliance must not be installed behind a lockable door, a sliding door or a door
with a hinge on the opposite side to that of the tumble dryer, in such a way that a full
opening of the tumble dryer door is restricted.
• Machine must be placed in a clean place, away from water, ice and combustible
materials. To keep vibration and noise to a minimum when the dryer is in use, it should
be placed on a firm, level surface.
• If the tumble dryer is not completely levelled, adjust the front feet up: to lower the dryer
by turning anti-clockwise and to ascend it by turning clockwise till the appliance will not
shake.
• Adequate ventilation must be provided to avoid the back flow of gases into the room
from appliances burning other fuels, including open fires.
• Items that have been soiled with substances such as cooking oil, acetone, alcohol,
petrol, kerosene, spot removers, turpentine, waxes and wax removers should be
washed in hot water with an extra amount of detergent before being dried in the
tumble dryer.
• Remove all objects from pockets such as lighters and matches.
• Oil-affected items can ignite spontaneously, especially when exposed to heat sources
such as in a tumble dryer. The items become warm, causing an oxidation reaction in
the oil.
• Oxidation creates heat. If the heat cannot escape, the items can become hot enough
to catch fire. Piling, stacking or storing oil soaked items can prevent heat from escaping
and so create a fire hazard.
• If it is unavoidable that fabrics that contain vegetable or cooking oil or have been
contaminated by hair care products be placed in a tumble dryer they should first be
washed in hot water with extra detergent - this will reduce, but not eliminate, the
hazard.
• Contains fluorinated greenhouse gases covered by the Kyoto Protocol.
• Hermetically sealed system.
• Do not vent gases into the atmosphere.
• If the power cord is damaged, it must be replaced by Kogan.com or an authorised
representative in order to avoid a hazard.
7
Electrical Connection
• This appliance must be earthed. In case of failure or damage, earth can provide a
minimum resistance to reduce the possibility of electric shock. The power cord has a
grounding and must be inserted into a properly installed and grounded socket (in
accordance with all local rules and standards).
• Any electrical work required to install this appliance should be carried out by qualified
electrician or authorised personnel.
• Before switching on, make sure the electricity supply voltage is the same as that
indicated on the appliance's rating plate.
• A cut off plug inserted into a socket is a serious safety (shock) hazard.
• Ensure that the cut off plug is disposed of safety.
• In the case of permanent connection, it is necessary that you install a double pole
switch. The switch must not break the yellow and green earth cable at any point.
Disposal:
This marking indicates that this appliance should not be disposed with other
household wastes. To prevent possible harm to the environment or human
health from uncontrolled waste disposal, recycle it responsibly to promote
the sustainable reuse of material resources.
WARNING: The appliance must be earthed.

8
Accessories
The following parts are optional depending on your dryer model. If your dryer includes the
following parts, it is recommended to wear gloves during the installation of accessories.
OVERVIEW
Power cord
Top
Water tank
Drum
Filter
Control panel
Door
Air inlet
Maintenance cover
Note:
The above image is for illustrative purposes only. Actual product may differ slightly.
Hose holder
Drain hose
Connector

9
Control Panel
Power button
Turns the dryer ON/OFF
Start/Pause
Press the button to start or pause the drying cycle.
Options
Select additional functions.
Display
The display shows the settings, estimated programme
time remaining and status messages of your dryer.
Programmes
Different drying cycles can be selected according to
the users need and the type of laundry to be dried.
My cycle
Bed Linen
Baby care
Shirts
Outdoor
Time dry
Refresh
Extra
Standard
Iron
Mix
Wool
Extra
Standard
Time
Signal
Anti
Crease
Delay
Lamp
Silence Dry
Hygiene
Intensity

10
Display
Cotton
Synthetics
Child lock
Remaining Time indicator/Error message
Cycle phase status
Clean filters (warning)
Empty water container(warning)
Intensity (dry level)
Lamp
Signal
My Cycle
Silence Dry
Hygiene
Time

11
1. Remove the drain hose from the
housing drawer
2. Insert the drain hose and the
external drainage hose into the
connector.
3. Put the hose holder in the washing basin or any other sink.
INSTALLATION
200cm
Max.120cm

12
Transport
• Exercise caution while moving the heat pump dryer. Avoid gripping any protruding
parts of the machine. Note that the machine door should not be used as a handle
during transportation.
• If the dryer needs to be transported in a non-upright position, it can be tilted no more
than 30°.
Risk of Injury and Damage
Improper handling of the appliance can lead to injuries. Consider the following precautions:
• The appliance is quite heavy. It should never be transported or carried alone. Always
seek assistance from another person.
• Clear the transport route and installation location of any obstacles, such as open doors
or objects on the floor.
• Do not use the open door as a handhold.
• Prior to setting up the tumble dryer, inspect it for any visible external damage. If there
are signs of damage, do not install or use a damaged tumble dryer and contact
help.Kogan.com for support.
• Avoid installing the tumble dryer in a room where frost is likely to occur. The tumble
dryer may not function properly at temperatures around freezing point. Freezing of the
condensed water in the pump and hoses can cause damage.
Installation Position
• Avoid installing the appliance behind a door that can be locked, a sliding door, or a
door with hinges on the opposite side of the tumble dryer. Such placement may restrict
the full opening of the tumble dryer door.
• Ensure that the floor clearance is not obstructed by deep pile carpets, wooden strips, or
similar objects. Obstructions can cause heat build-up, which can interfere with the
appliance's operation.
• For convenience, it is recommended to position the machine close to your washing
machine.
• Do not stack the dryer on a washing machine without using appropriate stacking kits. If
you intend to stack the dryer on a washing machine, purchase the necessary parts
separately. The installation should be carried out by a qualified individual to prevent
any hazards.
• The tumble dryer should be installed in a clean area where dirt does not accumulate. It
is important to ensure that there is sufficient air circulation around the appliance. Avoid
obstructing the front air inlet or the air intake grilles located at the back of the machine.
• To minimize vibration and noise during dryer operation, place it on a firm and level
surface.

13
• Never remove the feet of the dryer. They are an essential component of the appliance's
stability and should remain intact.
Level Adjusting
Once the dryer is in its permanent operating position, ensure the dryer is level with the aid of
a spirit level. If necessary, rotate the adjusting feet until the dryer is level.
Power Supply
1. Ensure that the voltage of the power supply is the same as the specification listed
in this user guide or on the rating plate on the appliance.
2. Do not connect the dryer using a power board, a universal plug or socket, do not
use multi-plug adapters and avoid using extension cords.

14
1. Leave the dyer to stand for at least 2 hours after transporting.
2. Use a soft cloth to clean the inside drum.
3. Place some clean rags into the drum.
4. Connect the power cord and press the Power button.
5. Select the “Refresh” programme and press Start/Pause button.
6. After finishing this programme, refer to the “cleaning and care” section of this user
guide to clean the filter. Note: During drying, the compressor and the water will
generate some noise which is entirely normal.
• Before drying, ensure that the laundry has been thoroughly spun in the washing
machine. Higher spin speeds reduce drying time and save energy.
• For consistent drying results, sort the laundry based on fabric type and select the
appropriate drying program.
• Before drying, please close zippers, hooks, eyelets, buttons, and tie fabric belts securely.
• Remove any objects from pockets, such as lighters and matches.
• Sew in or remove underwiring from bras before drying.
• Close duvet covers and pillowcases to prevent small items from getting rolled up inside
them.
• Keep jackets open and unzip any long zippers to allow textiles to dry evenly.
• Avoid over-drying clothes as excessive drying can lead to increased wrinkling.
• Do not dry items that contain rubber or similar elastic materials.
• Maintain cleanliness in the vicinity of the tumble dryer. Accumulation of coal dust or
flour can pose an explosion risk.
• The door should only be opened after the tumble dryer's program has finished to
prevent scalding from hot steam or an overheated drying machine.
• Clean the lint filter and empty the water tank after each use to prevent prolongation of
drying time and excessive energy consumption.
• Do not dry clothes that have undergone dry-cleaning processes.
BEFORE FIRST USE

15
Before Drying
Drying
OPERATION
Note:
Before first use, ensure the tumble dryer has been installed correctly.
1. Plug in the power cord
2. Load washing
3. Close the door
On
Select program
Select function or default
Start

16
After Drying
Buzzer beeps and "0:00" on display.
1. Open the door and
take out laundry
2. Remove the water
tank
3. Pour out condensate
water
4. Clean the filter
5. Disconnect the power

17
Weight of Dry Clothes (per item)
Sweater (mixed
800g)
Jacket (cotton
800g)
Jeans (800g)
Bath Towel
(cotton 900g)
Single bedsheet
(cotton 600g)
Work clothes
(1120g)
Pyjamas (200g)
Shirt (cotton
300g)
T-Shirt (cotton
180g)
Underwear (cotton
70g)
Socks (mixed
weave 50g)
Only dry laundry suitable for tumble drying. Always refer to the garment care labels on
clothing and linen:
Suitable for tumble drying
Normal drying process: Drying in the tumbler is possible under normal
load and temperature 80°.
Mild drying process: Caution is appropriate when tumble drying. Select
mild process with reduced thermal action.
Do not tumble dry: Articles unsuitable for drying in the tumbler
Notes:
• Do not over load than dryer.
• Do not place dripping wet laundry into the dryer. The dryer might get damaged.

18
Controls
Power button
Turns the dryer ON/OFF
Start/Pause
Press the button to start or pause the drying cycle.
Option
Select additional functions.
Display
The display shows the setting, estimated program
time remaining and status messages of your dryer.
Programmes
Different drying cycles can be selected according to
the users need and the type of laundry to be dried.
Delay
This function is used for delaying the start of the drying programme up to 24 hours. When
the delayed programme starts, the time starts to countdown on the display and the delay
icon blinks.
1. Load your laundry and make sure the machine door is closed.
2. Press the Power button, then use the programme selector knob to select the
desired programme.
3. You can additionally select (Anti-Crease) or (Signal) functions according to your
need.
4. Press the Delay button.
5. Repeatedly press the Delay button to select the desired delay time.
6. After the Start/Pause button is pressed, the Dryer is at the running condition. The
drying procedure will be automatically performed when the delay time has
elapsed.
7. If you press the (Start/Pause) button again, the delay function will be paused.
8. If you want to cancel the “Delay” function, press the Power button.
My cycle
Bed Linen
Baby care
Shirts
Outdoor
Time dry
Refresh
Extra
Standard
Iron
Mix
Wool
Extra
Standard
Time
Signal
Anti
Crease
Delay
Lamp
Silence Dry
Hygiene
Intensity

19
Time
When the (Warm) or (Cool) or (Refresh) programme is selected, the Time button can be
used to adjust the drying time in 10-minute increments.
Intensity
You can adjust the dryness level of the laundry by pressing the Intensity button. There are
four levels.
1. The intensity function can be activated only before the programme starts.
2. Press the Intensity button repeatedly to increase the drying grade.
3. Except the (Cotton Iron), (Delicate), (Wool), (Warm), (Cool), (Refresh) programme,
all the other programmes can be adjusted using the Intensity function.
Anti-Crease
At the end of the drying cycle, the anti-crease time is 30 minutes (default) or 120 minutes
(selected). This function prevents the laundry from creases. The laundry can be removed
during the anti-crease phase.
Except for (Cool), (Wool) and (Refresh), all the other programmes have this function.
My Cycle
Used to define and save your favourite programme.
1. Select the desired programme and any drying options.
2. Press and hold the “” button for 3 seconds until the dryer ‘beeps’. The desired
programme has been saved.
3. Turn the programme selector to the (My Cycle) position, then you can start your
favourite programme. If you want to change the (My Cycle) settings, repeat steps 1
& 2.
Child Lock
1. This dryer features a child safety lock, which can prevent children pressing buttons.
2. When the dryer is running or paused, press and hold the Anti-Crease and Signal
buttons at the same time for 3 seconds to activate child lock.
3. When the child lock function is set, the display will show Child lock icon and all
buttons are deactivated, except for the Power button.
4. To deactivate the child lock function, press and hold the Anti-Crease and Signal
buttons at the same time for 3 seconds.

20
Programme Selector
1. When the display screen turns on, rotate the programme knob to select the
desired programme.
2. Select options (Delay, Time, Intensity, Anti-Crease).
3. Press the Start/Pause button.
4. Press the Power button after the programme has completed.
Programme Start
The drum will rotate after the programme starts. The display will light up and the remaining
time will be displayed.
Programme end
1. The drum will stop rotating after the programme ends. The display will show"0:00"
and LED will illuminate. The dryer will start the (Anti-Crease) function if user
doesn't remove the load.
2. Press the Power button after unloading the dryer and disconnect the plug.
Drying Programmes
Programme
Max
Load
Application/Properties
Delay
Time
Cotton
Extra
8.0kg
For single or multi-layer cotton
laundry to be dried completely
for direct storage.
Y
N
Standard
Iron
For single layer cotton laundry
to remain damp for ironing.
Delicate
1.0kg
For delicate laundry that is
suitable for drying or laundry
advised to be hand washed at
low temperature.
Y
N
Mix
3.5kg
For mixed fabrics from cotton
and synthetics.
Y
N
Synthetics
Extra
3.5kg
For thick or multi-layer
synthetic fabrics to be dried
completely.
Y
N
Standard
To dry thin synthetic textiles,
which are not ironed, such as
easy-care shirts, baby clothes
or socks.
Table of contents
Other Kogan Dryer manuals

Kogan
Kogan KAG8HTPPDYA User manual

Kogan
Kogan KAGVNTDRY7A User manual

Kogan
Kogan KAGDRYCD80A User manual

Kogan
Kogan KA7VENTDRYA Manual

Kogan
Kogan KA7HPUMDRYA User manual

Kogan
Kogan KA6VDRYERA User manual

Kogan
Kogan KROMO KRRACKHEATA User manual

Kogan
Kogan KAMHTDRY8PA User manual

Kogan
Kogan 8 Series User manual

Kogan
Kogan 8KG Series User manual