KOKOPELLI PACKRAFT was founded out of
a garage in Denver, Colorado. Our Vision
is to create the opportunity for outdoor
enthusiasts to explore nature in its most
serene settings. We set to accomplish
this by developing a line of high quality
packrafts through extensive research
and development and by listening to our
customers wants and needs. Additionally,
we serve as a resource for learning how
to use your packraft, finding packrafting
trips in your area, and learning about the
equipment and techniques that will keep
you safe out on the water.
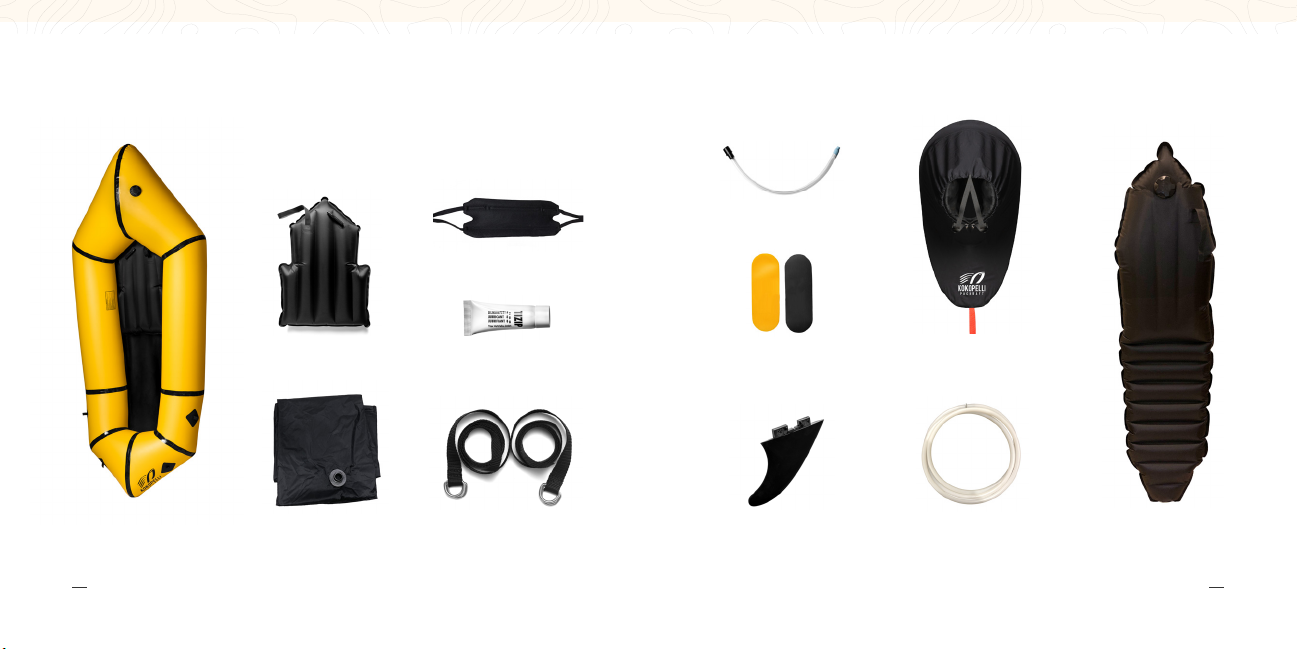
PRODUCT COMPONENTS
WHAT’S IN THE BOX
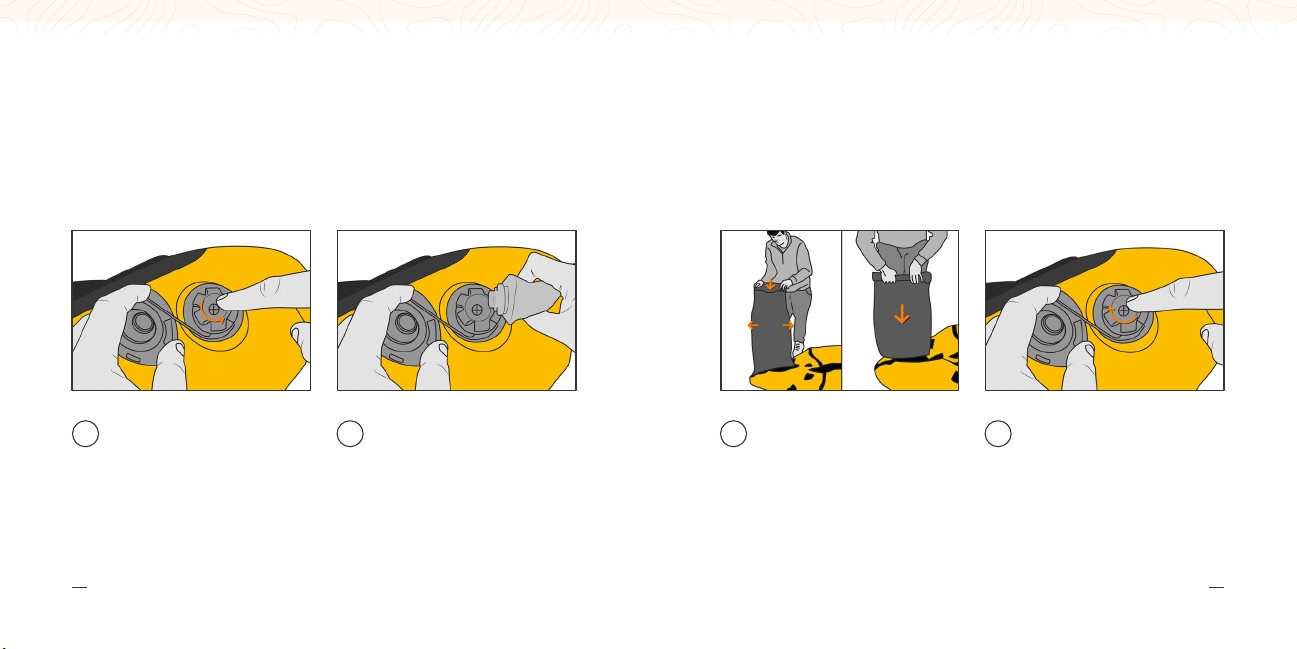
INFLATING YOUR PACKRAFT
SEAT INSTALLATION
ASSEMBLY OF SPRAYSKIRT
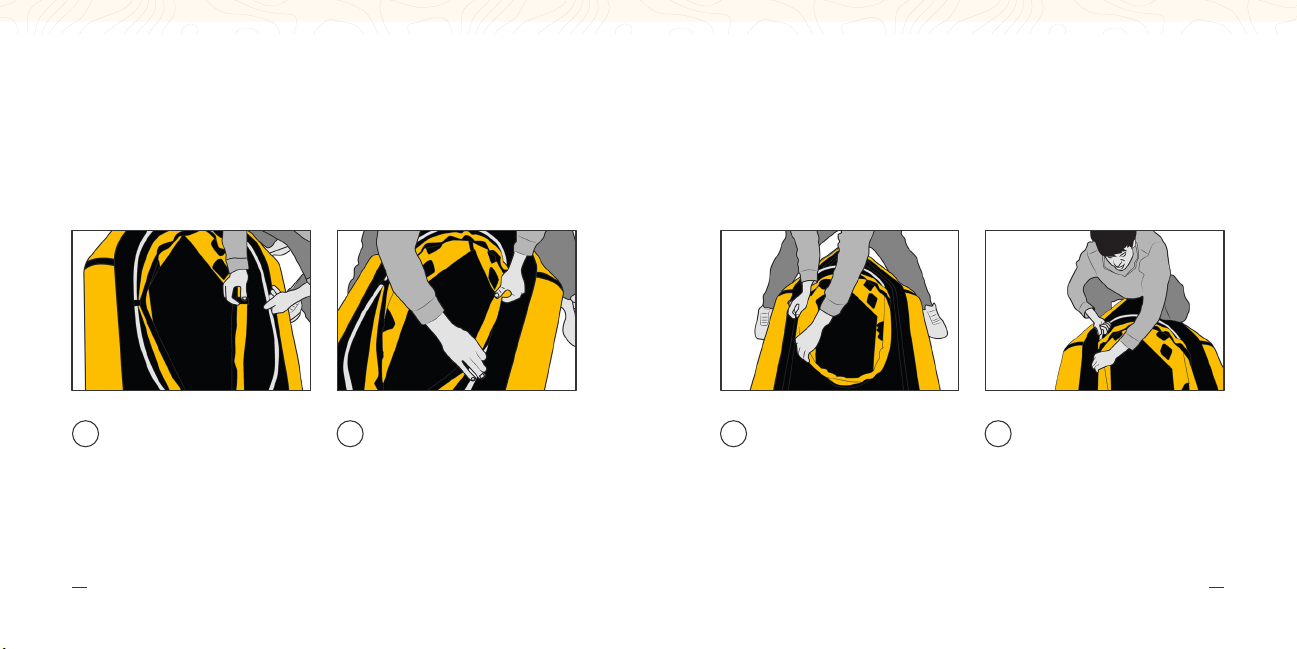
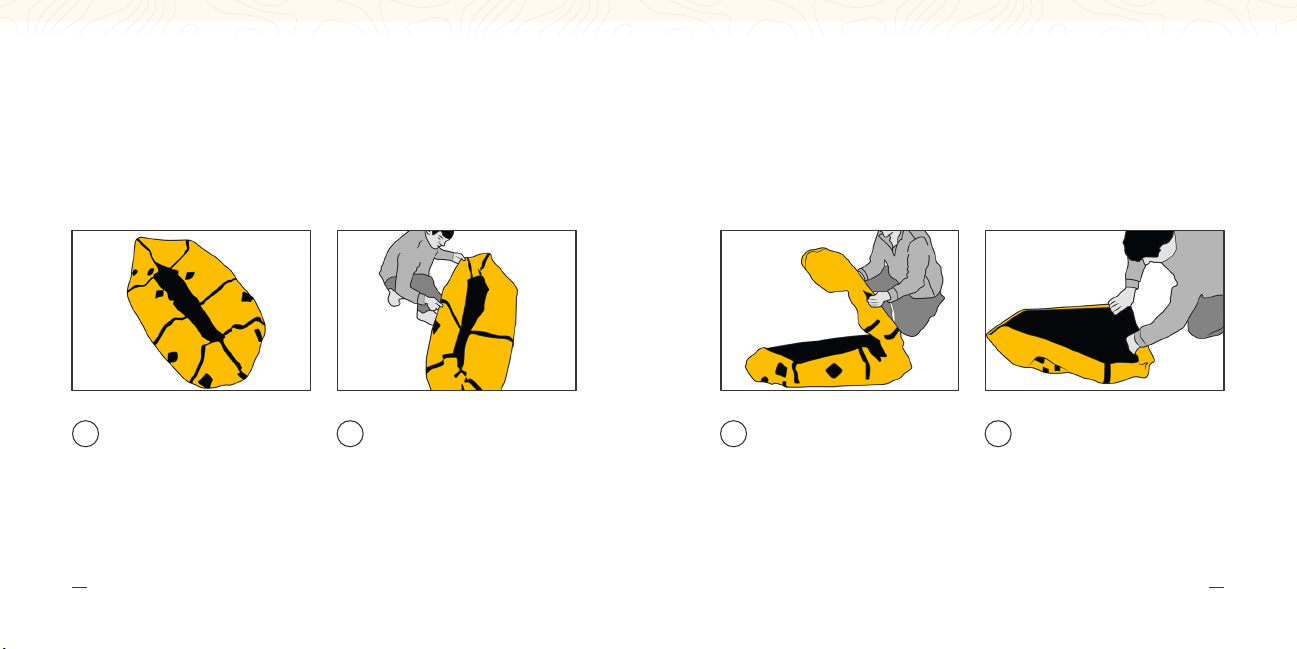
STORING YOUR PACKRAFT
TIZIP USE & MAINTENANCE
THIGH STRAP INSTALLATION
FIELD REPAIR
REGISTER YOUR PACKRAFT
WARRANTY & GUARANTEE
SAFETY PRECAUTIONS, TIPS & TRICKS
PACKRAFT LINEUP
4
6
8
11
14
18
21
22
24
26
27
30
32
TABLE OF CONTENTS
OUR COMPANY was founded
on the single principle of
innovation. In the early
years this meant we
were solely focused on
innovating our packrafts.
OUR STORY