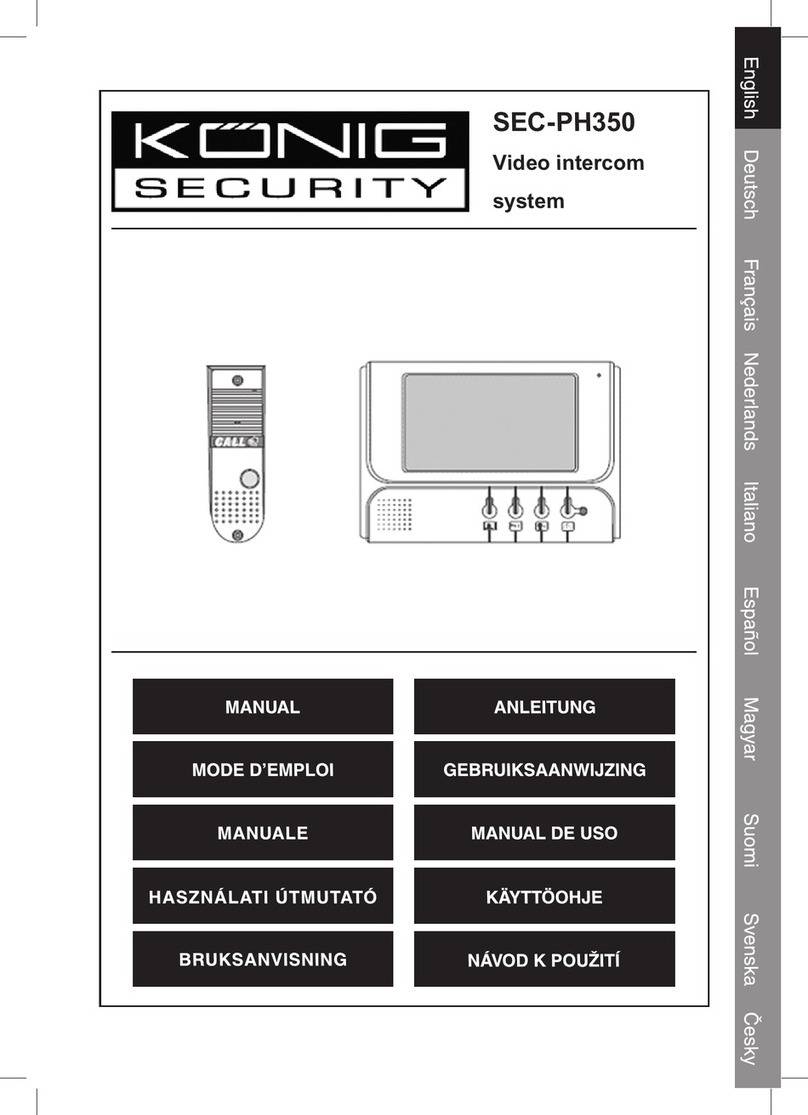
Konig Security SEC-PH330 User manual

SEC-PH330
2.5” TFT/LCD DOOR PHONE
2,5” TFT/LCD TÜRTELEFON
INTERPHONE VIDEO 2,5”/ LCD TFT
2.5” TFT/LCD-DEURTELEFOON
CITOFONO 2,5” TFT/LCD
TELÉFONO DE PUERTA 2.5” TFT/LCD
2,5” TFT/LCD KAPUTELEFON
2.5” TFT/LCD-OVIPUHELIN
2.5” TFT/LCD PORTTELEFON
ELEKTRONICKÝ VRÁTNÝ 2.5” TFT/LCD
VIDEOINTERFON CU ECRAN
TFT/LCD DE 2,5”

2
ENGLISH
Introduction:
Stylish and elegant door phone with 2-wire technology. Ideal for using
existing wiring, since no need wiring is necessary. Intercom function for easy
communication and unlock button for electronic door lock. Camera with IR LED‘s
for night vision.
Description outdoor Unit:
1. Plastic Mounting Bracket
2. 9 IR LED
3. Camera Lens
4. Speaker
5. Call Button
6. Name Plate
7. Microphone
8. Name Plate Insert
Installing outdoor unit:
1. Look for a suitable place for mounting
(mostly current position of door bell).
2. Screw the wall bracket with the supplied
screws to the suitable place (see figure).

3
Description (answering) indoor unit:
1. MENU button
2. VOL + button
3. VOL - button
4. Power Indicator (Green) (turns red when other buttons is in function)
5. TALK button
6. UNLOCK button
7. MONITOR button
8. Microphone
9. Speaker
10. 15 V Adaptor
11. Ring Tones Switch (1, 2, 3)
12. Ring Tones Volume Switch (+, -)
13. Indoor Wall Bracket

4
Connecting:
Outdoor Unit Answering Unit
1. Plug in the 15 VDC jack plug to the DC input (connect the power plug to mains
after installation and connecting).
2. Connect the conductor (e.g. black) of the 2 wire cable to A.
3. Connect the conductor (e.g. red) of the 2 wire cable to B.
4. Connect the wiring of the electronic door lock by wiring the transformer to the
terminal blocks (UNLOCK).
5. The answering unit can be connected to an amplified speaker by wiring the
speaker cable to A (Audio Ground) and B (Audio Out).

5
Connecting with RJ11 connector:
Outdoor Unit Answering Unit
1. Plug in the 15VDC jack plug to the DC input (connect the power plug to mains
after installation and connecting).
2. Connect the cable of the RJ-11 connector to the terminal
blocks A (Line -) and B (Line +). Maximum length of the
cable is 8m.
A B

6
3. Connect the wiring of the electronic door lock by wiring the transformer to the
terminal blocks (UNLOCK).
4. The answering unit can be connected to an amplified speaker by wiring the
speaker cable to A (Audio Ground) and B (Audio Out).
Operation:
A. Standby Mode
Both answering/outdoor units will be in standby mode (no image/ sounds) with
the green light LED of the answering unit on .
B. Monitoring Mode
Answering Unit
1. Press the “ ” button to activate the monitoring mode to view outdoor status
(the red light LED will be on).
2. Press the “ ” button again to exit the monitoring mode
C. Operating Mode
Answering Unit
1. When visitors press the door bell, the image on the answering unit will be
turned on automatically.
2. Press the “ ” button to talk with the visitor(blue LED keep flashing)
3. Press the “ ” button to open the door, the image/ sound will be off for 2secs
and return to the state before unlocking.
4. Press the “ ” again to exit the conversation(image/sound off).
5. Press the “ / ” Button on the indoor unit to adjust the speaker
volume.
6. Press the “ ” button to activate 2.5” TFT OSD menu, which include six
options.
BRIGTHNESS/CONTRAST/SHARPNESS/COLOR/HUE/VIDEO
Under OSD menu, pressing “ ”, to select items in turn and at last exit Menu.
After selecting an item, which will turn red in response, the user can adjust its
value to a desired level by pressing “ ” or “ ”.
7. Adjust tone switch on the right side of the Answering unit to select Doorbell
tone:1.Dingdong 2.Westninster 3. For Alice
8. Adjust Volume switch on the right side of he Answering unit to increase or
decrease the door bell volume
Outdoor Unit
1. When pressing the “ ” door bell button, the LED light on answering unit
will turn red and both outdoor unit and answering unit will start the ring tone for
5 ~ 10 sec (varying with different ring tones).

7
2. Press the “ ” door bell button again to repeat the ring tone. If no one
answered, the answering unit will automatically return to the standby mode
with green LED light after 1 min.
Notes:
1. Monitoring Duration (per triggered) 1 minute
2. Ring Tone (per triggered) 5~10 seconds
3. Conversation Duration 4 minutes
4. Unlock 2 seconds
Specifications:
Outdoor unit:
• Operating voltage: by answering unit
• Communication system: semiduplex
• Modulation: FM (analog)
• Picture sensor: 1/3” CMOS color, 628 x 562
• IR LED‘s: 9x IR LED, 1x CDS
• Lens: F4.5mm (H:67°, V:48°)
• Weight: 326g
• Dimensions: 180 x 104 x 37mm
Answering (outdoor) unit:
• Operating voltage: 15 VDC with door open function
• Communication system: semiduplex
• Modulation: FM (analog)
• Screen: 2.5“ TFT/LCD colour
• Resolution: 640 x 240
• Weight: 305 g
• Dimensions: 180 x 104 x 37mm
The connection between the answering unit and the outdoor unit is made via a
2-wire cable which should meet the specification as below:
Specification (cross section): Effective transmission range:
0.3mm225m
0.5mm235m
0.75mm250m
1.0mm265m

8
Declaration of conformity
We,
Nedis B.V.,
De Tweeling 28,
5215MC ’s-Hertogenbosch
The Netherlands
Tel.: 0031 73 599 1055
Email: info@nedis.com
Declare that product:
Name: König security
Model: SEC-PH330
Description: 2,5” TFT/LCD door phone
Is in conformity with the following standards
EMC: EN55022:1998+A1:2000+A2:2003, EN61000-3-2:2006,
EN61000-3-3:1995+A1:2001+A2:2005
EN55024:1998+A1:2001+A2:2003, EN61000-4-2/-3/-4/-5/-6/-11
LVD: EN60950-1/A11:2004
Following the provisions of the 2004/108/EC and 2006/95/EC directive.
‘s-Hertogenbosch, 08-05-2008
Mrs. J. Gilad
Purchase Director

9
Safety precautions:
CAUTION
RISK OF ELECTRIC SHOCK
DO NOT OPEN
To reduce risk of electric shock, this product
should ONLY be opened by an authorized
technician when service is required.
Disconnect the product from mains and other equipment if a problem should
occur. Do not expose the product to water or moisture.
Maintenance:
Clean only with a dry cloth. Do not use cleaning solvents or abrasives.
Warranty:
No guarantee or liability can be accepted for any changes and modifications of
the product or damage caused due to incorrect use of this product.
General:
Designs and specifications are subject to change without notice.
All logos brands and product names are trademarks or registered trademarks of
their respective holders and are hereby recognized as such.
Attention:
This product is marked with this symbol. It means that used electrical
and electronic products should not be mixed with general household
waste. There is a separate collections system for these products.
Copyright ©

10
DEUTSCH
Einleitung:
Stylisches und elegantes Türtelefon mit zweiadriger Technologie. Ideal für
die Nutzung einer bestehenden Leitung, da keine Verkabelung erforderlich
ist. Gegensprechanlagen-Funktion für einfache Kommunikation und
Entriegelungs-Taste für elektronische Türschlösser. Kamera mit Infrarot-LEDs
für Nachtsichtfähigkeit.
Beschreibung Außenstation:
1. Kunststoffhalterung
2. 9 Infrarot-LED
3. Kameralinse
4. Lautsprecher
5. Anruf-Taste
6. Namensschild
7. Mikrofon
8. Einschub für Namensschild
Installation der Außenstation:
1. Suchen Sie nach einem geeigneten
Montageort (meistens die gegenwärtige
Position der Türklingel).
2. Schrauben Sie die Wandhalterung mit den
beiliegenden Schrauben an eine geeignete
Stelle (siehe Abbildung).

11
Beschreibung (Antwort-) Innenstation:
1. MENÜ-Taste
2. LAUTSTÄRKE+ Taste
3. LAUTSTÄRKE- Taste
4. Betriebsanzeige (Grün) (schaltet auf Rot, wenn andere Tasten in Funktion
sind)
5. SPRECHEN-Taste
6. ENTRIEGELUNG-Taste
7. MONITOR-Taste
8. Mikrofon
9. Lautsprecher
10. 15 V Netzteil
11. Ruftonschalter (1, 2, 3)
12. Ruftöne Lautstärkeschalter (+, -)
13. Innen-Wandhalterung

12
Anschluss:
Außenstation Gegensprechanlage
1. Stecken Sie den 15 V DC Klinkenstecker in den DC-Eingang (stecken Sie den
Netzstecker nach Installation und Anschluss in die Steckdose).
2. Schließen Sie den Stromleiter (z.B. Schwarz) des 2-adrigen Kabels an A an.
3. Schließen Sie den Stromleiter (z.B. Rot) des 2-adrigen Kabels an B an.
4. Schließen Sie die Verkabelung der elektronischen Türverriegelung an, indem
Sie den Transformator mit dem Klemmenblock (ENTRIEGELN) verbinden.
5. Die Gegensprechanlage kann an einen Aktivlautsprecher angeschlossen
werden, indem Sie das Lautsprecherkabel an A (Audio Masse) und B (Audio
Ausgang) anschließen.

13
Anschluss mit RJ11 Stecker:
Außenstation Gegensprechanlage
1. Stecken Sie den 15 V DC Klinkenstecker in den DC-Eingang (stecken Sie den
Netzstecker nach Installation und Anschluss in die Steckdose).
2. Verbinden Sie das Kabel des RJ-11 Steckers mit dem
Klemmenblock A (Line -) und B (Line +). Die maximale
Länge des Kabels beträgt 8 m.
A B

14
3. Schließen Sie die Verkabelung der elektronischen Türverriegelung an, indem
Sie den Transformator mit dem Klemmenblock (ENTRIEGELN) verbinden.
4. Die Gegensprechanlage kann an einen Aktivlautsprecher angeschlossen
werden, indem Sie das Lautsprecherkabel an A (Audio Masse) und B (Audio
Ausgang) anschließen.
Bedienung:
A. Standby-Modus
Sowohl die Innen- als auch Außenstation sind im Standby-Modus (kein Bild/
Ton), wenn die grüne LED der Gegensprechanlage leuchtet.
B. Überwachungsmodus
Gegensprechanlage
1. Drücken Sie die “ ” Taste, um den Überwachungsmodus zu aktivieren und
den Außenbereich zu überwachen (die rote LED leuchtet).
2. Drücken Sie die “ ” Taste erneut, um den Überwachungsmodus zu
beenden.
C. Betriebsart
Gegensprechanlage
1. WennBesucher auf dieTürklingeldrücken,wirddas Bild derGegensprechanlage
automatisch eingeschaltet.
2. Drücken Sie die “ ” Taste, um mit dem Besucher zu sprechen (blaue LED
blinkt)
3. Drücken Sie die “ ” Taste, um die Tür zu öffnen. Bild/Ton werden für 2
Sekunden ausgeschaltet und die Anlage geht in den Status über, der vor der
Entriegelung aktiv war.
4. Drücken Sie erneut “ ”, um die Konversation zu beenden (Bild/Ton
ausgeschaltet).
5. Drücken Sie die “ / ” Taste auf der Innenstation, um die Lautstärke des
Lautsprechers einzustellen.
6. Drücken Sie die “ ” Taste, um das OSD-Menü des 2,5”TFT zu aktivieren, das
sechs Optionen beinhaltet.
BRIGTHNESS/CONTRAST/SHARPNESS/COLOR/HUE/VIDEO (Helligkeit/
Konstrast/Schärfe/Farbe/Farbton/Video)
Drücken Sie im OSD-Menü “ ”, um die Elemente nacheinander auszuwählen
und das Menü anschließend zu beenden. Wenn Sie ein Element ausgewählt
haben, das daraufhin rot unterlegt ist, können Sie diesen Wert wie gewünscht
einstellen, indem Sie “ ” oder “ ” drücken.
7. Nutzen Sie den Ruftonschalter auf der rechten Seite der Gegensprechanlage,
um den Ton der Türklingel auszuwählen: 1. Dingdong 2. Westminster 3. Für
Elise

15
8. Nutzen Sie den Lautstärkenschalter auf der rechten Seite der
Gegensprechanlage, um die Lautstärke der Türklingel zu erhöhen bzw. zu
senken.
Außenstation
1. Wenn Sie die “ ” Türklingel-Taste drücken, leuchtet die LED auf der
Gegensprechanlage rot und sowohl Außenstation als auch Gegensprechanlage
starten den Rufton für 5 ~ 10 Sekunden (abhängig von den verschiedenen
Ruftönen).
2. Drücken Sie die “ ” Türklingel-Taste erneut, um den Rufton zu
wiederholen. Wenn niemand antwortet, schaltet die Gegensprechanlage nach
1 Minute automatisch zurück in den Standby-Modus und die LED leuchtet
grün.
Anmerkungen:
1. Überwachungsdauer (pro Betätigung) 1 Minute
2. Rufton (pro Betätigung) 5~10 Sekunden
3. Konversationsdauer 4 Minuten
4. Entriegeln 2 Sekunden
Technische Daten:
Außenstation:
• Betriebsspannung: von Gegensprechanlage
• Kommunikationssystem: Halbduplex
• Modulation: FM (analog)
• Bildsensor: 1/3” CMOS Farbe, 628 x 562
• Infrarot-LEDs: 9x Infrarot-LED, 1x CDS
• Linse: F4,5mm (H:67°, V:48°)
• Gewicht: 326 g
• Abmessungen: 180 x 104 x 37 mm
Gegensprechanlage (innen):
• Betriebsspannung: 15 V DC mit Türöffnungsfunktion
• Kommunikationssystem: Halbduplex
• Modulation: FM (analog)
• Bildschirm: 2,5“ TFT/LCD Farbe
• Auflösung: 640 x 240
• Gewicht: 305 g
• Abmessungen: 180 x 104 x 37 mm

16
Die Verbindung zwischen der Gegensprechanlage und der Außenstation erfolgt
über ein 2-adriges Kabel, das den nachfolgenden Spezifikationen entsprechen
sollte:
Spezifikation (Querschnitt): Effektiver Übertragungsbereich:
0,3 mm225 m
0,5 mm235 m
0,75 mm250 m
1,0 mm265 m
KONFORMITÄTSERKLÄRUNG
Wir,
Nedis B.V.,
De Tweeling 28.
5215MC ’s-Hertogenbosch
Niederlande
Tel.: 0031 73 599 1055
Email: info@nedis.com
erklären, dass das Produkt:
Name: König Security
Modell: SEC-PH330
Beschreibung: 2,5” TFT/LCD Türtelefon
den folgenden Standards entspricht:
EMV: EN55022:1998+A1:2000+A2:2003, EN61000-3-2:2006,
EN61000-3-3:1995 + A1:2001+A2:2005
EN55024:1998+A1:2001+A2:2003, EN61000-4-2/-3/-4/-5/-6/-11
LVD: EN60950-1/A11:2004
Befolgt die Bestimmungen der Richtlinien 2004/108/EC und 2006/95/EC.
‘s-Hertogenbosch, 08.05.2008
J. Gilad
Einkaufsleiterin

17
Sicherheitsvorkehrungen:
VORSICHT
STROMSCHLAGGEFAHR
NICHT ÖFFNEN
Um das Risiko eines elektrischen Schlags zu
verringern, sollte dieses Produkt
AUSSCHLIESSLICH von einem autorisierten
Techniker geöffnet werden, wenn eine Wartung erforderlich ist. Trennen Sie das
Produkt vom Stromnetz und anderen Geräten, wenn ein Problem auftreten sollte.
Sorgen Sie dafür, dass das Gerät nicht mit Wasser oder Feuchtigkeit in Berührung
kommt.
Wartung:
Nur mit einem trockenen Tuch säubern. Keine Lösungsmittel oder Schleifmittel
verwenden.
Garantie:
Es kann keine Garantie oder Haftung für irgendwelche Änderungen oder
Modifikationen des Produkts oder für Schäden übernommen werden, die
aufgrund einer nicht ordnungsgemäßen Anwendung des Produkts entstanden
sind.
Allgemein:
Konstruktionen und technische Daten können ohne vorherige Ankündigung
geändert werden.
Alle Logos, Marken und Produktnamen sind Warenzeichen oder registrierte
Warenzeichen ihrer jeweiligen Eigentümer und werden hiermit als solche
anerkannt.
Achtung:
Dieses Produkt ist mit diesem Symbol gekennzeichnet. Es bedeutet,
dass die verwendeten elektrischen und elektronischen Produkte nicht
im allgemeinen Haushaltsmüll entsorgt werden dürfen. Für diese
Produkte stehen gesonderte Sammelsysteme zur Verfügung.
Copyright ©

18
FRANCAIS
Introduction :
Interphone vidéo chic et élégant avec technologie bifilaire. Idéal pour l'utilisation
du cablage existant, puisqu'aucun câblage n'est nécessaire. Fonction intercom
pour une communication facile et bouton de déverrouillage pour un verrouillage
électronique de la porte. Caméra avec LED infrarouge pour la vision nocturne.
Description de l'unité extérieure:
1. Support de fixation en plastique
2. 9 LED IR
3. Lentille caméra
4. Haut-parleur
5. Bouton d'appel
6. Plaque du nom
7. Microphone
8. Insertion plaque du nom
Installation de l'unité extérieure:
1. Recherchez un emplacement approprié
pour la fixation (très souvent la position
actuelle de la sonnerie de la porte).
2. Fixez la cheville murale avec les vis
fournies sur l'emplacement approprié (voir
schéma).

19
Description (réponse) de l'unité intérieure:
1. Touche MENU
2. TOUCHE VOL+
3. TOUCHE VOL-
4. Indicateur d'alimentation (Vert) (il devient rouge lorsque les autres boutons
sont en fonction)
5. Touche PARLER
6. Touche Déverrouillage
7. Touche Surveillance
8. Microphone
9. Haut-parleur
10. Adaptateur 15 V
11. Interrupteur de sonnerie (1, 2, 3)
12. Interrupteur volume sonneries (+, -)
13. Cheville murale intérieure

20
Connexion:
Unité extérieure Unité de réponse
1. Branchez la prise jack de 15 VCC à l'entrée du courant continu (connectez la
fiche d'alimentation au secteur après l'installation et la connexion).
2. Connectez le conducteur (exemple. noir) du câble bifilaire à A.
3. Connectez le conducteur (exemple. rouge) du câble bifilaire à B.
4. Connectez le câblage du verrouillage électronique de porte en câblant le
transformateur sur les blocs des terminaux (DEVERROUILLAGE).
5. L'unité de réponse peut être connectée au haut-parleur amplifié en branchant
le câble du haut-parleur sur A (Mise à la terre audio) et B (Sortie audio).
Table of contents
Languages:
Other Konig Security Intercom System manuals