manuals.online logo
Brands
  1. Home
  2. •
  3. Brands
  4. •
  5. Fermax
  6. •
  7. Intercom System
  8. •
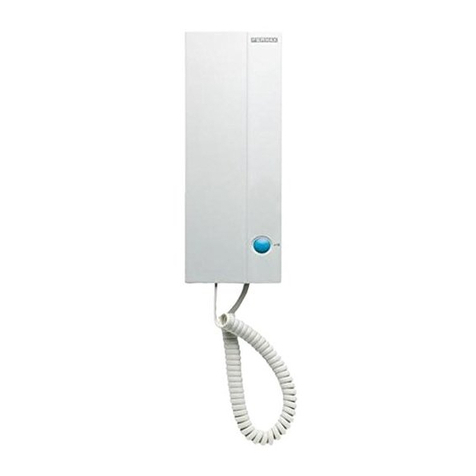
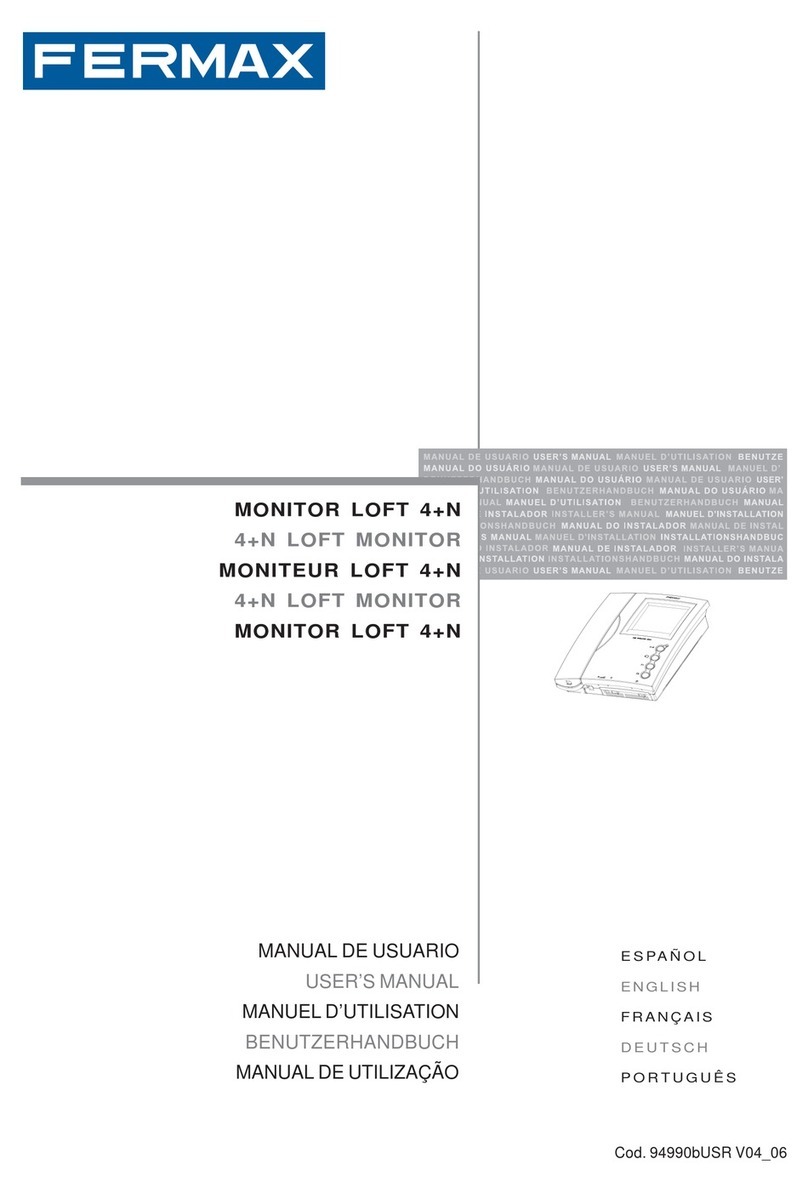
  9. Fermax Loft User manual

Fermax Loft User manual

Placas Marine de VIDEO de 1 a 20 LINEAS
Marine 1- to 20-LINE VIDEO Panels
Platines Marine VIDÉO de 1 à 20 LIGNES
VIDEOTÜRSTATIONEN Marine mit 1 bis 20 LEITUNGEN
Placas Marine de VÍDEO de 1 a 20 LINHAS
Pag 2
Placas MARINE
Placas MARINE
Cod. 97269 V10_06
E
EN
F
D
P
«Placas Marine de VIDEO de 1 a 20 LINEAS»
«Marine 1- to 20-LINE VIDEO Panels»
« Platines Marine VIDÉO de 1 à 20 LIGNES »
«VIDEOTÜRSTATIONEN Marine mit 1 bis 20 LEITUNGEN»
«Placas Marine de VÍDEO de 1 a 20 LINHAS»
Placas MARINE
Placas MARINE
Pag 3
INDICE - INDEX - SOMMAIRE
E
EN
F
SECCION I - MANUAL DEL INSTALADOR .................................................................. 5
Instalación del Alimentador ............................................................................ 6
Instalación de la placa de calle ..................................................................... 6
Ajustes finales de placa ................................................................................. 8
Precableado de la placa ................................................................................. 9
Programación del monitor.............................................................................. 9
Esquemas de cableado de:
- Placa de calle .......................................................................................... 10
- Conexión de abrepuertas ....................................................................... 11
- Conexión de monitores en distribución ............................................... 12
- Conexión de monitores en cascada ..................................................... 13
Programación del Monitor Loft ....................................................................... 14
Programación del Monitor Citymax ................................................................ 15
Características Técnicas ................................................................................ 16
SECCION II - MANUAL DE USUARIO ......................................................................... 17
Controles .......................................................................................................... 18
Funcionamiento ............................................................................................... 19
SECTION I – INSTALLATION MANUAL ...................................................................... 5
Power Supply Installation ............................................................................... 6
Outdoor Panel Installation .............................................................................. 6
Final panel adjustments ................................................................................. 8
Pre-cabling of the panel.................................................................................. 9
Programming the monitor............................................................................... 9
Cabling diagrams of:
- Outdoor panel .......................................................................................... 10
- Door-opener connection......................................................................... 11
- Connection of monitors in distribution configuration .......................... 12
- Connection of monitors in cascade configuration............................... 13
Programming the Loft Monitor........................................................................ 14
Programming the Citymax Monitor ................................................................ 15
Technical Characteristics ............................................................................... 16
SECTION II – USER MANUAL ..................................................................................... 17
Controls ............................................................................................................ 18
Functioning ....................................................................................................... 19
SECTION I : MANUEL D’INSTALLATION .................................................................... 5
Installation de l’alimentation .......................................................................... 6
Installation de la platine de rue ..................................................................... 6
Réglages finaux de la platine......................................................................... 8
Précâblage de la platine................................................................................. 9
Programmation du moniteur .......................................................................... 9
Schémas de câblage de :
- Platine de rue........................................................................................... 10
- Raccordement de la gâche électrique .................................................. 11
- Raccordement des moniteurs en distribution ..................................... 12
- Raccordement des moniteurs en cascade .......................................... 13
Pag 4
Placas MARINE
Placas MARINE
SOMMAIRE - INHALT - INDICE
D
P
Programmation du moniteur Loft................................................................... 14
Programmation du moniteur Citymax ........................................................... 15
Caractéristiques techniques .......................................................................... 16
SECTION II - MANUEL D’UTILISATION ...................................................................... 17
Contrôles .......................................................................................................... 18
Fonctionnement ............................................................................................... 19
F
TEIL I - INSTALLATIONSANLEITUNG ......................................................................... 5
Installation des Netzgeräts ............................................................................ 6
Installation der Türstation............................................................................... 6
Abschließende Einstellungen der Türstation .............................................. 8
Vorverkabelung der Türstation ....................................................................... 9
Programmierung des Monitors ...................................................................... 9
Verkabelungsschema für:
- Türstation ................................................................................................. 10
- Anschluss des Türöffners....................................................................... 11
- Anschluss der Monitore mit Verteilung.................................................. 12
- Anschluss der Monitore mit Kaskadenverteilung ................................ 13
Programmierung des Monitors Loft............................................................... 14
Programmierung des Monitors Citymax ....................................................... 15
Technische Eigenschaften ............................................................................. 16
TEIL II - BEDIENUNGSANLEITUNG ............................................................................. 17
Betriebs- und Funktionsanzeigen.................................................................. 18
Funktionsweise................................................................................................ 19
SECÇÃO I - MANUAL DO INSTALADOR .................................................................... 5
Instalação do Alimentador .............................................................................. 6
Instalação da placa de rua ............................................................................. 6
Ajustes finais da placa.................................................................................... 8
Pré-cablagem da placa .................................................................................. 9
Programação do monitor ................................................................................ 9
Esquemas de cablagem da:
- Placa de rua ............................................................................................. 10
- Ligação do trinco ..................................................................................... 11
- Ligação de monitores em distribuição ................................................. 12
- Ligação de monitores em cascata........................................................ 13
Programação do Monitor Loft ......................................................................... 14
Programação do Monitor Citymax.................................................................. 15
Características Técnicas ................................................................................ 16
SECÇÃO II - MANUAL DO UTILIZADOR ..................................................................... 17
Comandos........................................................................................................ 18
Funcionamento ................................................................................................ 19
Placas MARINE
Placas MARINE
Pag 5
Sección I - Manual del Instalador
Section I - Installer’s Manual
Section I - Manuel d’installation
Teil I - Installationsanleitung
Secção I - Manual do instalador
E
EN
F
D
P
Pag 6
Placas MARINE
Placas MARINE
1.70m
1.70m
Instalación en carril DIN - DIN rail Installation
Installation sur rail DIN - DIN-Schiene Installation
Instalação em carril DIN
Fijación con tornillos - Fixing with screws
Fixation au moyen de vis - Befestigung
mit Schrauben - Fixação com parafusos
INSTALACIÓN PLACADE CALLE - OUTDOOR PANEL INSTALLATION - INSTALLATION DE
LAPLATINE DE RUE - INSTALLATION DER TÜRSTATION - INSTALAÇÃO DAPLACA DE RUA
INSTALACIÓN DELALIMENTADOR - POWER SUPPLY INSTALLATION - INSTALLATION DE
L’ALIMENTATION - INSTALLATION DES NETZGERÄTS - INSTALAÇÃO DO TRANSFORMADOR
+18V 1.5A
50-60 Hz. 50VA MAX.
12V 1A
FUENTE ALIMENTACION
KIT DIGITAL
MADE IN SPAIN
1b
1a
Desmontaje - Disassembly
Démontage - Ansbau
Desmontagem
Montaje - Assembly
Montage - Einbau
Montagem
- Instalación con CAJA de EMPOTRAR
-Installation with FLUSH-MOUNTED BOX
-Installation avec BOÎTIER ENCASTRABLE
- Installation mit UNTERPUTZKASTEN
-Instalação com CAIXA de ENCASTRAR
- Instalación con CAJA de SUPERFICIE
-Installation with SURFACE-MOUNTED BOX
-Installation avec BOÎTIER EN SAILLIE
- Installation mit AUFPUTZKASTEN
-Instalação com CAIXA de SUPERFÍCIE
Placas MARINE
Placas MARINE
Pag 7
10º
10º
10º
10º
2 3
4a
4b
Acosejamos sellar la placa con un cordón de silicona para asegurar una mejor estanqueidad de
ésta.
We advise you to seal the panel with silicon to ensure watertightness.
Nous vous conseillons de fixer la platine à l’aide d’un joint de silicone afin d’en garantir la parfaite
étanchéité.
Wir empfehlen, die Türstation mit einem Silikonrand zu versehen, um eine höhere
Wasserundurchlässigkeit zu gewährleisten.
Aconselhamos a fixar a placa com um cordão de silicone, para assegurar uma melhor
estanqueidade.
- Cierre de placa con CAJA de EMPOTRAR
- Cover for panel with FLUSH-MOUNTED BOX
- Couvercle de platine avec BOÎTIER
ENCASTRABLE
- Abdichtung der Türstation mit
UNTERPUTZKASTEN
- Fecho de placa com CAIXA de ENCASTRAR
- Cierre de placa con CAJA de SUPERFICIE
-Cover for panel with SURFACE-MOUNTED BOX
-Couvercle de platine avec BOÎTIER EN
SAILLIE
- Abdichtung der Türstation mit AUFPUTZKASTEN
-Fecho de placa com CAIXA de SUPERFÍCIE
Pag 8
Placas MARINE
Placas MARINE
- Selección del idioma del mensaje de «puerta abierta».
- Select language for «open door» message.
- Sélection de la langue du message «porte ouverte».
- Sprachwahl der Meldung «Tür offen».
- Selecção da língua da mensagem de «porta aberta».
JP2:No quitar.
JP2:Do not remove.
JP2:Ne pas retirer.
JP2:Nicht entfernen.
JP2:Não tirar.
AJUSTES DE LA PLACA - PANEL ADJUSTMENT - RÉGLAGES DE LA PLATINE -
EINSTELLUNGEN DER TÜRSTATION - AJUSTES DAPLACA
EXT.
PLACA
INT.
TELEFONO
- Ajuste audio
- Adjust the audio
- Réglez le volume
- Audioeinstellung
- Ajuste o áudio
99
99
9
EN
E
F
D
P
99
99
9
99
99
9
10º
10º
10º
10º
Pan&Tilt (
±
10º)
99
99
9
A
B
C
D
JP2
- Enfoque la telecámara
-Focus the camera
-Réglez la caméra vidéo
- Richten Sie die Kamera
-Focar a telecâmara.
Placas MARINE
Placas MARINE
Pag 9
16 EXTENSION CALL PACK
1
REF.2 1
3276510981211 15113 16
PACK EXTENSION 16 LLAMADAS
SIGUIENTE/NEXT
ANTERIOR/PREVIOUS
LLAMADAS/CALLS
16 EXTENSION CALL PACK
1
REF.2 1
3276510981211 15113 16
PACK EXTENSION 16 LLAMADAS
SIGUIENTE/NEXT
ANTERIOR/PREVIOUS
LLAMADAS/CALLS
Al amplificador - To the amplifier
A l´amplificateur - Zum Lautsprecher
Ao amplificador
Pulsadores - Pushbuttons - Boutons
Poussoirs - Drucktasten - Botões
(1...16)
Conexión de más de 16 pulsadores - More than 16 pushbuttons connection
Connexion à plus de 16 boutons poussoirs - Schaltung von mehr als 16 Drucktasten -
Conexão de mais de 16 botões
PRECABLEADO PLACA - PANEL INTERNAL WIRING - PRÉCABLEMENT PLATINE
INTERNE VERKABELUNG DER TÜRSTATION - PRÉ-CABLAGEM PLACA .
Pulsadores - Pushbuttons - Boutons
Poussoirs - Drucktasten - Botões
(17...32)
12
3
56
2
1
3 8567
11
9
10 1312 161 15
CT
+ -
MV
..........
..............
....
REF.2 1 MODULO EXTENSION 16 LLAMADAS
16 CALL EXTENSION PACK
Ct LB
S
EXT.
INT.
C
BNo +-
+12
Nc
JP2
A
B
C
D
78
PLACA
TELEFONO
Pag 10
Placas MARINE
Placas MARINE
12
3
56
78
-
+CT VM
COAX
..........
..............
....
+-
L
Ct LB
S
EXT.
INT.
C
BNo +-
+12
Nc
JP2
230V
~
~
INPUT
230V ; 0,6 A
50-60 Hz
OUTPUT
18 V ; 1,5 A
ALIMENTADOR
POWER SUPPLY ALIMENTATEUR
NETZGERÄT
PROTEGIDO POR FUSIBLE
ELECTRÓNICO
Despues de un cortocircuito
desconectar el primario
durante un minuto
aproximadamente.
ELECTRONIC FUSE PROTECTED
After a short-circuit, main
voltage supply must be
disconected for one minute
approx.
810
~
OVERLOAD
ON
~~
~
12 V ; 1,5 A
21
3
65
87
PLACA
TELEFONO
Vac
18 Vdc
12 Vac
ESQUEMA CABLEADO PLACA DE CALLE - OUTDOOR PANEL WIRING - CABLAGE DE LA
PLATINE DE RUE - VERKABELUNG DER TÜRSTATION - CABLAGEM PLACA DA RUA.
1 - 50
50 - 100
100 - 200
75 Ohm
75 Ohm
75 Ohm
D
mm
mm
mm2,5
1,5
1
2
2
2
S
Placas MARINE
Placas MARINE
Pag 11
CONEXIÓN ABREPUERTAS - DOOR LOCK CONNECTION - CONNEXION GÂCHE -
TÜRÖFFNERANSCHLUSS - CONEXÃO TRINCO
Nota: Se recomienda la instalación de abrepuertas de alterna.
Note: AC door lock installation recommended.
Note: L’ installation d’une gâche à courant alternatif est recommandée.
Hinweis: Der Einsatz vin Wechselstromtüröffner wird empfohlen.
Nota: Recomenda-se a instalação de trinco de alterna
Ct LB
S
EXT.
INT.
C
BNo +-
+12
Nc
JP2
PLACA
TELEFONO
Abrepuertas de continua - DC door lock - Gâche à courant continu -
Geichstromtüröffner - Trinco de continua
Abrepuertas de alterna - AC door lock - Gâche à courant alternatif -
Wechselstromtüröffner - Trinco de alterna
230V
~
~
INPUT
230V ; 0,6 A
50-60 Hz
OUTPUT
18 V ; 1,5 A
ALIMENTADOR
POWER SUPPLY ALIMENTATEUR
NETZGERÄT
PROTEGIDO POR FUSIBLE
ELECTRÓNICO
Despues de un cortocircuito
desconectar el primario
durante un minuto
aproximadamente.
ELECTRONIC FUSE PROTECTED
After a short-circuit, main
voltage supply must be
disconected for one minute
approx.
810
~OVERLOAD
ON
~~
~12 V ; 1,5 A
Ct LS
EXT.
INT.
C
BNo +-
+12 Nc
JP2
PLACA
TELEFONO
E
GB
F
D
P
18 Vdc
12 Vac
Vac
Pag 12
Placas MARINE
Placas MARINE
L
+
2 OUTPUTS VIDEO DISTRIBUTOR
DISTRIBUIDOR VIDEO 2 SALIDAS
V
5
V
1M
+18
75
MR1
3
+
V
2
REF.2 8
6
VM M
DISTRIBUIDOR VIDEO 2 SALIDAS
2 OUTPUTS VIDEO DISTRIBUTOR
75
REF.2 8
V
1
R1
+18
VM 5M
+
3
MMV
2V
6
-
-
L
+COAX
(-)
(-)
n-2 n-1
+L
1-2 1-1
CT
+
M
V
M
V
F1
T
A
L
-
F2
CN1
CT
+
M
V
M
V
F1
T
A
L
-
F2
CN1
CT
+
M
V
M
V
F1
T
A
L
-
F2
CN1
CT
+
M
V
M
V
F1
T
A
L
-
F2
CN1
HIGH PERFORMANCE
MULTIPLEXED DIGITAL SYSTEM
STOP
10 Kohm
R
R
VIA_PADSTACKVIA_PADSTACKVIA_PADSTACKVIA_PADSTACKVIA_PADSTACKVIA_PADSTACKVIA_PADSTACKVIA_PADSTACKVIA_PADSTACKVIA_PADSTACKVIA_PADSTACKVIA_PADSTACKVIA_PADSTACKVIA_PADSTACKVIA_PADSTACKVIA_PADSTACKVIA_PADSTACKVIA_PADSTACK
PIN_PADSTACKPIN_PADSTACK
1-2
V
-A
T
LE
T
L
-
+
+A
Ct
M
V
M
L
+
2 OUTPUTS VIDEO DISTRIBUTOR
DISTRIBUIDOR VIDEO 2 SALIDAS
V
5
V
1
M
+18
75
M
R1
3
+
V
2
REF.2 8
6
VM M
1-1
V
LE
T
T
-A
+
L
-
Ct
+A
M
V
M
106CI08D
106CI08D
DISTRIBUIDOR VIDEO 2 SALIDAS
2 OUTPUTS VIDEO DISTRIBUTOR
T
LE
T
-A
+
-
L
+A
Ct
106CI08D
V
V
M
M
n-2
75
REF.2 8
V
1
R1
+18
VM
5
M
+
3
MMV
2
V
6
+A
T
T
-A
LE
-
L
+
Ct
106CI08D
n-1
V
V
M
M
-
-
L
+COAX
(-)
(-)
1
2
HIGH RESOLUTION
FLAT MONITOR
HIGH PERFORMANCE
MULTIPLEXED DIGITAL SYSTEM
STOP
1
2
HIGH RESOLUTION
FLAT MONITOR
1
2
HIGH RESOLUTION
FLAT MONITOR
1
2
HIGH RESOLUTION
FLAT MONITOR
+L
10 Kohm
R
R
Loft (**)
Citymax (**)
(*)
(*)
MONITORES EN DISTRIBUCIÓN - MONITORS IN DISTRIBUTION - MONITEURS EN
DISTRIBUTION - MONITORE MIT VIDEOVERTEILUNG - MONITORES EM DISTRIBUIÇÃO
21
3
65
87
21
3
65
87
Placas MARINE
Placas MARINE
Pag 13
CT
+
M
V
M
V
F1
T
A
L
-
F2
CN1
+
L
-
+L
10 Kohm
CT
+
M
V
M
V
F1
T
A
L
-
F2
CN1
CT
+
M
V
M
V
F1
T
A
L
-
F2
CN1
COAX
HIGH PERFORMANCE
MULTIPLEXED DIGITAL SYSTEM
STOP
R
R
R
n
2
1
V
M
M
V
LE
T
T
-A
+A
Ct
-
L
+
Ct
+A
-A
LE
T
T
L
-
+
M
V
V
M
2
-A
+A
Ct
T
-
T
M
+
L
M
V
V
n
LE
106CI08D
106CI08D
106CI08D
1
+
L
-
COAX
1
2
HIGH RESOLUTION
FLAT MONITOR
HIGH PERFORMANCE
MULTIPLEXED DIGITAL SYSTEM
STOP
1
2
HIGH RESOLUTION
FLAT MONITOR
1
2
HIGH RESOLUTION
FLAT MONITOR
+L
10 Kohm
R
R
R
Loft (**) Citymax (**)
(*)(*)
(*) Es necesario colocar una resistencia de 10 Kohm entre los bornes + y L del último monitor.
(**) Máximo 20 monitores sin fuente adicional (1 monitor por vivienda).
A 10 Kohm resistor must be placed between the + and L monitor terminals.
(**) Maximum 20 monitors without additional power supply (1 monitor por home).
Il est nécessaire de placer une résistance de 10 kOhm entre les bornes + et L du moniteur
(**) Maximum 20 moniteurs sans alimentation supplémentaire (1 moniteur par
logement).
Es ist erforderlich, einen 10 kOhm Widerstand zwischen den Klemmen ”+“ und ”L“ des Monitors
anzulegen.
(**) Maximal 20 Monitore ohne Zusatznetzgerät (1 monitor pro Wohnung).
(*) É necessário colocar uma resistência de 10 Kohm entre os terminais + e L do monitor.
(**) Máximo 20 monitores sem transformador adicional (1 monitor por vivenda).
E
GB
F
D
P
MONITORES EN CASCADA - MONITORS IN CASCADE - MONITEURS EN CASCADE -
MONITORE IN KASKADENSCHALTUNG - MONITORES EM CASCATA
21
3
65
87
21
3
65
87
Pag 14
Placas MARINE
Placas MARINE
PROG. MONITOR LOFT
1.Con el monitor conectado pulse el botón de programación. Se oirá un sonido de
confirmación.
2.Pulse el botón de llamada a vivienda. De nuevo se produce confirmación.
* El monitor no funcionará mientras no haya sido programado.
1.With the monitor connected, press the programming button. You will hear a
confirmation tone.
2.Press the house call button. Confirmation tone is heard again.
* The monitor will not work until it has been programmed.
1.Une fois le moniteur branché, appuyez sur le bouton de programmation. Une
tonalité de confirmation sera émise.
2.Replacez le com-mutateur en position initiale et posez correctement le moniteur.
* Le moniteur ne fonctionne pas tant qu’il n’a pas été programmé.
1.Drücken Sie die Programmiertaste bei angeschlossenem Monitor. Der Vorgang
wird durch einen Signalton bestätigt.
2.Drücken Sie die Ruftaste zur Wohnung. Der Vor-gang wird erneut durch einen
Signalton bestätigt.
* Der Monitor ist nicht betriebsbereit, wenn er zuvor nicht programmiert wurde.
1.Com o monitor ligado carregue no botão de programação. Ouve-se um som de
confirmação.
2.Carregue no botão de chamada da vivenda. Ouve-se um "bip" de confirmação.
* O monitor não funciona enquanto não tiver sido programado.
E
GB
F
D
P
< 2 min
2
1
Placas MARINE
Placas MARINE
Pag 15
1
PRG
J1
PRG
PROG. MONITOR CITYMAX
1. Con el monitor conectado ponga el conmutador «J1» en la posición «PRG» . Se
oirá un sonido de confirmación.
2. Pulse el botón de llamada a vivienda. De nuevo se produce confirmación.
3. Vuelva a colocar el conmutador «J1» a su posición original.
* El monitor no funcionará mientras no haya sido programado.
1.With the monitor connected, place the J1 switch in the PRG position. You will
hear a confimation tone.
2.Press the house call button. Confirmation tone is heard again.
3.Set the switch back to its original position.
* The monitor will not work until it has been programmed.
1.Une fois le moniteur branché, placez le com-mutateur J1 sur PRG. Une tonalité de
confirmation est émise.
2.Appuyez sur le bouton-poussoir d’appel du logement. Une tonalité de
confirmation est à nouveau émise.
3.Replacez le com-mutateur en position initiale.
* Le moniteur ne fonctionne pas tant qu’il n’a pas été programmé.
E
GB
F
1.Stecken Sie die Steckbrücke J1 auf Position PRG um. Der Vorgang wird durch
einen Signalton bestätigt.
2. Drücken Sie die Ruftaste zur Wohnung. Der Vor-gang wird erneut durch einen
Signalton bestätigt.
3.Stecken Sie die Steckbrücke wieder auf die Ausgangsposition um.
* Der Monitor ist nicht betriebsbereit, wenn er zuvor nicht programmiert wurde.
D
1.Com o monitor ligado Coloque o comutador J1 na posição PRG. Ouve-se um
som de confirmação.
2.Carregue no botão de chamada da vivenda. Ouve-se um "bip" de confirmação.
3.Volte a colocar o comutador na sua posição original.
* O monitor não funciona enquanto não tiver sido programado.
P
< 2 min
12 3
Pag 16
Placas MARINE
Placas MARINE
CARACTERÍSTICAS TÉCNICAS - TECHNICAL FEATURES - CARACTERISTIQUES
TECHNIQUES - TECHNISCHE EIGENSCHAFTEN - CARACTERÍSTICAS TÉCNICAS
en reposo - in standby - au repos - Im Bereitschaftsmodus - em repouso
audio activo - audio active - avec audio - Betriebszustand Audio - áudio activo
cámara - camera - caméra - Kamera - câmara
iluminación - lighting - éclairage - Beleuchtung - iluminação
40 mA
250 mA
150 mA
70 mA
Alimentación - Power Supply - Alimentation - Stromversorgung - Alimentação
Consumo - Consumption - Consommation - Stromverbrauch - Consumo
Temperatura de funcionamiento - Operating Temperature
Température de fonctionnement - Betriebstemperatur
Temperatura de funcionamento
Potencia audio sentido vivienda-calle - Audio power from the apartment to the panel
Piussance de l’audio sens poste-platine - Audio-Leistung in Richtung Türstation
Potência áudio sentido rua
Volumen regulable en ambos sentidos - Adjustable volume both ways
Volume réglable dans les deux sens - Regulierbare Lautstärke in beiden Richtungen
Volume regulável em ambos sentidos
18 Vdc
[0 , +60 °C]
Potencia audio sentido calle-vivienda - Audio power from the panel to the apartment
Piussance de l’audio sens platine-poste - Audio-Leistung in Richtung Telefon
Potência áudio sentido telefone
1 W
0,25 W
Placas MARINE
Placas MARINE
Pag 17
Sección II - Manual del Usuario
Section II - User’s Manual
Section II - Manuel d’’utilisation
Teil II - Bedienungsanleitung
Secção II - Manual do utilizador
E
EN
F
D
P
Pag 18
Placas MARINE
Placas MARINE
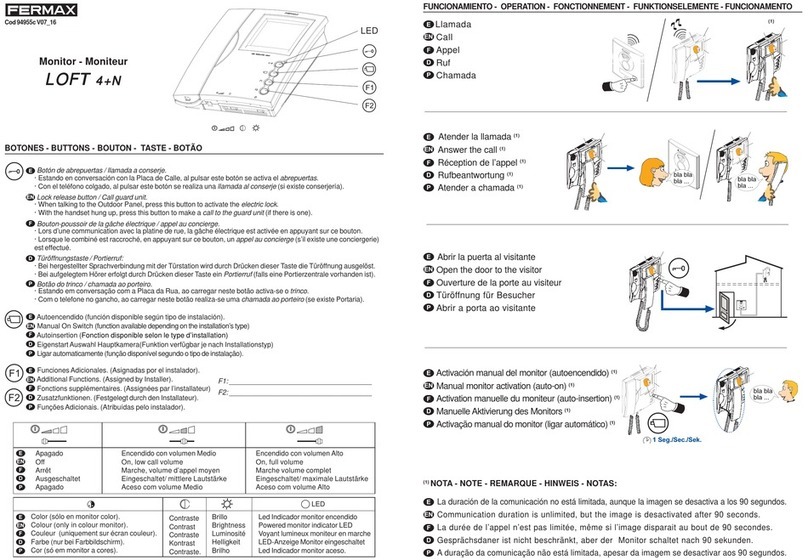
EL MONITOR LOFT - THE LOFT MONITOR - LE MONITEUR LOFT - LOFT MONITOR
O MONITOR LOFT
EN
E
F
D
P
LED
F2
F1
- Botón de ABREPUERTAS. (Pulsar para abrir la puerta).
- DOOR RELEASE button. (Press to open the door).
- Bouton-poussoir de la GACHE ELECTRIQUE. (Appuyez pour ouvrir la porte).
- TÜRÖFFNUNGSTASTE. (Drücken Sie um die Tür zu öffnen).
- Botão de TRINCO. (Carregar para abrir a porta).
- Funciones Adicionales. (Asignadas por el instalador).
- Additional Functions. (Assigned by Installer).
- Fonctions supplémentaires. (Assignées par l’installateur)
- Zusatzfunktionen. (Festgelegt durch den Installateur).
- Funções Adicionais. (Atribuídas pelo instalador).
BOTONES - BUTTONS - BOUTON - TASTE - BOTÃO
F2
F1
- Autoencendido y Selección Cámara Principal/Secundaria (1)
- Manual On Switch and Main/Secondary Camera Selection (1)
- Autoinsertion et sélection caméra principale/secondaire (1)
- Eigenstart Auswahl Hauptkamera/Nebenkamera (1)
- Ligar automaticamente e Selecção Câmara Principal/Secundária (1)
función disponible según tipo de instalación - function available depending on the installation’s type - fonction disponible
selon le type d’installation - Funktion verfügbar je nach Installationstyp - função disponível segundo o tipo de instalação
E
EN
F
D
P
E
EN
F
D
P
Color (sólo en monitor color).
Colour (only in colour monitor).
Couleur (uniquement sur écran couleur).
Farbe (nur bei Farbbildschirm).
Cor (só em monitor a cores).
Contraste
Contrast
Contraste
Kontrast
Contraste.
Brillo
Brightness
Luminosité
Helligkeit
Brilho
Apagado
Off
Arrêt
Ausgeschaltet
Apagado
Encendido con volumen Medio
On, low call volume
Marche, volume d’appel moyen
Eingeschaltet/ mittlere Lautstärke
Aceso com volume Medio
Encendido con volumen Alto
On, full volume
Marche volume complet
Eingeschaltet/ maximale Lautstärke
Aceso com volume Alto
Led Indicador monitor encendido
Powered monitor indicator LED
Voyant lumineux moniteur en marche
LED-Anzeige Monitor eingeschaltet
Led Indicador monitor aceso.
LED
(1)
Placas MARINE
Placas MARINE
Pag 19
CAM 2
2º
¸
1 Seg./Sec./Sek.
CAM 1
1º
¸
1 Seg./Sec./Sek.
CAM 1
3º
¸
1 Seg./Sec./Sek.
CAM 2
4º
¸
1 Seg./Sec./Sek.
. . .
CAM 1
HIGH RESOLUTION
CCD CAMERA
PAN &TILT
HIGH RESOLUTION
CCD CAMERA
PAN &TILT
HIGH RESOLUTION
CCD CAMERA
PAN &TILT
HIGH RESOLUTION
CCD CAMERA
PAN &TILT
HIGH RESOLUTION
CCD CAMERA
PAN &TILT
CAM 2
CAM 2CAM 1
¸
30 Seg./Sec./Sek.
¸¸
max. 90
Seg./Sec./Sek.
bla bla
bla ...
1 Seg./Sec./Sek.
• Activación manual del monitor (autoencendido)
Manual monitor activation (auto-on)
Activation manuelle du moniteur (auto-insertion)
Manuelle Aktivierung des Monitors
Activação manual do monitor (ligar automático)
FUNCIONAMIENTO - OPERATION - FONCTIONNEMENT - FUNKTIONSELEMENTE - FUNCIONAMENTO
HIGH RESOLUTION
CCD CAMERA
PAN & TILT
¸
max. 30
Seg./Sec./Sek.
HIGH RESOLUTION
CCD CAMERA
PAN &TILT
HIGH RESOLUTION
CCD CAMERA
PAN & TILT
¸
max. 90 Seg./Sec./Sek.
bla bla
bla ...
bla bla
bla ...
•Llamada
Call
Appel
Ruf
Chamada
•Abrir la puerta al visitante
Open the door to the visitor
Ouverture de la porte au visiteur
Türöffnung für Besucher
Abrir a porta ao visitante
•Atender la llamada
Answer the call
Réception de l’appel
Rufbeantwortung
Atender a chamada
E
EN
F
D
P
E
EN
F
D
P
E
EN
F
D
P
E
EN
F
D
P
E
EN
F
D
P
•Autoencendido CAM2
CAM2 activation
Auto insertion CAM2
CAM 2 Aktivierung
Activação CAM2
Pag 20
Placas MARINE
Placas MARINE
Publicación técnica de caracter informativo editada por FERMAX ELECTRONICA S.A.E.
FERMAX ELECTRONICA S.A.E., en su política de mejora constante, se reserva el derecho a
modificar el contenido de este documento así como las características de los productos que en él
se refieren en cualquier momento y sin previo aviso.
Cualquier modificación será reflejada en posteriores ediciones de este documento.
Technical document published for information purposes by FERMAX ELECTRONICA S.A.E.
FERMAX ELECTRONICA S.A.E., in a policy of ongoing improvement, reserves the right to modify
the contents of this document and the features of the products referred to herein at any time and
with no prior notice. Any such modifications shall be reflected in subsequent editions of this
document.
Publication technique à caractère informatif éditée par FERMAX ELECTRONICA S.A.E.
Conformément à sa politique de perfectionnement continu, FERMAX ELECTRONICA, S.A.E. se
réserve le droit de modifier, à tout moment et sans préavis, le contenu de ce document ainsi que les
caractéristiques des produits auxquels il fait référence. Toutes les modifications seront indiquées
dans les éditions suivantes.
Technische Veröffentlichung zu Informationszwecken; Herausgeber: FERMAX ELECTRONICA S.A.E.
FERMAX ELECTRONICA S.A.E, behält sich das Recht vor, den Inhalt dieses Dokuments sowie die
technischen Eigenschaften der erwähnten Produkte ohne vorherige Ankündigung zu ändern, um
dadurch den ständigen Weiterentwicklungen und den damit in Verbindung stehenden
Verbesserungen Rechnung zu tragen. Alle Änderungen finden Aufnahme in den Neuauflagen
dieses Dokuments.
Publicação técnica de carácter informativo editada por FERMAX ELECTRONICA S.A.E.A FERMAX
ELECTRONICA S.A.E., na sua política de melhoramento constante, reserva-se o direito de modifi-
car o conteúdo deste documento assim como as características dos produtos que nele são
referidos a qualquer momento e sem aviso prévio.
Qualquer modificação será apresentada em edições posteriores deste documento.
E
Audio and Video Door Entry Systems
EN
F
D
P
Avda. Tres Cruces, 133 • 46017 Valencia (España)
Telf. 96 317 80 00 • Fax 96 377 07 50
Telf. Export: 00 34 96 317 80 02
www.fermax.com• [email protected]

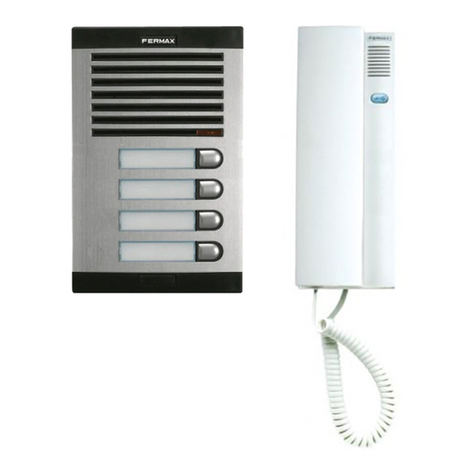
Other manuals for Loft

1

This manual suits for next models

1

Other Fermax Intercom System manuals

Fermax House Keeper User manual

Fermax

Fermax House Keeper User manual

Fermax CITY PRIVATE VIDEO DIGITAL KIT 1 Line Instruction Manual

Fermax

Fermax CITY PRIVATE VIDEO DIGITAL KIT 1 Line Instruction Manual

Fermax DUOX MARINE Series User guide

Fermax

Fermax DUOX MARINE Series User guide

Fermax Veo VDS Instruction Manual

Fermax

Fermax Veo VDS Instruction Manual

Fermax VEO DUOX User guide

Fermax

Fermax VEO DUOX User guide

Fermax DUOX PLUS SKYLINE User manual

Fermax

Fermax DUOX PLUS SKYLINE User manual

Fermax MEET 1W User guide

Fermax

Fermax MEET 1W User guide

Fermax VDS Cityline User guide

Fermax

Fermax VDS Cityline User guide

Fermax 9002 User manual

Fermax

Fermax 9002 User manual

Fermax KIN PANEL User guide

Fermax

Fermax KIN PANEL User guide

Fermax Minicentral MDS Digital Assembly instructions

Fermax

Fermax Minicentral MDS Digital Assembly instructions

Fermax VDS User guide

Fermax

Fermax VDS User guide

Fermax WAY KIT Instruction Manual

Fermax

Fermax WAY KIT Instruction Manual

Fermax MEET MILO 1W PANEL User guide

Fermax

Fermax MEET MILO 1W PANEL User guide

Fermax AUDIO 4+n KIT Series User manual

Fermax

Fermax AUDIO 4+n KIT Series User manual

Fermax COLOUR VDS LOFT MEMORY MONITOR User manual

Fermax

Fermax COLOUR VDS LOFT MEMORY MONITOR User manual

Fermax CITYMAX BASIC 4+N User manual

Fermax

Fermax CITYMAX BASIC 4+N User manual

Fermax CityLine 1 L User manual

Fermax

Fermax CityLine 1 L User manual

Fermax LOFT 4+n Basic 3393 User manual

Fermax

Fermax LOFT 4+n Basic 3393 User manual

Fermax MDS User manual

Fermax

Fermax MDS User manual

Fermax iloft User manual

Fermax

Fermax iloft User manual

Fermax NCITY 1-2L Instruction Manual

Fermax

Fermax NCITY 1-2L Instruction Manual

Fermax 1 WAY VDS CITY AUDIO KITS Instruction Manual

Fermax

Fermax 1 WAY VDS CITY AUDIO KITS Instruction Manual

Fermax DUOX MARINE 9788 User guide

Fermax

Fermax DUOX MARINE 9788 User guide

Popular Intercom System manuals by other brands

Entrotec PRO-SW6 installation guide

Entrotec

Entrotec PRO-SW6 installation guide

Bell System VRK1 Installation

Bell System

Bell System VRK1 Installation

RTS KP95 installation instructions

RTS

RTS KP95 installation instructions

ABB M25102xC Series manual

ABB

ABB M25102xC Series manual

Alcad TIN-022 manual

Alcad

Alcad TIN-022 manual

Sena BT10 quick start guide

Sena

Sena BT10 quick start guide

AES Cellcom Prime 5AB manual

AES

AES Cellcom Prime 5AB manual

FAAC 4402 installation instructions

FAAC

FAAC 4402 installation instructions

Aiphone IE-1AD instructions

Aiphone

Aiphone IE-1AD instructions

Vimar Elvox K40507/E Installation and operation manual

Vimar

Vimar Elvox K40507/E Installation and operation manual

Emos EM-07HD manual

Emos

Emos EM-07HD manual

KOCOM KIP-300 manual

KOCOM

KOCOM KIP-300 manual

SCS Sentinel KIT HP85 Installation and user manual

SCS Sentinel

SCS Sentinel KIT HP85 Installation and user manual

Cardo Systems G9 Powerset Pairing Guides

Cardo Systems

Cardo Systems G9 Powerset Pairing Guides

TekTone Tek-CARE300III Installation and operation manual

TekTone

TekTone Tek-CARE300III Installation and operation manual

Jaycar Electronics QC3602 Operation handbook

Jaycar Electronics

Jaycar Electronics QC3602 Operation handbook

Slinex Sonik 7 user manual

Slinex

Slinex Sonik 7 user manual

Comelit 3602 Technical manual

Comelit

Comelit 3602 Technical manual

manuals.online logo
manuals.online logoBrands
  • About & Mission
  • Contact us
  • Privacy Policy
  • Terms and Conditions

Copyright 2025 Manuals.Online. All Rights Reserved.