manuals.online logo
Brands
  1. Home
  2. •
  3. Brands
  4. •
  5. Kontax
  6. •
  7. Indoor Furnishing
  8. •
  9. Kontax Tensegrity User manual

Kontax Tensegrity User manual

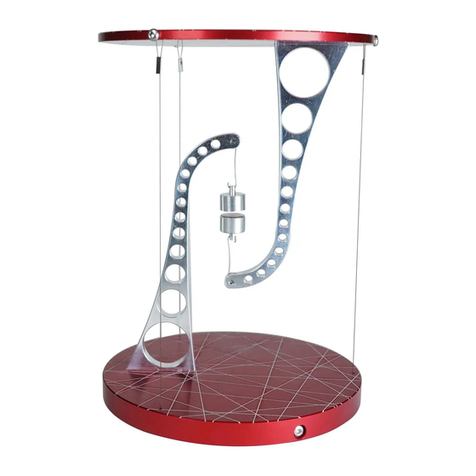
These instructions are for the centre cable with grub screws version of the Tensegrity table.
Please read all the way through the assembly instructions to familiarise yourself with the process
before you start and pay close attention to the alignment of all the parts in the diagrams.
Assembly time should be approximately 15-20 minutes.
Tensegrity cable grub screws assembly instructions page 1 of 14
Copyright Kontax Engineering Ltd 9/1/23
Base
1x1x
Outer cable
3x3x
Top plate
1x1x
Torx driver
1x1x
Shuttle
3x3x
Rubber feet
3x3x
Centre cable
1x1x
Assembly plate
1x1x
Assembly screw
2x2x
Long roundhead screw
3x3x
Short roundhead screw
3x3x
Countersunk screw
4x4x
Grub screw
5x5x
Hex key
1x1x
Tensegrity cable grub screws assembly instructions page 2 of 14
Copyright Kontax Engineering Ltd 9/1/23
Peel the backing off the 3x adhesive rubber
feet and stick them over the three dimples
on the bottom of the base.
Tensegrity cable grub screws assembly instructions page 3 of 14
Copyright Kontax Engineering Ltd 9/1/23
Screw 2x countersunk screws through the
base into the arm and tighten.
It might help to have an assistant hold the
base and arm together while you screw the
screws in.
Tensegrity cable grub screws assembly instructions page 4 of 14
Copyright Kontax Engineering Ltd 9/1/23
Fit the slot in the assembly plate over the lower arm and
screw 1x assembly screw through the arm into the assembly
plate.
You should be able to screw it in using your fingers, but if not
you can use a small cross-point screwdriver. Do not tighten
too much or you risk marking the arm.
Fit the second arm into the slot in the assembly
plate and screw 1x assembly screw through the
arm into the assembly plate.
Tensegrity cable grub screws assembly instructions page 5 of 14
Copyright Kontax Engineering Ltd 9/1/23
1. Fit the centre cable into the
slots in the ends of the arms.
2. Using the hex driver screw 2x
grub screws into the arms,
going through the loops on the
cable.
The screws should pass cleanly
through the loops on the ends
of the cable and screw down
flush with the arms. If they feel
tight as you screw them in do
not force them. Back the
screws off, reposition the loops
and try again.
Arm shown cutaway for clarity
1. fit cable
2. Fit screws
Tensegrity cable grub screws assembly instructions page 6 of 14
Copyright Kontax Engineering Ltd 9/1/23
Identify the top surface of the top plate,
this is the side with the countersinks on the
two holes.
Position the top plate over the arm with
the top surface upwards and screw 2x
countersunk screws through the top plate
into the arm and tighten.
If the plate is the right way up the screws
should fit slightly below the surface. If the
plate is the wrong way up the screws will sit
above the surface, in which case the plate
will need reversing.
Countersinks
Tensegrity cable grub screws assembly instructions page 7 of 14
Copyright Kontax Engineering Ltd 9/1/23
Fit 1x outer cable loop into one of the slots
in the top plate. The loop should enter
from the underside of the plate.
Using the hex driver screw 1x grub screw
into the plate, going through the loop on
the cable.
The screw should pass cleanly through the
loop on the end of the cable and screw
down flush with the edge of the plate. If it
feels tight as you screw it in do not force
it. Back the screw off, reposition the loop
and try again.
Repeat for the other two outer cables.
Plate shown cutaway for clarity
Tensegrity cable grub screws assembly instructions page 8 of 14
Copyright Kontax Engineering Ltd 9/1/23
1. Fit shuttle
3. Fit short roundhead screw
2. Fit long roundhead screw
Fit 1x shuttle into a short slot in the base.
1.
Fit 1x long roundhead screw through the hole in the edge
2.
of the base and screw it into the shuttle a couple of turns.
Screw 1x short roundhead screw into the shuttle a couple of
3.
turns.
Repeat for the other two shuttles.
Couple of
turns
Shuttle shown
cutaway
for clarity
Tensegrity cable grub screws assembly instructions page 9 of 14
Copyright Kontax Engineering Ltd 9/1/23
Feed 1x outer cable
1.
through its matching hole
in the base.
Loop the cable fully
2.
around its opposite
shuttle screw. The cable
should go a full 180°
around the screw.
Pull firmly enough to take
3.
up
all
the slack in the
cable but
not
tight like a
guitar string. The cable
should be straight all the
way from the base to the
top plate with no bends
or kinks.
Make sure the long
4.
roundhead screw has
been pulled fully into its
hole.
Make sure the slack is still
5.
taken up and screw the
shuttle screw down tightly
onto the outer cable.
4. Make sure screw is fully
inside pocket
2. Loop around
screw
1.Feed through hole
3. Take up slack
5. Tighten screw
Repeat for the other
two outer cables. When
they are all fitted you
can tuck the excess
lengths underneath.
Tensegrity cable grub screws assembly instructions page 10 of 14
Copyright Kontax Engineering Ltd 9/1/23
Remove the 2x assembly screws and then remove the assembly plate, the table will be quite wobbly at this stage.
Tensegrity cable grub screws assembly instructions page 11 of 14
Copyright Kontax Engineering Ltd 9/1/23
Note:
In the next step, tightening the screws shortens
the outer cables, and undoing the screws lengthens
the cables. Each screw will adjust the length of the
cable that is directly opposite the screw.
Use the T6 driver to tighten each screw around the
base until the top plate is held steady and horizontal.
It is best to work around the three screws in turn
tightening each one a little bit each time. You can
use a ruler against each cable to help get them all
the same length.
DO NOT TIGHTEN THE CABLES LIKE A GUITAR STRING!
The centre cable has an 8kg breaking strain, if you
tighten the three outer cables too tighly you will
break the centre cable.
The recommended tension is is just enough so that
when you nudge the Top Plate it wobbles slighty.
The table is not designed to carry heavy loads on
top. You can put light objects (250g) on top for brief
demonstration purposes but it is best to avoid leaving
heavy objects on it permanently.
Tensegrity cable grub screws assembly instructions page 12 of 14
Copyright Kontax Engineering Ltd 9/1/23
Your Tensegrity Table Wire Version is now fully assembled.
If you need help with your table you can email us at:
[email protected]
Tensegrity cable grub screws assembly instructions page 13 of 14
Copyright Kontax Engineering Ltd 9/1/23
Our workshop is located in the Thames Valley, United Kingdom and is staffed by a skilled team of 9
designers, machinists and assemblers. We have 4 CNC mills, 3 CNC lathes and 3 CNC mill-turn centres.
Tensegrity cable grub screws assembly instructions page 14 of 14
Copyright Kontax Engineering Ltd 9/1/23

Other manuals for Tensegrity

3

Other Kontax Indoor Furnishing manuals

Kontax Tensegrity Magnet User manual

Kontax

Kontax Tensegrity Magnet User manual

Kontax Tensegrity table with centre magnets User manual

Kontax

Kontax Tensegrity table with centre magnets User manual

Kontax Tensegrity User manual

Kontax

Kontax Tensegrity User manual

Kontax Tensegrity User manual

Kontax

Kontax Tensegrity User manual

Kontax Tensegrity User manual

Kontax

Kontax Tensegrity User manual

Popular Indoor Furnishing manuals by other brands

Furniture of America CM3920PT-3838 Assembly instructions

Furniture of America

Furniture of America CM3920PT-3838 Assembly instructions

Costway HW65481BK user manual

Costway

Costway HW65481BK user manual

DeskMakers ML Height Adjustable Mechanism user guide

DeskMakers

DeskMakers ML Height Adjustable Mechanism user guide

Riverside Furniture Myra 59550 Assembly instructions

Riverside Furniture

Riverside Furniture Myra 59550 Assembly instructions

HOMCOM 836-498 Assembly & instruction manual

HOMCOM

HOMCOM 836-498 Assembly & instruction manual

Novellini Sole manual

Novellini

Novellini Sole manual

Wallbeds Australia AB3a Assembly instructions

Wallbeds Australia

Wallbeds Australia AB3a Assembly instructions

U-Line H-3786 quick start guide

U-Line

U-Line H-3786 quick start guide

Home Decorators Collection FWA60563AW Use and care guide

Home Decorators Collection

Home Decorators Collection FWA60563AW Use and care guide

ASI 2650-22USF Assembly instructions

ASI

ASI 2650-22USF Assembly instructions

ADIROffice 631-04/05 installation guide

ADIROffice

ADIROffice 631-04/05 installation guide

Carpe Diem MARSTRAND manual

Carpe Diem

Carpe Diem MARSTRAND manual

ADIROffice Four Tier Locker user guide

ADIROffice

ADIROffice Four Tier Locker user guide

The Ensign's BALTIC Adjustable Height Standing Desk installation manual

The Ensign's

The Ensign's BALTIC Adjustable Height Standing Desk installation manual

Thomasville Nature's Retreat 12251-001 Assembly instructions

Thomasville

Thomasville Nature's Retreat 12251-001 Assembly instructions

Coaster 460213 Assembly instructions

Coaster

Coaster 460213 Assembly instructions

Amisco M656480205 Assembly

Amisco

Amisco M656480205 Assembly

Better Homes and Gardens 6176479 manual

Better Homes and Gardens

Better Homes and Gardens 6176479 manual

manuals.online logo
manuals.online logoBrands
  • About & Mission
  • Contact us
  • Privacy Policy
  • Terms and Conditions

Copyright 2025 Manuals.Online. All Rights Reserved.