manuals.online logo
Brands
  1. Home
  2. •
  3. Brands
  4. •
  5. Kontax
  6. •
  7. Indoor Furnishing
  8. •
  9. Kontax Tensegrity User manual

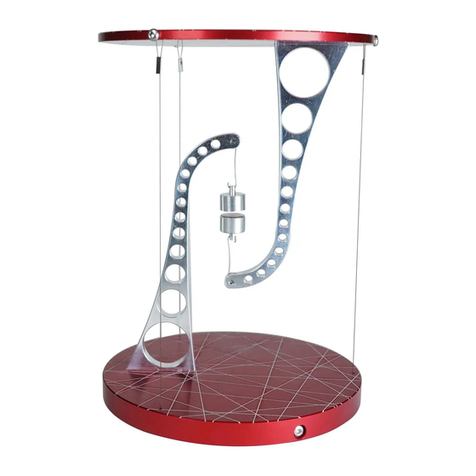
Kontax Tensegrity User manual

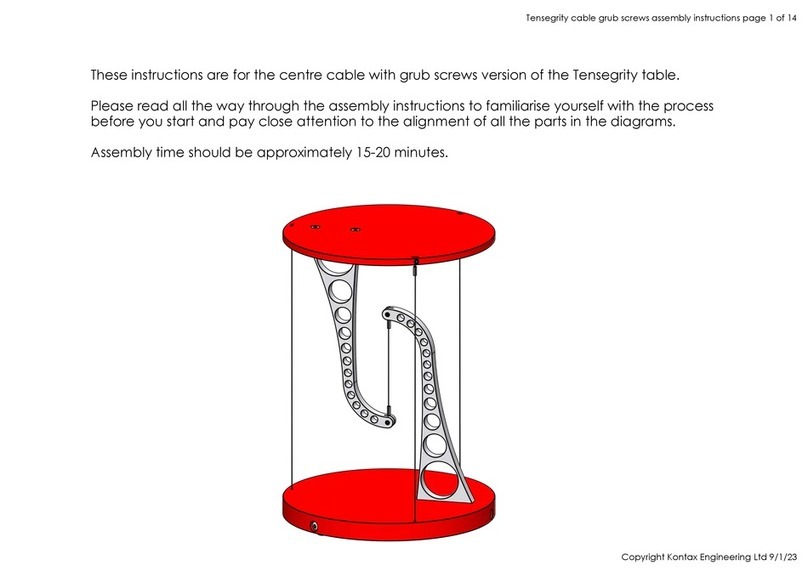
These instructions are for the Tensegrity Phone Table.
Please read all the way through the assembly instructions to familiarise yourself with the process
before you start and pay close attention to the alignment of all the parts in the diagrams.
Assembly time should be approximately 15-20 minutes.
Tensegrity Phone assembly instructions page 1 of 18
Copyright Kontax Engineering Ltd 13/1/23
Base
1x1x
Assembly plate
1x1x
Bottom Arm
1x1x
Top Arm
1x1x
Top plate
1x1x
Rubber foot
4x
Shuttle
3x
Centre cable
1x1x
Front cable
1x1x
Rear cable
2x2x
Tensegrity Phone assembly instructions page 2 of 18
Copyright Kontax Engineering Ltd 13/1/23
Assembly screw
2x2x
Long roundhead screw
3x3x
Short roundhead screw
3x3x
Countersunk screw
4x4x
Short grub screw
4x4x
Hex key
1x1x
Phone peg
2x2x
Torx driver
1x1x
Long grub screw
1x1x
Tensegrity Phone assembly instructions page 3 of 18
Copyright Kontax Engineering Ltd 13/1/23
Peel the backing off the 4x adhesive rubber
feet and stick them over the four dimples on
the bottom of the base.
Tensegrity Phone assembly instructions page 4 of 18
Copyright Kontax Engineering Ltd 13/1/23
Screw 2x countersunk screws through the
base into the arm and tighten.
It might help to have an assistant hold the
base and arm together while you screw the
screws in.
Tensegrity Phone assembly instructions page 5 of 18
Copyright Kontax Engineering Ltd 13/1/23
Fit the slot in the assembly plate over the bottom arm and
screw 1x assembly screw through the arm into the assembly
plate.
You should be able to screw it in using your fingers, but if not
you can use a small cross-point screwdriver. Do not tighten
too much or you risk marking the arm.
Fit the top arm into the slot in the assembly
plate and screw 1x assembly screw through the
arm into the assembly plate.
Tensegrity Phone assembly instructions page 6 of 18
Copyright Kontax Engineering Ltd 13/1/23
1. Fit the centre cable into the
slots in the ends of the arms.
2. Using the hex driver screw 2x
grub screws into the arms,
going through the loops on the
cable.
The screws should pass cleanly
through the loops on the ends
of the cable and screw down
flush with the arms. If they feel
tight as you screw them in do
not force them. Back the
screws off, reposition the loops
and try again.
Arm shown cutaway for clarity
1. fit cable
2. Fit screws
Tensegrity Phone assembly instructions page 7 of 18
Copyright Kontax Engineering Ltd 13/1/23
Position the top plate over the arm with
the Kontax logo upwards and screw 2x
countersunk screws through the holes in
the top plate into the arm and tighten.
Tensegrity Phone assembly instructions page 8 of 18
Copyright Kontax Engineering Ltd 13/1/23
Note: the front cable is the shorter
of the three outer cables.
Fit the front cable loop into the slot
near the bottom edge of the top
plate. The loop should enter from
the underside of the plate.
Using the hex key screw 1x long
grub screw into the plate, going
through the loop on the cable.
The screw should pass cleanly
through the loop on the end of the
cable and screw down flush with
the edge of the plate. If it feels
tight as you screw it in do not force
it. Back the screw off, reposition
the loop and try again.
Tensegrity Phone assembly instructions page 9 of 18
Copyright Kontax Engineering Ltd 13/1/23
Fit 1x rear cable loop into one of
the slots near the top edge of
the top plate. The loop should
enter from the underside of the
plate.
Using the hex key screw 1x short
grub screw into the plate, going
through the loop on the cable.
The screw should pass cleanly
through the loop on the end of
the cable and screw down flush
with the edge of the plate. If it
feels tight as you screw it in do
not force it. Back the screw off,
reposition the loop and try
again.
Repeat for the other rear cable.
Tensegrity Phone assembly instructions page 10 of 18
Copyright Kontax Engineering Ltd 13/1/23
1. Fit shuttle
3. Fit short roundhead screw
2. Fit long roundhead screw
Fit 1x shuttle into a short slot in the base.
1.
Fit 1x long roundhead screw through the hole in the edge
2.
of the base and screw it into the shuttle a couple of turns.
Screw 1x short roundhead screw into the shuttle a couple of
3.
turns.
Repeat for the other two shuttles.
Couple of
turns
Shuttle shown
cutaway
for clarity
Tensegrity Phone assembly instructions page 11 of 18
Copyright Kontax Engineering Ltd 13/1/23
Feed the front cable
1.
through its matching hole in
the base.
Loop the cable fully around
2.
its opposite shuttle screw.
The cable should go a full
180° around the screw.
Pull firmly enough to take
3.
up
all
the slack in the cable
but
not
tight like a guitar
string. The cable should be
straight all the way from the
base to the top plate with
no bends or kinks.
Make sure the long
4.
roundhead screw has been
pulled fully into its hole.
Make sure the slack is still
5.
taken up and screw the
shuttle screw down tightly
onto the outer cable.
4. Make sure screw is fully
inside pocket
2. Loop around
screw
1.Feed through hole
3. Take up slack
5. Tighten screw
Repeat for the two rear
cables. When they are
all fitted you can tuck
the excess lengths
underneath.
Tensegrity Phone assembly instructions page 12 of 18
Copyright Kontax Engineering Ltd 13/1/23
Screw 2x phone pegs into the holes near the
bottom edge of the top plate and tighten.
Tensegrity Phone assembly instructions page 13 of 18
Copyright Kontax Engineering Ltd 13/1/23
Remove the 2x assembly screws and then remove the assembly plate, the table will be quite wobbly at this stage.
Tensegrity Phone assembly instructions page 14 of 18
Copyright Kontax Engineering Ltd 13/1/23
Front screws
Horizontal
Note:
In the next two steps, tightening the screws shortens the outer
cables, and undoing the screws lengthens the cables. Each screw will
adjust the length of the cable that is directly opposite the screw.
Use the Torx driver to tighten each front screw until the top edge of the
top plate is horizontal. It is best to work between the two screws,
tightening each one a little bit at a time. You can use a ruler to measure
an equal height on each side of the back edge of the top plate.
When the top edge is horizontal you can move on to the next step.
Tensegrity Phone assembly instructions page 15 of 18
Copyright Kontax Engineering Ltd 13/1/23
Between
183mm
and
185mm
Between
57mm
and
59mm
Measure
height
here
Measure
height
here
Use the Torx driver to tighten each screw
around the base until the correct tension is
achieved, it is best to work around the three
screws in turn tightening each one a little bit at
a time. As a guide the optimum tension should
be when the front edge height is between
57mm and 59mm and the back edge height
between 183mm and 185mm, measuring from
the surface of your work space.
DO NOT OVER-TIGHTEN THE CABLES!
The centre cable has an 8kg breaking strain, if
you tighten the three outer cables too tighly
you will break the centre cable.
The table is designed to carry the weight of
most phones but is not suitable for tablets.
Tensegrity Phone assembly instructions page 16 of 18
Copyright Kontax Engineering Ltd 13/1/23
Your Tensegrity Phone Table is now fully assembled.
If you need help with your table you can email us at:
[email protected]
Tensegrity Phone assembly instructions page 17 of 18
Copyright Kontax Engineering Ltd 13/1/23
Our workshop is located in the Thames Valley, United Kingdom and is staffed by a skilled team of 9
designers, machinists and assemblers. We have 4 CNC mills, 3 CNC lathes and 3 CNC mill-turn centres.
Tensegrity Phone assembly instructions page 18 of 18
Copyright Kontax Engineering Ltd 13/1/23

Other manuals for Tensegrity

3

Other Kontax Indoor Furnishing manuals

Kontax Tensegrity User manual

Kontax

Kontax Tensegrity User manual

Kontax Tensegrity User manual

Kontax

Kontax Tensegrity User manual

Kontax Tensegrity table with centre magnets User manual

Kontax

Kontax Tensegrity table with centre magnets User manual

Kontax Tensegrity Magnet User manual

Kontax

Kontax Tensegrity Magnet User manual

Kontax Tensegrity User manual

Kontax

Kontax Tensegrity User manual

Popular Indoor Furnishing manuals by other brands

FMD Furniture BRISTOL 100 Assembly instructions

FMD Furniture

FMD Furniture BRISTOL 100 Assembly instructions

Walker Edison WLED3D Assembly instructions

Walker Edison

Walker Edison WLED3D Assembly instructions

Case Hierve Vitrina quick guide

Case

Case Hierve Vitrina quick guide

Hay Loop Stand Table instruction manual

Hay

Hay Loop Stand Table instruction manual

Knight Ergoplan Assembly instructions

Knight

Knight Ergoplan Assembly instructions

BLACK RED WHITE STYLIUS B169-SZF2D2S Assembly

BLACK RED WHITE

BLACK RED WHITE STYLIUS B169-SZF2D2S Assembly

atmosphera Chrysa 131161 instruction sheet

atmosphera

atmosphera Chrysa 131161 instruction sheet

Lightolier FRX Series Specifications

Lightolier

Lightolier FRX Series Specifications

Teknik Boulevard Cafe 5427345 Instruction booklet

Teknik

Teknik Boulevard Cafe 5427345 Instruction booklet

Naterial ORION ALPHA II 3276007278811 Assembly manual

Naterial

Naterial ORION ALPHA II 3276007278811 Assembly manual

Argent Edo ED10SF0401 installation instructions

Argent

Argent Edo ED10SF0401 installation instructions

Next ELMIR NAT FIX 4 M60921 Assembly instruction

Next

Next ELMIR NAT FIX 4 M60921 Assembly instruction

Westwood Design TRIBECA Assembly instruction

Westwood Design

Westwood Design TRIBECA Assembly instruction

Tenzo 1323 Assembly instruction

Tenzo

Tenzo 1323 Assembly instruction

Mocka Harlin Kids Bedside Table Assembly instructions

Mocka

Mocka Harlin Kids Bedside Table Assembly instructions

Arthauss Furniture INES WIT50 Assembly instruction

Arthauss Furniture

Arthauss Furniture INES WIT50 Assembly instruction

modway EEI-3678-NAT-TAU manual

modway

modway EEI-3678-NAT-TAU manual

Rauch AC358.0DL7 Assembly instructions

Rauch

Rauch AC358.0DL7 Assembly instructions

manuals.online logo
manuals.online logoBrands
  • About & Mission
  • Contact us
  • Privacy Policy
  • Terms and Conditions

Copyright 2025 Manuals.Online. All Rights Reserved.