Korpinen 21273113-00 User manual

D012219
Manual
21273113-00 Royal basin manual lifter
installation guide

D012219
Manual
Description
ID
Item Revision
D012219
A.3
Type
Installation instructions
Subject
Owner
korpinen_admin
Owning Group
Korpinen

D012219
Manual
1
Symbols used in this manual
Warning!
Indication of potentially hazardous situation. If not
avoided, it can result in serious injury or death.
Caution!
Indication of potentially hazardous situation which may
result in minor or moderate injury.
It may also be used to alert against unsafe practices.
Notification!
This symbol is used to notify correct use and handling of
the product.
General safety
This manual must be read and understood before use and
installation. Always keep this manual in close proximity of
the product.
The use, installation and service of this product must follow
this manual to avoid accidents and serious personal injury.
Never use or handle this product in other ways specified in
this manual as it can result in personal safety hazards and/or
cause damage to the product.
Persons installing and/or using this product either as
operator or user should have the necessary safety
information and access to this manual.
If the supply cord is damaged, it must be replaced by the
manufacturer, its service agent or duly qualified designated
persons in order to avoid a hazard.

D012219
Manual
2
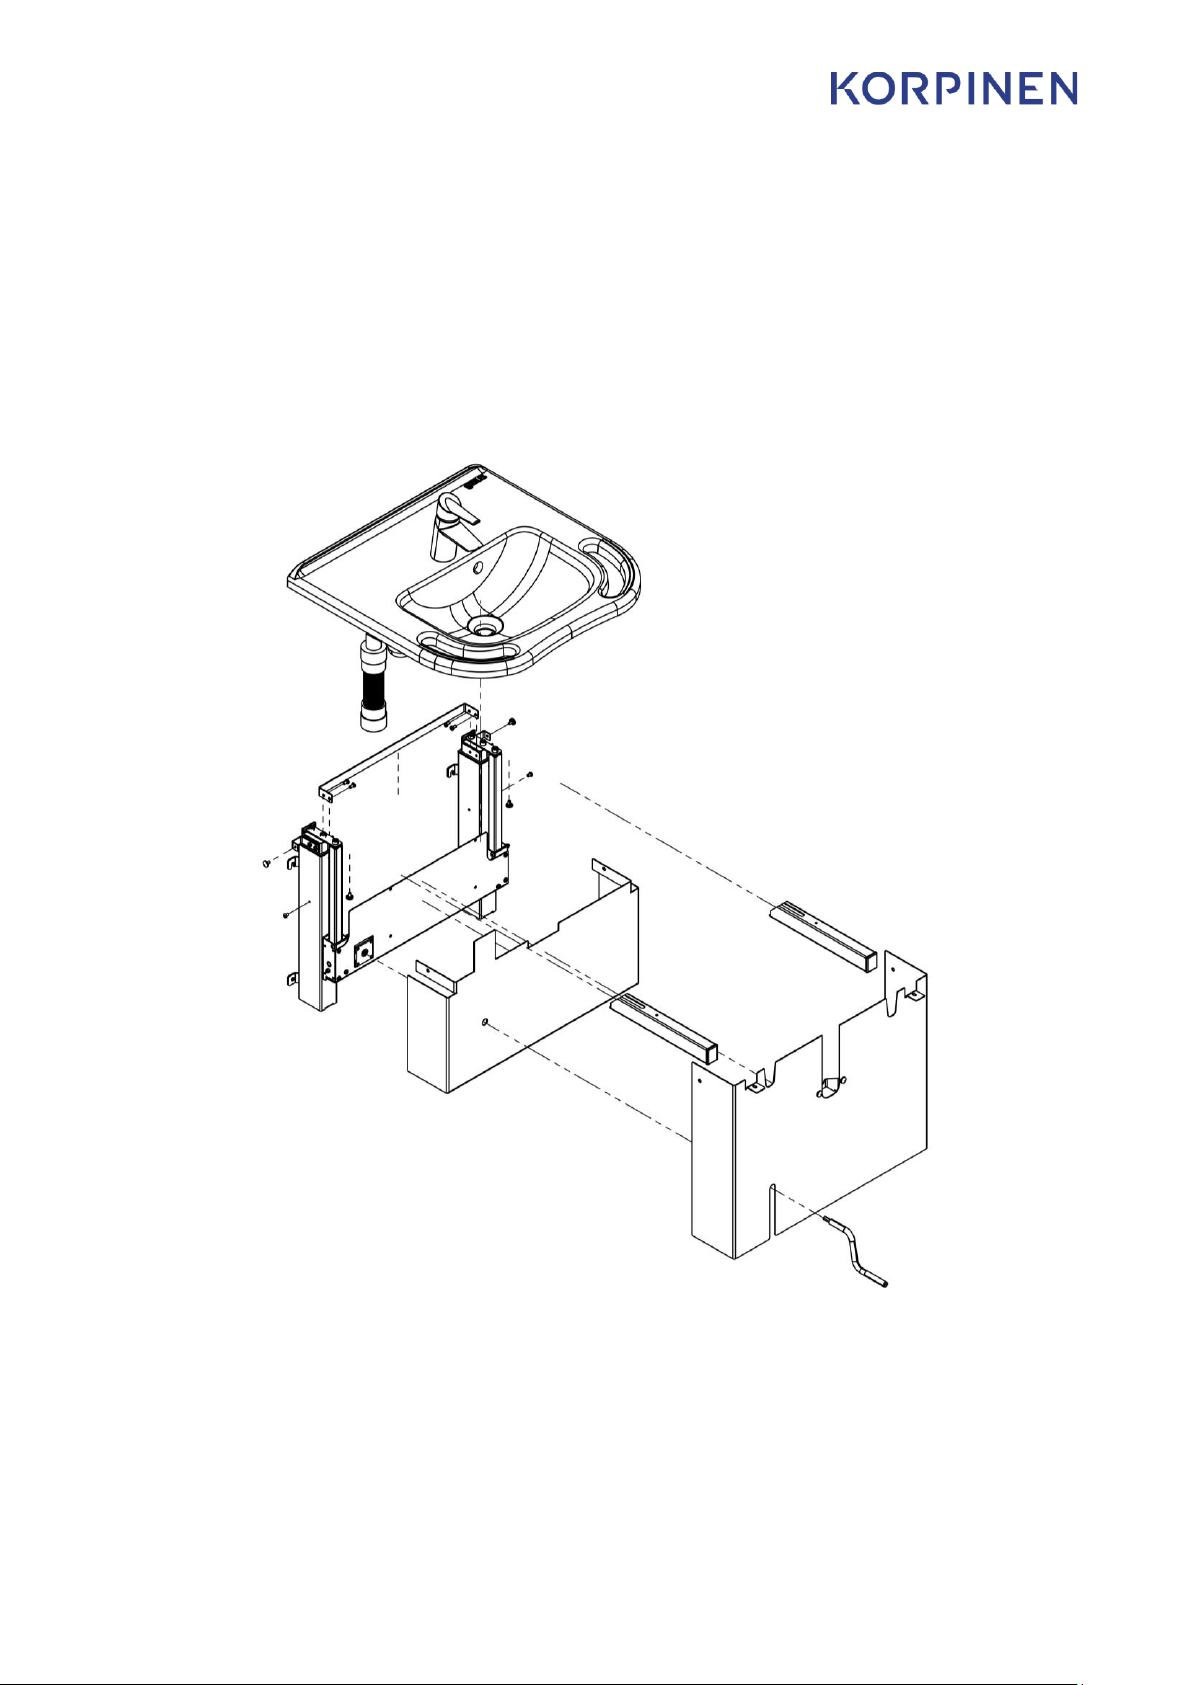
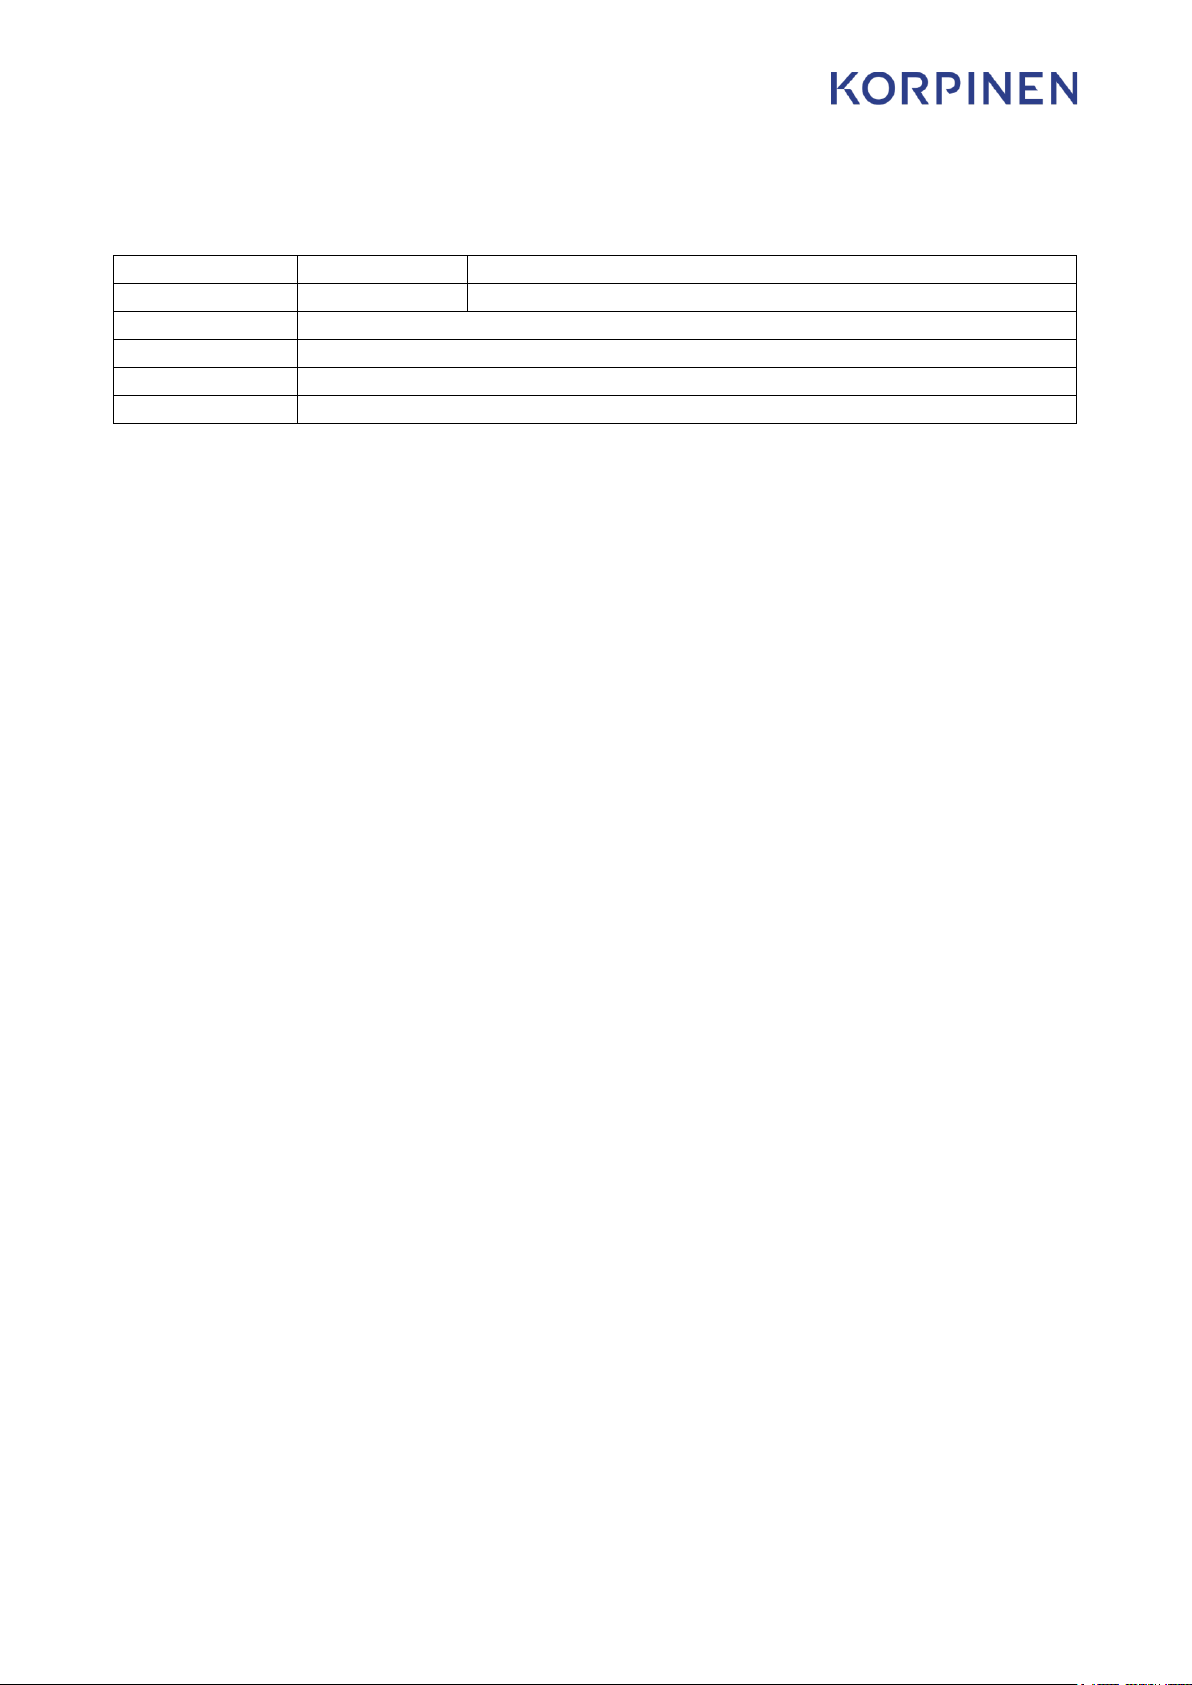
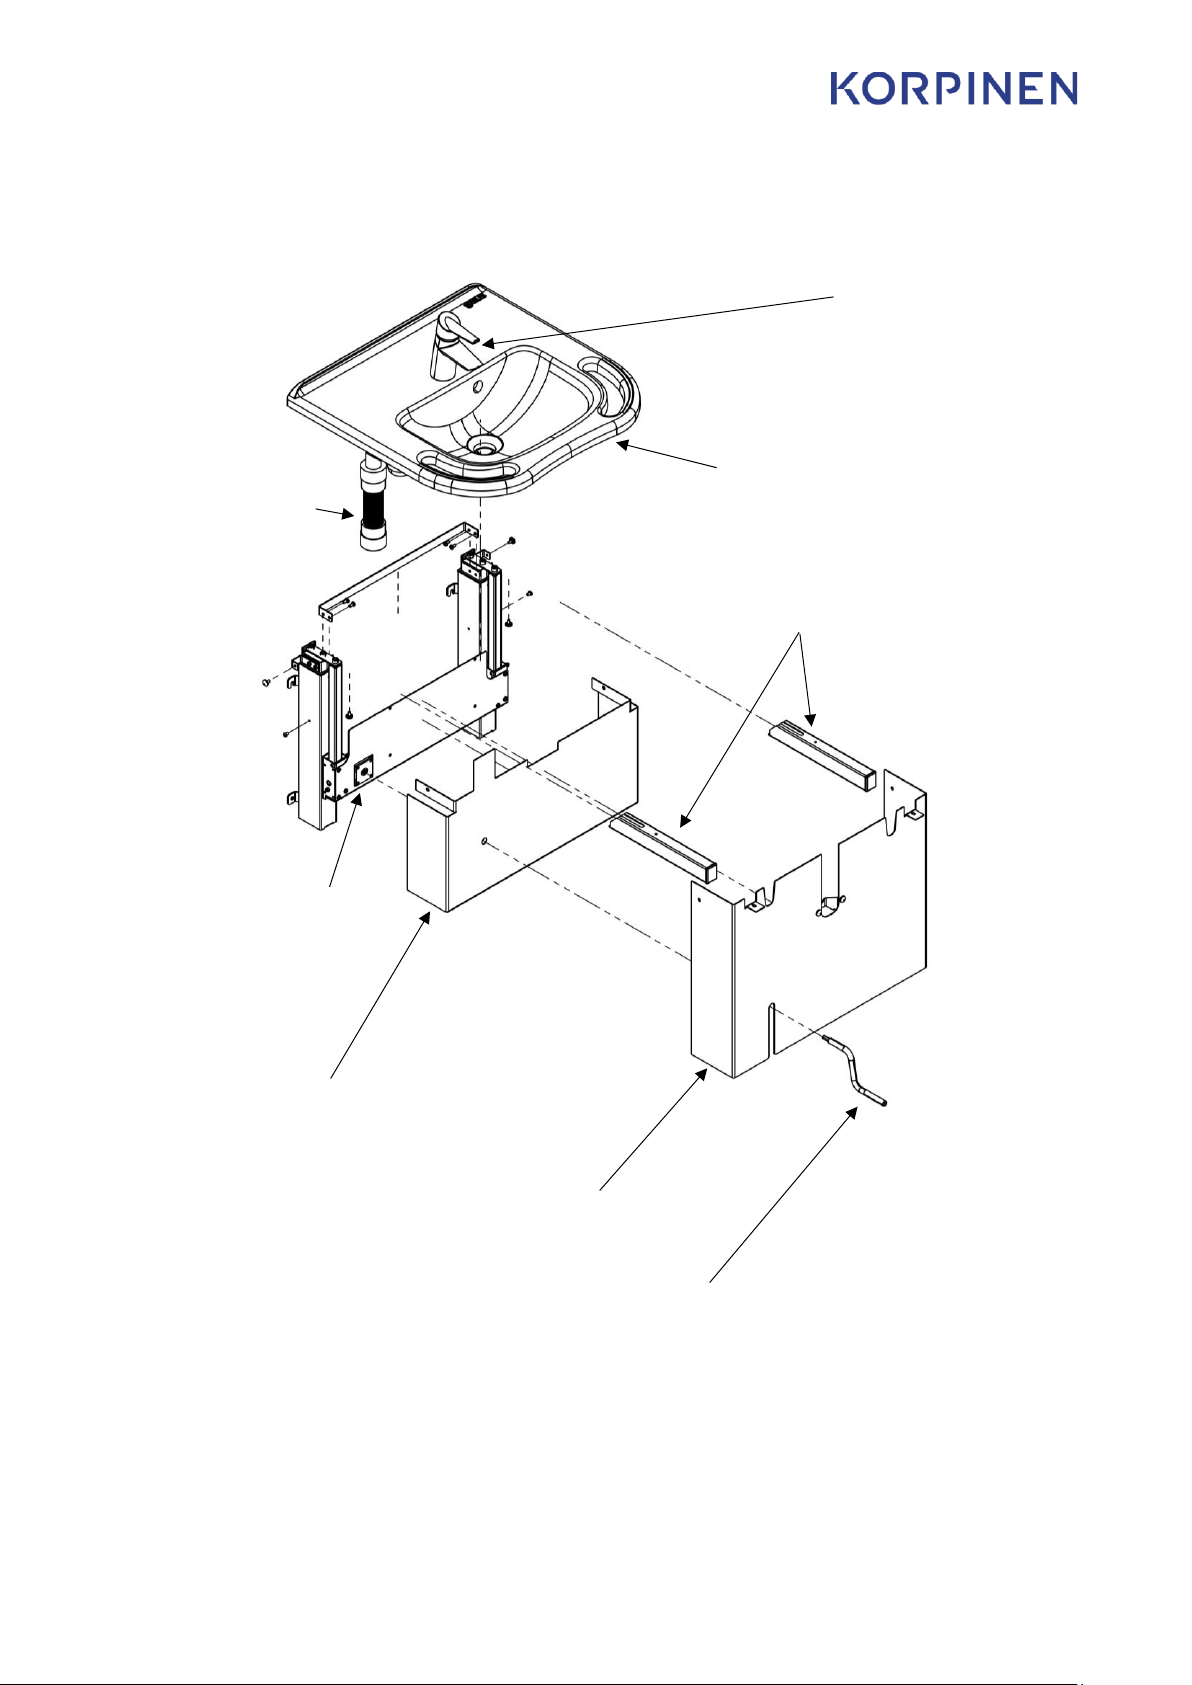
Do not perform unauthorized repairs, disassembly or
assembly operations, add-ons, re-adjustments or
modification of the product beyond what is described in
this manual. Any use, modification or adjustment not
described in the most recent approved revision of the
manual is strictly forbidden. Do not perform service while the
product is connected to the mains power.
This appliance can be used by children aged from 8 years
and above and persons with reduced physical, sensory or
mental capabilities or lack of experience and knowledge if
they have been given adequate supervision or instruction
concerning the safe use of the appliance and they
understand the hazards involved. Children shall not play
with the appliance. Cleaning and user maintenance shall
not be performed by children without supervision.
Do not use the product if it has defects or signs of damage
are present. If the device makes unusual noise or smells,
switch off the mains voltage immediately.
Take care that the cables are not damaged. Unplug the
mains cable on mobile equipment before it is moved.
The products must only be used in an environment that
corresponds to their IP protection.
The information in this manual is based on correct
installation in accordance with installation instructions for
this product.
Korpinen cannot be held liable if the product is used in any
way that differs from stated in this manual and/or
installation instruction. Korpinen reserves the right to amend
this manual and reference documents without prior notice.

D012219
Manual
3
Product label symbols
This product is CE-marked in accordance with:
Council Directive 2006/42/EC on machinery
Council Directive 2011/65/EU, RoHS
Manufacturer name and address
Date of production
Stock number
Serial number
Consult manual before use
Operating interval of electrically operated equipment. The use of
electrical height adjustable equipment can run at maximum 2
minutes, followed by an 18-minute break.
Type B applied part. The product complies with IEC 60601-1
requirements to provide protection against electric shock.
Consult manual for important safety related information, warnings,
and safety precautions.
Class II, double isolated electrical components.
Do not dispose as unsorted municipal waste. Product must be
returned to a designated recycling station.
Mobile phones or other portable RF emitting equipment should be no
closer to the product than 30cm.
Operating and storing temperatures may not exceed 5-40°C

D012219
Manual
4
Exploded view
1 pcs. Lifting unit
1 pcs. 622712/
622713 Royal
basin (Sold
separate)
1 pcs. Bottom
cover
1 pcs. Top cover
1 set Basin
support arms
1 pcs. 13982
Drain pipe (sold
separate)
1 pcs. Faucet
with 350 mm
flexible tubing
(Sold separate)
1 pcs. Crank
NOTICE! Mounting hardware
sold separate
Korpinen part no. 6219-Z
Or 8 pcs. Full thread 8x60mm
deck screws with adequate
wall plugs

D012219
Manual
5
Figure 1. Plumbing & mounting hole placement
Drain area
Water inlets
IMPORTANT NOTICE! Floor drain should extend at least 235 mm from the floor.
Tube diameter 32 –40 mm. Tube center distance from wall 50-60 mm.

D012219
Manual
6
Figure 2. External dimensions and minimum reinforced area (Plywood 20 mm with full thread screws)

D012219
Manual
7
1. Install the basin support arms and tighten the mounting
screws
Before tightening, make
sure the support arms are
mounted as far as they
will go.

D012219
Manual
8

D012219
Manual
9
2. Predrill all necessary holes and install the top mounting
screws into the wall.
IMPORTANT NOTICE!
Please leave a 10mm
gap between the wall
and the screw head.
NOTICE! Mounting
hardware not included
Korpinen part no. 6219-Z
NOTICE! If the wall
material requires the
use of a wall plug,
silicone caulk should
be used in the holes.

D012219
Manual
10
3. Lift the basin lifter on top of the top screws in the wall.
Using a spirit level, ensure that the unit is installed level.
When the unit is level, tighten the top screws; insert and
tighten the bottom screws. Test the lifter before adhering
the basin.
IMPORTANT NOTICE! Use
a spirit level to ensure
the unit is installed level
IMPORTANT NOTICE! Test
the unit before moving
to the next step.
IMPORTANT NOTICE! While testing, keep hands
and tools away from the open mechanism.

D012219
Manual
11
4. Assemble the faucet, basin and plumbing

D012219
Manual
12
IMPORTANT NOTICE!
Use a faucet with
flexible water inlet
tubing with a length
of 350 mm.
NOTICE! 13982 Flexible
drain pipe sold separate.
NOTICE! Air lock must
be pressed and fixed
to the top position
with a cable tie.
Flexible drain pipe
must be held in place
with hose clamps.

D012219
Manual
13
5. After testing the unit and cleaning the underside of the
basin; remove the shipping support, adhere the basin to
the lifter frame and install the plumbing.
IMPORTANT NOTICE! The
bond will be permanent.
Before continuing, allow
the adhesive to cure
according to the
manufacturer’s
instructions
Use Sikaflex FC11 to
adhere the basin.
Clamp the basin to the
frame to ensure a good
bond
Remove the shipping
support after mounting
the unit.

D012219
Manual
14
IMPORTANT NOTICE! Make
sure to leave a 5 –8 mm
gap between the basin
and any walls next to it

D012219
Manual
15
IMPORTANT NOTICE! The
water inlet points must
not protrude more than
45 mm from the wall. The
openings must point
towards the floor
Hose: L500 G1/2
or Total L650-
700mm
2x Hose
brackets
13970 Water hoses,
connectors and
brackets package
(sold separate)
contains: 2 pcs.
Hose L500 G1/2, 2
pcs. G1/2 10mm
Cut-off valves (not
visible in the
picture) and 2 pcs.
Hose brackets
Drain
area
IMPORTANT NOTICE! Floor
drain should extend at
least 235 mm from the
floor. Tube diameter 32 –
40 mm. Distance from wall
50 - 70 mm

D012219
Manual
16
6. Install the bottom cover
IMPORTANT NOTICE!
Mind the bottom
screws when sliding
the bottom cover to
place; remember to
tighten the bottom
screws.

D012219
Manual
17
7. Install the top cover and crank. Test the unit to ensure full
functionality.
Table of contents
Popular Bathroom Aid manuals by other brands

NRS Healthcare
NRS Healthcare M48787 Technical data sheet

Gordon Ellis & CO
Gordon Ellis & CO ASHBY 6218/B manual

Invacare
Invacare 91-2 Assembly, installation and operating instructions

EZee Life
EZee Life CH3060 manual

Direct Healthcare Group
Direct Healthcare Group Linido LI2603.3 Series manual

Pressalit
Pressalit R9430 Mounting instruction