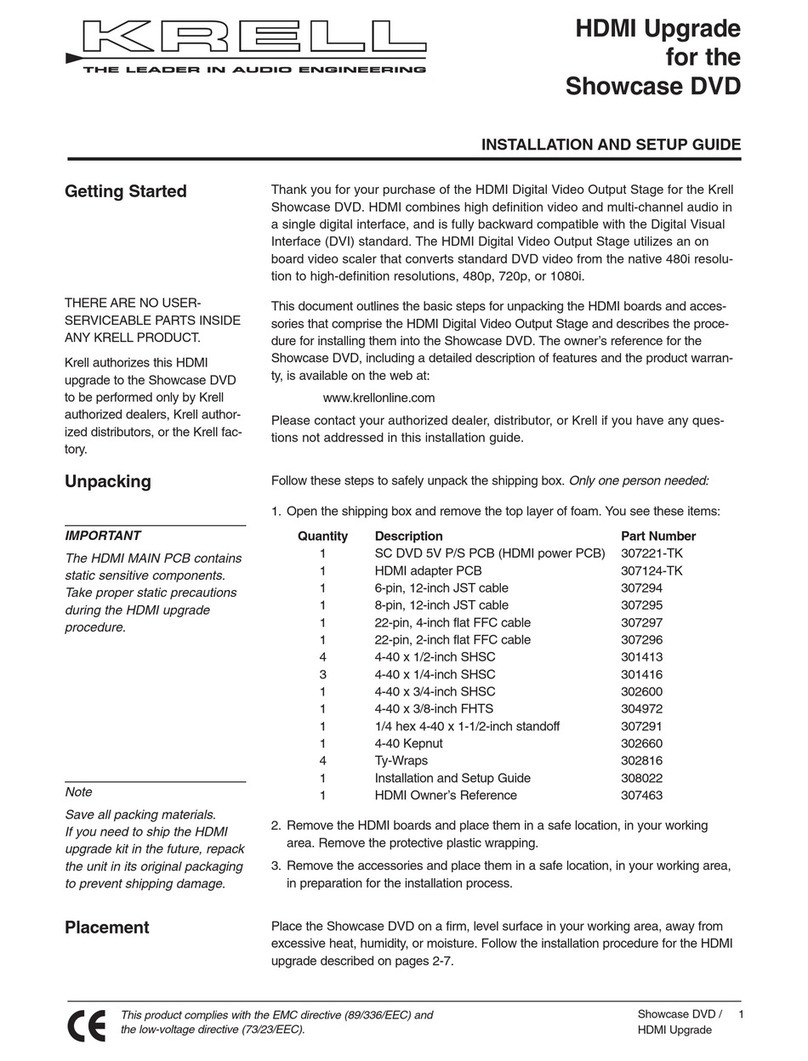
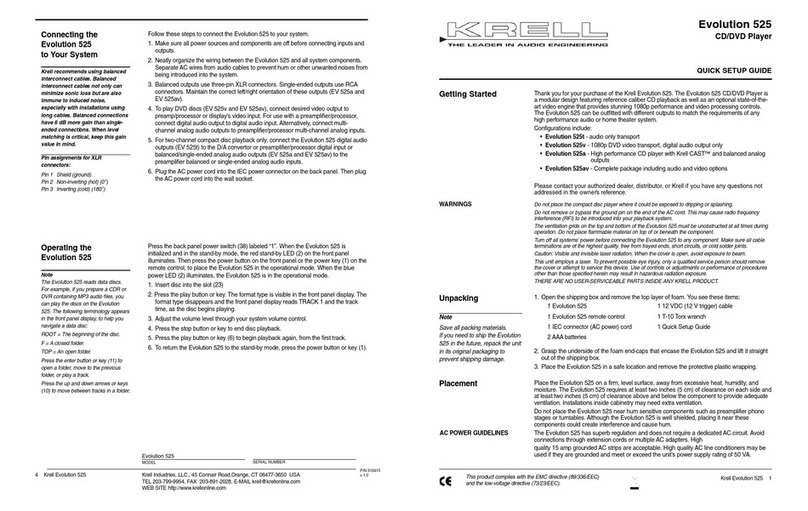
Krell Industries Showcase DVD User manual

Follow these steps to safely unpack your Showcase DVD:
1. Open the shipping box and remove the top layer of foam. You see these items:
1Krell Showcase DVD
1AC power cord
112 VDC (12 V trigger) cable
2. Grasp the underside of the foam end-caps that encase the Showcase DVD and
lift it straight out of the shipping box.
3. Place the Showcase DVD in a safe location and remove the end-
caps and protective plastic wrapping.
Only one person needed.
Showcase DVD
Digital Video Disc Player
QUICK SETUP GUIDE
Getting Started
THE LEADER IN AUDIO ENGINEERING
Thank you for your purchase of the Krell Showcase DVD. Your new digital video
disc player features progressive scan video connections as well as standard com-
ponent, S-Video, and composite video connections and allows you to seamlessly
integrate the Showcase DVD with the highest quality video display devices. A
substantive and carefully regulated power supply results in picture stability, even
during line fluctuations. Advanced drive mechanisms results in superior disc read-
ing capabilities.
The wireless infrared remote control, the RS-232 and12 VDC back panel remote
connections, and the optional HDMI out connection allow you to integrate the
Showcase DVD into advanced control systems. The user-friendly setup menu pro-
vides a variety of audio, video, and access control options for optimum configuration
and enjoyment of your Showcase DVD and home theater system.
This document outlines the basic steps for unpacking, placing, connecting, and oper-
ating the Showcase DVD. The owner’s reference for this product, including a
detailed description of features and the product warranty, is available on the web at:
www.krellonline.com
Please contact your authorized dealer, distributor, or Krell if you have any ques-
tions not addressed in the owner’s reference.
Do not place the Showcase DVD where it could be exposed to dripping or splashing.
Do not remove or bypass the ground pin on the end of the AC cord. This may cause radio fre-
quency interference (RFI) to be introduced into your playback system.
The ventilation grids on the top and bottom of the Showcase DVD must be unobstructed at all
times during operation. Do not place flammable material on top of or beneath the component.
Turn off all systems’ power before connecting the Showcase DVD to any component. Make
sure all cable terminations are of the highest quality, free from frayed ends, short circuits, or
cold solder joints.
Caution: Visible and invisible laser radiation. When the cover is open, avoid exposure to beam.
This unit employs a laser. To prevent possible eye injury, only a qualified service person should
remove the cover or attempt to service this device. Use of controls, adjustments, or perfor-
mance of procedures other than those specified herein may result in hazardous radiation expo-
sure.
WARNINGS
THERE ARE NO USER-SERVICE-
ABLE PARTS INSIDE ANY KRELL
PRODUCT.
Krell Showcase DVD 1
Unpacking
Note
Save all packing materials.
If you need to ship the
Showcase DVD in the future,
repack the unit in its original
packaging to prevent
shipping damage.
Krell Industries, Inc., 45 Connair Road,Orange, CT 06477-3650 USA
WEB SITE http://www.krellonline.com
Connecting
the Showcase DVD
to Your System
Placement Place the Showcase DVD on a firm, level surface, away from excessive heat,
humidity, or moisture. The Showcase DVD requires at least two inches (5 cm) of
clearance on each side and at least two inches (5 cm) of clearance above and
below the component to provide adequate ventilation. Installations inside cabinetry
may need extra ventilation.
AC Power Guidelines. The Showcase DVD has superb regulation and does not
require a dedicated AC circuit. Operate the Showcase DVD only with the power cord
supplied.
Avoid connections through extension cords or multipleAC adapters. High quality 15
amp grounded AC strips are acceptable. High qualityAC line conditioners or filters
may be used if they are grounded and meet or exceed the unit’s power supply rating
of 100 VA.
Krell recommends using balanced interconnect cables. Balanced interconnect
cables not only can minimize sonic loss but are also immune to induced noise, espe-
cially with installations using long cables. Balanced connections have 6 dB more
gain than single-ended connections. When level matching is critical, keep this gain
value in mind.
Follow these steps to connect the Showcase DVD to your system.
1. Make sure all power sources and components are off before connecting inputs
and outputs.
2. Neatly organize the wiring between the Showcase DVD and all system compo-
nents. Separate AC wires from audio cables to prevent hum or other unwanted
noises from being introduced into the system.
3. Connect the input of your video components to the appropriate output of the
Showcase DVD.
4. Connect the balanced or single-ended analog outputs.
5. Plug the AC power cord into the IEC connector (39) on the back panel, then plug
the AC power cord into the wall socket.The red stand-by LED (3) on the front
panel illuminates.
The Showcase DVD is shipped ready to play when it is connected to a home theater
system and plugged into AC power.
1. Press the power button on the front panel or the power key (1) on the remote.
The blue power LED (2) illuminates, and the red stand-by LED (3) turns off. The
Showcase DVD is in the operational mode, and the disc transport (12) is active.
2. Press the open/close button or key (11) to open the disc transport.
3. Place the disc on the transport.
4. Press the open/close button or key again to close the disc transport.
5. Press the play button or key (8) to start playing the disc. Playback begins from the
first title or track.
6. Press the stop button or key (7) to end disc playback.
7. To turn the Showcase DVD off, press the power button on the front panel or the
power key on the remote. The red stand-by LED illuminates and the Showcase
DVD is in the stand-by mode.
Status box. Astatus box appears briefly in the upper left of the video monitor, when
a disc is playing while a feature is selected. If the box contains an X, the feature
selected is not available.
4 Krell Showcase DVD
Your Showcase DVD product serial number is:
This product complies with the EMC directive (89/336/EEC) and
the low-voltage directive (73/23/EEC).
P/N 306988
v 03.0
1remote control
1CR2025 lithium battery
1 Quick Setup Guide
Operation
Notes
Krell recommends leaving the
Showcase DVD in the stand-by
mode when not playing a disc.
Do not attach enhancement
accessories such as rings, mats,
or dampers to individual discs.
These accessories may interfere
with the disc transport, resulting
in erratic playback and/or poor
performance.
Showcase DVD Compatible
Disc Formats Include:
DVD, DVD-R, CDDA, CD-R,
CD-RW, DVD+RW, MP3, VCD
Note
When powering up any system,
always turn amplifiers on last.
When powering down, always
turn amplifiers off first.
Note
The Showcase DVD has an
advanced suspension system
and does not require additional
mass coupling or isolation.
Experiment with feet or cones as
long as they are not permanent-
ly affixed to the unit.Any unau-
thorized modifications to the unit
or electronics void the warranty.
2 Krell Showcase DVD Krell Showcase DVD 3
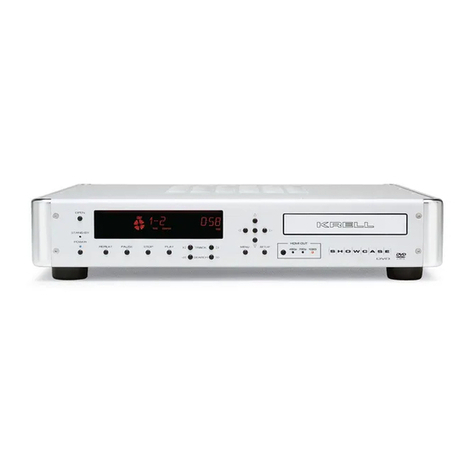
Figure 1 The SHOWCASE DVD Front Panel
1
11 6
58
710
917
16
12
14
19
18
413
32
15
Figure 2 The Showcase DVD Remote
DispRet
Title Menu
A-B
Repeat
Setup
87
432
SubtitleAudio AnglePower
Prog
6
Clr09
5
1
122
21
17
5
25
16
not active*
23
14
15
not active*
9
10
24
20
8
6
7
26
11
not active*
*This key does not activate a function
on the Showcase DVD.
Figure 3 The Showcase DVD Back Panel
27 28
40 41 32
30 29 31 33 34
35
37
36
38 39
This product is manufactured in the United States of America. Krell®is a registered trademark of Krell Industries, Inc., and is restricted for use by Krell
Industries, Inc., its subsidiaries, and authorized agents. Krell Current Mode™and Krellcoat™are trademarks of Krell Industries, Inc. HDMI, the HDMI logo, and
High-Definition Multimedia Interface are trademarks or registered trademarks of HDMI Licensing LLC. "DTS" and "DTS Digital Out" are registered trademarks of
Digital Theater Systems, Inc. Manufactured under license from Dolby Laboratories. "Dolby," and the double-D symbol are trademarks of Dolby Laboratories.
DCDi” is a trademark of Faroudja, a division of Sage, Inc. All other trademarks and tradenames are registered to their respective companies.
©2003 by Krell Industries, Inc., All rights reserved
This product incorporates copyright protection technology that is protected by method claims of certain U.S. patents and other property rights owned by
Macrovision Corporation and other rights owners. Use of this copyright protection technology must be authorized by Macrovision Corporation, and is intended
for home and other limited viewing uses only unless otherwise authorized by Macrovision Corporation. Reverse engineering or disassembly is prohibited.
Front Panel
and Remote
Back Panel
DISC FUNCTIONS, continued
Repeat, continued
REPEAT OFF Clears the
repeat function.
6Pause Button or Key
Pauses disc playback.
The video status box
indicates PAUSE in the
top right corner.To
resume playback as sin-
gle frame stills, press the
pause button again. To
resume normal play-
back, press the play but-
ton or key (8).
7 Stop Button or Key
Stops DVD playback.
8Play Button or Key
Begins or resumes DVD
playback.
9Track Forward and
Back Button or Key
Selects the track that
follows or precedes the
current track.
10 Search Forward and
Back Button or Key
Accesses two fast for-
ward or two fast back-
ward playback modes,
while in the play mode.
Press once to access
the first mode. Press
again to access the sec-
ond mode. While in the
pause mode, press once
to access one fast for-
ward or backward play-
back mode.
11 Open/Close Button
or Key
Opens and closes the
disc transport.
12 Disc Transport
Holds the disc.
POWER
1Power Button and Key
Switches the Showcase
DVD between stand-by
and operational modes.
2Power LED
The blue power LED illu-
minates when the
Showcase DVD is in the
operational mode.
3 Stand-by LED
The red stand-by LED
illuminates when the
Showcase DVD is
plugged into a standard
AC wall receptacle,
indicating that the
Showcase DVD is in
the stand-by mode and
ready to be switched to
the operational mode.
4Front Infrared Sensor
Receives commands
from the Showcase DVD
remote. When the IR
Select Switch (37) is in
the up position, the front
infrared sensor is active.
For proper remote con-
trol operation, make sure
that nothing is obstruct-
ing the infrared sensor.
DISC FUNCTIONS
5Repeat Button or Key
Repeat the currently
playing chapter, repeat
chapters in a current
title, or repeat the entire
disc.
DISC FUNCTIONS, continued
13 Front Panel Display
Shows currently playing
title and chapter num-
bers, elapsed time, and
repeat mode.
14 Directional Buttons
or Keys
Navigate the disc menu
and setup menus.
15 Enter Button or Key
Selects menu items,
program items, returns
to previous setup menu,
and suppresses setup
menu.
16 Menu Button or Key
Accesses the disc
menu. The directional
buttons or keys navi-
gate the menu (14).
17 Setup Button or Key
Accesses the setup
menu, to configure dis-
play, audio, language,
parental control, and
other functions. Press
the setup button or key
again to exit the setup
menu.
18 HDMI Button
(Optional, located on
front panel only)
Scrolls through avail-
able resolutions.
19 HDMI LEDs
(Optional, located on
front panel only)
Illuminated LED indi-
cates component video
format and resolution of
signal/video display.
Remote
Only
ADVANCED DISC
FUNCTIONS
20 Audio Key
Cycles between lan-
guages on the disc
soundtrack.
21 Subtitle Key
Activates subtitles on
the currently playing
disc.
22 Angle Key
Selects alternate cam-
era angles, when they
are available on the
disc.
23 Title Key
Access the title number.
ANALOG AUDIO
OUTPUTS
27 Left and Right
Balanced Audio
Outputs
One pair via XLR con-
nectors.
28 Left and Right Single-
ended Audio Outputs
One pair via RCA con-
nectors.
STANDARD VIDEO
OUTPUTS
29 Composite Standard
Video Output
One composite standard
video output via an RCA
connector.
30 S-Video Standard
Video Output
One S-video output via
a 4 pin mini-DIN
connector.
31 Component Standard
Video Output
One component stan-
dard video output via
RCA connectors.
Component video uses
three wires (labeled Y,
Pb, and Pr on the back
panel) to convey the
video signal.
Note
The Showcase DVD auto-
matically switches to NTSC
or PAL, depending on the
disc format. The default
standard is preset, and not
selectable by the user.
PROGRESSIVE SCAN
VIDEO OUTPUT
32 Progressive Video
Output Pr, Pb, Y.
One progressive video
output via RCA connec-
tors.
DIGITAL AUDIO
OUTPUTS
33 Optics Digital Output
One EIAJ optics digital
audio output via a
TosLink connector.
34 Coaxial Digital Output
One S/PDIF coaxial digi-
tal audio output via an
RCA connector.
BACK PANEL
REMOTE
CONNECTIONS
35 RS-232
Communication Port
For application develop-
ers who want to control
the Showcase DVD
using an external com-
puter-based device. For
more information, see
RS-232 Port: Sending
Commands and
Interpreting Data, the
developer’s reference
shipped with the
Showcase DVD.
36 12 VDC In/Out
(12 V Trigger)
Allows you to turn the
Showcase DVD on, or
off, or to and from stand-
by from other compo-
nents.
REMOTE BACK PANEL
CONNECTIONS,
12 VDC In/Out, continued
Out. The output sends
12 VDC power on/off
signals to other compo-
nents and devices that
incorporate a 12 V trig-
ger.
In. The input receives
12 VDC power on/off
signals from other com-
ponents and devices
that incorporate a 12 V
trigger.
Notes
When the Showcase DVD
is in the operational mode,
12 VDC output provides
12 V of DC output. When
the Showcase DVD is in
the stand-by mode or off,
DC output is 0 V.
12 VDC Out (12 V trigger)
current is limited to 30 mA.
37 IR Select Switch
Front. The switch in the
up position indicates that
the front infrared sensor
is active.
Rear. The switch in the
down position indicates
that the back infrared
sensor is active.
38 Back Infrared Sensor
Receives commands
from the Showcase DVD
remote control.
POWER
39 IEC Connector
Use the provided IEC
standard 15 amp power
cord.
HDMI CONNECTION
(Optional)
40 AUDIO SYNC
Synchronizes audio and
video when using the
HDMI output (41). Turn
this function off, if you
are not using the HDMI
output.
41 HDMI OUT
Interfaces with an A/V
receiver or a video
monitor.
24 Numeric Keys
Press a numeric key to
select a disc track dur-
ing playback. The tool-
bar menu opens with
the cursor at the title
and chapter number
that is playing. Press
the numeric key for the
title and chapter num-
ber you want to play.
Playback resumes at
the selected title and
chapter.
PROGRAMMING
FUNCTIONS
25 A-B Key
Press this key to define
the start of a continuous
loop. Press again to
define the end of a con-
tinuous loop. Playback
begins immediately
and continues until you
press the A-B key a third
time, to clear the loop.
26 Prog(ram) Key
Programs tracks to play-
back in sequence .
Press this key to access
the FTS configuration
menu. Select a track,
and press enter. Use the
directional buttons or
keys (14) to add tracks.
Press the play button or
key (8) to begin play-
back of the sequence.
Setup Menu
Although the Showcase
DVD is shipped as an easy
to use, “plug and play”
component , the setup
menu allows you to access
and modify video, audio,
and playback functions.
After your DVD player is
connected to your system:
1. Access the setup menu
by pressing the setup
button on the front
panel or the setup key
(17) on the remote.
The setup menu
appears, including a
toolbar with the configu-
ration menus at the top,
and a help screen at the
bottom.
When you press the
down directional arrow
(14), a left hand column
including the categories
within each configura-
tion menu appears,
along with a right hand
column displaying the
items in each category.
When you press the
right directional arrow in
the item list, selections
appear for each item.
2. Modify the on screen
display (OSD) while the
disc is stopped.
3. Modify other functions
while the disc is playing.
You can configure the fol-
lowing menus on the tool-
bar, if the disc you are play-
ing allows access to them:
On screen display (OSD),
Subtitle, Language, Color,
Sound, Frame by Frame,
Slow Motion, Scan
Speeds, Camera Angle,
Enlarge Picture, Title ,
Chapter,Time Search, and
Favorite Track Selection.
For an expanded list of
functions and details on
how to use them, see the
Showcase DVD Owner’s
Reference Setup Menu
on the Krell website at:
www.krellonline.com
Navigating
the Setup Menu
Black menu items are the
current selection. Blue
menu items are available
selections. White menu
items are not selectable.
Use the directional arrows
on the front panel or
remote control (14) to navi-
gate the menu. The last
item selected is active.
Other manuals for Showcase DVD
5
Other Krell Industries DVD Player manuals

Krell Industries
Krell Industries Showcase DVD User manual

Krell Industries
Krell Industries DVD Player User manual

Krell Industries
Krell Industries DVD Standard Quick start guide

Krell Industries
Krell Industries S-350 User manual

Krell Industries
Krell Industries Showcase DVD Assembly instructions

Krell Industries
Krell Industries Evolution 525 User manual