www.kriptonite.com
Panno umido, sapone neutro.
Damp cloth, mild soap.
30 Kg
=
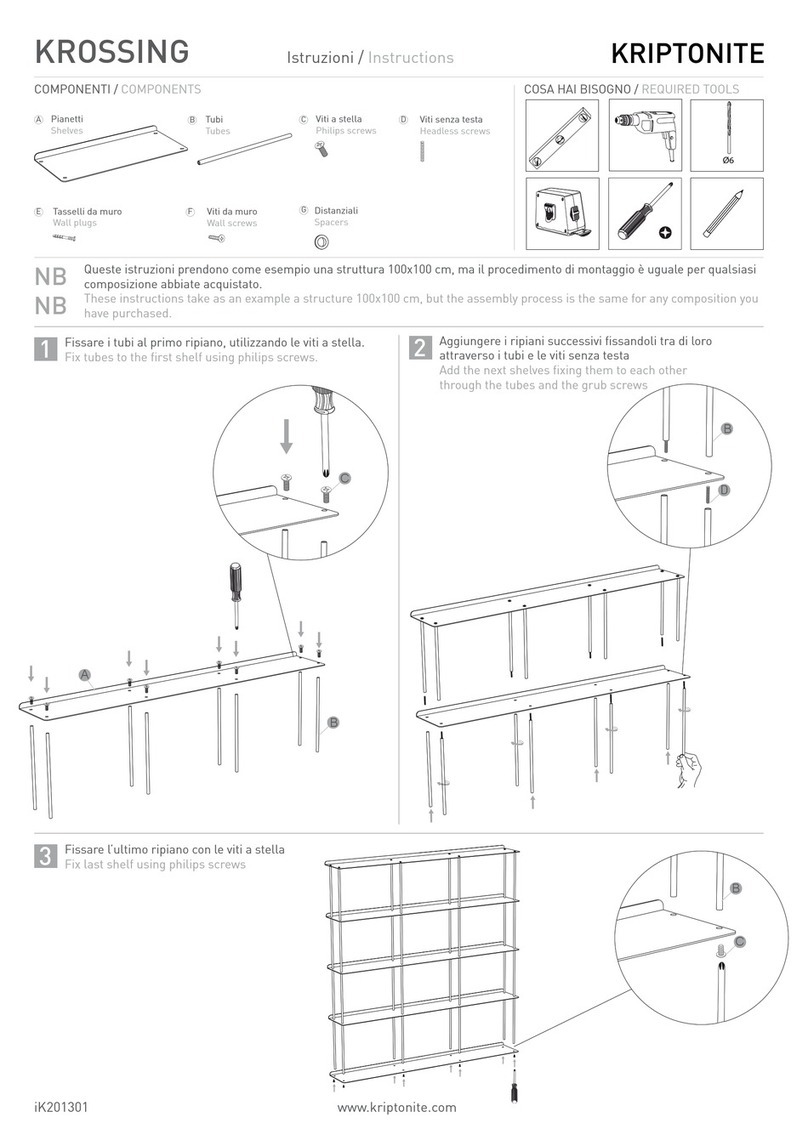
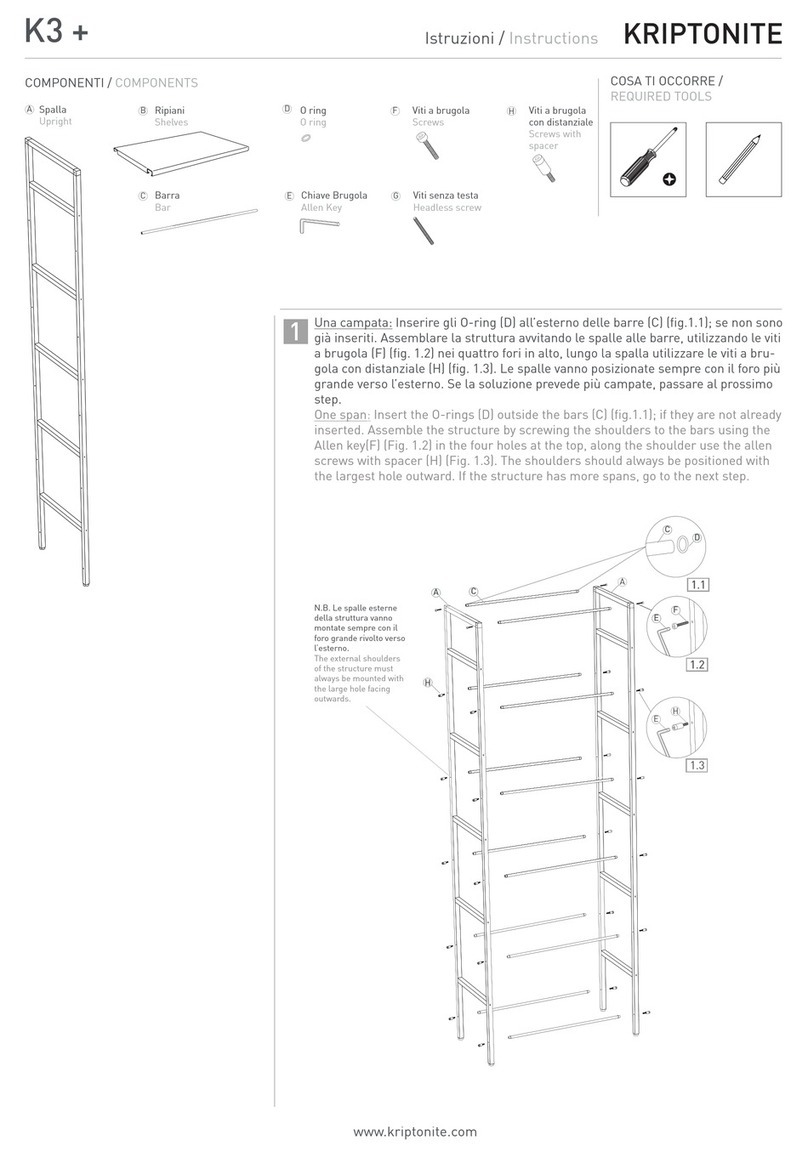
Due o più campate: Inserire gli O-ring (D) all’esterno delle barre (C)
(fig.2.1); se non sono già inseriti. Individua il lato esterno della prima
spalla, cioè quello con i fori più grandi. Avvitala alle barre tramite le
viti con testa a brugola (fig. 2.2). Nei fori della parte destra delle
barre, avvita per metà le viti senza testa (G), inserisci la seconda
spalla (Fig 2.3) e avvita i tubi della successiva campata. Procedi così
fino ad arrivare all’ultima spalla, la quale verrà chiusa con le viti a
brugola.
Two or More Spans: Insert the O-rings (D) outside the bars (C)
(fig.2.1); if they are not already inserted. Locates the outer side of the
first shoulder, that is, the one with the largest holes. Screw the bars
through the screws with the Allen head (Fig. 2.2). In the holes on the
right side of the bars, screw the headless screws (G) halfway, insert
the second shoulder (Fig. 2.3) and screw the bars of the next span.
Proceed until reaching the last shoulder, which will be closed with the
Allen screws.
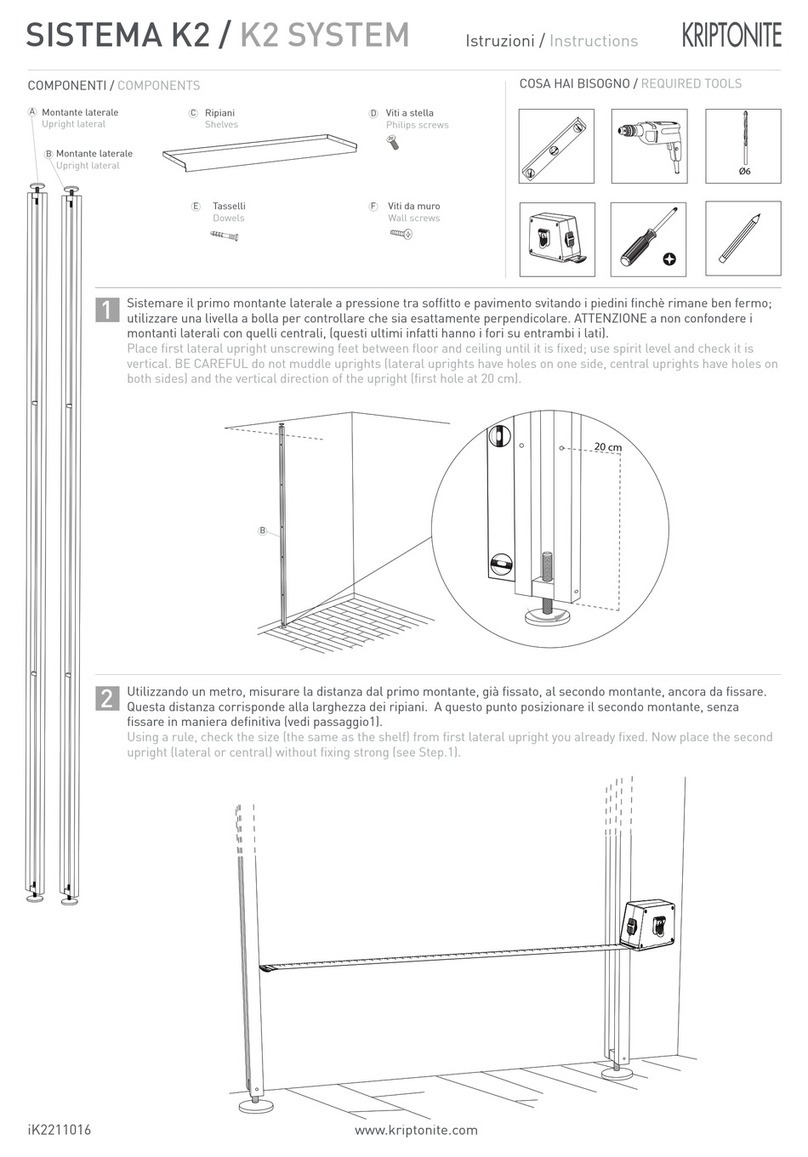
23Inserire i ripiani (B), incastrando la piega
frontale all’interno della barra e spingendo
la parte posteriore verso il basso. Regolare i
piedini (fig. 3.1)
Insert the shelves (C), fitting the front fold
on the bar and pushing the the back part
downwards. Adjust the feet (Img. 3.1)
Consiglio: Se devi fissare al struttura a parete, vai
direttamente al passaggio 4 prima di fissare i ripiani.
If you want to fix the structure to the wall, go directly to the
step 4 before fixing the shelves.
B
3.1
Fai attenzione ad
agganciare la
doppia piega del
ripiano, nella parte
frontale (Fig. 3.2)
Be careful to hook
the double fold of
the shelf to the
front. part of the
bookshelf (Fig. 3.2)
F
A
D
C
F
C
D
H
F
H
2.1 2.3
2.2
3.2


