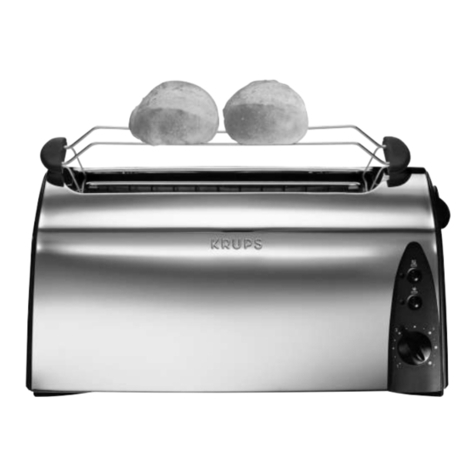
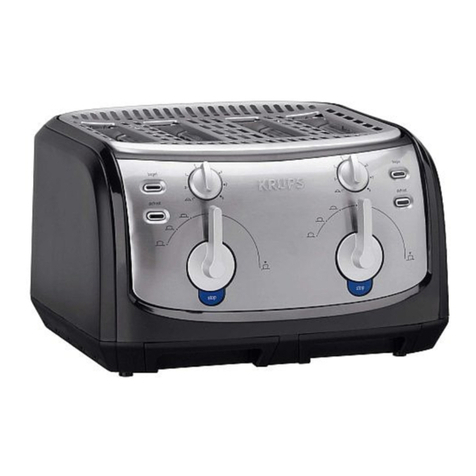
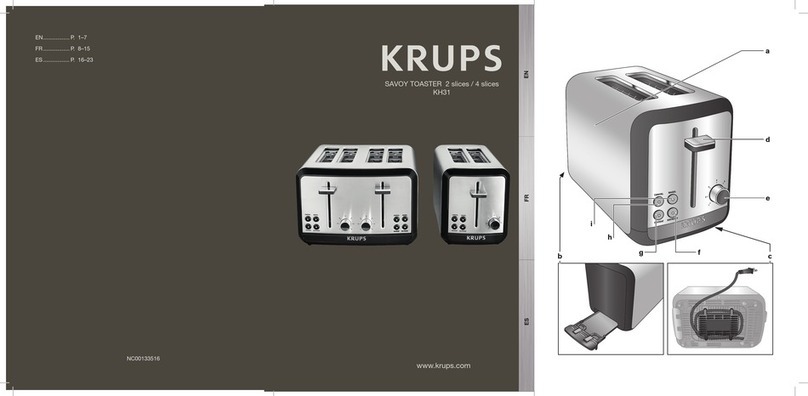
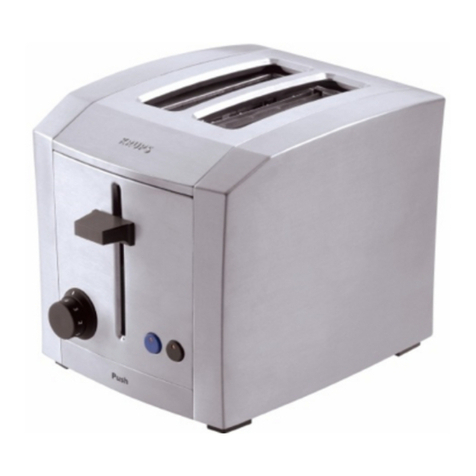
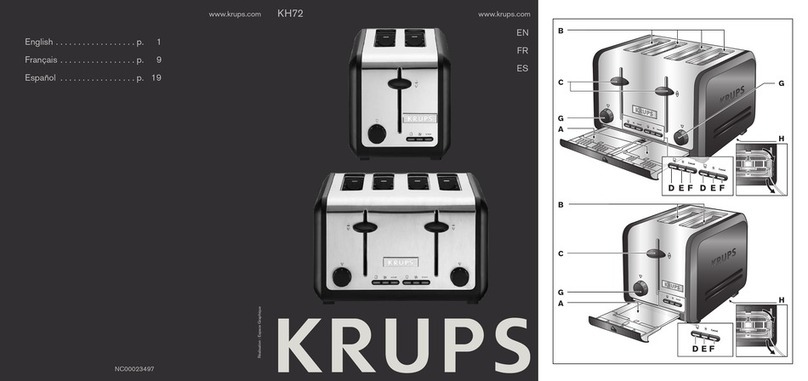
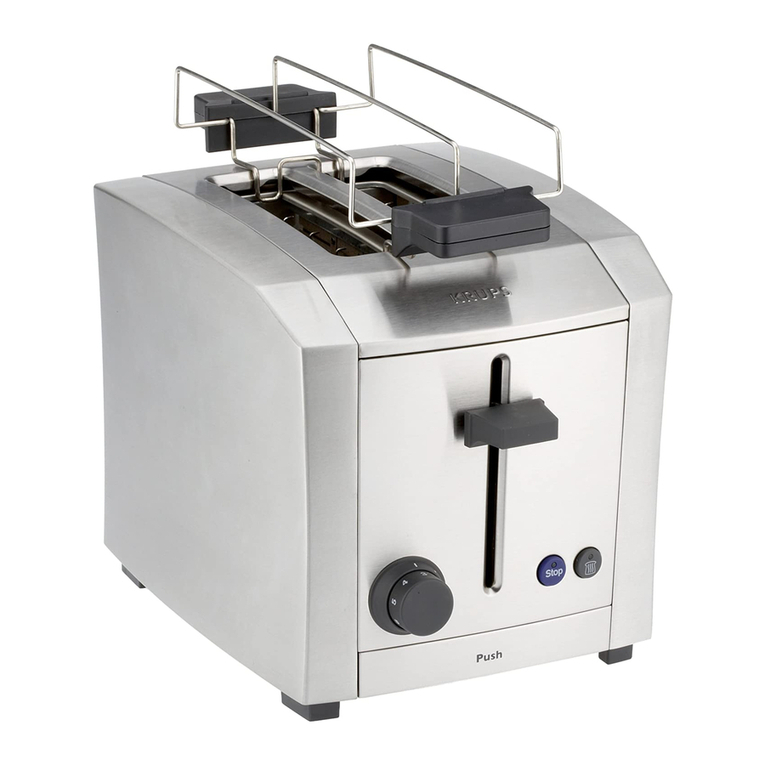
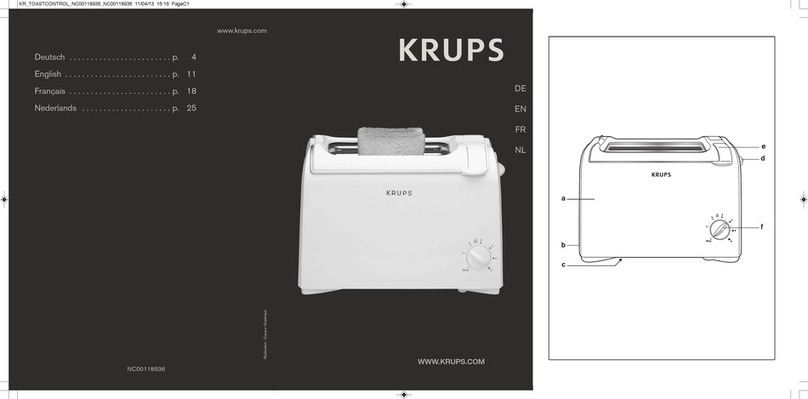
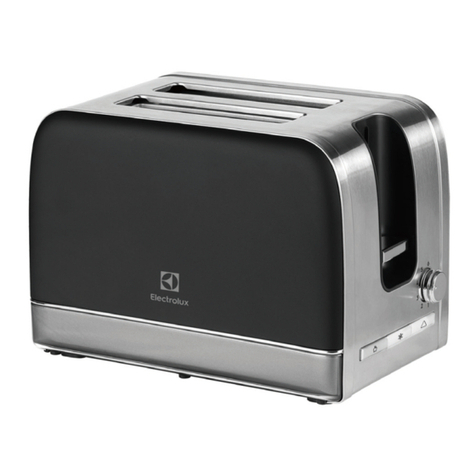
Krups KH442D User manual

C1 C2
NC00122252 - Réalisation : Espa e Graphique
www.krups.com
KH442
www.krups.com
DE
EN
FR
NL
ES
IT
PT
DA
FI
NO
SV
e
b
c
d
f
a
h
g
i
KR_TOASTER_PRELUDE_EO_NC00122252_Mise e page 29/04/14 14:05 PageC1

x3
1
2
fig. 3
fig. 1
fig. 4 fig. 5 fig. 6
fig. 2
fig. 7
fig. 12
fig. 9
fig. 10
fig. 8
fig. 11
2 1
auto
KR_TOASTER_PRELUDE_EO_NC00122252_Mise e page 29/04/14 14:05 PageC4

5
ACHTU G: Die Sicherheitshinweise sind Teil des Gerätes. Bitte lesen Sie die Anweisungen
und Sicherheitshinweise vor der Inbetriebnahme des Gerätes aufmerksam durch.
Bewahren Sie sie auf, damit Sie sie bei Bedarf schnell zur Hand nehmen können.
nEntfernen Sie sowohl innen als auch außen am Gerät die gesamte Verpackung und die
verschiedenen Zubehörteile.
nStellen Sie die Länge des Stromkabels durch Aufrollen unter dem Sockel ein. Klemmen Sie das
Stromkabel in der Nut fest (Abb. 1).
nSchließen Sie den Toaster an.
nUm eventuell vorhandene Fertigungsrückstände zu beseitigen, sollte der Toaster vor dem Erstgebrauch
1-2 mal auf höchster Röstgradeinstellung ohne Toastbrot betrieben werden (Raum lüften).
nToastscheiben in den Toaster geben (Abb. 2).
Keine zu großen und zu dicken Scheiben verwenden. Der Toast darf nicht im Schacht eingeklemmt
sein.
nStellen Sie den gewünschten Bräunungsgrad ein (Abb. 3).
nWählen Sie zwischen den 6 verschiedenen Bräunungsstufen aus. Stellen Sie dementsprechend den
Röstgradeinsteller ein:
Position 1 = schwach geröstet
Position 6 = sehr stark geröstet
nErst-Einstellung ausprobieren, da der Röstgrad abhängig vom Toastbrot und dessen Feuchtegehalt
ist. Bei Graubrot generell eine höhere Röstgradeinstellung wählen als bei Weißbrot. Stellen Sie den
Röstgradeinsteller auf eine niedrigere Stufe, wenn Sie z.B. nur eine Scheibe Brot rösten möchten.
Wichtig:
Trockenere Brotscheiben oder schon einmal getoastetes Brot bräunt schneller und kann sich
unter Umständen entzünden. Deshalb niedrigere Röstgradeinstellung wählen und Gerät
nicht unbeaufsichtigt lassen.
nAbsenktaste ganz herunterdrücken (Abb. 4).
Das Gerät geht an und die ST PP-Taste leuchtet auf. Der Hebel rastet nur dann ein, wenn der
Toaster angeschlossen ist.
nNach Beendigung des Toastvorgangs wird der Toast automatisch angehoben und das Gerät
ausgeschaltet (Abb. 5).
nNehmen Sie das Brot heraus. Sie können den Einschaltregler benutzen, indem Sie ihn bis zum
Anschlag anheben. Mit dieser Funktion kann das Brot leichter herausgenommen werden.
nZum Unterbrechen des aktuellen Toastvorgangs drücken Sie die Stopp-Taste (Abb. 6).
Hinweis:
Sollte sich eine Brotscheibe im Röstschacht verklemmt haben, etzstecker ziehen, Gerät
abkühlen lassen und dann die Toastscheibe vorsichtig lösen ohne die Heizelemente zu
berühren.
BESCHREIBUNG
aWärmeschutzmantel
bKrümelschublade
cKabelaufwicklung
dAbsenktaste
eBrötchenlift
fRöstgradeinsteller
gAuftau-Funktion
hAufback-Funktion
iStopp-Taste
V R DEM ERSTEN GEBRAUCH
INBETRIEBNAHME
DE
KR_TOASTER_PRELUDE_EO_NC00122252_Mise e page 29/04/14 14:06 Page5

6
Brötchenlift
nHeben Sie den Brötchenaufsatz an, indem Sie den entsprechenden Hebel für die
Brötchenaufwärmfunktion (e) herunterdrücken (Abb. 7).
nLegen Sie die Brötchen auf den Aufsatz und drücken Sie den Einschaltregler bis zum Einrasten
herunter. Gehen Sie nicht über die Position 2 hinaus. Schalten Sie das Gerät ein (Abb. 8).
nBitte beachten Sie beim Aufwärmen von Brötchen, dass sich die Brötchen und der Brötchenaufsatz
in der richtigen Position befinden (Abb. 9). Legen Sie die Brötchen zum Aufwärmen nicht direkt auf
den Toaster. Verwenden Sie den Brötchenaufsatz (e).
nUm ein besseres Ergebnis zu erhalten, empfiehlt es sich, die Brötchen umzudrehen und den
Toastvorgang zu wiederholen.
nNach dem Gebrauch senken Sie den Brötchenaufsatz ab, indem Sie den Hebel für die
Brötchenaufwärmfunktion anheben.
nDer Brötchenlift sollte nicht länger als 10 Minuten benutzt werden.
Auftau-Funktion
nDer Toaster ist mit einer vorprogrammierten Auftau-Funktion ausgestattet: Das Toasten von
tiefgekühltem Brot dauert länger als das Toasten von nicht tiefgekühltem Brot.
nLegen Sie eine oder zwei tiefgekühlte Brotscheiben oder Toasts in den Toaster (Abb. 10).
nStellen Sie den gewünschten Bräunungsgrad ein und drücken Sie den Hebel herunter (siehe
Abschnitt „BETRIEBSM DUS“).
nDrücken Sie die Taste „ “ (Abb. 10).
nDie Tasten „DEC NGELATI N“ (Auftau-Taste) und „ST P“ leuchten auf.
Aufback-Funktion
nDer Toaster ist mit einer vorprogrammierten Aufback-Funktion ausgestattet, um Brotscheiben oder
Toasts aufzuwärmen, ohne sie stärker zu rösten.
nDie Aufbackdauer ist automatisch, unabhängig von der Stellung des Einstellknopfs (etwa 30
Sekunden).
nLegen Sie die Brotscheiben oder Toasts in den Toaster und drücken Sie den Hebel herunter.
nDrücken Sie die Taste „ “ (Abb. 11).
nDie Tasten „RECHAUFFAGE“ (Aufback-Taste) und „ST P“ leuchten auf.
nVor dem Herausziehen der Krümelschublade den Toaster mindestens 10 Minuten, nach
Beendigung des letzten Toastvorgangs, abkühlen lassen.
nVor der Reinigung Netzstecker ziehen.
nEr wird durch Herunterdrücken abgenommen, ohne metallische Teile zu berühren. Führen Sie diesen
Schritt regelmäßig durch (Abb. 12).
nGerät nicht ins Wasser tauchen.
nVerwenden Sie nie einen Scheuerschwamm zum Reinigen des Toasters. Reinigen Sie ihn mit einem
feuchten Tuch und wischen Sie ihn mit einem weichen, trockenen Tuch ab, um ihn zum Glänzen zu
bringen.
nZiehen Sie die Krümelschublade heraus, und entfernen Sie die Krümel (Abb. 12).
nWischen Sie die Krümelschublade mit einem feuchten Tuch ab und setzen Sie es wieder ein.
nVerwenden Sie den Toaster nie ohne die Krümelschublade.
ZUSÄTZLICHE AUSSTATTUNG
REINIGEN
KR_TOASTER_PRELUDE_EO_NC00122252_Mise e page 29/04/14 14:06 Page6
7
DE
Die Verpackung besteht ausschließlich aus umweltfreundlichen Materialien, die den örtlichen
Recyclestellen übergeben werden sollten. Entsorgungsmöglichkeiten für das ausgediente
Gerät erfahren Sie bei Ihrer Gemeindebzw. Stadtverwaltung.
Denken Sie an den Schutz der Umwelt!
Ihr Gerät enthält zahlreiche wiederverwertbare oder recycelbare Materialien.
Entsorgen Sie Ihr Gerät deshalb umweltgerecht bei einer Sammelstelle Ihrer Stadt oder
Gemeinde.
ENTS RGUNG
PROBLEM LÖSU G
Der Toaster funktioniert
nicht.
Prüfen Sie, ob der Stecker richtig in der Steckdose steckt.
Wenn der Toaster immer noch nicht funktioniert, bringen Sie ihn zu
einem zugelassenen Kundendienstcenter von KRUPS.
Das Brot bleibt im Toaster
stecken.
Trennen Sie das Gerät von der Stromversorgung und lassen Sie es
abkühlen. Nehmen Sie das Brot vorsichtig heraus. Achten Sie darauf,
die Heizelemente beim Herausnehmen des Brotes nicht zu
beschädigen. Verwenden Sie nie einen Gegenstand aus Metall, um das
Brot herauszunehmen.
Das Brot ist zu stark oder
zu schwach gebräunt.
Prüfen Sie den eingestellten Bräunungsgrad. Stellen Sie den
Bräunungsgrad schwächer ein, wenn das Brot zu stark getoastet ist,
oder stärker, wenn das Brot nicht stark genug getoastet ist.
Vergewissern Sie sich, dass die Auftau- oder Aufback-Tasten nicht
betätigt wurden.
Das Brot kommt fast
sofort wieder heraus,
ohne dass es getoastet
wurde.
Der Hebel muss bis zum Anschlag heruntergedrückt werden. Prüfen
Sie, dass die Aufback-Taste nicht betätigt wurde.
Wenn das Brot immer noch nicht im Toaster bleibt, bringen Sie das
Gerät zu einem zugelassenen Kundendienstcenter von KRUPS.
Aus dem Toaster kommt
Rauch.
Der Bräunungsgrad ist möglicherweise zu stark eingestellt. Drücken Sie
die ST PP-Taste, um den Toastzyklus abzubrechen, und trennen Sie
das Gerät von der Stromversorgung.
Das Kabel ist beschädigt. Wenn das Kabel des Geräts beschädigt ist, muss es in einem
zugelassenen Kundendienstcenter von KRUPS ausgetauscht werden.
FEHLERBEHEBUNG
KR_TOASTER_PRELUDE_EO_NC00122252_Mise e page 29/04/14 14:06 Page7
8
CAUTIO : the safety precautions are part of the appliance. Read them carefully before
using your new appliance for the first time. Keep them in a place where you can find and
refer to them later on.
nRemove all packaging and other accessories inside as well as outside the appliance.
nUnwind the cord from under the toaster (Fig. 1).
nPlug the toaster into the wall socket.
nTurn the dial to the maximum browning setting without inserting any bread, then press the lever
down. Repeat the toasting sequence twice to remove the "new" smell.
nInsert the slices of bread (Fig. 2).
Do not use slices which are too large or too thick, as they must not be allowed to stick in the
toasting well.
nSelect the desired toasting setting (Fig. 3).
nChoose between 6 different degrees of browning by setting the selector to the appropriate position:
Position 1 = lightly toasted
Position 6 = very well toasted
nWhen first using, try out the toasting setting, as the result depends upon the type of bread and the
degree of moisture.
Generally speaking, a higher temperature is required for breads other than white. Turn the toasting
grade selector to a lower number if, for example, only one slice of bread is being toasted.
Caution:
Relatively dry slices of bread, or bread that has already been toasted once, will brown much
more quickly and may under certain circumstances catch fire. Therefore set the heat control
to a lower setting and do not leave the toaster unattended.
nFully depress the lowering lever, which will then lock into position (Fig. 4).
The appliance will begin to operate and the ST P button will illuminate. The handle will only lock if
the toaster is plugged in.
nAfter completion of the toasting operation, the toast will automatically be raised and the appliance
will switch itself off (Fig. 5).
nRemove the bread. To make it easier to remove the bread you can lift the lowering lever as far as it
will go.
nTo stop the toaster when toasting is underway, press the “stop” button (Fig. 6).
ote:
Should a slice of bread become trapped in the toasting well, unplug the power cord, let the
appliance cool down and then carefully free the toast without touching the heating elements.
DESCRIPTI N
aHeat insulated casing
bCrumb tray
cCord storage
dLowering lever
eBun warmer
fToaster browning setting
gDefrost button
hReheat button
iStop button
BEF RE FIRST USE
USING THE T ASTER
KR_TOASTER_PRELUDE_EO_NC00122252_Mise e page 29/04/14 14:06 Page8

9
Bun Warmer
nRaise the bun warmer by pressing the handle on the corresponding bun warmer function (e) (Fig.
7).
nPosition the rolls on the shelves and press on the lowering lever until it locks automatically. Do not
go beyond position 2. Start the appliance (Fig. 8).
nPlease take care for rolls rewarming function that the rolls and the lift have to be in the right position
(Fig. 9). Do not put any pastries directly on the toaster to reheat them. Use the bun warmer instead
(e).
nTo improve the results, turn the rolls over and repeat the toasting operation.
nAfter use, lower the bun warmer by raising the handle on the bun warmer feature.
nThe bun warmer should not be used for longer than 10 minutes.
Defrost feature
nThe toaster has a pre-programmed defrosting feature. Toasting frozen bread takes longer than
toasting bread which is not frozen.
nInsert one or two frozen slices of bread or toast in the toaster (Fig. 10).
nSelect the desired toasting level and lower the handle (please see the " PERATING M DE”
paragraph).
nPress the ” ” button (Fig. 10).
nThe "DEFR ST" and "ST P" buttons will illuminate.
Reheat feature
nThe toaster has a pre-programmed feature to reheat pieces of bread or toast without toasting them
too much.
nThe reheating time is automatic, regardless of the position of the setting button (roughly 30
seconds).
nInsert the pieces of bread or toast in the toaster and lower the handle.
nPress the ” ” button (Fig. 11).
nThe “REHEAT” and “ST P” buttons will illuminate.
nBefore pulling out the crumb tray, allow the toaster to cool for at least ten minutes after
completion of the preceding toasting operation.
nBefore commencing the cleaning operation, pull out the mains plug.
nIt can be removed by pressing above, avoid all contact with metal parts. Clean the toaster regularly
(Fig. 12).
never immerse the appliance in water or put it under running water.
nNever use an abrasive sponge to clean the toaster. Clean it with a damp cloth and wipe it with a soft,
dry cloth in order to make it shine.
nRemove the crumb tray by pressing above and remove the crumbs (Fig. 12).
nWipe using a damp cloth then return the crumb tray to its place.
never use the toaster without the crumb tray.
CLEANING
ADDITI NAL ACCESS RIES
EN
KR_TOASTER_PRELUDE_EO_NC00122252_Mise e page 29/04/14 14:06 Page9

10
The packaging comprises exclusively environmentally-friendly materials which should be
disposed of according to the local recycling arrangements.
Disposal methods for the appliance itself can be found by enquiry at the appropriate
department of the local authority in your area.
Environment protection first !
Your appliance contains a lot of recoverable or recyclable material.
When disposing of it, take it to a local civic waste collection point.
DISP SAL
PROBLEM SOLUTIO
The toaster does not work. Ensure the plug is properly connected to the socket.
If the toaster is still not working, take it to an approved KRUPS service
centre.
The bread is stuck in the
appliance.
Unplug the appliance and leave it to cool. Remove the bread carefully.
Be careful not to damage the heating elements when removing the
bread. Never use a metallic object to remove the bread.
The bread is too brown or
not brown enough.
Check the setting level selected. Select a lower level if your bread is too
brown, or a higher level if it is not brown enough.
Ensure the freezing or reheating buttons have not been selected.
The bread pops out
almost immediately and is
not toasted.
Ensure the handle has been lowered to the bottom. Also check that the
reheating button was not selected.
If the bread still does not stay in the toaster, bring your appliance to an
approved KRUPS service centre.
Smoke is coming out of
the toaster.
It is possible that the toasting level selected is too high. Press the ST P
button to stop the toasting cycle and unplug the appliance.
The cord is damaged. If the cord on the appliance is damaged, it must be replaced in an
approved KRUPS service centre.
REPAIR SERVICE
KR_TOASTER_PRELUDE_EO_NC00122252_Mise e page 29/04/14 14:06 Page10

AVERTISSEME T : Les consignes de sécurité font partie de l’appareil. Veuillez les lire
attentivement avant d'utiliser votre nouvel appareil. Gardez-les dans un endroit où vous
pourrez les retrouver et vous y référer ultérieurement.
nEnlevez tous les emballages, autocollants ou accessoires divers à l’intérieur comme à l’extérieur du
grille pain.
nRéglez la longueur du cordon en l’enroulant sous le socle. Coincez le cordon dans l’encoche (Fig. 1).
nBranchez le grille pain.
nMettez une ou deux fois le grille-pain en marche sur le niveau 6 afin d'éliminer l'odeur du neuf. Cette
opération doit être réalisée à vide (sans pain) dans une pièce ventilée.
nPlacez les toasts ou les tranches de pain dans le grille-pain (Fig. 2).
N'insérez pas des tranches trop grandes ou trop épaisses : la tranche ne doit pas rester coincée
dans la fente.
nSélectionnez le niveau de dorage désiré (Fig. 3).
Choisissez entre 6 degrés de dorage différents en sélectionnant la position souhaitée :
Position 1 = légèrement grillé
Position 6 = très grillé
nL'intensité du dorage augmente en même temps que les chiffres du sélecteur. Pour le pain complet,
mettez le bouton de réglage sur un temps de dorage plus long que pour le pain blanc.
Positionnez le bouton de réglage sur un chiffre inférieur si, par exemple, vous souhaitez griller
seulement une tranche de pain.
Important:
Les morceaux de pain sec ou qui auraient été déjà grillés, brunissent plus rapidement et
peuvent même, le cas échéant brûler. Il est donc recommandé de choisir un niveau de dorage
inférieur pour ce type de pain et de ne pas laisser l'appareil fonctionner sans surveillance.
nDescendez le levier de mise en marche jusqu'à ce qu'il soit automatiquement bloqué (Fig. 4).
L'appareil fonctionne et la touche ST P s'allume. Le levier ne peut être bloqué que si le grille pain
est branché.
nLe pain est ejecté automatiquement et l'appareil s’arrête une fois que le niveau de dorage
préalablement sélectionné est atteint (Fig. 5).
nRetirez le pain. Vous pouvez utiliser la commande de mise en marche en la remontant au maximum.
Cette fonction permet de faciliter le retrait du pain.
nPour interrompre le fonctionnement de grillage en cours appuyez sur le bouton “stop” (Fig. 6).
Attention:
Si une tranche de pain reste bloquée dans l'appareil, débranchez immédiatement, laissez
refroidir quelques minutes et dégagez le pain délicatement, sans toucher les éléments
chauffants.
DESCRIPTI N
aRevêtement parois froides
bTiroir ramasse-miettes
cRangement cordon
dCommande de mise en marche
eChauffe-petits pains
fBouton de réglage
gFonction décongelation
hFonction réchauffage
iBouton stop
AVANT LA PREMIERE UTILISATI N
M DE D'UTILISATI N
FR
11
KR_TOASTER_PRELUDE_EO_NC00122252_Mise e page 29/04/14 14:06 Page11

12
Chauffe-petits pains
nRelevez le chauffe-petits pains en appuyant sur le levier de la fonction chauffe petits pains
correspondant (e) (Fig. 7).
nPlacez les petits pains sur les supports et appuyez sur la commande de mise en marche jusqu’à ce
qu’elle soit automatiquement bloquée. Ne dépassez pas la position 2. Mettez l'appareil en marche
(Fig. 8).
nPour cette fonction, faites attention à ce que les deux supports et les petits pains soient dans la
bonne position (Fig. 9). Ne posez pas les viennoiseries directement sur le grille pain pour les
réchauffer. Utilisez le chauffe petits pains (e).
nPour obtenir de meilleurs résultats, retournez les petits pains et répétez l'opération de dorage.
nAprès utilisation, abaissez le chauffe-petits pains en soulevant le levier de la fonction Chauffe petits
pains.
nLe chauffe-petits pains ne doit pas être utilisé plus de 10 minutes.
Fonction décongélation
nLe grille-pain est doté d’une fonction préprogrammée de décongélation : griller du pain congelé
prend plus de temps que griller du pain non congelé.
nInsérez une ou deux tranches de pain ou des toasts congelés dans le grille-pain (Fig. 10).
nSélectionnez le niveau de grillage désiré et descendez le levier (voir le paragraphe « M DE
D’UTILISATI N »).
nAppuyez sur la touche ” ” (Fig. 10).
nLes touches « DEC NGELATI N » et "ST P" s'allument.
Fonction réchauffage
nLe grille-pain est doté d’une fonction préprogrammée pour réchauffer des tranches de pain ou des
toasts sans les griller davantage.
nLe temps de réchauffage est automatique quelque soit la position du bouton de réglage (environ 30
secondes).
nInsérez les tranches de pain ou les toasts dans le grille-pain et descendez le levier.
nAppuyez sur la touche ” ” (Fig. 11).
nLes touches « RECHAUFFAGE » et "ST P" s'allument.
nAvant de sortir le tiroir ramasse-miettes, laissez l'appareil refroidir au moins 10 minutes
après la dernière utilisation.
nAvant de nettoyer le grille-pain, assurez-vous qu'il ne soit pas branché.
nLe nettoyage est facile et rapide grâce au tiroir ramasse-miettes. Il s'enlève en appuyant dessus et
évite tout contact avec les parties métalliques. Réalisez cette opération régulièrement (Fig. 12).
ne plongez jamais l'appareil dans l'eau pour le nettoyer.
nN'utilisez jamais une éponge abrasive pour nettoyer le grille-pain. Nettoyez-le avec un chiffon humide
et essuyez-le avec un chiffon doux et sec pour le faire briller.
nRetirez le tiroir ramasse-miettes en appuyant dessus et enlevez les miettes (Fig. 12).
nEssuyez à l'aide d'un chiffon humide puis remettez le tiroir ramasse-miettes en place.
n'utilisez jamais le grille-pain sans le tiroir ramasse-miettes.
F NCTI NS P SSIBLES
NETT YAGE
KR_TOASTER_PRELUDE_EO_NC00122252_Mise e page 29/04/14 14:06 Page12

13
L'emballage comprend exclusivement des matériaux sans danger pour l'environnement,
pouvant être jetés conformément aux dispositions de recyclage en vigueur. Pour la mise au
rebut de l'appareil, se renseigner auprès du service approprié de votre commune.
Participons à la protection de l’environnement !
Votre appareil contient de nombreux matériaux valorisables ou recyclables.
Confiez celui-ci dans un point de collecte ou à défaut dans un centre de service agréé pour
que son traitement soit effectué.
ELIMINATI N DES MATÉRIAUX D'EMBALLAGE ET DE L'APPAREIL
PROBLÈME SOLUTIO
Le grille pain ne fonctionne
pas.
Assurez vous que la fiche est bien branchée dans la prise.
Si le grille pain ne fonctionne toujours pas, apportez le dans un centre
service KRUPS agrée.
Le pain reste coincé dans
l’appareil.
Débranchez l’appareil et laissez-le refroidir. Retirez le pain avec précau-
tion. Faites attention de ne pas endommager les éléments chauffants
lorsque vous retirez le pain. N’utilisez jamais un objet métallique pour
retirer le pain.
Le pain est trop ou pas
assez grillé.
Vérifiez le niveau de réglage sélectionné. Sélectionnez un niveau plus
faible si votre pain est trop grillé, ou un niveau plus élevé s’il ne l’est pas
assez.
Assurez-vous que les touches décongélation ou réchauffage n’ont pas
été sélectionnées.
Le pain ressort
presqu’immédiatement
sans être grillé.
Assurez-vous de bien descendre le levier jusqu’au bout. Vérifiez aussi
que la touche réchauffage n’a pas été sélectionnée.
Si le pain ne reste toujours pas dans le grille-pain, apportez votre
appareil dans un centre service KRUPS agrée.
De la fumée s’échappe du
grille-pain.
Il est possible que le niveau de grillage sélectionné soit trop élevé.
Appuyez sur la touche ST P pour interrompre le cycle de grillage et
débranchez l'appareil.
Le cordon est
endommagé.
Si le cordon de l’appareil est endommagé, il doit être remplacé dans un
centre service KRUPS agrée.
DEPANNAGE
FR
KR_TOASTER_PRELUDE_EO_NC00122252_Mise e page 29/04/14 14:06 Page13

GEVAAR: De veiligheidsvoorschriften worden bij het apparaat geleverd. Lees deze
voorschriften aandachtig door voordat u uw nieuw apparaat voor het eerst gebruikt. Bewaar
ze op een veilige plek, zodat u ze later als referentie kunt inzien.
nVerwijder het verpakkingsmateriaal en de accessoires aan de buiten- en binnenkant van het
apparaat.
nStel de lengte van het snoer af door het onder het voetstuk op te rollen. Zet het snoer vast in de
inkeping (Fig. 1).
nSteek de stekker van het broodrooster in het stopcontact.
nZet het broodrooster, voordat u het in gebruik neemt, eerst 1 of 2 keer aan zonder brood in het
rooster (ventileer de ruimte).
nDoe de te roosteren sneetjes brood in het broodrooster (Fig. 2).
Duw niet te dikke boterhammen in de sleuven, daar het geroosterde brood anders niet vrij omhoog
kan springen.
nSelecteer de gewenste bruiningsgraad (Fig. 3).
Kies een van de 6 bruiningsgraden door de keuzeknop op de juiste stand te zetten:
Stand 1 = licht geroosterd
Stand 6 = donker geroosterd
nProbeer de instelling een keer uit. De bruiningsgraad is mede afhankelijk van het soort brood en de
vochtigheid ervan. Bij bruin brood moet u in het algemeen een hogere bruiningsgraad instellen dan
bij wit brood. Draai de keuzeknop naar een lagere stand indien u bijvoorbeeld maar één snee brood
roostert.
Belangrijk:
Brood dat wat droger of al eerder geroosterd is, wordt sneller bruin en kan in bepaalde oms-
tandigheden verbranden. Zet het broodrooster op een lagere stand en blijf bij het broo-
drooster staan wanneer u brood roostert.
nDuw de broodlift volledig naar beneden tot hij vasthaakt (Fig. 4).
Het apparaat werkt en de ST P-knop licht op. De hendel kan alleen geblokkeerd worden als het
broodrooster op de netstroom aangesloten is.
nHet brood springt aan het eind van de roostertijd automatisch omhoog. Het broodrooster schakelt
dan uit (Fig. 5).
nHaal het brood uit het broodrooster. U kunt hiervoor de startknop op maximum zetten. Met deze
functie kunt u het brood gemakkelijker uit het broodrooster nemen.
nWilt u het roosteren onderbreken, druk dan op de knop “stop” (Fig. 6).
BESCHRIJVING
aBehuizing apparaat
bKruimellade
cSnoeropbergruimte
dBroodlift
eBroodjes-opzetrekje
fInstelling bruiningsgraad
gntdooifunctie
hpwarmfunctie
iStopknop
V R HET EERSTE GEBRUIK
GEBRUIK
14
KR_TOASTER_PRELUDE_EO_NC00122252_Mise e page 29/04/14 14:06 Page14

15
Let op:
Indien het brood in de sleuf klem zit, trek de stekker dan uit het stopcontact en laat het
broodrooster afkoelen. Maak het brood dan voorzichtig los. Kom niet aan het
verwarmingselement!
Broodjes-opzetrekje
nZet het broodjesopzetrekje overeind door op de hendel te drukken van de overeenstemmende
functie broodjes opwarmen (e) (Fig. 7).
nLeg de broodjes op het rekje en druk op de startknop tot deze automatisch blokkeert. Ga niet hoger
dan stand 2. Zet het apparaat aan (Fig. 8).
nAls u deze functie gebruikt moet u ervoor zorgen dat de twee houders en de kleine broodjes goed
zijn geplaatst (Fig. 9). Leg broodjes nooit rechtstreeks op het broodrooster om ze op te warmen.
Gebruik het broodjesopzetrekje (e).
nVoor het beste resultaat draait u de broodjes een keer om en roostert u ook de andere kant.
nLaat het broodjesopzetrekje na gebruik weer zakken door de hendel van de functie broodjes
opwarmen omhoog te trekken.
nGebruik het broodjes-opzetrekje niet langer dan 10 minuten achter elkaar.
Ontdooifunctie
nHet broodrooster heeft een voorgeprogrammeerde ontdooifunctie: bevroren brood roosteren vergt
meer tijd.
nDuw één of twee sneetjes bevroren brood of toast in het broodrooster (Fig. 10).
nKies de gewenste bruiningsgraad en druk de hendel naar beneden (zie paragraaf
"GEBRUIKSAANWIJZING").
nDruk op de knop " " (Fig. 10).
nDe knoppen " NTD IEN" en "ST P" lichten op.
Opwarmfunctie
nHet broodrooster heeft een voorgeprogrammeerde opwarmfunctie voor het opwarmen van sneetjes
brood of toast zonder ze te roosteren.
nDe opwarmtijd wordt automatisch bepaald, ongeacht de stand van de regelknop (ongeveer 30
seconden).
nDuw de sneetjes brood of toast in het broodrooster en druk de hendel naar beneden.
nDruk op de knop " " (Fig. 11).
nDe knoppen " PWARMEN" en "ST P" lichten op.
nLaat het broodrooster minimaal 10 minuten afkoelen alvorens u de kruimellade uittrekt.
nTrek de stekker uit het stopcontact.
nDe lade kan worden verwijderd door erop te drukken en komt niet in contact met de metalen
onderdelen. Doe dit regelmatig (Fig. 12).
nDompel het broodrooster nooit onder in water. Houd het ook niet onder de kraan.
nGebruik nooit een schuurspons om het broodrooster schoon te maken. Maak hem schoon met een
vochtige doek en droog hem af met een zachte en droge doek voor een mooie glans.
nHaal de kruimellade uit het broodrooster door erop te drukken en verwijder de kruimels (Fig. 12).
nVeeg schoon met een vochtige doek. Schuif de kruimellade daarna weer in het broodrooster.
nGebruik het broodrooster nooit zonder de kruimellade.
EXTRA ACCESS IRES
SCH NMAKEN
NL
KR_TOASTER_PRELUDE_EO_NC00122252_Mise e page 29/04/14 14:06 Page15

16
De verpakking van KRUPS huishoudelijke apparaten is gemaakt van milieu vriendelijke
materialen en kan in overeenstemming met de gemeentelijke bepalingen omtrent
afvalverwerking verwerkt worden. Uw gemeente kan u eveneens informatie verschaffen
omtrent de wijze waarop u zich van uw oude, defecte huishoudelijke apparaten kunt ontdoen.
Wees zuinig op het milieu!
Uw apparaat bevat talrijke materialen die hergebruikt of gerecycled kunnen worden.
Breng het naar een daarvoor bestemd verzamelpunt of indien dit niet mogelijk is naar een
erkend service center zodat het apparaat verwerkt kan worden.
AFVALVERWERKING
PROBLEEM OPLOSSI G
Het broodrooster werkt
niet.
Controleer of de stekker goed in het stopcontact zit.
Werkt het broodrooster nog steeds niet, breng hem dan naar een
erkend servicecentrum van KRUPS.
Het brood zit geblokkeerd
in het broodrooster.
Trek de stekker uit het stopcontact en laat het apparaat afkoelen. Haal
het brood er voorzichtig uit. Zorg ervoor dat u de
verwarmingselementen niet beschadigt wanneer u het brood eruit haalt.
Gebruik nooit een metalen voorwerp om het brood eruit te halen.
Het brood is te veel of niet
genoeg geroosterd.
Controleer de gekozen bruiningsgraad. Kies een lagere graad als uw
brood te veel geroosterd is, of een hogere graad als het niet genoeg
geroosterd is.
Controleer of de knop ontdooien of opwarmen niet ingedrukt is.
Het brood komt bijna
onmiddellijk weer uit het
broodrooster en is niet
geroosterd.
Zorg ervoor dat u de hendel helemaal naar beneden duwt. Controleer
ook of de knop opwarmen niet is ingedrukt.
Blijft het brood nog steeds niet in het broodrooster, breng het apparaat
dan naar een erkend servicecentrum van KRUPS.
Er komt rook uit het
broodrooster.
De gekozen bruiningsgraad is mogelijk te hoog. Druk op de knop ST P
om het roosteren te onderbreken en trek de stekker uit het stopcontact.
Het snoer is beschadigd. Als het snoer van het apparaat beschadigd is, moet het in een erkend
servicecentrum van KRUPS worden vervangen.
PR BLEMEN PL SSEN
KR_TOASTER_PRELUDE_EO_NC00122252_Mise e page 29/04/14 14:06 Page16

PRECAUCIÓ : Las precauciones de seguridad forman parte del aparato. Léalas
detenidamente antes de usar su nuevo aparato por primera vez. Guárdelas en un lugar de
facil acceso para futuras consultas.
nRetire todos los envases, etiquetas y accesorios que hay tanto dentro como fuera del aparato.
nAjuste la longitud del cable enrollándolo en la base. Acople el cable en la ranura (Fig. 1).
nConecte la tostadora.
nAntes del primer uso poner en marcha la tostadora una o dos veces sobre nivel 6 a fin de eliminar
el olor a nuevo. Esta operación debe realizarse en vacío (sin pan) en un lugar ventilado.
nColocar las tostadas o rebanadas de pan en la tostadora (Fig. 2).
No insertar nunca rebanadas demasiado grandes o anchos. La rebanada no debe quedar atrancada
en la apertura.
nSeleccione el nivel de tostado deseado (Fig. 3).
Elegir entre 6 grados de dorado distintos y seleccionar la posición deseada.
Posición 1: ligeramente tostado.
Posición 6: muy tostado.
nLa intensidad del dorado aumenta al mismo tiempo que el número del selector. Para un pan integral,
colocar el botón de ajuste en un tiempo de dorado más largo que para el pan blanco. Ubicar el
botón de ajuste en una cifra inferior si, por ejemplo, solo se desea tostar una rebanada de pan.
Importante:
Los trozos de pan seco o que ya fueron tostados, se queman más rápidamente y, en
ocasiones, también pueden quemarse. Por ende se recomienda elegir un nivel de dorado
inferior para este tipo de pan y de no dejar que el aparato funcione sin vigilancia.
nDespués de encender el aparato, colocar el mando de puesta en marcha hasta que quede
automáticamente bloqueado (Fig. 4).
El aparato funciona y el botón ST P se enciende. La palanca solo puede bloquearse si la tostadora
está conectada.
nEl pan es eyectado automáticamente y el aparato se detiene una vez que el nivel de dorado
seleccionado previamente ha sido alcanzado (Fig. 5).
nRetire el pan. Puede utilizar el mando de puesta en marcha subiéndolo al máximo. Esta función
ayuda a extraer el pan.
nPara interrumpir el funcionamiento de tostado en curso pulse el botón “stop” (Fig. 6).
Atención:
Si una rebanada de pan queda bloqueada en el aparato, desconectarlo de inmediato, dejarlo
enfriar unos minutos y retirar el pan delicadamente, sin tocar los elementos que calientan.
DESCRIPCIÓN
aRevestimiento de paredes frías
bCajón corredizo para migas
cAlmacenamiento del cable
dBotón de puesta en marcha
eCalentador para pancitos
fBotón de ajuste
gFunción descongelar
hFunción calentar
iBotón stop
PRIMER US
M D DE EMPLE
17
ES
KR_TOASTER_PRELUDE_EO_NC00122252_Mise e page 29/04/14 14:06 Page17

18
Calentador para pancitos
nSuba el calentador de panecillos presionando sobre la palanca de la función panecillos
correspondiente (e) (Fig. 7).
nPonga los panecillos sobre los soportes y pulse el mando de puesta en marcha hasta que se
bloquee automáticamente. No supere la posición 2. Ponga el aparato en marcha (Fig. 8).
nPara esta función hay que prestar atención que los dos soportes y los pancitos estén bien
colocados (Fig. 9). No ponga la bollería directamente en la tostadora para calentarla. Utilice el
calentador de panecillos (e).
nPara obtener mejores resultados, girar los pancitos y repetir la operación de dorado.
nDespués del uso, baje el calentador de panecillos levantando la palanca de la función calentador de
panecillos.
nNo se puede utilizar a los calentadores para pancitos por más de 10 minutos.
Función descongelar
nLa tostadora incluye una función preprogramada de descongelación: tostar pan congelado lleva
más tiempo que tostar pan no congelado.
nIntroduzca una o dos rebanadas de pan o tostadas congeladas en la tostadora (Fig. 10).
nSeleccione el nivel de tostado deseado y baje la palanca (véase el apartado «M D DE US »).
nPulse el botón ” ” (Fig. 10).
nLos botones «DESC NGELAR» y "ST P" se encienden.
Función calentar
nLa tostadora incluye una función preprogramada para calentar rebanadas de pan o tostadas sin
dorarlas más.
nEl tiempo de calentamiento es automático con independencia de la posición de ajuste (unos 30
segundos).
nIntroduzca las rebanadas de pan o las tostadas en la tostadora y baje la palanca.
nPulse el botón ” ” (Fig. 11).
nLos botones «CALENTAR» y "ST P" se encienden.
nAntes de sacar el cajón corredizo para migas, dejar que el aparato se enfríe por lo menos
10 minutos después del último uso.
nAntes de limpiar la tostadora, asegurarse de que no esté conectada.
nLa limpieza es fácil y rápida gracias al cajón corredizo. Se retira presionando encima y evita
cualquier contacto con las partes metálicas. Realice esta operación regularmente (Fig. 12).
no sumergir el aparato en agua para limpiarlo.
nNunca utilice una esponja abrasiva para limpiar la tostadora. Límpiela con un paño húmedo y
séquela con un paño suave y seco para sacarle brillo.
nRetire la bandeja recogemigas presionando encima y quite las migas (Fig. 12).
nSéquela con un paño húmedo y luego coloque la bandeja recogemigas de nuevo en su lugar.
nunca utilice la tostadora sin la bandeja recogemigas.
LIMPIEZA
FUNCI NES P SIBLES
KR_TOASTER_PRELUDE_EO_NC00122252_Mise e page 29/04/14 14:06 Page18

19
El embalaje incluye únicamente materiales sin riesgo para el medio ambiente, que se pueden
desechar de conformidad con las disposiciones de reciclaje vigentes.
Para desechar el aparato, infórmese en el servicio técnico autorizado de su comunidad.
¡Colaboremos con la protección del medio ambiente!
Su aparato contiene un gran número de materiales aprovechables o reciclables.
Lleve el aparato a un punto de recogida o deséchelo en un Centro de Servicio Autorizado
para su procesamiento.
ELIMINACIÓN DE L S MATERIALES DE EMBALAJE Y DEL APARAT
PROBLEMA SOLUCIÓ
La tostadora no funciona. Compruebe que el enchufe está bien conectado a la clavija.
Si la tostadora sigue sin funcionar, llévela a un centro de reparación
KRUPS autorizado.
El pan se queda atascado
en el aparato.
Desconecte el aparato y deje que se enfríe. Retire el pan con cuidado.
Procure no dañar los elementos calefactores cuando retira el pan.
Nunca utilice un objeto metálico para retirar el pan.
El pan está demasiado o
poco tostado.
Compruebe el nivel de ajuste seleccionado. Seleccione un nivel inferior
si su pan está demasiado tostado, o un nivel superior si el pan está
poco tostado.
Compruebe que los botones descongelar y calentar no están
seleccionados.
El pan salta casi de
inmediato sin tostar.
Asegúrese de bajar bien la palanca hasta el tope. Compruebe también
que no se ha seleccionado el botón calentar.
Si no consigue que el pan permanezca en la tostadora, llévela a un
centro de reparación KRUPS autorizado.
La tostadora desprende
humo.
Tal vez el nivel de tostado seleccionado sea demasiado elevado. Pulse
el botón ST P para interrumpir el ciclo de tostado y desconecte el
aparato.
El cable está dañado. Si el cable del aparato está dañado, debe ser sustituido en un centro
de reparación KRUPS autorizado.
REPARACIÓN
ES
KR_TOASTER_PRELUDE_EO_NC00122252_Mise e page 29/04/14 14:06 Page19

ATTE ZIO E: Le precauzioni di sicurezza fanno parte dell’apparecchio. Leggere
attentamente le precauzioni di sicurezza prima di usare l’apparecchio per la prima volta.
Conservale in un posto dove possano essere trovate e consultate in seguito.
nTogliere tutti gli imballi, adesivi o accessori vari sia all’interno che all’esterno dell’apparecchio.
nRegolare la lunghezza del cavo di alimentazione avvolgendolo sotto la base. Bloccare il cavo
nell'apposita scanalatura (Fig. 1).
nAccendere il tostapane.
nPrima del primo utilizzo, avviare il tostapane per una o due volte al livello 6, per eliminare l’odore
iniziale. Questa operazione deve essere effettuata a vuoto (senza pane) in un ambiente ventilato.
nInserire i toast o le fette di pane nel tostapane (Fig. 2).
Non inserire fette troppo grandi o troppo spesse: la fetta non deve rimanere incastrata nella fessura.
nSelezionare il livello di tostatura desiderato (Fig. 3).
È possibile scegliere tra 6 gradi di doratura, impostando il termostato sulla posizione desiderata:
Posizione 1 = leggermente tostato
Posizione 6 = molto tostato
nL'intensità della doratura cresce con l’aumentare del numero sul termostato. Per il pane integrale,
aumentare il livello di doratura rispetto al pane bianco. Posizionare il termostato su un livello inferiore
se, ad esempio, si desidera tostare solo una fetta di pane.
Importante!
I pezzi di pane secco o fette già tostate si abbrustoliscono più rapidamente e potrebbero
anche bruciare. Si raccomanda quindi di selezionare un livello di doratura inferiore per
questo tipo di pane e di non lasciare l’apparecchio in funzione senza sorveglianza.
nDopo aver collegato l’apparecchio, abbassare la leva di avviamento fino al suo blocco automatico
(Fig. 4). L'apparecchio inizierà a funzionare e si illuminerà il tasto ST P. La leva non può essere
bloccata quando il tostapane è acceso.
nAl raggiungimento del livello di doratura impostato, il pane viene espulso automaticamente e
l’apparecchio si spegne (Fig. 5).
nEstrarre il pane. È possibile utilizzare il comando di avvio impostandolo al livello massimo. Questa
funzione agevola l'estrazione del pane.
nPer interrompere la funzione di tostatura in corso premere il tasto “stop” (Fig. 6).
Attenzione!
Se una fetta di pane rimane incastrata nella fessura, scollegare immediatamente
l’apparecchio dall’alimentazione, lasciare che si raffreddi per qualche minuto ed estrarre il
pane delicatamente, senza toccare gli elementi riscaldanti.
DESCRIZI NE
aRivestimento isolante
bVassoio raccoglibriciole
cCustodia del cavo di alimentazione
dLeva di avviamento
eGriglia per panini
fTermostato
dFunzione scongelamento
eFunzione riscaldamento
fTasto stop
PRIM UTILIZZ
FUNZI NAMENT
20
KR_TOASTER_PRELUDE_EO_NC00122252_Mise e page 29/04/14 14:06 Page20

21
Supporto per panini
nEstrarre lo scalda panini/brioches premendo la leva corrispondente alla funzione "scalda
panini/brioches" (e) (Fig. 7).
nDisporre i panini/le brioches sui supporti e premere il tasto di accensione fino a quando non rimarrà
automaticamente bloccato. Non superare la posizione 2. Accendere l'apparecchio (Fig. 8).
nDurante l’uso della griglia per panini, verificare che i due supporti e i panini siano posizionati
correttamente (Fig. 9). Non collocare le brioches direttamente sul tostapane per riscaldarle.
Utilizzare lo scalda panini/brioches (e).
nPer ottenere i migliori risultati, voltare i panini e ripetere l’operazione di doratura.
nDopo l'utilizzo, abbassare lo scalda panini/brioches sollevando la leva corrispondente alla funzione
Scalda panini/brioches.
nLa griglia per panini non deve essere utilizzata per più di 10 minuti.
Funzione scongelamento
nIl tostapane ha una funzione pre-programmata di scongelamento: per tostare del pane congelato
occorre molto più tempo che tostare del pane non congelato.
nInserire una o due fette di pane o di toast congelate nel tostapane (Fig. 10).
nImpostare il livello di tostatura desiderato e abbassare la leva (vedere il paragrafo "ISTRUZI NI
PER L'US ").
nPremere il tasto ” ” (Fig. 10).
nI tasti "SC NGELAMENT " e "ST P" si accendono.
Funzione riscaldamento
nIl tostapane è dotato di una funzione pre-programmata per riscaldare le fette di pane o di toast senza
tostarle troppo.
nIl tempo di riscaldamento è automatico, indipendentemente dalla posizione del selettore del grado
di tostatura (30 secondi circa).
nInserire le fette di pane o i toast nel tostapane e abbassare la leva.
nPremere il tasto ” ” (Fig. 11).
nI tasti "RISCALDAMENT " e "ST P" si accendono.
nPrima di estrarre il vassoio raccoglibriciole, lasciare che l’apparecchio si raffreddi per
almeno 10 minuti dopo l’uso.
nPrima di pulire il tostapane, verificare che non sia collegato all’alimentazione.
nLa pulizia è facile e rapida grazie al vassoio raccoglibriciole. Il vassoio raccogli briciole si estrae
esercitando pressione verso il basso e non entra in contatto con le parti metalliche. Eseguire
regolarmente questa operazione (Fig. 12).
nDurante la pulizia, non immergere mai l’apparecchio in acqua.
nNon utilizzare mai una spugna abrasiva per pulire il tostapane. Pulire il tostapane con un panno
umido e asciugarlo con un panno asciutto e morbido per lucidarlo.
nEstrarre il vassoio raccogli briciole esercitando pressione verso il basso e rimuovere le briciole (Fig.
12).
nPulirlo con un panno umido, quindi riposizionarlo.
nNon utilizzare mai il tostapane senza il vassoio raccogli briciole.
PULIZIA
FUNZI NALITÀ AGGIUNTIVE
IT
KR_TOASTER_PRELUDE_EO_NC00122252_Mise e page 29/04/14 14:06 Page21

L'imballaggio comprende esclusivamente materiali non dannosi per l’ambiente che possono
essere smaltiti conformemente alle norme di riciclaggio in vigore.
Per lo smaltimento dell’apparecchio rivolgersi al dipartimento apposito del proprio comune.
Salvaguardia dell’ambiente
Questo apparecchio contiene numerosi materiali riutilizzabili o riciclabili.
Portarlo in un punto di raccolta o, in sua mancanza, in un centro di assistenza autorizzato
affinché possa essere riciclato.
SMALTIMENT DELL’APPARECCHI E DEI MATERIALI D’IMBALLAGGI
PROBLEMA SOLUZIO E
Il tostapane non funziona. Verificare che la spina sia completamente inserita nella presa di
corrente.
Se il tostapane ancora non funziona, contattare il centro assistenza
KRUPS autorizzato.
Il pane resta incastrato
all'interno
dell'apparecchio.
Scollegare l'apparecchio e lasciarlo raffreddare. Estrarre il pane con
cautela. Fare attenzione a non danneggiare gli elementi riscaldanti
durante l'estrazione del pane. Non utilizzare mai un oggetto metallico
per estrarre il pane.
Il pane è eccessivamente
tostato o non
sufficientemente tostato.
Verificare il livello del selettore del grado di tostatura selezionato.
Selezionare il livello più basso se il pane è eccessivamente tostato o il
livello massimo se non è sufficientemente tostato.
Verificare che i tasti di scongelamento o di riscaldamento non siano stati
selezionati.
Il pane esce quasi subito
senza essere tostato.
Assicurarsi di abbassare completamente la leva. Verificare anche che il
tasto riscaldamento non sia stato selezionato.
Se il pane non rimane nel tostapane, portare il tostapane presso un
centro assistenza KRUPS autorizzato.
Esce del fumo dal
tostapane.
È possibile che il livello di tostatura selezionato sia troppo alto. Premere
il tasto ST P per arrestare il ciclo di tostatura e spegnere
l'apparecchio.
ll cavo di alimentazione è
danneggiato.
Se il cavo di alimentazione è danneggiato occorrerà sostituirlo presso
un centro di assistenza KRUPS autorizzato.
RIS LUZI NE DEI PR BLEMI
22
KR_TOASTER_PRELUDE_EO_NC00122252_Mise e page 29/04/14 14:06 Page22
This manual suits for next models
1
Table of contents
Languages:
Other Krups Toaster manuals

Krups
Krups FEM3 User manual

Krups
Krups KH250 User manual

Krups
Krups PRECISION KH7002 Series User manual

Krups
Krups SILVER ART KH754E50 User manual

Krups
Krups KH72 User manual

Krups
Krups ProAroma KH1518 User manual

Krups
Krups TT9300 User manual

Krups
Krups KH732 User manual

Krups
Krups FEPB User manual

Krups
Krups GSEB008 User manual
Popular Toaster manuals by other brands

TriStar
TriStar BR-1013 user manual

Promax
Promax GR14SPT-120V Installation and operation instructions

H.Koenig
H.Koenig VIEW7 instruction manual

Promax
Promax GR14SPTK-UK Installation and operation instructions

Silvercrest
Silvercrest SSWM 750 C3 operating instructions

Silvercrest
Silvercrest STC 950 D3 operating instructions