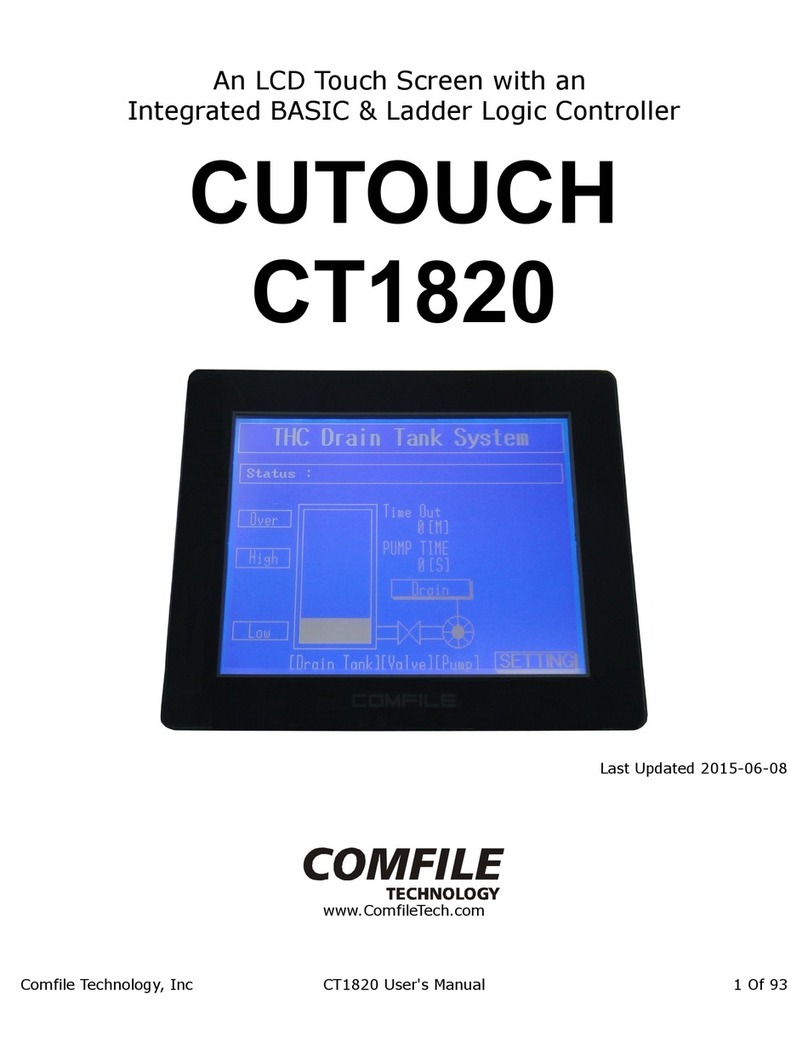
Ksenia ergo-T pro User manual

ergo-T pro
KSI2100042.302
Tastiera Touchscreen - Manuale di installazione
Touchscreen Keypad - Installation guide
Clavier à écran tactile - Manuel d’installation
www.kseniasecurity.com

INDICE - INDEX - SOMMAIRE
INTRODUZIONE ................................................................................................................ 3
DESCRIZIONE DEL PRODOTTO ...................................................................................... 3
CARATTERISTICHE TECNICHE ....................................................................................... 5
COLLEGAMENTI RETE LAN E CABLAGGIO ALIMENTAZIONE ..................................... 6
INSTALLAZIONE ................................................................................................................ 7
PRIMA ATTIVAZIONE ........................................................................................................ 7
AGGIORNAMENTI ............................................................................................................. 9
STANDBY / RISVEGLIO AUTOMATICO DELLO SCHERMO ........................................... 9
SINCRONIZZAZIONE DATI ............................................................................................... 9
CONNESSIONE WIFI ......................................................................................................... 9
INTRODUCTION .............................................................................................................. 10
PRODUCT DESCRIPTION .............................................................................................. 10
TECHNICAL CHARACTERISTICS .................................................................................. 12
LAN NETWORK CONNECTIONS AND POWER WIRING .............................................. 13
INSTALLATION ................................................................................................................ 14
FIRST START ...................................................................................................................14
UPDATES ......................................................................................................................... 16
AUTOMATIC STANDBY/WAKE UP OF THE SCREEN ................................................... 16
DATA SYNCHRONIZATION ............................................................................................ 16
WIFI CONNECTION ......................................................................................................... 16
INTRODUCTION .............................................................................................................. 17
DESCRIPTION DU PRODUIT .......................................................................................... 17
DONNÉES TECHNIQUES ............................................................................................... 19
CONNEXIONS DE RÉSEAU LAN ET CÂBLAGE D'ALIMENTATION ............................. 20
INSTALLATION ................................................................................................................ 21
PREMIER DÉMARRAGE ................................................................................................. 21
MISES À JOUR ................................................................................................................ 23
EN VEILLE / RÉVEIL AUTOMATIQUE DE L’ÉCRAN ...................................................... 23
SYNCHRONISATION DES DONNÉES ............................................................................ 23
CONNEXION WIFI ........................................................................................................... 23

3
IT
INTRODUZIONE
ergo-T pro è una tastiera IP touchscreen di ultima generazione, con interfaccia
grafica di comando e controllo della piattaforma IoT lares 4.0, in linea con
l’applicazione mobile lares 4.0: questo garantisce all’utente la stessa esperienza d’uso,
sia che controlli la centrale localmente, sia che lo faccia da remoto.
Comunica con la centrale utilizzando la rete LAN locale attraverso l’interfaccia IP, in
questo modo non solo è possibile gestire agevolmente le numerose funzioni in ambito
della Sicurezza Fisica (Antintrusione, Video Verifica e Controllo Accessi) ma anche la
parte Domotica o Smart Home and Building Automation (Automazioni, Luci,
Temperature, Avvolgibili motorizzati, Elettrodomestici, Irrigazione, ecc).
La ergo-T pro viene acquisita dalla centrale con una veloce procedura di
apprendimento, senza bisogno di alcuna configurazione sul router; può inoltre essere
supervisionata dalla centrale come normale tastiera su BUS.
DESCRIZIONE DEL PRODOTTO
Dimensioni e vista laterale
Vista retro e supporti di aggancio
1. Supporti aggancio
2. Alloggiamento vite di bloccaggio
3. Etichetta MAC Address
256 mm
181 mm
27mm
LAN USB USB DC IN
1
2
3
1

4
IT
Tasti lato superiore Connettori lato inferiore
1. Tasto accensione: pressione breve stand-by, in questa modalità la connessione
della centrale è interrotta; pressione lunga accensione/spegnimento.
2. Slot micro SD (uso futuro).
3. Tasto esc: torna alla precedente pagina (non usato).
4. Tasti (su/giù) (non usati).
5. Volume (+ / -) per aumentare/abbassare il volume dei segnali acustici.
6. Porta Eth RJ45 (10/100/1000Mbps).
7. Porta USB: USB 2.0 type A (non usato).
8. Porta USB: Micro-USB 2.0 (non usato).
9. Alloggiamento vite di bloccaggio.
10. Headphone 5mm Stereo + MIC (non usato)
11. Alimentazione DC IN Jack (+/-)
12. Connettore di terra (potrebbe non essere presente)
13. Indicatore LED: Verde = alimentazione ON - display acceso
Rosso = alimentazione ON - display spento
Spento = alimentazione assente
++
1
2
3
4
5
6
7
8
9
10
11
12
13

5
IT
Staffa metallica
CARATTERISTICHE TECNICHE
Dati tecnici
Alimentazione - Jack 2A@12V DC input
oppure
- PoE - 13W max
Connessione Ethernet RJ45 10/100/1000Mbps
Display Touch Capacitivo 10.1” TFT LCD IPS, 16:10 wide
Risoluzione 1280 x 800
CPU Cortex A17, Quad Core, RK3288
Sistema operativo Android 8.1
RAM 2Gb DDR
Nand Flash 16Gb
Dimensioni 256 x 181 x 27 mm
Peso 650gr
1
2
1
2
3
1. Supporti di sostegno
2. Fori guida DIN 503 oppure
standard europeo (60mm)
3. Bloccaggio fondo tastiera con
passante per vite di
bloccaggio

6
IT
COLLEGAMENTI RETE LAN E CABLAGGIO ALIMENTAZIONE
La tastiera può essere collegata alla piattaforma lares 4.0 in due modalità:
1. se alimentata PoE, è sufficiente collegare il cavo di rete proveniente dallo switch
alla porta Ethernet RJ45 della tastiera;
2. se non alimentata PoE, oltre a quanto descritto sopra, collegare anche
l’alimentazione: occorre collegare il morsetto [+] dell’adattatore jack al morsetto
[+P] proveniente dalla centrale e il morsetto [-] dell’adattatore jack al negativo di
alimentazione della centrale (vedi tabella seguente):
Se la tastiera non è alimentata PoE, effettuare il cablaggio dei morsetti di
alimentazione.
Adattatore Jack lares 4.0
++P
--
Attenzione: se presente il connettore di terra, per collegare il jack al DC-IN della
tastiera, potrebbe essere necessario svitare o spostare verso l’esterno, il connettore
di terra che ne ostacola parzialmente l’ingresso.

7
IT
INSTALLAZIONE
Fissare la staffa metallica di supporto della tastiera ergo-T pro direttamente sul muro
mediante due stop da 5mm, rispettando la distanza dei fori presenti (interasse 83,50
mm oppure 60 mm), oppure utilizzare la scatola ad incasso DIN 503 o anche la scatola
da incasso standard europeo (interasse 60 mm).
Collegare la tastiera alla centrale come descritto nel paragrafo precedente
“Collegamenti rete LAN e cablaggio alimentazione”.
Agganciare quindi i fori presenti sul retro della tastiera ergo-T pro negli appositi ganci
di sostegno presenti sulla staffa, ancorare il dispositivo facendolo scorrere verso il
basso e infine bloccare il fondo della tastiera tramite la vite con la guarnizione fornita in
dotazione con la piastra, facendo attenzione a far uscire i cavi dei collegamenti
(alimentazione e rete lan) dal fondo della tastiera.
PRIMA ATTIVAZIONE
Rimuovere la pellicola trasparente posta a protezione dello schermo touch.
Per accendere il dispositivo, tenere premuto il tasto <Accensione> per 5 secondi (vedi
paragrafo “Descrizione del prodotto”). Terminata la fase di accensione, si apre
l’applicazione lares 4.0 per ergo-T pro.
A questo punto, dal programma di configurazione “Installer” aprire il menu
<Dispositivi IP -> ergo-T> ed aggiungere la tastiera ergo-T dove, se correttamente
alimentata e collegata alla rete della centrale, apparirà la tastiera come mostra la
seguente immagine, l’acquisizione è immediata, salvare ed applicare la sessione di
configurazione (il MAC Address verrà letto e visualizzato automaticamente):
vite di bloccaggio
supporti di sostegno
staffa metallica

8
IT
Al termine dell’invio della configurazione in centrale, la pagina appare come mostra
l’immagine seguente:
e l’App lares 4.0 sulla tastiera si riavvierà automaticamente:
cliccare qui per acquisire automaticamente la
tastiera,

9
IT
AGGIORNAMENTI
La presenza di aggiornamenti FW per la ergo-T pro viene notificata mediante un
pallino rosso sul pulsante <Impostazioni Centrale> dell’App lares 4.0, premere per
aprire la pagina e selezionare “Installa aggiornamenti”.
Al termine la tastiera eseguirà un riavvio dell’App prima di tornare alla pagina “Home”.
Solo per manutenzione: per modificare le impostazioni di rete è necessario aprire la
pagina <Impostazioni Centrale> e premere sul campo “Consenti accesso al Sistema
Operativo”, inserire il codice di sblocco 051155 e accedere alle impostazioni di
configurazione del SO Android.
STANDBY / RISVEGLIO AUTOMATICO DELLO SCHERMO
Lo spegnimento automatico dello schermo è attivo alla prima accensione dopo
l'aggiornamento del firmware, con le seguenti modalità:
• dopo 2 minuti di inattività (abilitato) - oppure - dopo 1 minuto dall'inserimento
dell'impianto (da abilitare nella sezione menu <Impostazioni Centrale -> Opzioni
Standby>).
• Per mettere in standby lo schermo prima della scadenza del timer, premere
brevemente il tasto accensione della tastiera.
• Lo schermo si risveglia da solo quando avviene un cambio di stato in centrale
(inserimento, disinserimento, tempi di ingresso, warning per superamento potenza
del modulo energia, ecc.) oppure con un tocco sullo schermo.
• La supervisione della tastiera resta attiva anche in standby.
SINCRONIZZAZIONE DATI
Reload notturno a display spento e reload cronotermostati per sincronizzazione con i
dati dell'App lares 4.0.
CONNESSIONE WIFI
L'utilizzo del WiFi richiede l'abilitazione nei settaggi di Android. Per un utilizzo esclusivo
del WiFi occorre alimentare la tastiera a 12V oppure PoE ma senza collegamento
Ethernet.
Il contenuto del presente documento viene fornito unicamente a scopo informativo, è soggetto a modifica senza
preavviso e non deve essere interpretato come un impegno da parte di Ksenia Security. Si invita a consultare la
manualistica on line presente nel nostro sito dove i contenuti sono sempre aggiornati.

10
EN
INTRODUCTION
ergo-T pro is a touchscreen IP keypad of the latest generation, it has a graphic
interface, the ideal command and control interface of lares 4.0 IoT platform, in line with
lares 4.0 mobile application: this guarantees the same user experience to the end-user,
during the local or remote management of the control panel.
It communicates with the control panel via LAN network thanks to its IP network
interface. In this way, it is possible to manage the functions in terms of Physical
Security (Intrusion, Video Verification and Access Control) but also Home & Building
Automation (i.e. management of the various Automations, Lights, Temperatures,
Motorized shutters, Appliances, Irrigation, etc.).
ergo-T pro is recognized by the control panel with a fast acquisition process with no
need of any configuration on the router; furthermore, it can be supervised by the control
panel like a normal keypad on BUS.
PRODUCT DESCRIPTION
Dimensions and side view
Back view and support holes
1. Support holes
2. Housing for locking screw
3. MAC Address label
256 mm
181 mm
27mm
LAN USB USB DC IN
1
2
3
1

11
EN
Buttons top side Connectors buttom side
1. ON/OFF BUTTON: with a short press, the device will be set in stanb-by, in this
case the connection with the panel will be interrupted; with a long press, it is
possible to turn on/off the device.
2. Micro SD slot (future use).
3. Exit Button: return to the previous page (not used).
4. Function Keys (Up / Down) (not used).
5. Volume (Vol+ / Vol-) for adjusting the volume of acoustic signals.
6. RJ45 Ethernet port (10/100/1000MBps).
7. USB Port: USB 2.0 type A (not used).
8. Micro-USB Port: Micro-USB 2.0 (not used).
9. Housing for locking screw.
10. Headphone 5mm Stereo + MIC (not used).
11. Power supply DC IN Jack (+/-).
12. Ground connector (it might be not present).
13. LED Indicator: Green = Power ON - display ON
Red = power ON - display OFF
OFF = power OFF
++
1
2
3
4
5
6
7
8
9
10
11
12
13

12
EN
Mount adapter plate
TECHNICAL CHARACTERISTICS
Technical data
Power supply -Jack 2A@12V DC input
OR
-PoE - 13W max
Ethernet connection RJ45 10/100/1000Mbps
Display Capacitive Touch 10.1” TFT LCD IPS, 16:10 wide
Resolution 1280 x 800
CPU Cortex A17, Quad Core, RK3288
Operating system Android 8.1
RAM 2Gb DDR
Nand Flash 16Gb
Dimensions 256 x 181 x 27 mm
Weight 650gr
1
2
1
2
3
1. Support hooks
2. Holes for DIN 503 recessed
box or European standard
box (60mm)
3. Keypad buttom locking hook
with passing through for
locking screw

13
EN
LAN NETWORK CONNECTIONS AND POWER WIRING
The keypad can be connected to the lares 4.0 platform in two ways:
•if PoE powered, simply connect the network cable from switch to the RJ45 Eth port
of keypad;
•if not PoE powered, in addition to what has been described above, connect the
power supply: the [+] terminal of the jack adapter must be connected to the [+P]
terminal coming from the panel and the [-] terminal of the jack adapter to the negative
power supply of the panel (see table below):
If the keypad is NOT PoE powered, execute the power wiring of jack adapter
terminals.
Jack adapter lares 4.0
++P
--
WARNING! For connecting the jack to the keypad DC-IN, it is necessary to unscrew
or move sideways the ground connector that partially block the entrance, if present.

14
EN
INSTALLATION
Fix the mount adapter plate of ergo-T pro directly to the wall, using two 5mm
expansion anchors and distance between holes at 83.50mm or 60mm, or on a DIN 503
recessed box or on a European standard box (60mm screw-distance).
Connect the keypad to the panel as described in previous paragraph “Lan network
connections and power wiring”.
Insert the support hooks on the metal plate in the support holes on the back of the
keypad and slid it downwards to lock the device.
Finally, lock the bottom of the ergo-T pro using the screw supplied with the mount
adapter plate, paying attention to let the connection cables (power supply and LAN
network) exit from the bottom of the keypad.
FIRST START
Remove the protective transparent film placed on the touchscreen.
To switch on the device, press the <ON/OFF> button for five seconds (see paragraph
“Product description”). Once the startup phase has finished, App lares 4.0 for ergo-T
pro starts.
At this point, from "Installer" configuration program, open the menu <IP Devices ->
ergo-T> and add the keypad ergo-T where, if properly powered and connected to the
panel, the keypad will appear as shown in the following image, the acquisition is
immediate, you have to save and apply the configuration session (MAC Address will be
read and displayed automatically).
locking screw
support hooks
mount adapter plate

15
EN
After saved and applied the configuration, the following page opens:
and the App lares 4.0 will restart automatically on the keypad:
click here to acquire the keypad automatically,
then save and apply the configuration session

16
EN
UPDATES
The presence of FW updates for the ergo-T pro is notified with a red dot on the <Panel
Settings> button of the App lares 4.0, press it to open next page and tap on the
"Install updates" field.
At the end, the keypad will perform a restart of the App before returning to the "Home"
page.
For maintenance only: to change the network settings, open the <Panel Settings> page
and click on the "Allow access to the operating system" field, enter the unlock code
051155 and access the Android OS configuration settings.
AUTOMATIC STANDBY/WAKE UP OF THE SCREEN
From the first time you turn on the keypad after the firmware update, the automatic
screen standby is active, as follows:
• after 2 minutes of inactivity (enabled) - or - 1 minute after arming your control panel
(must be enabled from <Panel Settings -> Standby Options> section).
• To put the screen on standby before the timer expires, briefly press the keypad power
button
• The screen wakes up by itself when a change of status occurs in the control panel
(arming, disarming, entry timers, warning for exceeding the energia module power,
etc.) or you can single tap to turn on the screen.
• The supervision remains active even in standby.
DATA SYNCHRONIZATION
Night reload with display off and chronothermostat reload for synchronization with the
data of the lares 4.0 App.
WIFI CONNECTION
For using WiFi connection, It is required to enable it on Android settings.
The exclusive use of WiFi will be guaranteed if the keypad is power supplied 12V or
PoE but without Ethernet connection.
All information in this document is subject to change without notice, and does not represent a
commitment on the part of Ksenia Security. We invite you to consult the online manuals on our
website where the data are always updated.

17
FR
INTRODUCTION
ergo-T pro est le clavier IP à écran tactile de dernière génération, avec des interfaces
graphiques de commande et de contrôle de la plate-forme IoT lares 4.0, conforme à
l’application mobile lares 4.0 : cela garantit à l’utilisateur la même expérience, qu’il
contrôle la centrale localement ou à distance.
Le clavier utilise le port de réseau pour communiquer avec la centrale d’alarme en
connexion réseau local. De cette façon, il est possible de gérer à la fois les fonctions
de Sécurité Physique (anti-intrusion, vidéo vérification et contrôle d’accès) et
d’Automatisation de la Maison et des Bâtiments (par example gestion de l’automation,
des lumières, des températures, des appareils électroménagers, des volets roulants,
des systèmes d’irrigation, etc.).
ergo-T pro est acquis par la centrale avec une procédure d’apprentissage rapide, sans
aucune configuration sur le router; il peut également être supervisé par la centrale
comme un normal claviers sur BUS.
DESCRIPTION DU PRODUIT
Dimensions et vue latérale
Vue arrière et logement de support
1. Logement de support
2. Logement pour vis de fixation
3. Étiquette de l’adresse MAC
256 mm
181 mm
27mm
LAN USB USB DC IN
1
2
3
1

18
FR
Touches supérieures Connecteurs inférieurs
1. Bouton allumé/éteint: appuyer bref et l'appareil sera mis en standby, dans ce cas
la connexion avec le panneau sera interrompue; appuyer longuement pour
allumer/éteindre l'appareil.
2. Slot Micro SD (utilisation future).
3. Bouton de Sortie : retour à la page précédente (pas utilisé).
4. Touches de fonction (Haut / Bas) (pas utilisé).
5. Volume (Vol+ / Vol-) pour régler le volume des signaux acoustiques.
6. Port Ethernet RJ45 (10/100/1000 Mbps).
7. Port USB : USB 2.0 de type A (pas utilisé).
8. Port Micro-USB : Micro-USB 2.0 (pas utilisé).
9. Logement pour vis de fixation.
10. Écouteurs 5mm Stéréo + MIC (pas utilisé).
11. Alimentation Jack DC IN (+/-).
12. Connecteur de masse (il pourrait ne pas être présent).
13. Indicateur LED : Vert = alimentation ON - écran ON
Rouge = alimentation ON - écran OFF
OFF = alimentation OFF
++
1
2
3
4
5
6
7
8
9
10
11
12
13

19
FR
Plaque de support en métal
DONNÉES TECHNIQUES
Caractéristiques techniques
Alimentation Jack 2A@12V DC input
OU
PoE - 13W max
Port Ethernet RJ45 10/100/1000Mbps
Display Touch Capacitif 10.1” TFT LCD IPS, 16:10 wide
Résolution 1280 x 800
CPU Cortex A17, Quad Core, RK3288
Système d’exploitation Android 8.1
RAM 2Gb DDR
Nand Flash 16Gb
Dimensions 256 x 181 x 27 mm
Poids 650gr
1
2
1
2
3
1. Supports d’appui
2. Trous de montage
(compatible boîtier DIN 503)
ou standard européen(60mm)
3. Logement et passage pour vis
de fixation

20
FR
CONNEXIONS DE RÉSEAU LAN ET CÂBLAGE D'ALIMENTATION
Le clavier peut être connecté à la plate-forme lares 4.0 de deux manières:
•si alimenté PoE, connecter simplement le câble du réseau local venant du switch au
port Ethernet RJ45 du clavier;
•si pas alimenté PoE, en plus de ce qui est décrit ci-dessus, connecter également
l'alimentation: la borne [+] du jack doit être connectée à la borne [+ P] venant de la
centrale et la borne [-] du jack à l'alimentation négative de la centrale (voir le tableau
suivant).
Si pas alimenté PoE: câbler les bornes d'alimentation
Adaptateur Jack lares 4.0
++P
--
Attention: si le connecteur de masse est présent, pour connecter le jack au DC-IN
du clavier, il est nécessaire de dévisser ou de déplacer le connecteur de masse
vers l'extérieur, ce qui obstrue partiellement l'entrée.
This manual suits for next models
1
Table of contents
Languages:
Popular Touchscreen manuals by other brands

Element
Element VK Series user manual

Johnson Controls
Johnson Controls Tyco HC2TCHPRO user manual

Elo TouchSystems
Elo TouchSystems 2242L user guide

Elo Touch Solutions
Elo Touch Solutions ET1717L user manual

Johnson Controls
Johnson Controls Tyco HS2TCHP E user manual

Advantech
Advantech IDP31-150 Series user manual

BubblyNet
BubblyNet T4 installation instructions

Elo TouchSystems
Elo TouchSystems I-Series Quick installation guide

COOPER FIRE
COOPER FIRE CTPR3000 installation manual

Parrot Products
Parrot Products IWS1043 user manual

Fireye
Fireye NXD410TS installation guide

Speechi
Speechi SpeechiTouch ST-XX-AND-UHD-HP2-PLUS quick start guide