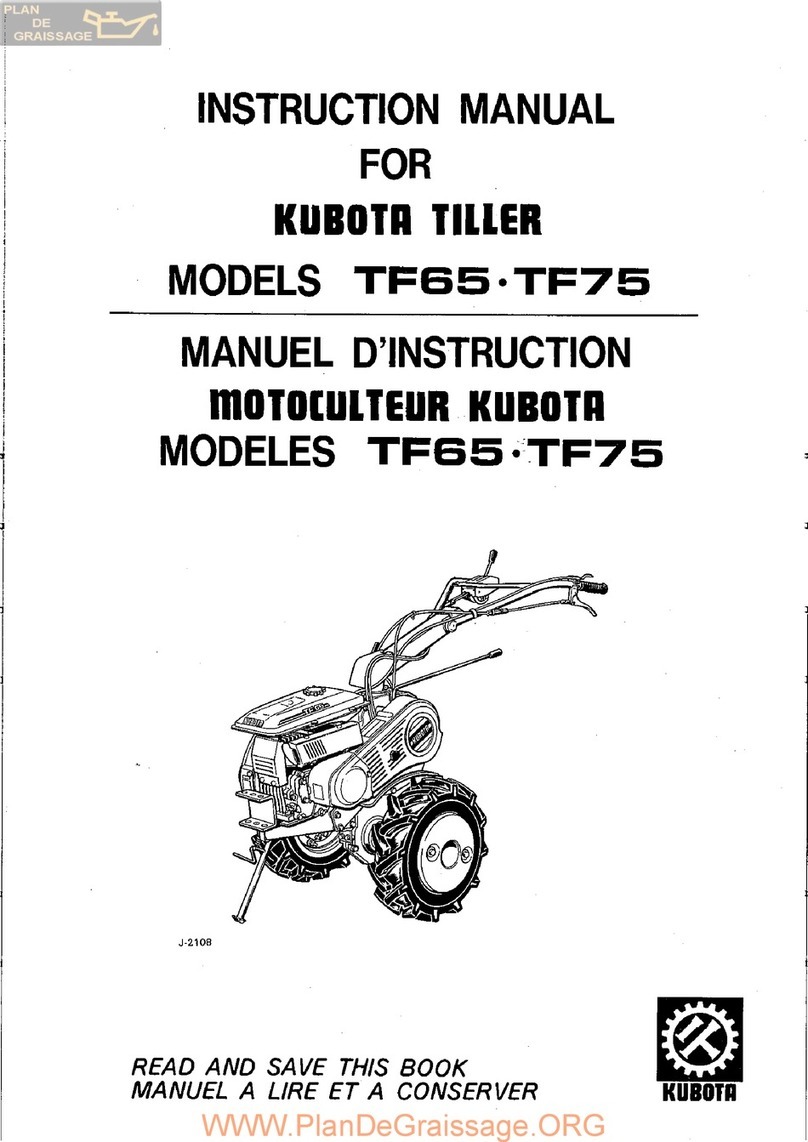
Kubota T450 User manual

INSTRUCTION MANUAL
FOR
KUBOIR ÏIl1ER
MODEL T45CI.T55CI.TCi5CI
MANUEL D,INSTRUCTION
MOIOTUI,IEUR KUBOIR
MODELE T4sCT.T 5 sCI. TCi 5c!
I(UBOÏR
WWW.PlanDeGraissage.ORG

Kubota, Ltd. ls. . .
Kubota Makes all Kinds
of Agricultural
Machinery for Seeding
to Harvesting.
Since its inception in 1890, Kubota, Ltd. has grown to rank
as one of the major firms in Japan, To achieve this
status, the company has through the years diversified the
range of its products and services to a remarkable extent,
until today, 22 plants and 18,000 employees produce
over 1,000 different items. large and small.
All these products, and all the services which accompany
them, however, are unified by one central commitment.
Kubota makes products which, taken on a national scale,
are basic necessities. Products which are indispensable'
Products intended to help individuals and nations fulfill the
potential inherent in their environment. For Kubota is the
basic necessities giant. This potential includes water supply,
food from the soil and from the sea, industrial develop-
ment. architecture and construction, transportation.
Thousands of people depend on Kubata's know-how,
technology, experience and customer service. You too can
depend on Kubota.
. Radiator-Cooled Diesel Engines
o Air-Cooled Gasoline Engines o Air-Cooled Diesel Engines
. Power Tillers o Farm Tractors o Power Sprayers
. Power Mist Blower & Dusters o Brush Cutters
o Dairy Machines o Sprinklers . Rain Guns o Pumps
. Others
WWW.PlanDeGraissage.ORG

i{
..;f«, i.,$t ,: di;SF i Eâ?,èft1,1ÿ.;.'i ' üir'.,:::,i::fia
operate, check, and Iubrieate the tiller correctly, it will give
you longlasting and trouble-fræ service. The specifications
.Bttiev.oi.. àXâùi.§.mùê.imÉ ü Îr*ùi.r,*ràÉffât l
indicatiorrc, et vous obtièndrez le'mei.lleur serÙice de votre
,Bstitiq,rc.der:rK,,Û&, iir-*'.dàe,,..â f1 , ,,,i,:,,.::,,,:
continue de ses prduits, oertaines spécifications de votre
appareil pourraient légèrement diverger de celles indiquées
sur ce manuel: veuillez nous en excuser pâr avance,
WWW.PlanDeGraissage.ORG

Contents Table des mat ières
Safeÿ Precaution . .
Part Names
Pre-operation servicing
1. Transmission case oil . . '
2. Engine crank case oil . . .
3. Fuel supply
4. Lubrication of external Parts
5. Check the following before
starting the engine
6. Break-in
Starting the engine
1. Starting the engine
2. Engine stopping
Operation
1. Adjusting handle height .
2. Swiveling the handle
3. Reversing the handle
4. Speed & Direction selection
5. Start & Stop
6. Turning
Maintenance
l.Maintenance...
2. Adjusting the main clutch
3. Adjusting the steering clutch .
4. Adjusting & cleaning
the ignition plug . .
5. Cleaning the air cleaner
6. Cleaning the fuel filter . .
Long storage
Specifications....
1
4
5
5
5
5
6
6
6
7
7
I
I
I
I
10
12
13
14
15
15
16
17
18
19
19
20
21
Almost all the photos shown in this lnstruction
Manual are of the Model T650.
Consignes de securité
Nomenclature....
Preparation avant EmPloi
1. Huile pour le carter de transmission . .
2. Huile moteur
3. Alimentation en carburant . .
4. LüOritication de pièces externes
5. Avant la mise en marche vérifier . . . .
Mise en marche du moteur
1. Démarrage du moteur
2. Arrêt du moteur
Utilisation
1. Réglage de la hautear mancherons . . .
2. Pivotage des mancherons ' . .
3. Mancherons enposition inversêe
4. Sélection de vitesse
et de marche AV/AR.
5. Démarrage & Arrêt
1
4
5
5
5
5
6
6
6
7
7
I
I
I
I
10
12
(Embrayage-Debrayage) 13
6. Pourtourner(T550,T650). .. .. . . . 14
Entretien 15
1. Entretien 15
2. Réglage embrayage 16
3. Réglagedudéclabotage... . ....... 17
4. Réglage et nettoyage de la bougie. . . . 18
5. Nettoyage du filtre à air. . 19
6. Nettoyage du filtre à carburant 19
Stockage .......2O
Caractéristiques... 22
Presque toutes les photos montrées dans le
Manuel d'instructions sont celles du moto-
culteur modèle T650.
WWW.PlanDeGraissage.ORG

1
A Safety precautron
A Consignes de securitê
To operate your Tiller safety without accident,
be sure to read the instructions below carefully.
r Preparation
Operator
1) Those who are pregnant and/or drunk
should not operate the machine.
2) Be sure to wear tight clothes to prevent
them from being caught by the machine;
long hair should be pinned up or kept under
a hat.
3) When letting someone else use your ma-
chine, explain how to handle it carefully,
and have him/her read the lnstruction
Manual thoroughly.
Working place
1) Refrain from operating the machine where
there is danger of fire.
2) As exhaust fumes are poisonous, avoid
operating the machine in a poorly ventilated
place.
Equipment
1) Check to see that the ignition plugs are in-
stalled properly.
2) Check to see that the safeguards are properly
i nstalled.
3) Check to see that the machine is well bal-
anced when an attachment is connected.
Refueling
1 ) Be sure to stop the engine before refueling.
2) Keep the engine away from flame or heat.
3) Wipe fuel off clean if it should be spilt.
Starting the engine
1) Do not start the engine on a bumpy road or
gradients.
2) Keep the clutch lever at the disengaged posi-
tion and the speed change lever at neutral
when starting the engine.
Merci de lire attentivement les consignes ci-
après: le bon fonctionnement de votre moto-
culteur, et, partant, la satisfactlon que vous en
tirerez, en dépendent étroitement, votre sé-
curité aussi.
r Préparation
Opérateur
1) Notez qu'il est dangereux d'utiliser cet
appareil en certaines circonstances: état
d'ébriété, f emmes enceintes, etc...
2) Evitez les vêtements amples et flottants
toujours pour une question de sécurité.
3) Ne confiez pas votre appareil à un utilisateur
non averti.
Lieu d'utilisation
1) On évitera les lieux à risque d'incendie.
2) Dans un lieu fermé ou mal aéré, attention
aux gaz d'échappement, toujours toxiques.
Equipements
1) Vérifier le bon positionnement et l'état de
la bougie d'allumage.
2) Controler la bonne mise en place des carters
de protection.
3) Vérifier l'équilibrage de l'ensemble lorsque
le motoculteur est équipé d'un accessoire (il
existe des contrepoids en option).
Carbuiant
1) Toujours arrêter le moteur avant de fairele
plein de carburant.
2) S'éloigner de tout risque cl'incendie.
3) Essuyer soigneusement l'essence qui aurait
pu s'écouler au dehors.
Mise en marche
1) Eviter de lancer le moteur quand l'appareil
est en pente, ou posé sur un sol trop irrégu-
lier.
2) Avant le démarrage, bien vérifier que
l'appareil est débrayé, et que le levier de
vitesses est au neutre.
WWW.PlanDeGraissage.ORG

. Operation
Human
1l Keep people away from the rotor when it is
in operation; especially when turning the
machine right or left.
2) Do not get too close to the muffler or some
other heated or rotating parts.
3l Do not let others get too close to the ma-
chine.
4) When working with another tiller, let the
operator know what you are going to do.
Machine
1) Stop the engine immediately if something
abnormal is observed with the machine.
2) Before leaving the machine, be sure to stop
the engine and take the machine to a flat
place.
Travelling
1) Observe all traffic regulations when travel-
ling on the public road.
2) Be careful when travelling on gradients,
bumpy or soft roads. so as not to tip over
the machine.
3) On gradients. run the tiller at low speed; re-
frain from disengaging the clutch or putting
the speed change lever in neutral.
o Maintenance
Cleaning, checking and servicing
1) Maintain the machine whenever operation is
over.
2) Stop the engine and wait until it completely
cools downs, before starting the machine
maintenance.
3) Clean machine parts with the proper tools.
Do not do anything by hand when a tool is
called for.
4) Stop the machine on a flat place before
beginning maintenance.
5) Be sure to read the Owner's Manual for
checking, servicing and cleaning.
6) After cleaning, checking and servicing the
machine, be sure to refit the safeguards.
Attachments
1) Stop the engine when connecting an attach-
ment.
2) Connect attachments to the tiller only on
flat and safe places.
o Commande
Fonctionnement
1 ) Les spectateurs éventuels se tiendront à
distance lorsque l'appareil fonctionne,
surtout lors des virages.
2) Se méfier du pot d'échappement brulant, et
de tous les organes en rotation.
3) Veiller aux distances de sécurité si plusieurs
machines travaillent simultanément sur le
même terrain.
Apparei!
1) Stopper le moteur si l'on décèle la moindre
anomalie dans le fonctionnement.
2) Ne pas abandonner le motoculteur avec le
moteur en marche. Stationner sur un endroit
plat.
Transport
1) En cas de transport manuel sur une voie
publique, observer les règlements habituels
de circulation.
2) Attention à ne pas renverser l'appareil en
circulant sur sol irrégulier ou en pente.
3) Sur une pente, utiliser le rapport le plus lent:
ne pas débrayer, ne pas mettre le levier de
vitesses au neutre.
o Entretien
Nettoyaç, vérification, et entretien
1 ) Ces opérations sont à effectuer après chaque
période de travail.
2) Pour ce faire, attendre que le groupe moteur
soit refroidi.
3) Procéder au nettoyage et à l'entretien en
utilisant les outils adéquats. Lorsqu'un outil
est requis, ne pas tenter d'agir à la main.
4) Stationner sur un sol plat.
5) Lisez soigneusement le manuel avant toute
opération.
6) Après toute opération, pensez à remettre en
place les capots de protection.
Montage d'accessoires
1) Toujours arrêter le moteur pour monter un
accessoire ou un outil sur le motoculteur.
2) Choisir un endroit plat et sûr pour procéder
au montage.
WWW.PlanDeGraissage.ORG

o Transportation
Tiller loading/unloading
1) Stop the engine when loading or unloading
the tiller.
2) Be extremely careful not to upset or drop
the tiller.
o Storage
1l Store the tiller in a safe place.
o Transport
Chargement et en!èvement de motoculteur
1) Si vous soulevez la machine, veillez toujours
à stopper le moteur.
2) Et faites attention à ne pas le basculer, et à
fortiori, le laisser tornber.
. Stockage
1) Rangez votre motoculteur en lieu str, à
l'abri de toute manipulation ou utilisation
intempestive.
WWW.PlanDeGraissage.ORG

t-
I
I
IPart Nam es Nom enclatu re
No. Part Names
I
2
3
4
5
6
7
I
I
't0
t1
12
13
t4
t5
16
t7
t8
t9
20
Main Clutch lever
Adjusting lever (Handle swing)
Adjusting knob (Handle height)
P.T.O. shaft
Air cleaner
lnspection and oil level plug
Engine stop switch
Choke lever
Starting grip
Axle (Hexgon)
Fuel intake
Exhaust muffler
Engine oil drain
Engine oil intake & dipstick
Accelerating lever
Speed change lever
Belt cover
Steering clutch lever (T550 & T650)
Double-tension switch knob (7650)
Stand
No. Nomenclature
I
2
3
4
5
6
7
I
I
t0
t1
't2
t3
t4
15
16
t7
18
19
20
Levier d'embrayage
Levier de pivotement des
mancherons
Poignée de règlage en hauteur des
mancherouns
Arbre de prise de force
Filtre à air
Niveau d'huile
Bouton d'arrêt-moteur
Starter
Poignée du lanceur
Sortie 6 pans
Bouchon de réservoir
Pot d'échappement
Vis de vidange d'huile moteur
Orifice de remplissage d'huile moteur
Levier d'accélérateur
Levier de changement de vitesses
Cache courroie
Levier de déclabotage (7550 et 7650)
B ou to n d'em brayage (T650)
Béquille
WWW.PlanDeGraissage.ORG

\
5
P re- ope ration servicing
Preparation avant Emploi
1. TRANSMISSION CASE OIL
2.6 L of gear oil (SAE 80 or g0).
Q) Transmission case
oil intake plug
Q) lnspection & oit
level plug
2. ENGINE CRANKCASE
Keep the body horizontal. 0.6
SAE 30 or 20.
1. HUILE POUR LE CARTER DE
TRANSMISSION
2.6 litres d'huile (SAE 80 ou g0) pour transmis-
sion.
A Orifice d'huile de
la boîte de
transmission
@ Orifice de niveau
d'huile
2, HUILE MOTEUR
Maintenir le motoculteur horizontal 0.6 litre
d'huile moteur (SAE 30 ou 20).
C orifice de
remplissage
d'huile moteur
3. ALIMENTATION EN CARBURANT
2.3 litres d'essence ordinaire (jamais de super).
(T450, T550)
3.8 litres d'essence ordinaire (jamais de super).
(T650)
IATTENilONÏ
Pour le remplissage de carburant, ne pas enlever
le filtre.
0tL
I of engine oil
Q Engine oil intake
plug & dipstick
3. FUEL SUPPLY
2.39. of regular gasoline. (Two
(T450, T550)
3.8 Q of regular gasoline. (Two
(T650)
[cAufloNn
Be sure when supplying fuel that the strainer is
at the fuel intake.
star grade).
star grade).
J-1052
(!) Fuel intake A Bouchon de réservoir
WWW.PlanDeGraissage.ORG

(1)
l2l
4, LUBRICATION OF EXTERNAL
PARTS
Lubricate periodically the tension pulley
support shaft with engine oil SAE 20 or
30.
Lightly oil or grease exposed cables & ope-
rating controls.
@ Tension putley
support shaft
5. CHECK THE FOLLOWING BEFORE
STARTING THE ENGINE:
Examine the engine & transmission case for
oil leaks & the fuel tank & carburettor for
fuel leaks.
Damaged or exposed electric wires.
Replace all safety guards.
Missing axle set pins or loose blade bolts.
Dirty air cleaner element.
6. BREAK-IN
For the first three to five hours of operation,
avoid running the engine at high speeds or with
heavy loads.
4. LUBRIFICATION DE PIECES
EXTERNES
Lubrifier l'axe de bras de la poulie de
tension avec de l'huile moteur SAE 20 or
30.
Huiler ou graisser légèrement les parties
extérieures des cables de commande.
C ar" de bras de la
poulie de tension
5. AVANT LA MISE EN MARCHE
VERIFIER:
Fuites d'huile ou d'essence de carter de
moteur, transmission, réservoir à carburant
et carburateur,
Fils électriques endommagés ou mis à nu.
Remettre en place les capots de sécurité.
Vérifier si la goupille de calage'des axes
moteur est bien en place, et vérifier le
serrage des boulons.
Vérifier l'état du filtre à air.
RODAGE
Votre machine doit être rôdée pendant 3 à 5
heures.
(1)
t2l
(1) (1)
l2l
(3)
(4)
(5)
(2t
(3)
(4)
(5)
6.
_;
WWW.PlanDeGraissage.ORG

7
Sta rt ing The Engine
Mise en marche du moteur
(1)
(21
1. STARTING THE ENGINE
Check to see that the main clutch lever is
in "OFF" and the main speed change lever
is in neutral.
Open the fuel cock.
G) Fuel cock
@ oPtw
(D CTOSE
Puth the accelerating lever midway between
"FAST" and "SLOW".
C Accelerating lever
@ stow
@) FASr
Set the choke lever at "CLOSE".
ICAUTrONn
It is not necessary to operate the choke if
the engine is warm enough.
(1) choke tever
@ cross
Pull the recoil starter grip a little to engage
the drive dog. Then, pull it to your side.
IcAUrroNn
The starter cord will return by itself.
Allow it to return slowly.
1. DEMARRAGE DU MOTEUR
Vérifier que le motoculteur est débrayé, et
le levier de changement de vitesses en posi-
tion "neutre".
Ouvrir le robinet de carburant"
(! Robinet de
carburant
@ ouvtnr
@ rraur
(1)
l2l
(3) | (3) Tourner légèrement
teur. la manette d'accéléra-
C Manette
d'accélêrateur
@ LENT
@ RAPIDE
(41 En cas de démarrage à froid, le starter doit
être fermé.
(l Levier de starter
@ FERME
(5) Tirer la corde du lanceur jusqu'au déclic
puis tirer à f.ond énergiquement (le rappel
de la corde est automatique).
AI
(5)
WWW.PlanDeGraissage.ORG

(6)
(71
Gradually return the choke lever to
"OPEN" by taking engine condition into
consideration.
Warm up the engine for a few minutes,
then start oPeration
[cAuflON]
. Set the choke lever to the CHOKE position
when the engine is cold, and to the run posi-
tion when it is warm.
o lf the starter is pulled repeatedly with the
choke closed, overchoking might occur,
causing the ignition plug to become wet and
making engine starting difficult.
Whenever cverchoking occurs, open the
choke lever and open the accelerator fully;
using the recoil starter, turn the engine over
several times to clear out excess fuel.
Ouand le moteur a démarré, ouvrir le
starter Progressivement.
Avant de commencer à travailler, faire
tourner le moteur 2 à 3 minutes.
IArrENTrONn
o Moteur froid: levier de starter sur "starter".
. Moteur chaud: levier de starter en position
normale.
o Des tentatives répétées de lancement du
moteur en position "starter" risquent de
noyer la bougie, rendant le démarrage im-
possible.
Dans ce cas: 1) fermer le robinet d'essence
2l lermer le starter
3) accélérer à fond
4) faire tourner le moteur à
plusieurs reprises à l'aide du lanceur à main.
afin d'évacuer l'excès de carburant.
2. ARRET DU MOTEUR.
( 1) Tourner la manette d'accélérateur au
minimum.
(2) Appuyer sur le bouton d'arrêt,
Q) Bouton d'arrêt
(3) Fermer le robinet de carburant.
IArrENrroNn
. Le robinet laissé ouvert provoquerait
excès d'alimentation en carburant, ce
rendrait le prochain démarrage'difficile.
(6)
(71
2.
(1)
t2t
ENGINE STOPPING
Position the accelerating lever to slow posi-
tion.
Depress the stop button.
(D Stop button
(3) Close the fuel cock.
[cAUrroNn
o lf you fail to close the fuel cock, fuel may
overflow, flooding the engine and making
starting difficult next time.
un
qui
WWW.PlanDeGraissage.ORG

I
0peration U ti I is ation
1. ADJUSTING HANDLE HEIGHT
Loosen the adjusting knob, and adjust the
handle height, according to the type of job and
the height of the operator.
A Adiusting knob
(Handle height)
HIGH
LOW
2, SWIVELING THE HANDLE
(1) Lifting the handle swing lever allows the
handle to change position to the right or
left.
C Handle swing
lever
Lift the base of the speed change lever, and
set the handle to the desired position.
@ Speed change
lever
1. REGLAGE DE LA HAUTEUR DES
MANCHERONS
En desserrant la poignée régulatrice, positionner
les mancherons à la hauteur désirée, suivant le
type de travail et la taille de l'opérateur.
C Poignée
régulatrice
(Rqlage vertical
des mancherons)
@ HAUT
@ 8AS
PIVOTAGE DES MANCHERONS
Rotation des mancherons: un levier permet
de positionner les mancherons à droite ou
à gauche.
@ Levier de pivotement
des mancherons
(2) Tirer la base du levier de changement de
vitesses vers le haut et la fixer à la position
désirée.
O Levier de changement
de vitesses
@
@
2.
(1)
l2l
:(
WWW.PlanDeGraissage.ORG

10
IcAUilONn
lf the handle is to be kept in the center
position for a long time, fix it there by
tightening the handle lock bolt which is
found in the accessory box.
Q Handle lock
bolt
3. REVERSING THE HANDLE
r T450
With the speed change lever in neutral, lift the
handle swivel lever, and turn the handle clock-
wise.
r T550 & T650
(t) Put the speed change lever in neutral.
IcAUrroNn
The handle cannot be swiveled if the
speed change lever is put in either the
5th or 6th gear. Be sure to set the lever
in neutral before reversing the handle.
(2) Detach the wire bands holding the wires to
the handle.
G) Wire bands
Remove the steering clutch wires from the
steering clutch levers.
While lifting the handle swing lever, turn
the handle 180" clockwise.
IATTENTTONn
En cas d'une longue utilisation, man-
cherons en position normale, les bloquer
avec un boulon de fixation (ce boulon se
trouve dans la trousse à outils).
@ Boulon de
fixation
3. MANCHERONS EN POSITION
INVERSÉE
r T450
Le levier de changement de vitesses en position
neutre, faire fonctionner le levier de pivote-
ment, puis tourner complètement vers le haut.
r T550 et T650
(1) Levier de changement de vitesses en
positon neutre.
IATTENTIONn
Le retournement n'est pas possible si le
levier de changement de vitesses est
engagé en Seme ou 6eme.
(2) Détacher les cables des mancherons.
@ Bandesdes
cables
Détacher entr'eux les cables de déela-
botage et les poignées de déclabotage.
Faire fonctionner le levier de pivote-
ment puis tourner complètement vers la
DROITE.
C Cables de
déclabotage
@ Levier de
pivotement
@ Pivoter
(3)
(4)
(3)
(4)
L*&'''
@ Steering ctutch
wires
Q) Handle swing
lever
@ TURN 6)
2
WWW.PlanDeGraissage.ORG

11
"Ël'*â§
..-,v,irdiÉt,,r:.',a*"
(5) Turn the speed change lever by lifting its
base.
Speed change lever
Turn
Attach the steering clutch wires correctly
to the respective levers.
IcAUTTON]
It is necessary to reverse the positions of
the right and left steering clutch wires,
opposite to the normal handle positions.
Gather the wires, and fix them to the
handle with the wire bands.
IcAUiloNn
With the handle in the reversed position,
the sth and 6th speeds cannot be
obtained.
A Wire bands
(5) Tirer la base du levier de changement de
vitesses vers le haut et la fixer à la posi-
tion désirée.
@ Levier de changement
de vitesses
@ Pivoter
Remonter les cables de déclabotage sur
les poignées de déclabotage.
IATTENTTONn
Dans le cas d'inversement des mancherons,
le cable de déclabotage droit doit être
remonté sur la poignée gauche et inverse-
ment.
Attacher les cables sur les mancherons.
IATTENTTONÏ
En position mancherons inversés, pour la
sécurité le motoculteur ne peut pas fonc-
tionner en 5eme et 6eme vitesse.
(A Bandes des cables
c
@
(6)
17l
(6)
17l
t
l
WWW.PlanDeGraissage.ORG

12
4. SPEED & DIRECTION SELECTION
(1) Speed selection
r T450 & T550
By changing the position of the V-belt, be-
tween the high-speed and low-speed pul-
leys, 6 forward and 2 reverse speeds can be
achieved.
@ StOw (inside)
@ FAST but side)
IcAUTroNn
Stop the engine before removing the belt
cover.
r T650
By operating a knob on the fender, 6 for-
ward and 2 reverse speeds canbeachieved
(dou ble-tension system).
(D Knob
(ù SLOW (putt)
@; FAST (push)
IcAUilONn
lf the knob is difficult to push or pull,
remove the beta pin of the main clutch
lever and push the knob to make the
main clutch wire free.
4, SELECTION DE VITESSE
ET DE MARCHE AV/AR
(1) Sélection de vitesse
r T450 et T550:
Vous pouvez obtenir 6 vitesses en marche
avant et 2 vitesses en marche arrère, en
changeant la courroie en position grande
vitesse et petite vitesse.
@ Vitesse lente (lntérieur)
@ Yitesse rapide (Extérieur)
IATTENTTONn
Arrêter le moteur avant de toucher au
capot de courroie.
I T650:
Vous pouvez obtenir 6 vitesses en marche
avant et 2 vitesses en marche arrière, en
manoeuvrant le bouton qui se trouve sur le
côté droit.
Q) Bouton
@) LENT (Tirer)
@ AanOf (Pousser)
IATTENTToNn
En cas de difficulté pour faire fonc-
tionner le bouton de changement de
vitesses, détacher le cable d'embrayage du
levier de changement de vitesses, en
démontant la goupille.
CA)L- Y!lf Norma
^:îfl:^
Re v e rs ed / lnve rsée
,.,. \-i';i'
WWW.PlanDeGraissage.ORG

13
c
@
@
A Knoo
@ Beta pin
@ Push
IcAUTrONn
Be sure to operate the main clutch lever slowly
when working on a slope or confined area or
backing up the tiller. Otherwise the handle may
jerk upwards.
(2) Move the accelerating lever for the desired
speed.
('.1) Accelerating lever
@t stow
@ asr
5. START & STOP
For starting, shift the main clutch lever to the
position "1N".
For stopping, shift the main clutch lever to the
position "OUT".
(ÿ Uain clutch lever
@) oUT
@r lru
A Bouto,
(ù Goupilte
@ Pousser
IATTENTTONn
(1) En cas de difficulté pour passer les vites-
ses, engager une nouvelle fois l'embrayage
et recommencer.
l2l La sélection AV/AR se fait en déplaçant
le levier marche sur'Avant" ou "Arriere".
(2) Réglez les gaz à volonté.
Ma nette d'accélérateu r
SLOW (Lent)
rAST (Rapide)
5. DEMARRAGE & ARRET
( E M e nnync E- DE B RAYAG E)
Pour mettre en marche, déplacer le levier
d'embrayage (en position) "MARCHE".
Pour débrayer déplacer le levier d'embrayage en
position "ARRET".
(! Levier d'embrayage
@; nnatr
@ MARCHE
IATTENTTONn
Pour un travail en pente ou dans un endroit
très étroit, en marche arrière utiliser l'embray-
age avec précaution.
WWW.PlanDeGraissage.ORG

14
6. TURNING (rsso.T650)
To turn the tractor to the right or left, use the
steering clutch levers. Squeeze the right steering
clutch lever to turn to the righu squeeze the
left one to turn to the left.
IcAUfloN]
It is very dangerous to touch the steering clutch
levers when the tractor is travelling on a slope
or drawing an implement.
C Right steering clutch lever
8) teft sæering clutch lever
6. POUR TOURNER (TSSO.T650)
Pour tourner à droite ou à gauche, utiliser les
déclabotages. Pour tourner à droite, actionner
le déclabotage droit, pour tourner à gauche, le
déclabotage gauche.
IATTENTTONn
ll est très dangereux d'actionner les déclabo-
tages lorsque le motoculteur est en marche sur
un terrain en pente ou lorsqu'il remorque.
| (.0 oeaamtuge droit
I z DéclaOotage gauche
--J".fl
WWW.PlanDeGraissage.ORG

15
Maintenance E ntretien
(1)
(21
1. MAINTENANCE
Allow about a ten-gour running-in. And
avoid hard use during this period.
Change oil as specified below. lt is re-
commended to drain oil immediately after
use.
(.i; Engine oil drain plug
...21 Gear oil drain Plug
o Oil draining
To eliminate all foreign matter in the case at
the same time, drain oil while it is still warm
after use.
1. ENTRETIEN
Roder le moteur pendant une dizaine
d'heures en évitant les surcharges.
Renouveler l'huile comme spécifié ci-
dessous, il est préférable de faire la vidange
d'huile iuste après usage (moteur chaud).
1) Orifice de vidange d'huile moteur
(à Oritice de vidange d'huile pour engrenage
o Vidange
lncliner le moteur légèrement vers l'avant et
vidanger. Faire cette opération lorsque le
moteur est encore chaud, pour une meilleure
vidange.
(1)
(21
Location First
change Second and
thereafter Grade of oil O'ty
Engine
cra n kcase 20 hours Every
50 hours Engine oil
SAE 30 or 20 0.6 r
Transmission
case 50 hours Every
100 hours Gear oil SAE
80 or 90 2.8 e
Organes Prem ier
renouvellement
Deuxième
renouvellement
et suivants
Type
d'h uile Ouantité
Carter de
moteur 20 heures Toutes les
50 heures
Huile
moteur
SAE 30 ou
20
0.6 r
Carter de
transmis-
sion 50 heures ïoutes les
1 00 heures
Huile
engrenage
SAE 80
ou 90
2.8 e
î*
WWW.PlanDeGraissage.ORG

16
lf belt slips Lengthen adjuster.
lf main clutch lever
operation is heavy. Shorten adjuster.
Proper belt tension
With main clutch engaged.
a deflection of 1.0 to 1.5
cm is achieved when
pressing with a finger belt
midway between pu llerys.
2. ADJUSTING THE MAIN CLUTCH
lf, with the main clutch lever engaged, the V-
velt slips, failing to transmit power to the
wheels, or if the lever is difficult to engage
owing to an excessively tight belt, correct the
belt tightness by adjusting the tension pulley by
means of the wire adiuster.
(1) Tighten the lock nut on the tightener after
adjustment. The proper belt play, when
pressed at the center lightly by hand
(about 1.5k9 of pressure), is 1.0 to 1.scm
with the clutch engaged.
Q Tightener
Q- Lock nuæ
2, NÉCUCT D'EMBRAYAGE
Dans le cas où la courroie patine, ou si le
levier d'embrayage est trop dur, régler avec le
tendeur sur le cable d'embrayage.
(1) Après avoir réglé le tendeur, resserrer
l'écrou de verrouillage sur le tendeur.
Lorsque vous appuyez légèrement à la mian
(environ 1.5kg de pression) sur le centre de
la courroie, le jeu propre sera de 1.0 à
1.Scm avec l'embrayage engagé.
A Tendeur
(à Ecrou de verrouillage
Si la courroie patine Allonger le tendeur.
Si l'opération du
levier d'embrayage
principal est lourde, Raccourcir le tendeur.
Tension la courroie
Avec l'embrayage prin-
cipal engagé. la courroie
devra présenterune déf-
lexion de 1.0 à I.Scm,
en étant pressée du doigt
au milieu des deux poulies.
.Z
WWW.PlanDeGraissage.ORG
This manual suits for next models
2
Table of contents
Other Kubota Tiller manuals