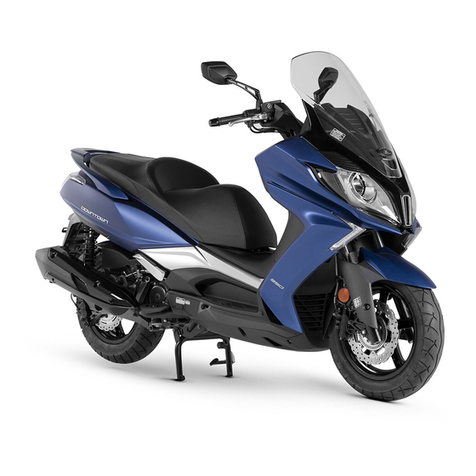
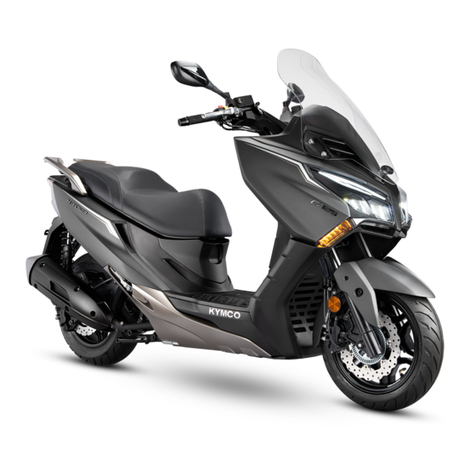
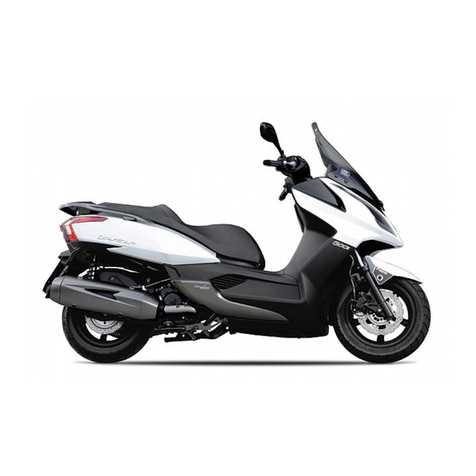
KYMCO X-Town 300 User manual

WARNING
WARNING
To avoid damage from the electronic fuel injection system, do not remove or install the
battery when the ignition switch is in the "ON" position.
The long-term storage of the vehicle could cause fuel and engine oil deterioration and
probably get into a non-start situation.
Service more frequently when operating in severe conditions such as dusty area, high
speed riding, frequent start and stop or extreme riding habit.
Make sure to keep away from any flammable materials such as dry grasses or leaves,
avoid them in contact with the exhaust pipe or muffler when parking the vehicle.

Read this manual carefully.
This Owner’sManual contains important information on safety, operation and maintenance of KYMCO X-
Town 300.Anyone who is going to ride should carefully read and understand the contentsof thismanual
before riding. For personal safety, understand and follow all of the warnings contained in this Owner’s
Manual and the labels attached on vehicle. This Owner’s Manual should be considered a permanent
partofthevehicle,keepitwith the motorcycle.ON-ROADUSEONLYfor this motorcycle.
Particularly important information is provided in this manual by the following
symbols and signal words:
The SAFETY ALERT symbol means ATTENTION! BE ALERT!
YOURSAFETYCAN BE AFFECTED.
WARNING
CAUTION
Failure to follow these instructions can result in severe injury or death.
These instructions point out the special precautions must be
followed to avoiddamage.
▆NOTE:The NOTE indicates the additional important information.

Identification Numbers Record
Vehicle Identification Number (VIN)
Engine Serial Number (ESN)
Record the Vehicle Identification Number①,
Engine Serial Number②, in the blanks
above for a reference to assist you in
ordering parts from the authorized KYMCO
dealer or in case the vehicle is stolen.
1
2

TABLE OF CONTENTS
SECTION 1–SAFETY INTRODUCTION....
Forward......................................................
.
Scooter Safety............................................
Accessories &
Modifications.......................
Locations of Parts & Controls.....................
SECTION 2–CONTROLS &
FEATURES...
Ignition Switch............................................
Security shutter..........................................
Instruments................................................
USB power supply.....................................
Right-hand Handlebar
Switch.....................
Left-hand Handlebar Switch.......................
Fuel Recommendation...............................
Seat............................................................
Suspension................................................
Side stand..................................................
SECTION 3–OPERATION.........................
Pre-ride Inspection.....................................
Break-In......................................................
Startin
g the
Engin
e........
..........
..........
.........
ABS
Syste
m
(Optio
nal)....
..........
..........
......
1
1
2
4
5
8
8
9
10
16
17
18
19
20
22
23
24
24
25
26
28
SECTION 4–MAINTENANCE................
Maintenance Schedule..........................
Engine Oil..............................................
Engine Oil Replacement........................
Transmission Fluid Change...................
Air Filter Element ..................................
Throttle Operation..................................
Spark Plug.............................................
Brake Fluid Level Inspection.................
Brake Lever Adjusters...........................
Brake Pad
Inspection..
..................
.........
Battery.......
..................
..................
.........
Fuse..........
..................
..................
.........
Tires..........
..................
..................
.........
Coolant......
..................
..................
.........
Clean the
Windshield.
..................
..........
Crankcase

Blow-by Drain.......................
Storage...................................................
EMISSION CONTROL...........................
SPECIFICATIONS..................................
29
30
33
34
35
36
36
37
38
39
40
41
42
43
45
47
47
48
49
50

SECTION 1 -
FORWARD & SAFETY INTRODUCTION
Thanks for purchasing this KYMCO X-Town 300, and welcome to the KYMCO family.
Please read this owner's manual carefully before riding so that you will be thoroughly familiar with
the properoperationofcontrols,features,capabilities,andlimitations.
To ensure a long, trouble-free life for using the vehicle, provide it with the proper care and
maintenance as describedinthismanual.
For replacement parts andaccessories, you should always use genuineKYMCO products, as they
have beenspeciallydesignedforthevehicleandmanufacturedtomeetthestandards. Keep this
owner's manual with the motorcycle at all times so that you can refer to it whenever you need
information. This manual should be considered a permanent part of the motorcycle and should
remain with thevehiclewhenitissold.
All information, illustrations, photographs and specifications contained in this manual are based on
the latest product information available at the time of publication. Due to improvements or other
changes, there maybeslightly differentfromthe vehicle.KYMCOreservesthe rightto makeproduct
andpublicationchangesatanytimewithoutnoticeor obligation.
1

SCOOTER SAFETY
IMPORTANT SAFETY INFORMATION
It will be used longer and pleasure if you take
responsibility for your safety and understand the
challenges that you could face on the road. There
is much that you can do to protect yourself.
Here are many helpful recommendations and
some very important tips in this manual.
Wear a helmet
The safety equipment starts with a quality helmet.
One of the most serious injuries in a crash is a
head injury. Always wear a properly approved
helmet and also wear suitableeyesprotection.
Make
you
easy to see
To make yourself more visible, wear bright
reflective clothing to position yourself clearly, so
other drivers can see you, signal before turning or
changinglanes,anduseyourhorn whenitwillhelp
othersnoticeyou.
Know your limits
Always ride within the limitation of personal skill.
Know these limits and stay within themwillhelpyou
toavoidaccidents.
2
Keep the vehicle in safe condition
For safe riding, it's important to inspect the
vehicle before every ride and perform all
recommended maintenance. Never exceed
load limits, and only use the approved
accessories.
Inspect the vehicle before riding
Donotforget toperform anentire safety
inspection to ensure safety for all riders before
riding.
Be very conscious on bad weather
Riding on bad weather requires extra caution
especially it’s wet. Braking distance is longer
on a rainy day. Keep off the painted
surfaces, manhole covers and greasy spots
on the paved road as it could be especially
slippery. Use extreme caution onthe railway
crossing oron themetalsurface.Whenever in
doubtabouttheroadcondition,please slow
down.
Modification
Modification on the vehicle or removal of
original equipmentmayhavethevehicle
become unsafeorillegal. Obey all the related
equipment regulations from the authority.
SCOOTER SAFETY
PROTECTIVE CLOTHING
For your safety, always wear an approved
motorcycle or scooter helmet, eyes protection,
boots,gloves,longpants,andalong-sleeveshirt or
jacketduring a ride.
Helmets and protection
The helmet is the most important gear because it
offers the best protection against head injury. The
helmet should fit your head comfortably and
securely. Always wear a face shield or goggles to
protect eyes, but not to interfere with thevision.
Additional riding gears
In addition to the head and eyes protection, you
shouldalsouse:
Sturdy boots with non-slip soles to help protect
feetandankles.
Leather gloves to keep your hands warm and
preventblisters,cuts,burnsandbruises.
Amotorcycle suit is designed for comfort as well
as protection. Bright color with reflection strips
canmake you more noticeable. Be sure to avoid
loose clothes that could get caught on any part of
the vehicle.
The recommended riding gears:
①Wear gloves
②Clothes should be fit properly
③Always wear a helmet with eye protection
④Wear bright or reflective clothing
⑤Footwear should be the proper size, have low
heels, and offerankle protection.
WARNING
∎Not wearing a helmet increases your
chance of serious injury or death in an
accident.
∎Be sure you and your passenger always
wear an approved motorcycle helmet
that fits properly. You should also wear
eyes protection and other protective
clothingduring a ride.

3

ACCESSORIES & MODIFICATION
There is a large variety of accessories available to KYMCO vehicle owners. KYMCO cannot have
direct control over the quality or suitability of accessories you may wish to purchase. The addition of
unsuitable accessories canlead to unsafe operation.It is not possible forKYMCOto test each
accessory on the market or combinations of all the available accessories; however, the
KYMCOdealercanassistyouinselectingqualityaccessoriesandtheninstallthemcorrectly.
Use extreme caution when selecting and installing the accessories.
No modifications:
KYMCO strongly advises you against removing any original equipment or modifying the vehicle in
any waythatwouldchangeitsdesignoroperation.
WARNING
Improperaccessoriesormodificationscanmakethe vehicleunsafeandcanleadtoanaccident.
Never modify the vehicle through the improper installation or use of accessories. All parts
and accessoriesaddedto thisvehicleshouldbegenuineKYMCOparts orequivalent
componentsdesignedforuse on this vehicle and should be installed and used according to the
correct instruction. If you have any questions, consulttheauthorizedKYMCOdealer.
4

LOCATION OF PARTS & CONTROLS
1 Headlight
2 Rear Brake Lever
3 Front Left Turn Signal Light
4 Fuel Filler Cap
5 Helmet Hook
6 Side Stand
7 Seat
8 Engine Number
9 Air Cleaner
10 Rear Left Turn Signal Light
11 Tail/Brake Light
12 Luggage Box
13 Reflector
▆NOTE: Your scooter may differ slightly in appearance from the images in this manual.
5
1
2
3
4
7
10
13
11
12
5
6
8
9
13

LOCATION OF PARTS & CONTROLS
14 Right Turn Signal Light
15 Muffler
16 Oil Filler Cap/dipstick
17 Center Stand
18 Rear Passenger Foot Peg
19 Front Brake Lever
20 Right Turn Signal Light
21 Right Handlebar Switch
22 Ignition Switch
23 Vehicle Identification Number (VIN)
▆NOTE: Your scooter may differ slightly in appearance from the images in this manual.
23
14
22
21
20
19
15
16
17
18
6

LOCATION OF PARTS & CONTROLS
24 Front Turn Signal Light
25 Headlight
26 Left Storage Compartment
(Accessory Socket)
27 Tail/Brake Light
28 Rear Turn Signal Light
29 Right Storage Compartment
▆NOTE: Your scooter may differ slightly in appearance from the images in this manual. 7
24
24
27
29
28
28
26

SECTION 2 - CONTROLS&FEATURES
IGNITION SWITCH
Tooperatetheignitionswitchandit'sfunctions:
With the ignition key in the " " position (the
engine is not running), turn the counterclockwise
“”Position:
All electrical circuits are off. The engine will not fromthe" "tothe " " position.
startorrun.
“”Position:
The ignition circuit is "ON" and engine can be
started. The key can not be removed from the
ignitionswitchinthisposition.
Pulluponthebackportionoftheseattoliftitup.
“ ”Position:
To lock the steering, turn the handlebar all the way
to the left, push down and turn the key to the " "
position and remove the key. All electrical circuits
areoff.
“ ”Position:
With the ignition key at the " " position (the
engine is running), push the key in and turn it

counterclockwisefrom " " tothe" "position.
8

SECURITY SHUTTER
CONTROLS & FEATURES
To open the ignition switch security
shutter:
Push the shut button on the ignition switch
panel to close thesecurity shutter.
To shut the ignition switch security
shutter:
Insert the specific key until the notch is
alignedwith thepin .
Turn clockwise to open the security shutter.
The keys have a unique code that is stamped on
the tab with the keys. This code is required if you
need to duplicate the key. Record this important
code on the blank column below.
Security shutter key code:
1
2
2
3
2

9

INSTRUMENTS
CONTROLS & FEATURES
Speedometer: Indicates the road speed in
Km/h (kilometers per hour).
Coolant temperature gauge
Turn Signal Indicator Light: Flashes when
either turn signal is being used.
Odometer/Trip meter: Press the mode button
to toggle between the overall and trip mileage,
or to reset the trip meter.
˙Press the “MODE” button to enter the ODO,
Trip A/B, Oil Service or Empty mode.
˙Press the “RESET”button for 3 seconds to
reset on the Trip A/B, Oil Service mode.
˙Press the “MODE”and “RESET”buttons for
3 seconds to set the unit of km/h or MPH.
Clock
Fuel Warning Indicator “ “: This indicator
lights when the fuel tank is near empty to alert
the rider to refill the fuel tank as soon as
possible.
High Beam Indicator Light: This light is
illuminated when the headlight high beam is
on.
Tachometer: Indicates the engine speed in
the revolutions per minute (RPM)
MODE
FUNC
RESET
1
2
2
2
3
2
3
2
4
2
5
2
6
2
8
2
7
2
2
2

10
10

CONTROLS & FEATURES
9CELP indicator: If flashing(EURO 4 models would keep
lighting), it indicates that a fault has been detected in the
EFI or electrical system. Need to have immediate
inspection by the authorized KYMCO dealer.
▆NOTE: The CELP indicator lights momentarily
when the ignition switch is turned on before starting
engine.
10 Oil service indicator: It lights up when reaching the
oil service mileage interval. Whenever the ignition
switch is turned on, it goes on then off at once after
starting engine.
˙Press the “MODE” button to enter the ODO,
Trip A/B, Empty display ( Service Mode )
˙Press the “RESET”button for 3 seconds to
reset on the Oil Service mode.
11 Battery Warning Indicator:
If the battery voltage is too low while starting the
engine. The indicator can be lighting. The engine
fails to be restarted unless the battery should be
recharged completely.
11
9
1
0
11
Table of contents
Other KYMCO Motorcycle manuals

KYMCO
KYMCO X-Town 250 ABS User manual

KYMCO
KYMCO Quannon 150 User manual

KYMCO
KYMCO 125 MOVIE S INJECTION User manual

KYMCO
KYMCO CV3 Series User manual

KYMCO
KYMCO Downtown 350i Operating instructions

KYMCO
KYMCO downtown 300i User manual

KYMCO
KYMCO NEXXON 50 User manual

KYMCO
KYMCO Dink 50 Release note

KYMCO
KYMCO K-PIPE 125 User manual

KYMCO
KYMCO FILLY 50 User manual

KYMCO
KYMCO 125 ZING II QE - User manual

KYMCO
KYMCO G-Dink 125i User manual

KYMCO
KYMCO X-Town CT125 User manual

KYMCO
KYMCO Stryker 125 User manual

KYMCO
KYMCO 125 ZING II QE - User manual

KYMCO
KYMCO K-XCT 125i User manual

KYMCO
KYMCO AGILITY300 User manual

KYMCO
KYMCO Active 50 User manual

KYMCO
KYMCO 125 PULSAR User manual

KYMCO
KYMCO Dink 50 User manual