4.3 Backlight
In the measurement process, if the ambient light is too dark to read,
you can press " " key to open the backlight. Backlight timer is set to 15
seconds. During this period, you can press " " key again to turn off
backlight at any time.
Note:
The luminous body of backlight is LED with large operating current.
Frequently using backlight will shorten battery life. Do not use backlight
when unnecessary.
When the battery voltage ≤ 7V, the " " (low battery) symbol will show
on the display. However, in the case of using the backlight, if the battery
voltage ≥ 7V, the battery voltage drops because of its larger operating
current, "
" symbol may show (when "
" symbol is showing, the
accuracy of the measurement can’t be guaranteed). At this moment,
you needn’t replace battery until the "
" symbol display again under
normal use condition without using backlight.
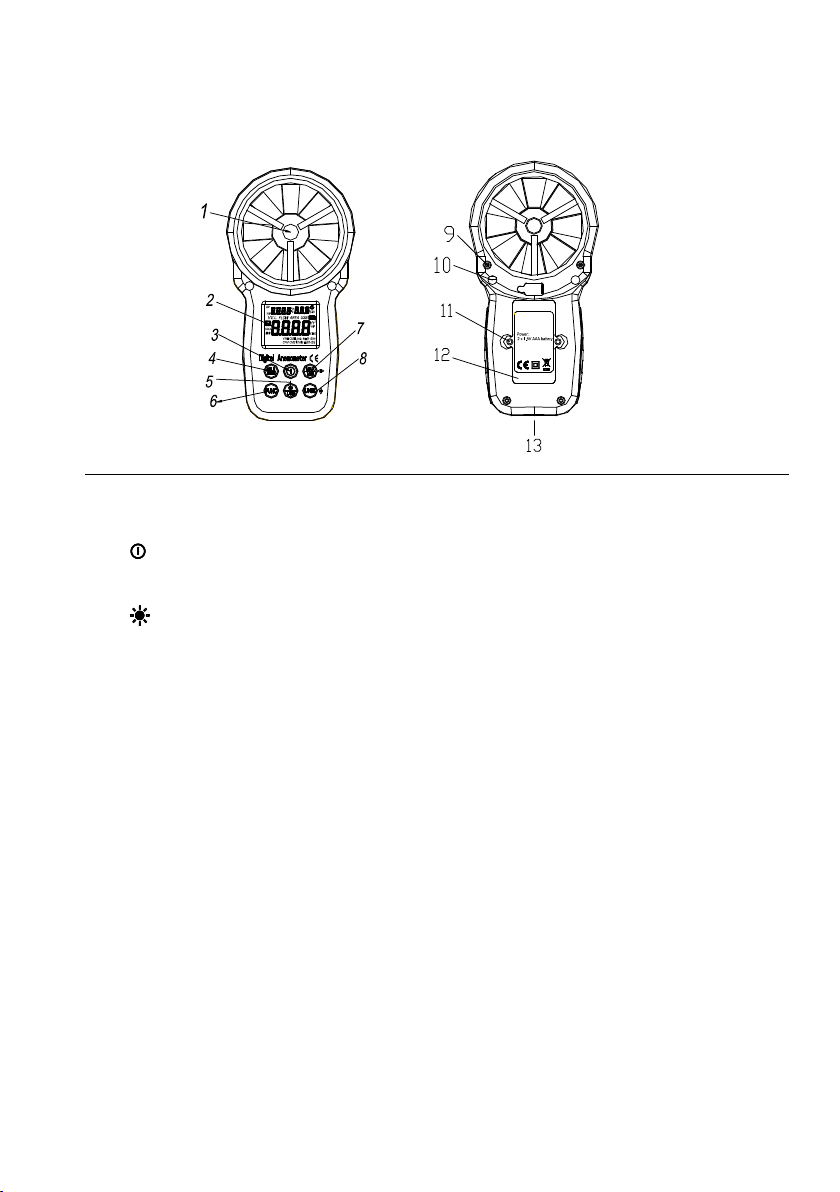
4.4 Wind speed measurement
Place the detector (fan) into the test environment, "VEL" symbol will
display on the screen, measurement is done with the fan surface
perpendicularly to the wind direction.
Note:
1. If the detector (fan) is not aiming at the wind direction, which will bring
the measurement error.
2. For steady wind, the detector (fan) will get maximum reading when it is
aiming at the wind direction.
4.5 Wind speed measurement
When using the meter to measure air volume, you can press “UNIT”
key to select the measurement unit you required (m/s, km/h, MPH, ft/m, ft/s,
knots).