Tenma 72-10465 User manual

1
LCR METER
Model: 72-10465

2
CONTENTS
Page Number Details
3 Important Safety Information
3 Measurement Range & Accuracy
3 Ambient Conditions
4 Features
4 Impedance Explanation
4 Measurement Mode
5 LCD Description
5Acronym Denitions
5 Product Overview
6 Operation - Automatic Measurement
6 Data Hold
6 Measurement Parameter Under L/C/R Mode
6 Measurement Frequency
7 REL% Measurement
7 Sorting Measurement
8 Calibration Function
8 PC Communication
9 Backlight
9 Auto Power Off
9 Selection of Serial/Parallel Mode
9 Inductance Measurement
9 Capacitance Measurement
10 Resistance Measurement
10 DCR Measurement
10 PC Communication Protocol
10 Technical Indicators
13 Battery Replacement
14 Maintenance
WHAT’S INCLUDED
• One LCR meter
• One user manual
• One USB adaptor
• Short circuit test piece
• Short circuit adaptor
• One software disc
• One tweezer probe

3
IMPORTANT SAFETY INFORMATION
• When using electrical appliances basic safety precautions should always be
followed.
• Do not use the meter in environments exposed to explosive gas, vapour or dust, in
direct sunlight or high radiation.
•There are no user serviceable parts in this product. Refer all servicing to qualied
personnel.
• Turn off all the circuit power and discharge completely all capacitors before
measuring in-line components.
• Measurement terminals, capacitors and other live components must be discharged
before being measured.
• There are two power supplies available for the meter: 9V battery and USB
powered.
• If the USB port is connected to the PC, the meter is USB-powered and will
communicate with the PC for data collection.
MEASUREMENT RANGE & ACCURACY
L: 20mH - 2000H best accuracy: (0.5% + 5)
C: 200pF - 20µF best accuracy: (0.5% + 5)
R: 20Ω - 200MΩ best accuracy: (0.3% + 5)
Impedance/
Frequency DCR 100/120Hz 1kHz 10kHz 100kHz
0.1-1 1.0% 1.0% 1.0% 1.0% 1.0%
1-10 0.5% 0.5% 0.5% 0.5% 0.5%
10-100k 0.3% 0.3% 0.3% 0.5% 0.3%
100k-1M 0.5% 0.5% 0.5% 1.0%
1M-20M 1.0% 1.0% 1.0%
20M-200M 2.0% 2.0% 5.0%
Remark D ≤ 0.1
Note: Multiply by √1+D² if D exceeds 0.1
Formula to convert capacitance to impedance: Zᶜ = 1/2πfC
Formula to convert inductance to impedance: Zᶫ = 2πfL
AMBIENT CONDITIONS
• Altitude: <2000 metres
•Storage humidity: ≤ 75% RH
• Operating environment: 0°C~40°C
• Storage environment: -20°C~50°C
Please read these instructions carefully before use and retain for future
reference.

4
FEATURES
• Main display: 19999 count. Secondary display: 1999 count.
• Measurement frequency: 100Hz/120Hz/1kHz/10kHz/100kHz.
• Measurement voltage: 0.6Vrms.
•Output impedance: 120Ω.
• Basic accuracy: 0.5%.
•LCR automatic identication/manual measurement.
• DC resistance (DCR) measurement.
• Auto calibration.
• Auto power off.
• Relative measurement and sorting function.
• Communicates with PC using mini-USB interface to acquire, analyse and collect
data.
IMPEDANCE EXPLANATION
• Impedance is compromised of two
base components – Resistance
and Reactance.
• This LCR meter is capable of
measuring both Resistance and
Reactance.
• Reactance varies in proportion to
the frequency of the AC circuit.
• Impedance forms an imaginary
vector comprised of Resistance
R (real) and Reactance X
(imaginary) with Impedance
Z=R+jX, which can also be
represented by amplitude |Z| and
phase angle θ, which can be seen
in the diagram.
•If the phase angle θ > 0, the reactance is inductive in nature, if θ < 0 the reactance
is capacitive in nature.
MEASUREMENT MODE
Impedance can be measured in serial or parallel mode. Under parallel mode,
impedance Z can be expressed in relation with the admittance Y and Y=G+jB. G is
conductance and is B admittance.
Serial Measurement
Rˢ: Serial mode of resistance
Xˢ: Serial mode of reactance
Cˢ: Serial mode of capacitance
Lˢ: Serial mode of inductance
Rˢ jXˢ
Z = Rˢ + jXˢ

5
Parallel Measurement
Rᵖ: Parallel mode of resistance
Xᵖ: Parallel mode of reactance
Cᵖ: Parallel mode of capacitance
Lᵖ: Parallel mode of inductance
LCD DESCRIPTION
1. USB communication
2. Open/short calibration
3. Auto power off
4. Relative measurement
5. Main display
6. Secondary display
7. Analogue bar
8. Sorting tolerance mode
9. Data hold
ACRONYM DEFINITIONS
1. LCR: Automatic identication mode
2. Lᵖ: Parallel measurement mode for
inductance
3. Lˢ: Serial measurement mode for
inductance
4. Cᵖ: Parallel measurement mode for
capacitance
5. Cˢ: Serial measurement mode for
capacitance
6. Rᵖ: Parallel measurement mode for
resistance
7. Rˢ: Serial measurement mode for
resistance
PRODUCT OVERVIEW
8. DCR: DC resistance measurement mode
9. D: Dissipation factor
10. Q: Quality factor
11. θ: Phase angle
12. ESR: Equivalent serial resistance
13. EPR: Equivalent parallel resistance
14. DUT: Device under test
15. Short press (<1 second), long press
(>2 seconds): indicating the time to press
a button.
1. LCD
2. Frequency/sorting button
3. Open/short calibration button
4. Power on/off button
5. USB communication button
6. D/Q/θ selection button
7. Relative button
8. Input terminals
9. Guard terminals
10. Serial/parallel selection button
11. L/C/R function button
12. Enter/hold button
13. Sorting setup button
Y = 1/Z = 1/Rᵖ + 1/jXᵖ = G + jB
Rᵖ
jXᵖ
7)

6
OPERATION - AUTOMATIC MEASUREMENT
• Once the meter is switched on, it defaults to AUTO LCR mode, at the frequency of
1kHz.
• In auto mode, the meter can automatically check the impedance characteristics of
a tested object and then select L, C or R main parameter, its associated secondary
parameter and the correct serial/parallel mode accordingly.
• Correspondence between the main and secondary parameter under auto mode:
- Capacitance (C) - Dissipation (D)
- Inductance (L) - Quality Factor (Q)
- Resistance (R) - Phase Angle (θ)
• Under auto measurement mode, serial/parallel mode is determined based on the
impedance of the tested object.
•The parallel mode is selected if the impedance is greater than 10kΩ.
•The serial mode is selected if the impedance is less than 10kΩ.
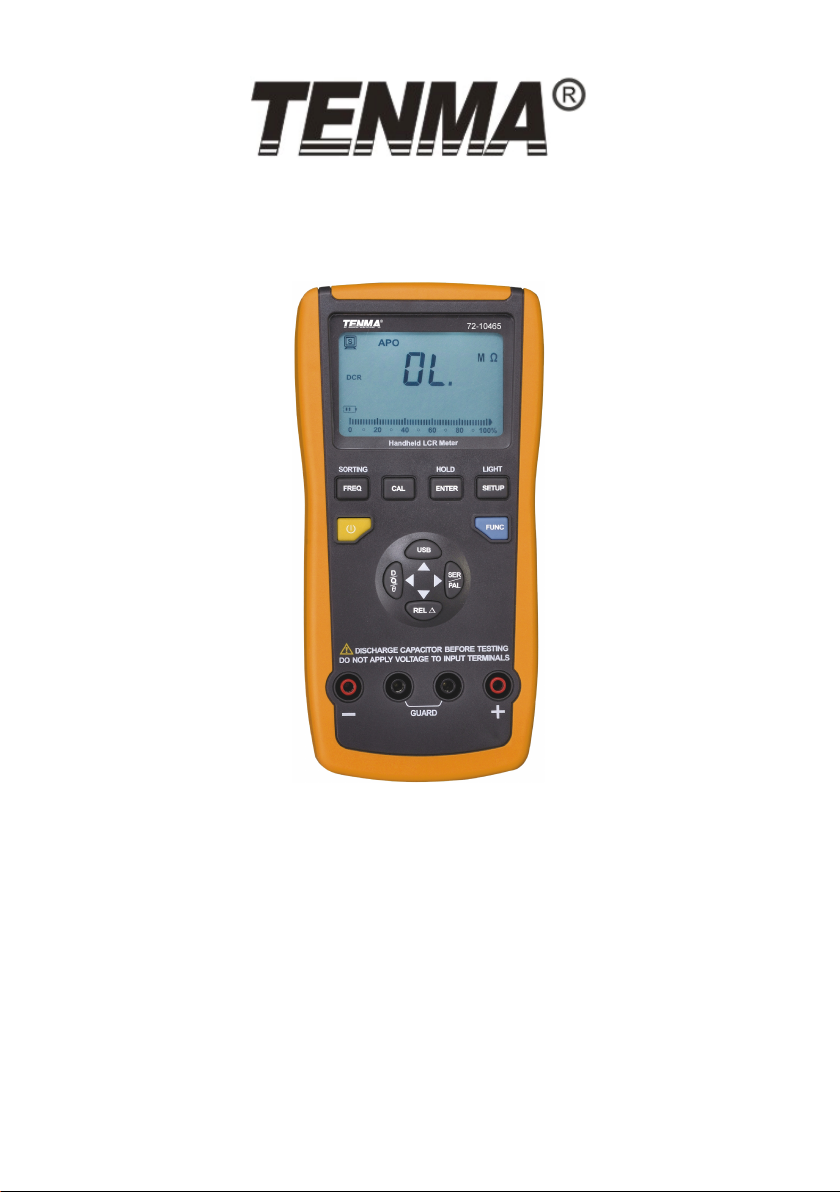
DATA HOLD
• Press and hold the HOLD button to freeze the data during measurement.
• Press again to exit and return to normal measurement.
MEASUREMENT PARAMETER UNDER L/C/R MODE
• Select the corresponding parameters under manual L/C/R mode.
Selection of main parameter:
• Default status is AUTO LCR once powered on.
• Select “FUNC” to select parameters of:
“AUTO LCR → AUTO L → AUTO C → AUTO R → DCR → AUTO LCR”.
Selection of secondary parameter:
• After a main parameter has been selected, press SER/PAL to switch between
serial and parallel mode,
• Press D/Q/θ to select “D”, “Q”, “θ”, “ESR” (“ESR” will show if under serial mode
and likewise “Rp” if parallel mode is selected).
• Under “AUTO R” or “AUTO DCR”, the secondary parameter will be negligible.
Notes:
•When measuring capacitance <5pF under AUTO LCR mode, “Rᵖ” will show on the
secondary display instead of Dissipation factor (D).
• Some secondary parameters will not show on the LCD even if you have accessed
“AUTO R”, “AUTO DCR” or “AUTO LCR” mode.
MEASUREMENT FREQUENCY
•This model can provide ve frequency testing points:
100Hz/120Hz/1kHz/10kHz/100kHz.
• Default frequency is 1kHz, although the user can press FREQ to select:
“1kHZ → 10kHz → 100kHz → 100Hz → 120Hz → 1kHz”.
Note: DC impedance is measured under “AUTO DCR” mode and measurement
frequency can be neglected.

7
REL% MEASUREMENT
• REL% mode measures % deviation between two components.
•The measured value of the tested object shows on the main display, with the %
value on the secondary display.
• Set the main display value as the nominal reference.
• % display range: -99%~99.9%.
•% calculation: REL%=(Dᶜᵘʳ-Dʳᵉᶠ)/Dʳᵉᶠ* 100%.
Dᶜᵘʳ: main display value of tested object.
Dʳᵉᶠ: the reference value that has been set.
•If Dᶜᵘʳ > 2Dʳᵉᶠ or 2Dᶜᵘʳ < Dʳᵉᶠ, “OL%” will display on the secondary display and the
main display will show the measured value of the tested object.
Access REL mode
• Press FUNC to select the desired “AUTO L”, “AUTO C”, “AUTO R” or “AUTO
DCR” mode.
•Connect the tested object to the input terminals and press REL to access REL%
mode.
• appears on the LCD with the main display showing the measured component
value and the secondary display showing % of deviation.
• Press REL again and the reference value will show on the main display and the
icon flashes, while the % value will still be visible on the secondary display.
• Press REL again to return to normal REL% measurement mode.
• Press and hold REL to exit REL% measurement and return to normal mode.
SORTING MEASUREMENT
•Sorting mode is used to quickly select components’ value within a specied
tolerance.
• Press FUNC to select the desired “AUTO L”, “AUTO C”, “AUTO R” or “AUTO
DCR” mode.
•Connect the tested object to the input terminals and press and hold FREQ to
access sorting mode. “Sorting” will appear on the LCD. This sets the limit value.
• “PASS” shows on the main display and the measured component value on the
secondary display is set to a nominal value.
• Connect another component and “PASS” will show if the component falls within the
set limit and the measured value shows on the secondary display.
• The buzzer will sound once. If it is out of scope, “FAIL” shows and the measured
component value.
• Press and hold FREQ to exit.
Set up sorting tolerance
• The sorting limit can be set at the following values:
±0.25%, ±0.5%, ±1%, ±2%, ±5% ±10%, ±20%, +80%~-20%.
• The meter defaults to ±1%. To set up sorting, put the meter under sorting mode
first and then press SETUP and the “Range” icon will flash on the LCD.
• Press ENTER to confirm and set the main display parameter, of which the last digit
flashes.
•Press ▼/▲ to decrease/increase the digit or ◄/► to select another flashing digit
for adjustment.

8
• Then press ENTER to go into the tolerance setup and the “TOL±1%” icon will flash
on the LCD.
•Press ◄/► to adjust the tolerance and then press ENTER to confirm, to allow you
to begin the sorting measurement.
• Press SORTING to exit sorting measurement and return to normal mode.
CALIBRATION FUNCTION
• Calibration function can effectively reduce stray impedance caused by test wires.
• The meter offers short and open calibration. Short calibration is to remove the
impact of contact resistance and test wire resistance that interferes with low
impedance measurement.
• Open calibration is to remove stray capacitance and resistance of test wires that
interfere with high impedance measurement.
Access Calibration Function
• Power on the meter and press and hold CAL to
access open calibration.
• “OPEn” will show on the secondary display (Fig. 1),
then press CAL again to begin the calibration and
the meter will count down from 30 seconds on the
LCD.
• When it reaches zero “PASS” appears (Fig. 2),
which indicates open calibration has nished.
• Press the CAL button and “Srt” appears on the
secondary display (see Fig. 3).
• Insert short-circuit device into input terminals, press
CAL to begin and the meter will count down from 30
seconds to 0 seconds.
• “PASS” appears indicating that short calibration is
complete (Fig. 4).
• Press CAL again to return to normal measurement
mode.
Note: if the the LCD shows “FAIL” under open
calibration mode, it indicates that the calibration has
failed. Check whether the input terminals are open
or not. Make sure the circuit is open and do the
calibration again.
• Similarly, under short calibration mode if the LCD
shows “FAIL” it indicates that the calibration has
failed. Check the short circuit device has been
inserted into the input terminals.
• Make sure the terminals are shorted and calibrate again.
PC COMMUNICATION
• Insert the disc supplied and install software from auto run.
• Press the USB button to access communication function.
• Connect the meter to the PC using the USB wire and run the meter software on
the PC to start data transfer.
• Press USB again to exit and stop the data transfer.
DPEn
PRSS
DPEn
Src
PRSS
Src
Cal APO
FRIL
DPEn
Fig. 1
Fig. 2
Fig. 3
Fig. 4
Fig. 5

9
BACKLIGHT
• Press and hold the LIGHT button to turn on or off the LCD backlight.
• The backlight will automatically switch off after 60 seconds.
AUTO POWER OFF
• Power will turn off after 5 minutes of idle time.
SELECTION OF SERIAL/PARALLEL MODE
• A suitable equivalent mode can be selected to gain more precise measurement
data.
• In general, it is suggested to select serial equivalent mode for low impedance
element, such as less than 100Ω.
• Select parallel equivalent mode for high impedance element, such as more than
10kΩ.
INDUCTANCE MEASUREMENT
• Press the power button and then press FUNC to
display “Lp” on the LCD.
• Select inductance measurement range.
• Insert the inductor into input terminals or connect the
inductor to the meter using the test clamp.
• Press FREQ to select suitable testing frequency.
• Press “D/Q/θ” to select the auxiliary parameter to
measure.
CAPACITANCE MEASUREMENT
• Capacitors must be completely discharged before
measurement.
• Press the power button, then press FUNC to
display “Cp” on the LCD and select capacitance
measurement range.
• Insert the capacitor into input terminals or
connect the capacitor to the meter using the test
clamp.
• Press FREQ to select a suitable testing
frequency.
• Then press “D/Q/θ” to select the auxiliary
parameter to measure.

10
RESISTANCE MEASUREMENT
• Press the power button.
• Press FUNC to display “Rp” on the LCD and select
resistance measurement range.
• Insert the resistor into the input terminals or connect
the resistor to the meter using the test clamp.
• Press FREQ to select a suitable testing frequency.
Note: When measuring resistance under auto mode,
the secondary parameter θ will be activated. If under
manual mode, the secondary parameter of resistance
will be neglected.
DCR MEASUREMENT
• Press the power button.
• Press the FUNC button to display DCR on the LCD
and select DCR measurement range.
• Insert the resistor into the input terminals or connect
the resistor to the meter using the test clamp.
Note: The secondary parameter and the frequency is
negligible under DCR measurement and doesn’t show
on the LCD.
PC COMMUNICATION SPECIFICATION
Communication parameters:
1) Baud rate: 9600
2) Data bit: 8
3) Start bit: 1
4) Stop bit: 1
5) Parity: None
Refer to the connection diagram (right).
TECHNICAL INDICATORS
1) Testing ambient temperature: 23°C ± 5°C, humidity = 75% RH.
2) Warm up for 10 minutes before testing.
3) Test on the meter’s terminals.
4) Perform short/open calibration before testing.

11
Frequency Range Min.
Resolution
Accuracy: ±(a% of reading + b digits)
(18°C to 28°C)
100Hz /
120Hz
20.000mH 1µH ± (1.0% + 5)
200.00mH 0.01mH ± (0.5% + 5)
2000.0mH 0.1mH ± (0.5% + 5)
20.000H 1mH ± (0.5% + 5)
200.00H 0.01H ± (1.0% + 5)
2000.0H 0.1H ± (1.0% + 5)
1kHz
2000.0µH 0.1µH ± (1.0% + 5)
20.000mH 1µH ± (0.5% + 5)
200.00mH 0.01mH ± (0.5% + 5)
2000.0mH 0.1mH ± (1.0% + 5)
20.000H 1mH ± (1.0% + 5)
200.00H 0.01H ± (2.0% + 5)
10kHz
20.000µH 0.01µH ± (1.0% + 5)
200.00µH 0.01µH ± (1.0% + 5)
2000.0µH 0.1µH ± (0.5% + 5)
20.00mH 1µH ± (0.5% + 5)
100kHz
20.000µH 0.001µH ± (2.0% + 5)
200.00µH 0.01µH ± (2.0% + 5)
2000.0µH 0.1µH ± (2.0% + 5)
Function: Inductance gear
Measurement Mode: Lˢ/Lᵖ
Note: The precision is evaluated if D is less than 0.1. Ae=Ae* √1+D² if D exceeds 0.1.
(Ae: Precision).
Function: Capacitance gear
Measurement mode: Cˢ/Cᵖ
Frequency Range Min.
Resolution
Accuracy: ±(a% of reading + b digits)
(18°C to 28°C)
100Hz /
120Hz
20.000nF 1pF ± (2.0% + 5)
200.00nF 0.01nF ± (0.5% + 5)
2000.0nF 0.1nF ± (0.5% + 5)
20.000µF 1nF ± (0.5% + 5)
200.00µF 0.01µF ± (1.0% + 5)
2000.0µF 0.1µF ± (2.0% + 5)
20.00mF 0.1mF ± (2.0% + 5)

12
1kHz
2000.0pF 0.1pF ± (1.0% + 5)
20.000nF 1pF ± (1.0% + 5)
200.00nF 0.01nF ± (0.5% + 5)
2000.0nF 0.1nF ± (0.5% + 5)
20.000µF 1nF ± (0.5% + 5)
200.00µF 0.01µF ± (1.0% + 5)
2000.0µF 0.1µF ± (1.0% + 5)
10kHz
2000.0pF 0.1pF ± (1.0% + 5)
20.000nF 1pF ± (1.0% + 5)
200.00nF 0.01nF ± (1.5% + 5)
2000.0nF 0.1nF ± (2.0% + 5)
100kHz
2000.0pF 0.1pF ± (2.0% + 5)
20.000nF 1pF ± (2.0% + 5)
200.00nF 0.01nF ± (5.0% + 5)
Note: The precision is evaluated if D is less than 0.1. Ae = Ae* √1+D² if D exceeds 0.1.
(Ae: Precision).
Function: Resistance gear
Measurement mode: Rˢ/Rᵖ
Frequency Range Min.
Resolution
Accuracy: ±(a% of reading + b digits)
(18°C to 28°C)
100Hz /
120Hz
200.00Ω 0.01Ω ± (1.0% + 5)
2.0000kΩ 0.1Ω ± (0.3% + 5)
20.000kΩ 1Ω ± (0.3% + 5)
200.00kΩ 0.01kΩ ± (0.5% + 5)
2.0000MΩ 0.1kΩ ± (1.0% + 5)
20.000MΩ 1kΩ ± (2.0% + 5)
1kHz
20.000Ω 0.001Ω ± (1.0% + 5)
200.00Ω 0.01Ω ± (1.0% + 5)
2.0000kΩ 0.1Ω ± (0.3% + 5)
20.000kΩ 1Ω ± (0.3% + 5)
200.00kΩ 0.01kΩ ± (0.5% + 5)
2.0000MΩ 0.1kΩ ± (1.0% + 5)
20.000MΩ 1kΩ ± (2.0% + 5)

13
10kHz
20.000Ω 0.001Ω ± (1.0% + 5)
200.00Ω 0.01Ω ± (1.0% + 5)
2.0000kΩ 0.1Ω ± (0.3% + 5)
20.000kΩ 1Ω ± (0.5% + 5)
200.00kΩ 0.01kΩ ± (1.0% + 5)
2.0000MΩ 0.1kΩ ± (2.0% + 5)
100kHz
20.000Ω 0.001Ω ± (2.0% + 5)
200.00Ω 0.01Ω ± (2.0% + 5)
2.0000k 0.1Ω ± (2.0% + 5)
20.000kΩ 1Ω
Function: Resistance gear
Measurement mode: DCR
Frequency Range Min.
Resolution
Accuracy: ±(a% of reading + b digits)
(18°C to 28°C)
200.00Ω 0.01Ω ± (1.0% + 5)
2.0000kΩ 0.1Ω ± (0.3% + 5)
20.000kΩ 1Ω ± (0.3% + 5)
200.00kΩ 0.01kΩ ± (0.5% + 5)
2.0000MΩ 0.1kΩ ± (1.0% + 5)
20.000MΩ 1kΩ ± (2.0% + 5)
200.00MΩ 0.1MΩ ± (2.0% + 5)
Note: The precision is evaluated if D is less than 0.1. Ae = Ae* √1+D² if D exceeds 0.1.
(Ae: Precision).
BATTERY REPLACEMENT
• Replace the battery as soon as the low battery symbol appears on the LCD, in
order to avoid an impact on measurement accuracy.
•Replace the old battery with a new battery of the same specication (9V).

14
MAINTENANCE
Cleaning
• Ensure the power is off and remove the battery and external power before
cleaning.
• Clean the meter with a soft cloth and mild detergent.
• Do not use any chemicals, abrasives or solvents that could damage the meter.
• Ensure the detergent does not enter the meter.
• Only use the meter if it is completely dry.
Moisture Prevention
• Use and store the meter in a dry environment.
• Switch the power off and remove the battery quickly if the water enters the casing.
•Do not disassemble the meter randomly. Have the meter checked by qualied
personnel.
Repair
• If the meter doesn’t power on, inspect the battery, external power and power input
terminal.
• If the measurement does not work normally, check if the test wires are in good
condition and if the component pin has been connected with the input terminals.
•Refer all servicing to qualied personnel.
• Do not disassemble the meter, replace components or change the circuits
randomly.
INFORMATION ON WASTE DISPOSAL FOR CONSUMERS OF
ELECTRICAL & ELECTRONIC EQUIPMENT.
When this product has reached the end of its life it must be treated as Waste Electrical
& Electronic Equipment (WEEE). Any WEEE marked products must not be mixed with
general household waste, but kept separate for the treatment, recovery and recycling of
the materials used. Contact your local authority for details of recycling schemes in your
area.
Made in China. www.premierfarnell.com
V.1.0
Other manuals for 72-10465
3
Table of contents
Other Tenma Measuring Instrument manuals

Tenma
Tenma 72-10465 User manual

Tenma
Tenma 72-9490 User manual

Tenma
Tenma 72-3500 User manual

Tenma
Tenma 72-14400 User manual

Tenma
Tenma 72-14415 User manual

Tenma
Tenma 72-7228 User manual

Tenma
Tenma 72-7222 User manual

Tenma
Tenma 72-7224 User manual

Tenma
Tenma ST-95 User manual

Tenma
Tenma 72-3515 User manual

Tenma
Tenma 72-3545 User manual

Tenma
Tenma TEN01073 User manual

Tenma
Tenma 72-7935 User manual

Tenma
Tenma 72-8150 User manual

Tenma
Tenma 72-7222 User manual

Tenma
Tenma ST-91 User manual

Tenma
Tenma Smart Tweezer ST-5S-BT2 User manual

Tenma
Tenma ST-8920 User manual

Tenma
Tenma 72-14440 User manual

Tenma
Tenma 72-7730A User manual