General Safety Precautions
Do not undertake work outdoors at height unless you are
competent in the use of
ladders
and other access equipment.
Always use correct equipment, observe appropriate safety
precautions and follow manufacturers instructions. If in doubt
consult a professional installer.
Before starting installation check structure is sound and check for
hidden wiring or plumbing.
When working on an installation outside, beware of overhead power lines.
Observe safe working practices, tread carefully on roofs and ensure
adequate lighting is available if working in loft or roof space.
Before making any connections switch electricity off at the mains.
To avoid injury always route cables or wiring carefully. Ensure cable
is correctly routed before xing into position, taking care not to
overtighten cable clips.
This kit contains small parts - keep out of reach of children.
After installation make regular maintenance checks for wear and tear.
Congratulations on the purchase of your yagi aerial.
The aerial is ideal for the reception of all available
signals in strong signal strength areas.
Assembly and Installation
For best results the aerial should be mounted on an outdoor aerial
mast and pointed in the direction of the nearest transmitter*
making sure it is in a position where the transmitter signal will not be
obstructed by nearby trees and buildings. If you are in any doubt
about the direction in which the aerial should be pointing or the
orientation of the aerial (horizontal for main transmitter, vertical
for relay transmitter) check your neighbours’ aerials. For vertical
mounting rotate the aerial through 90° before sliding into the mast
clamp.
Loft mounting is often a viable option in strong signal strength areas
allthough the roof may cause some loss of signal strength.
If mounting on an existing mast check that the mast is in good
condition and rmly xed.
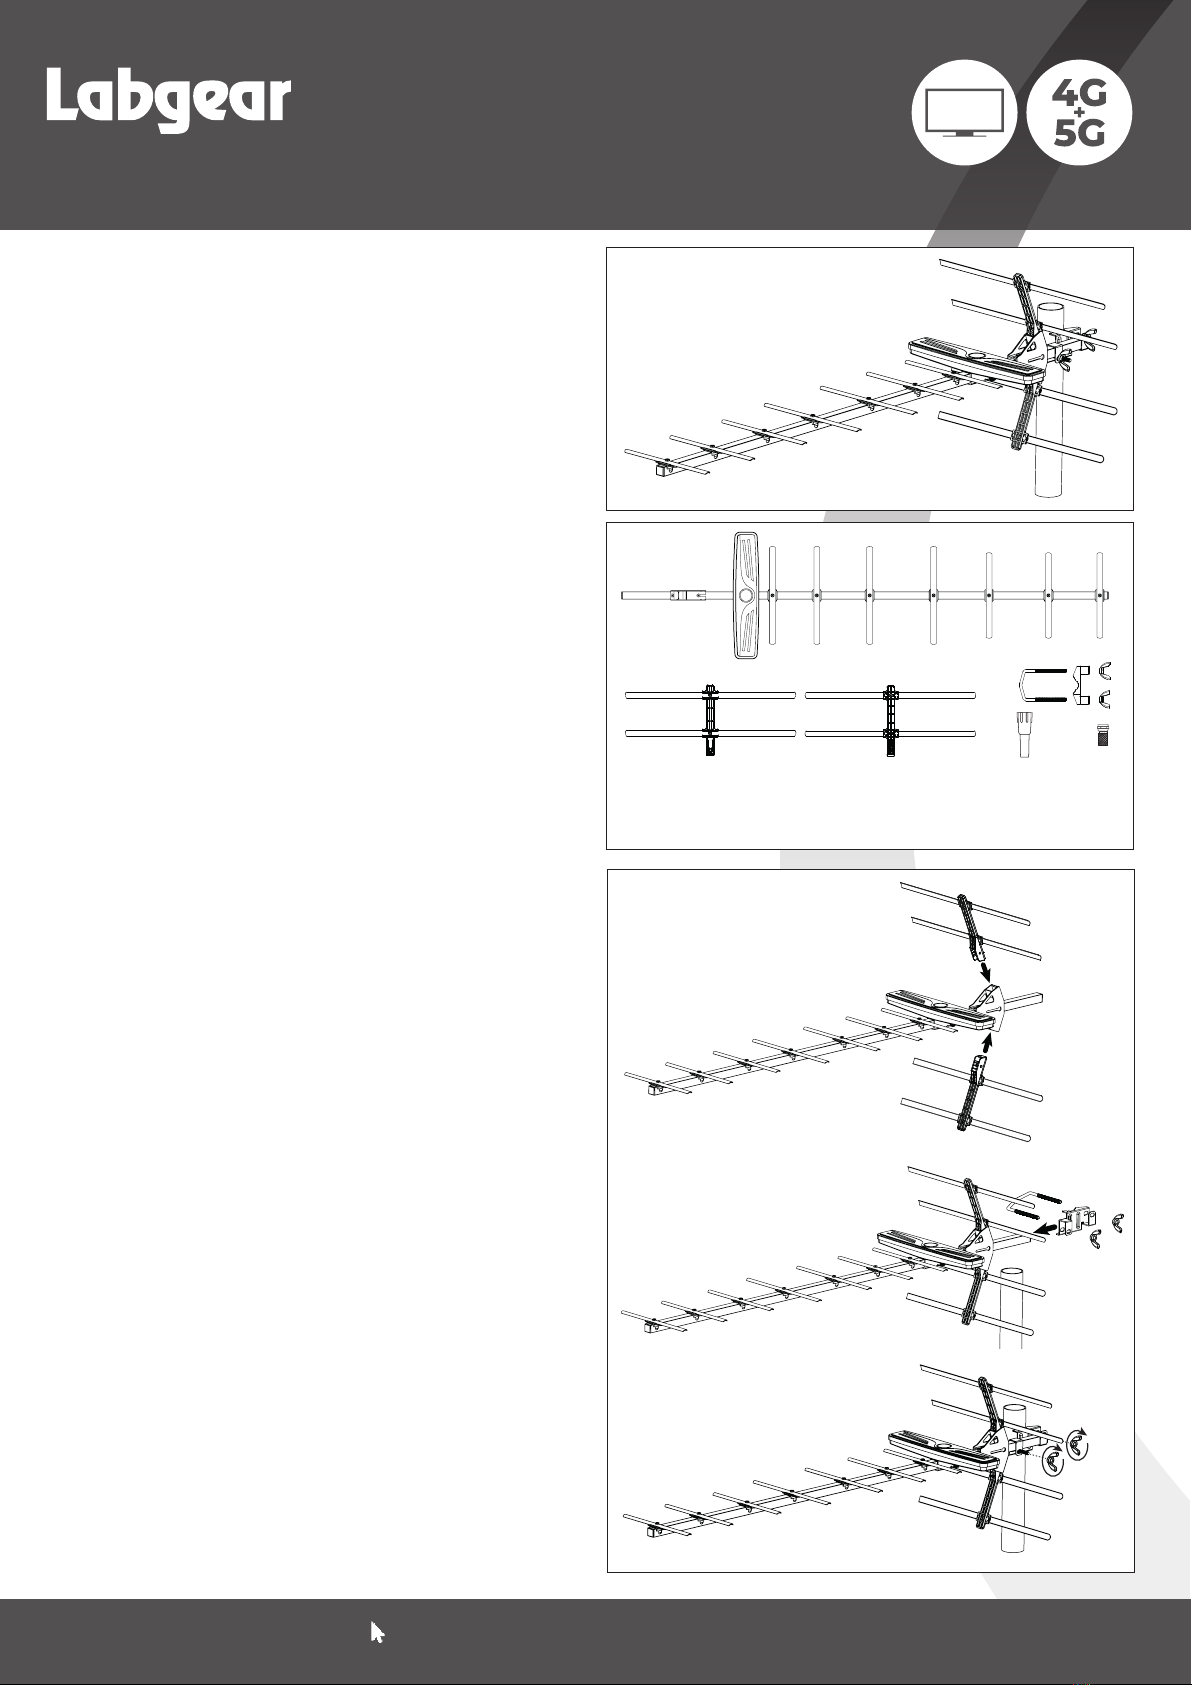
1a.To assemble your aerial rst slide the reectors (4) into the reector
bracket until they click into place (make sure that the reectors
are the corrct way round as shown in Fig. 1a)
1b.Slide the mast clamp onto the aerial boom (as shown in Fig. 1b).
1c. Attach the assembled aerial and mast clamp onto the mast and
tighten the wing nuts until the assembly is securely attached to
the mast (as shown in Fig. 1c).
• Tuned to exclude signals from Lte 800 4G and Lte 700 5G
mobile phone transmitters which might cause interference
•
F type connection
• Forward
Gain 13dBi
•
Suitable for outdoor or loft installation
•
Low wind resistance
•
Supplied part assembled with mast clamp,
F connector and rubber weather boot
•
Clip-on reectors for rapid assembly
12 Element Yagi GT
Standard Gain TV Group K Aerial
LABGT12K
User Guide
Support:
www.labgear.co.uk/support 1
Full HD
HD
Ready
➊➌
➏➐
➍
➋
➎
1. Boom Assembly x1
2. Reflector Bracket x1
3. Dipole x1
4. Reflectors x2
5. Mast Clamp (inc. wing nuts x2 V-Bolt x1)
6. Weather Boot x1
7. F Plug x1
➍
➍
➋
➎
Fig. 1a
Fig. 1b
Fig. 1c


