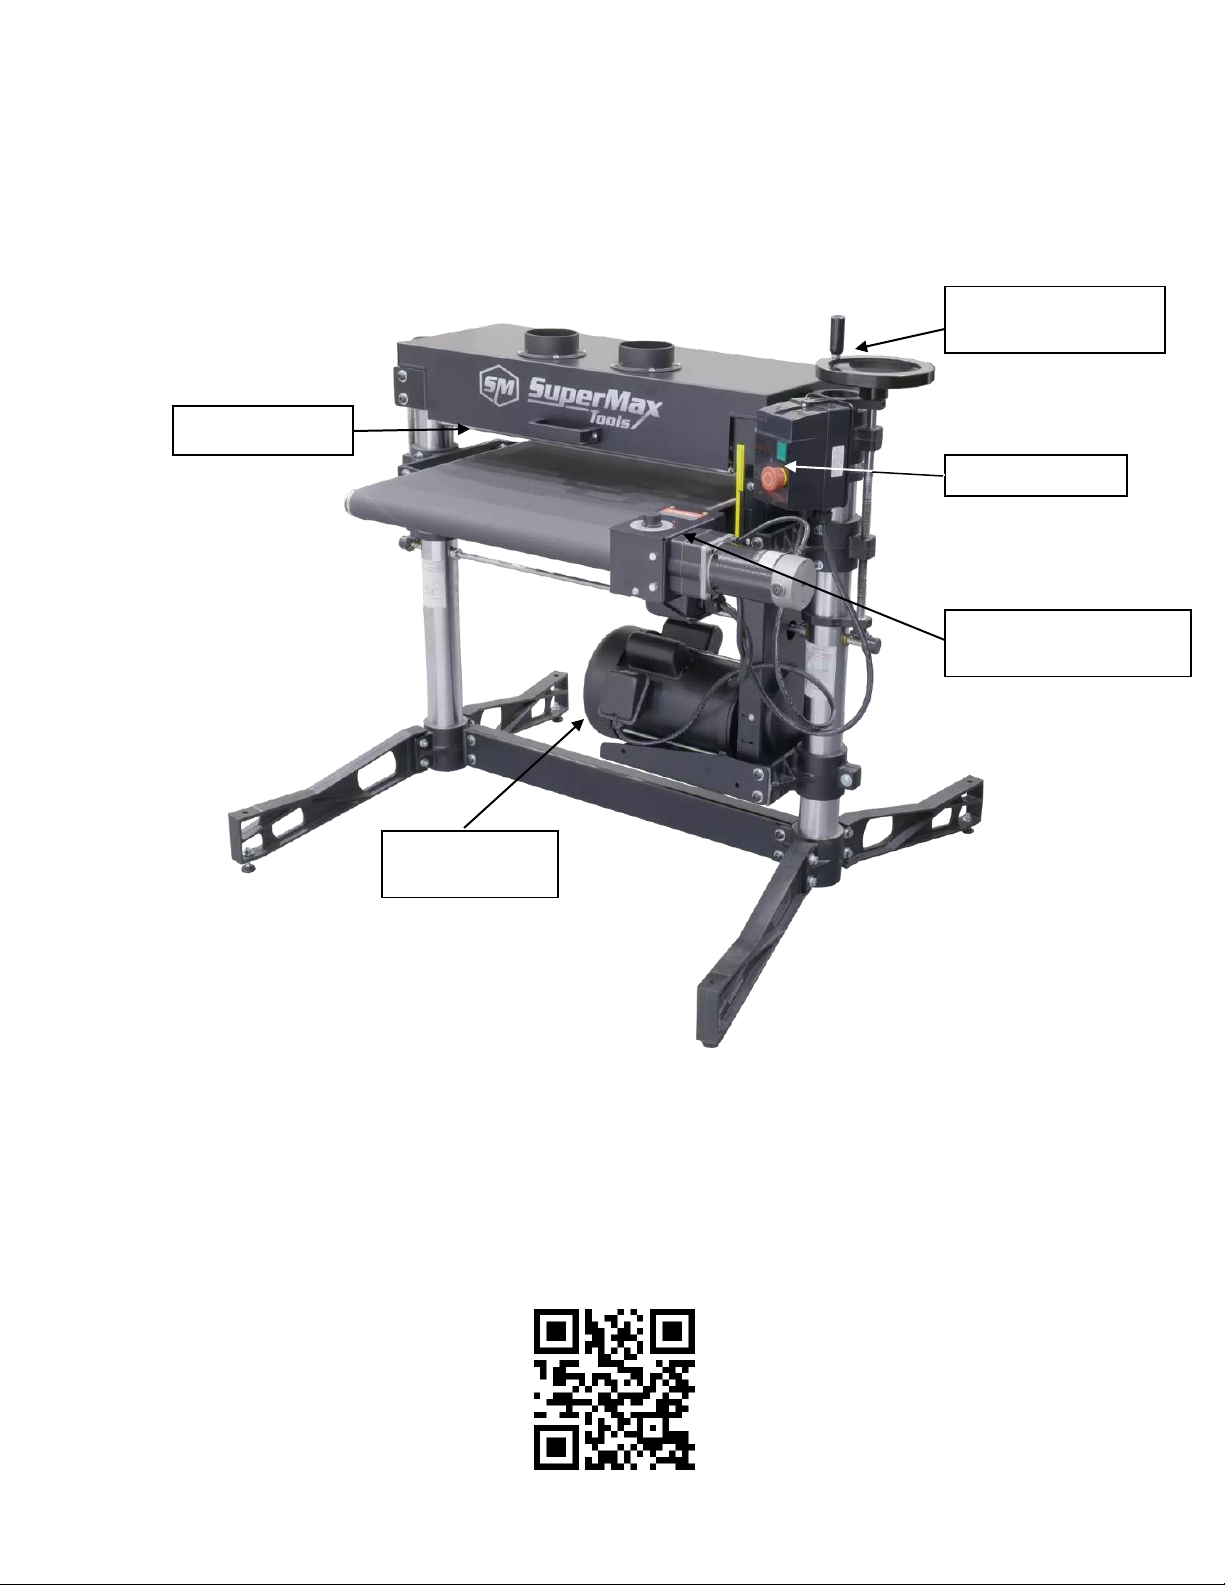
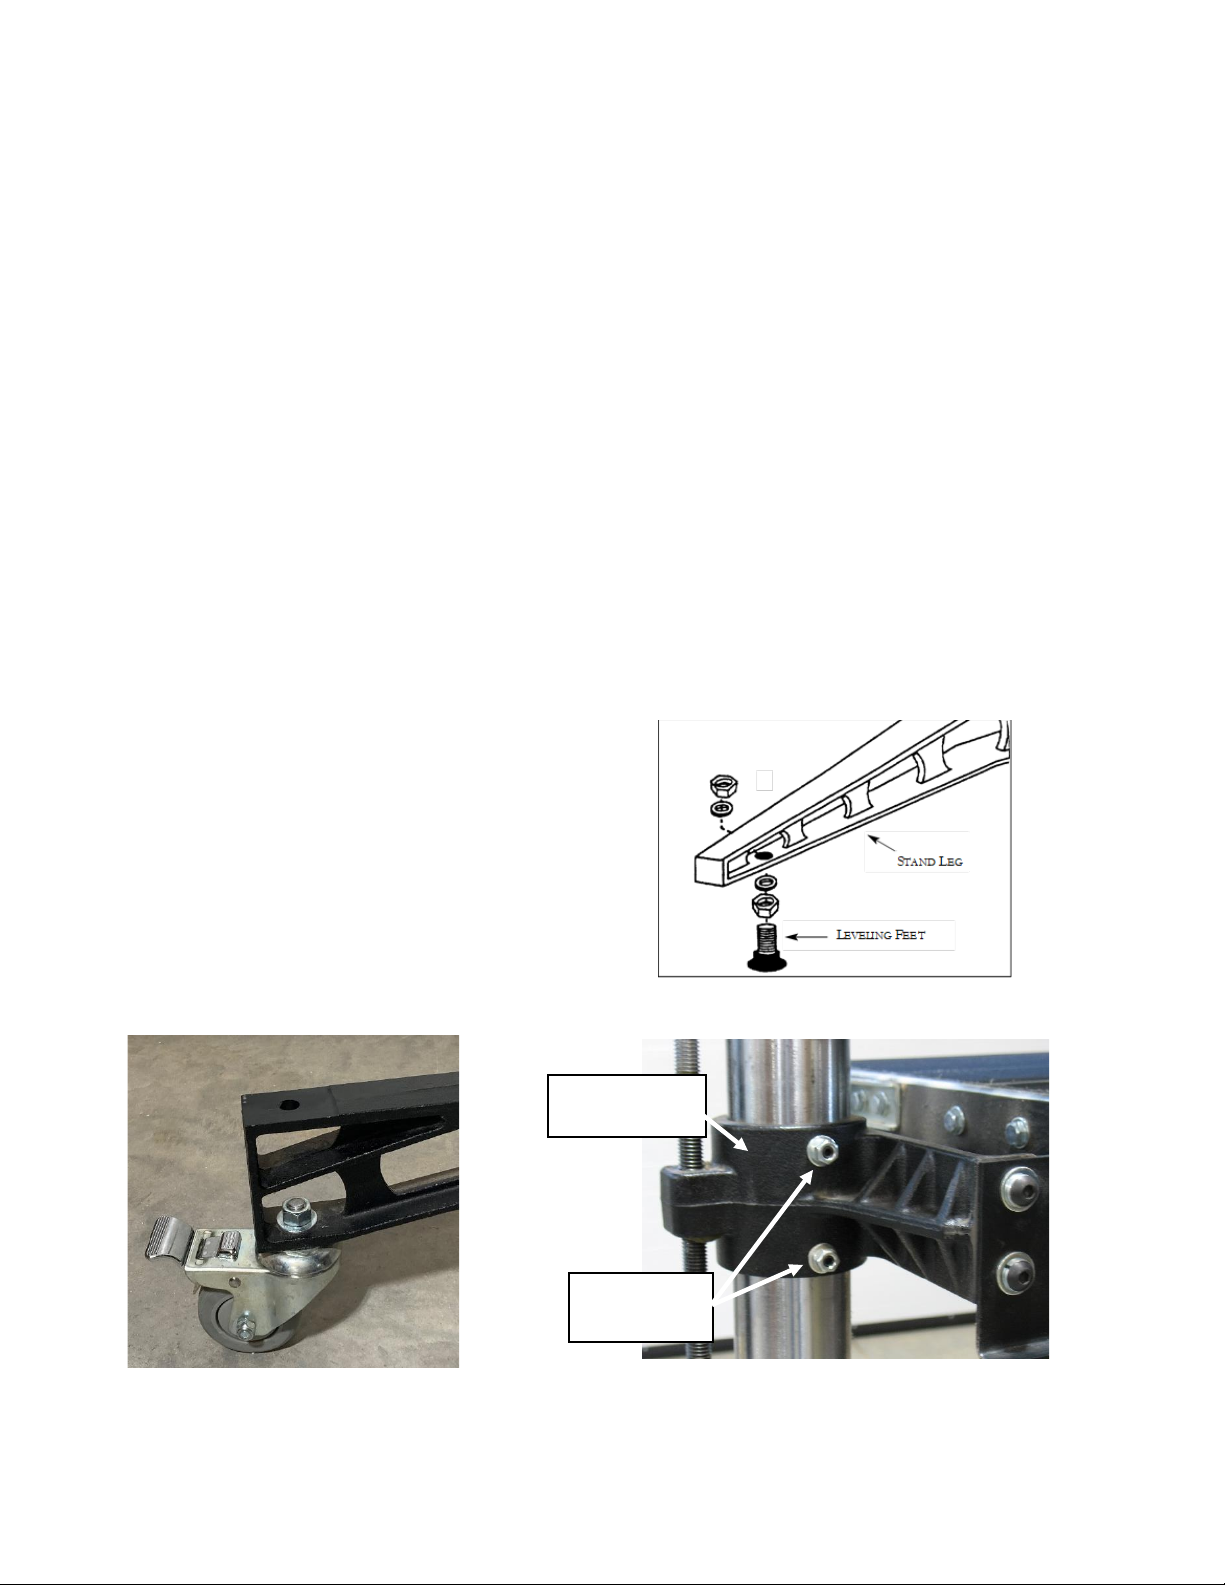
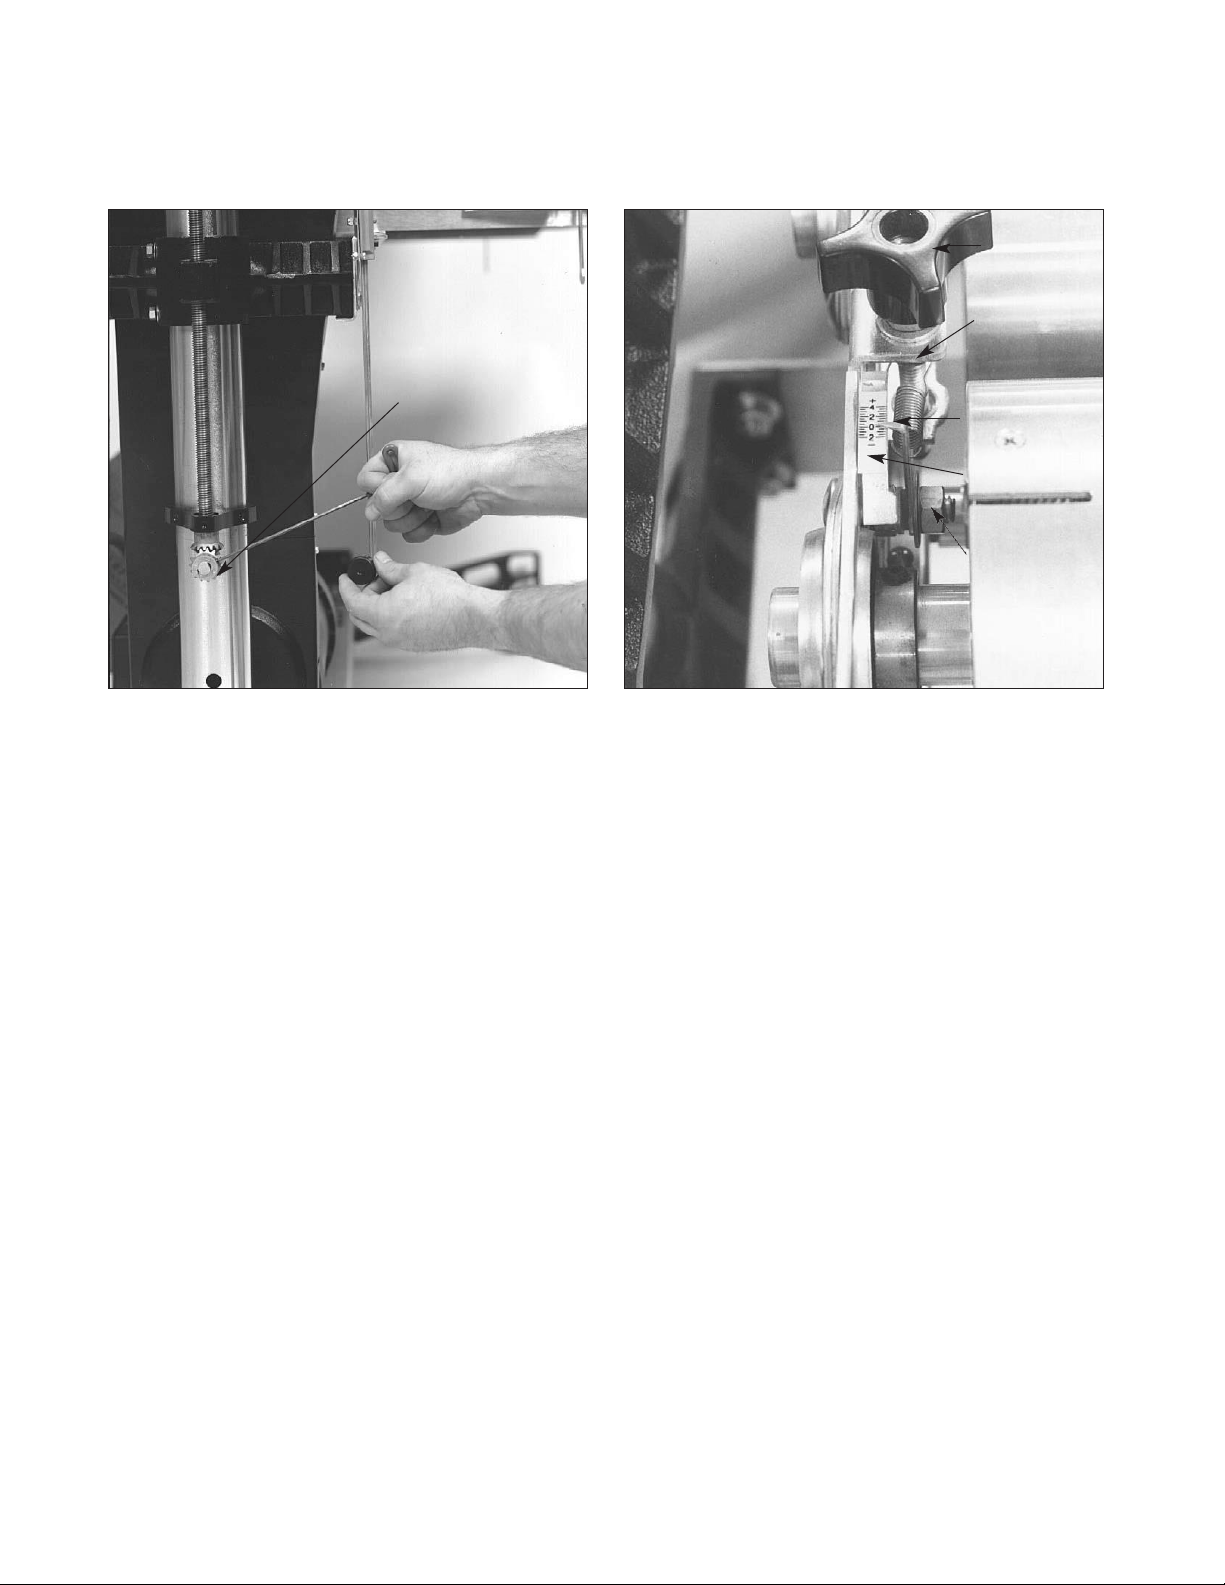
8
SETTING UP
The drum sander was adjusted and aligned at the
factory, and it has been carefully packedfor
shipment.However,becauseofpossible stress
during transit, the unit should be thoroughly
checkedbeforeuse.Thissectioncovers the pre-
operational checks you should make after
unpacking and final assembly. Unnecessary
problemscanbeavoidediftheseessentialchecks
are performed before operating thesander.
Likewise,performingtherecommendedmonthly
maintenance procedures listed at the end of this
sectionwillhelp assuretrouble-free service.
M
AKING
E
LECTRICAL
C
ONNECTIONS
A cord and plug are not included. Consult with
an electrician and confirm all applicable
electrical codes before wiring. Pleaseseewiring
diagramsfor details.
Single Phase: The drum(s) of all SUPERMAX
singlephasesandersarepoweredbya5HP,208-
230 volt, single phase motor. A plug and cord
is not supplied. SinglephaseSUPERMAX
sandersrequirea minimumdedicatedcircuit of
10-gauge wire protected by a 30-amp fuse or
breaker. Extension cords are not
recommended, butifused,should be of at
least 10-gaugewire for lengths up to 10' and
of at least 8-gauge wire for longer lengths.
Views of junction box(under conveyor motor) with cord
installed.
Remove the cover of the conduit box, located
on the underside of the conveyor motor
housing, by removing the screws securing the
cover.
1. Loosen (do not remove) the tension nut of
the strain relief bushing.
2. Feed the new cord through the strain relief
busing.
3. Attach the first HOT (black) wire to the
terminal, by lifting the orange clamp,
inserting the bare wire. Press down on the
orange clamp to secure wire. Attach the
second HOT (red, or white*) in the same
manner. See Figs. A & B.
CAUTION: Confirm the wire is secure in the
terminal clamp and there is no exposed non-
insulated wire!
4. Attach the GROUD (green or green &
yellow) to the ground screw of the conduit
box. Confirm the wire is secure.
5. Tighten strain relief nut. Confirm the
power cord is secure.
6. Confirm all electrical connections are
secure and tight. Confirm wires are within
conduit box and will not be pinched.
7. Re-attach conduit box cover and secure
with screws.
*Follow NEMA/local codes when using
“white” as HOT.
Fig.B. Installed Wiring