Lakeland 63482 User manual

INSTRUCTION BOOKLET
Model: 63482
DIGITAL BEAN-TO-CUP
COFFEE MAKER

2
LAKELAND DIGITAL BEAN-TO-CUP
Thank you for choosing the Lakeland Digital Bean-to-Cup.
Please take a little time to read this booklet before you use your appliance and keep it in a
safe place for future reference.
Enjoy freshly ground coffee every morning with a rich aroma to wake you up, at a touch
of a button - espresso, lungo and Americano. With 5 levels of grind and a setting to
remember your desired cup volume, a sleek LED touchscreen control panel, 1.2L capacity.
Here at Lakeland, our award-winning family-owned business still offers the same excellent
quality, value for money and exceptional customer service as when we founded the
company back in the 1960s.
Our products are hand-picked and thoroughly tested so you can be sure that everything
you purchase will be a pleasure to use for many years to come.

3
CONTENTS
Product features .............................................................................................................4
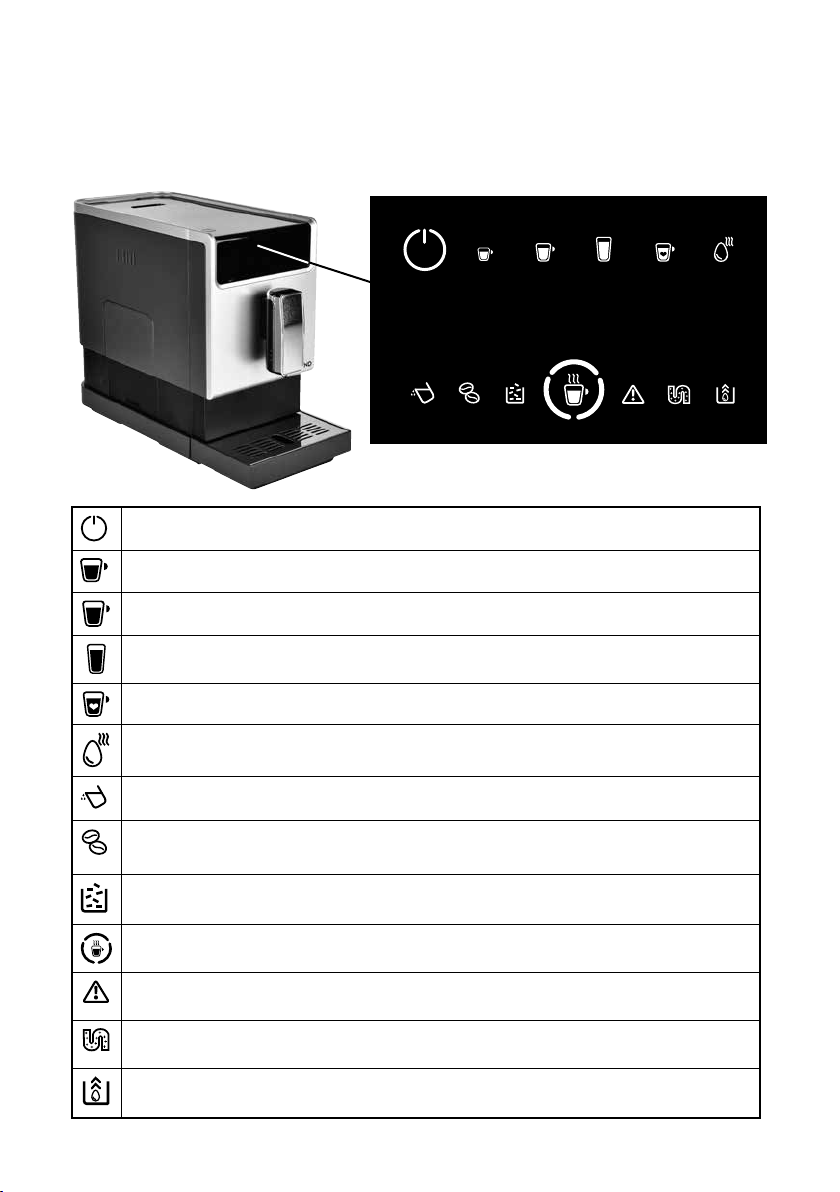
Touchscreen control panel...............................................................................................5
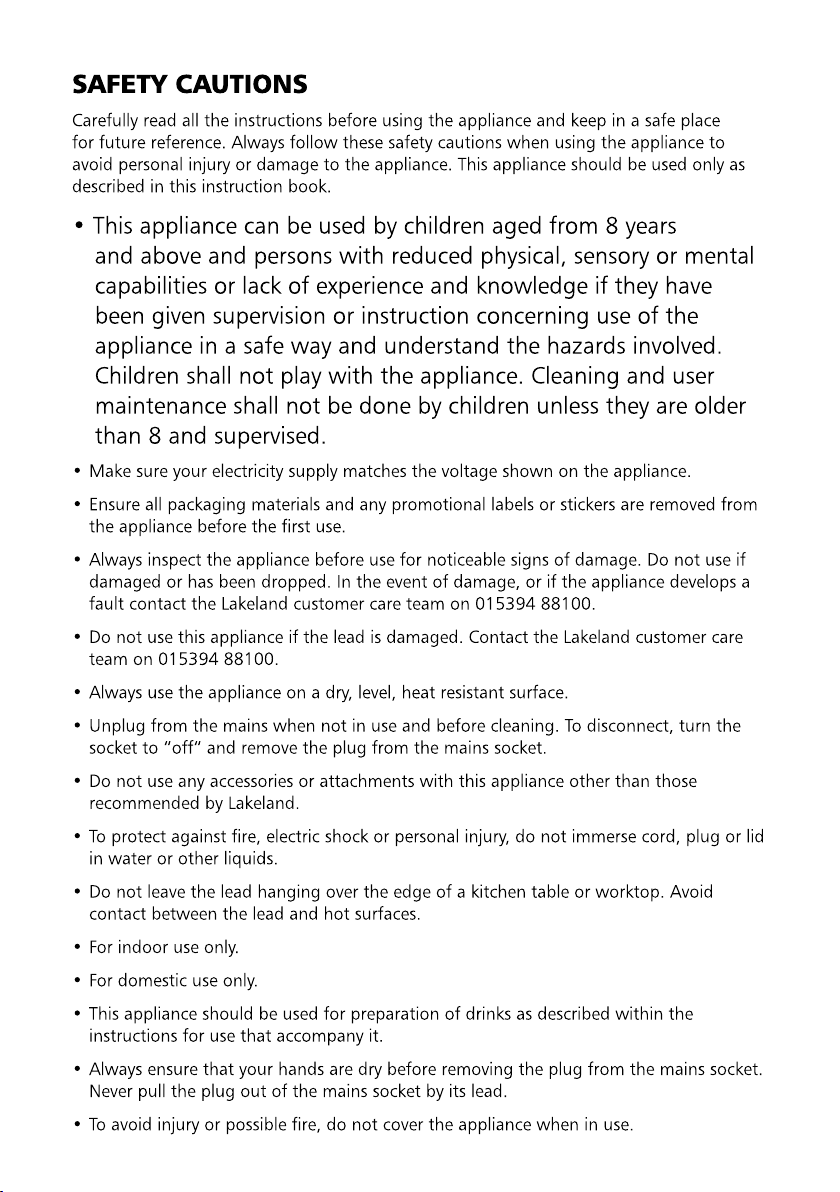
Safety cautions.............................................................................................................6-8
Using your Digital Bean-to-Cup for the first time..............................................................9
Filling the water tank ................................................................................................10
Filling the coffee bean container............................................................................. 11
Instructions for use .......................................................................................................12
Hot water .................................................................................................................13
Favourite function .....................................................................................................13
Set up the favourite coffee setting............................................................................ 13
Using the favourite function......................................................................................13
Turning off the appliance ..........................................................................................13
Auto-shut off............................................................................................................13
Further settings .............................................................................................................14
Adjusting the volume of your coffee/hot water ....................................................... 14
Grinding adjustment .................................................................................................14
Mode selection ....................................................................................................14-15
Daily cleaning of the appliance................................................................................ 16-18
Hints and tips................................................................................................................19
Frequently asked questions.......................................................................................20-21
Cleaning and maintenance............................................................................................22
Descaling ..................................................................................................................22
Empty system function ..............................................................................................23
Care and cleaning .........................................................................................................24
Technical information....................................................................................................25
Electrical connections....................................................................................................25
Recycling your electricals ...............................................................................................25

4
PRODUCT FEATURES
12
3
45
9
10
11
12
13
6
8
7
1. Water Tank
2. Coffee Bean Container Lid
3. Coffee Bean Container
4. Power ON/OFF Button
5. Control Panel
6. Adjustable Coffee Spout
7. Coffee Grounds Container
8. Internal Drip Tray
9. Drip Tray Cover
10. External Drip Tray
11. Brewer Assembly
12. Service Door
13. Steam Vent
Accessories including in the box, a cleaning brush, a cleaning
cloth for the control panel and three packs of cleaning
agents are included for the process of descaling.

5
TOUCHSCREEN CONTROL PANEL
Power ON/OFF button
Espresso coffee button
Lungo coffee button
Americano coffee button
Favourite coffee button
Hot Water button
Flashing: Low water level or water tank missing
Lack of coffee beans
Lights up stably: Requires descaling
Flashing: Internal drip tray or coffee grounds container is missing
Coffee brewing indicator
Lights up stably: Brewer is missing or not properly installed
Flashing: Service door is opened or not properly installed
Lights up stably: Requires descaling
Flashing: Descaling process is under process
Empty system function is running

6

7

8

9

10
When is flashing, the water tank is in low water level and requires
filling the water tank.
1. Lift the water tank by using the lid as the handle.
2. Rinse the water tank with fresh cold water and then fill
the tank to the ’Max’ mark level and place it back into
the appliance. Make sure it is fully inserted.
Note: To prevent overflow of water from the water tank, DO NOT add water directly into
the appliance with another container.
IMPORTANT: Never fill the water tank with warm, hot, sparkling water or any other liquid
which might damage the water tank and the appliance.
FILLING THE WATER TANK

11
When the appliance needs to be filled with coffee beans.
1. Remove the bean container lid.
2. Slowly pour in the coffee beans.
3. Install the container lid back on top.
IMPORTANT: Fill the coffee bean container with coffee
beans only. Ground coffee, instant coffee, caramelized
coffee and any other objects may damage the appliance.
4. Unwind and straighten the power cord and insert the plug into the socket located on
the back of the appliance. Insert the other end of the power cord into a wall socket.
5. The Digital Bean-to-Cup Coffee Maker is now ready to use.
FILLING THE COFFEE BEAN CONTAINER

12
INSTRUCTIONS FOR USE
1. Switch on the appliance by pressing the power ON/OFF button and there will be
a short beep sound. Make sure the drip tray is under the coffee spout and water tank
with water inside. The appliance will perform auto-rinsing for a small cup of water, you
can stop it by pressing Hot Water button.
2. The appliance will then go into the standby mode.
3. Place a cup under the coffee spout and adjust the height of the spout the fit the cup.
Depending on the size of the cup (too tall or too wide) you can remove the drip tray or
adjust the position of the drip tray, as shown.
4. Warm your coffee cup with hot water to get a hotter cup of coffee. Press the Hot
Water button.
5. Depending on the taste of coffee you would like to have, press espresso coffee
button, lungo coffee button or Americano coffee button.
6. The coffee button being pressed will light up, brewing coffee indicator and spout
illumination will light up, to indicate that the appliance is preparing the cup of coffee.
You can stop dispersing coffee by pressing the button again.
7. When the appliance is back to standby mode, the coffee is ready to serve.

13
HOT WATER
The appliance can dispense hot water by simply pressing the Hot Water button . The
hot water button will light up, the brewing coffee indicator
and spout illumination
will light up, indicating that the appliance is heating up the water. When the Hot Water
button and the illumination will go off, the water is ready to serve.
FAVOURITE FUNCTION
You can use the favourite function to memorize your desired volume of espresso, lungo
and Americano coffee which is not easy to be adjusted by other people.
SET UP THE FAVOURITE COFFEE SETTING
Press and hold the favourite button for 2 second, then the espresso, lungo,
Americano coffee and hot water buttons will flash and you can select any one to
memorize the volume.
When you select either espresso, lungo, Americano coffee or hot water. You will see the
drinks come out, and then you can press and hold to keep dispensing the drinks and stop
it by release the button. After that the volume will be memorized.
USING THE FAVOURITE FUNCTION
Press the favorite function button , the memorized favorite drinks will come out.
TURNING OFF THE APPLIANCE
Switch off the appliance by pressing the power ON/OFF button .
AUTO-SHUT OFF
The appliance is equipped with auto-shut off. Depending on the mode you have selected
the appliance will have different auto-shut off timing, see ‘Mode Selection’.

14
FURTHER SETTINGS
ADJUSTIING THE VOLUME OF YOUR COFFEE/HOT WATER
You can memorize your desired volume of coffee for espresso, lungo, Americano and also
the hot water from 25ml to 250ml.
1. When making your coffee (either espresso, lungo or Americano coffee) or dispensing
hot water, press and hold the button you selected. The appliance will continue to
make the cup of coffee or hot water.
2. When the volume of coffee meets your desired volume, release the button. Two beep
sounds will be heard indicates that the volume of coffee is being memorized.
GRINDING ADJUSTMENT
You can adjust the grinder to suit the taste of your coffee
by turning adjuster knob in the bean container:
1. When the grinder is grinding the coffee beans during
making the coffee, you can turn the adjuster knob to
do the adjustment (CAUTION: Never do the grinding
adjustment when the grinder is not operating. It may
damage the grinder.)
2. The dots on the adjuster knob indicate the fineness of
the grind.
MODE SELECTION
The appliance has three different settings: default setting, ECO mode and speed mode. In
ECO mode, the appliance helps to save more energy. In speed mode, the user can make
their coffee faster than in default setting.
ECO Mode Speed Mode Default Setting
Illumination Light No Yes Yes
Pre-brewing* Yes No Yes
Auto-shut off time 10mins 30mins 20mins
Cup Volume
memory
Yes Yes Yes
*Note: The pre-brewing function moistens the grounded beans in the brewer with a
small amount of water before full extraction. This expands the coffee grounds to build up
a greater pressure in the brewer which help extraction of all the oils and full flavour from
the grounded beans.

15
1. When the appliance is in standby mode, press and holds the for 5 seconds.
2. The will then be flashing and the following button will have the following
indications in different settings:
Hot water button
Espresso coffee button
Lungo coffee button
In ECO Mode Lights on Flashing Flashing
In Speed Mode Flashing Lights on Flashing
In Default Setting Flashing Flashing Lights on
3. Press the hot water button for ECO mode, espresso coffee button for speed mode
and lungo coffee button for default setting. Two beep sound will be heard
indicates that the mode is being selected.
(Note: If you are pressing the relative lighted on button for each mode, the appliance
will not respond).
4. If you would like to remain the setting unchanged, press again or wait for
5 seconds for the appliance to return to the standby mode.

16
DAILY CLEANING OF THE APPLIANCE
Timely cleaning and maintenance of the appliance is very important in prolonging the life
of the appliance.
1. Remove the external drip tray.
2. Remove the cover and empty the water inside the
drip tray into the sink. Wash it with fresh water and
dry thoroughly.
3. Slide open the internal drip tray and the coffee
grounds container.
4. Empty the coffee grounds container and wash it with
fresh water and dry thoroughly.
Note: When lights up, the coffee grounds container
needs to be empty.
5. Press at the bottom of the service door to release it.

17
6. Remove the service door.
7. Press the release knobs on either side of the brewer.
8. Remove the brewer.
9. Wash the brewer with fresh water and dry thoroughly.
10. Insert the brewer, back to its original position and install back the service door to its
original position.
Note: When lights up stably, it indicates that the brewer is missing / installed
improperly.

18
11. Place the coffee grounds container on the internal
drip tray and insert back into its original position.
Note: When is flashing, the coffee grounds container
is missing.
12. Place the external drip tray at its original position.

19
HINTS AND TIPS
• Try to use the coffee beans within a week of adding to the appliance.
• For hotter coffee, warm your coffee cup with warm water before brewing.

20
FREQUENTLY ASKED QUESTIONS
Question: Why is the appliance not working?
Answer:
The appliance may not be connected at the socket, check that it is plugged
in and turned on at the mains socket. Press the ON/OFF button on top of
the appliance.
Question: Why after pressing a function key on the control panel and there is a
delayed response, or nothing happens after several tries?
Answer: The appliance could be under electromagnetic interference, or there is dirt
on the control panel. Unplug the appliance and switch back on after a
few minutes. Clean the control panel with the cloth provided.
Question: Why is my coffee not hot enough?
Answer: Remember to preheat the coffee cups with warm water. The brewing unit
maybe too cold, rinse the appliance at least 3 times before making
your coffee.
Question: Why is there no coffee coming out of the spout?
Answer: The ‘Empty System Function’ may have been used last on the appliance.
Press the hot water button until water comes out from spout.
Question: Why is my first cup of coffee a poor quality?
Answer: When you use the appliance for the first run to grind the coffee beans,
it may not pour sufficient quantity of coffee grounds into the brewing
unit. Throw the coffee away, the other coffees will always be of
good quality.
Question: Why has my cup of coffee got no crema on top?
Answer: The coffee beans are not fresh, change or use appropriate brand of
coffee bean.
Question: Why are the touch buttons on the control panel not sensitive?
Answer: Try pressing the buttons directly from the front, also press the lower
bottom part of the touch button icon from the front direction of
the appliance.
Question: Why is the appliance taking a long time to warm up?
Answer: There could be an excessive built up of scale inside the appliance, descale
the appliance.
Table of contents
Other Lakeland Coffee Maker manuals

Lakeland
Lakeland 71061 User manual

Lakeland
Lakeland TO GO 61783 User manual

Lakeland
Lakeland Touchscreen Bean to Cup User manual

Lakeland
Lakeland 19686 User manual

Lakeland
Lakeland 63481 User manual

Lakeland
Lakeland Coffee On The Move User manual

Lakeland
Lakeland 63480 User manual

Lakeland
Lakeland 26782 User manual

Lakeland
Lakeland 19700 User manual

Lakeland
Lakeland 62807 User manual