6
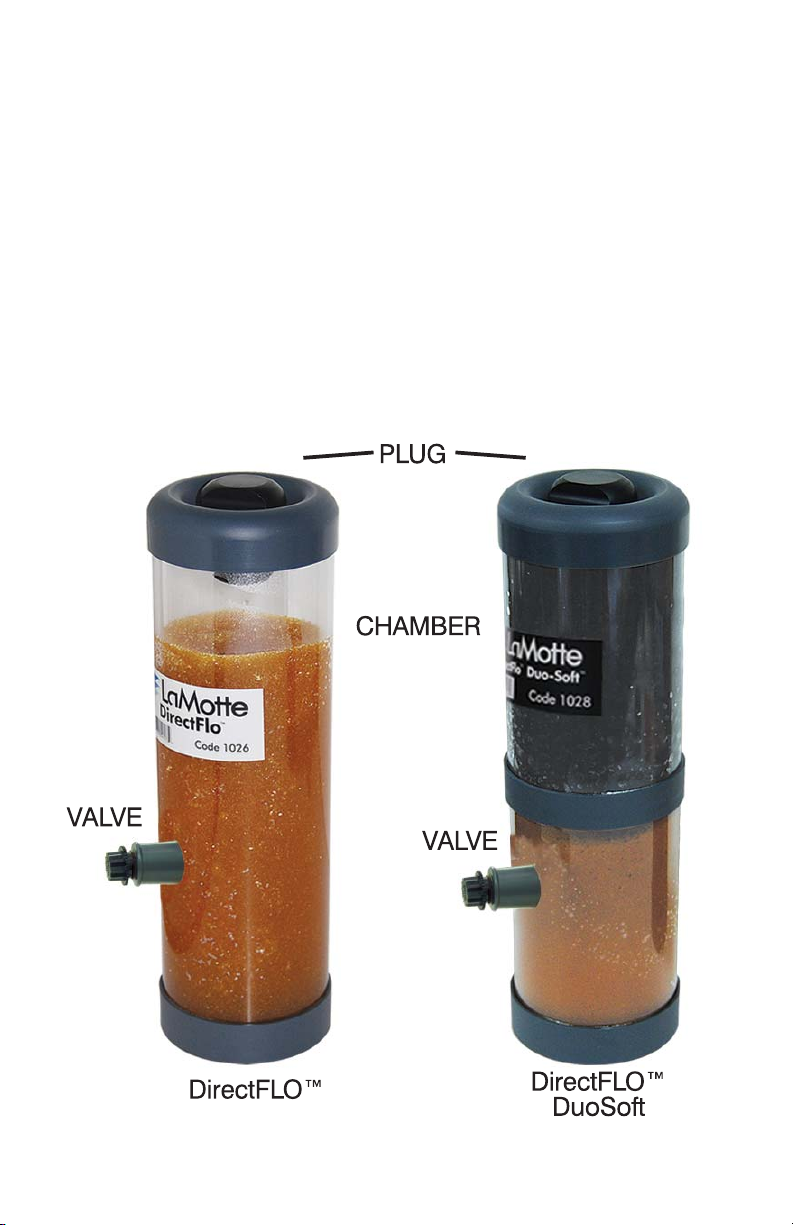
PROCEDURE C— Replacing the Media in the Bottom
Chamber of the DirectFlo DuoSoft
Follow steps 1-6 of PROCEDURE Bto replace the media in the top chamber of the
DirectFlo DuoSoft Softener.
Follow the procedure below to replace the media in the
bottom chamber. Ion exchange resin is generally used in the bottom section.
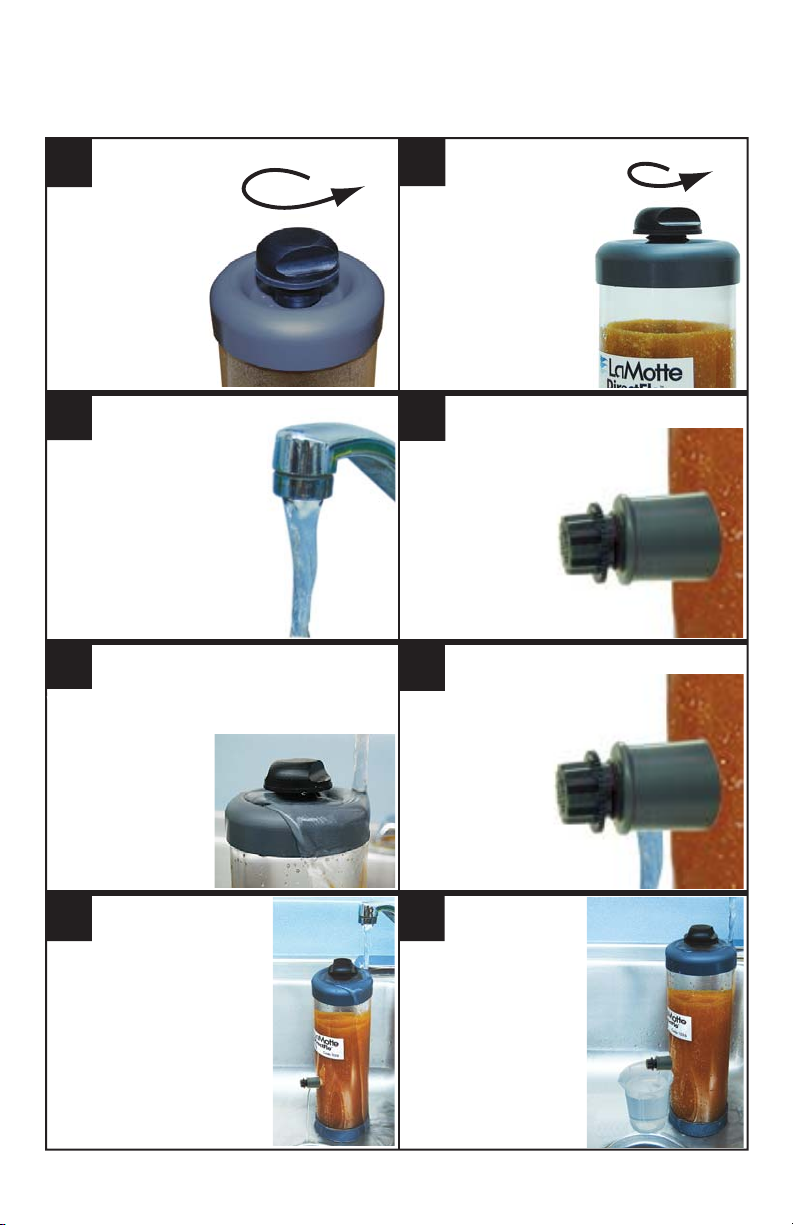
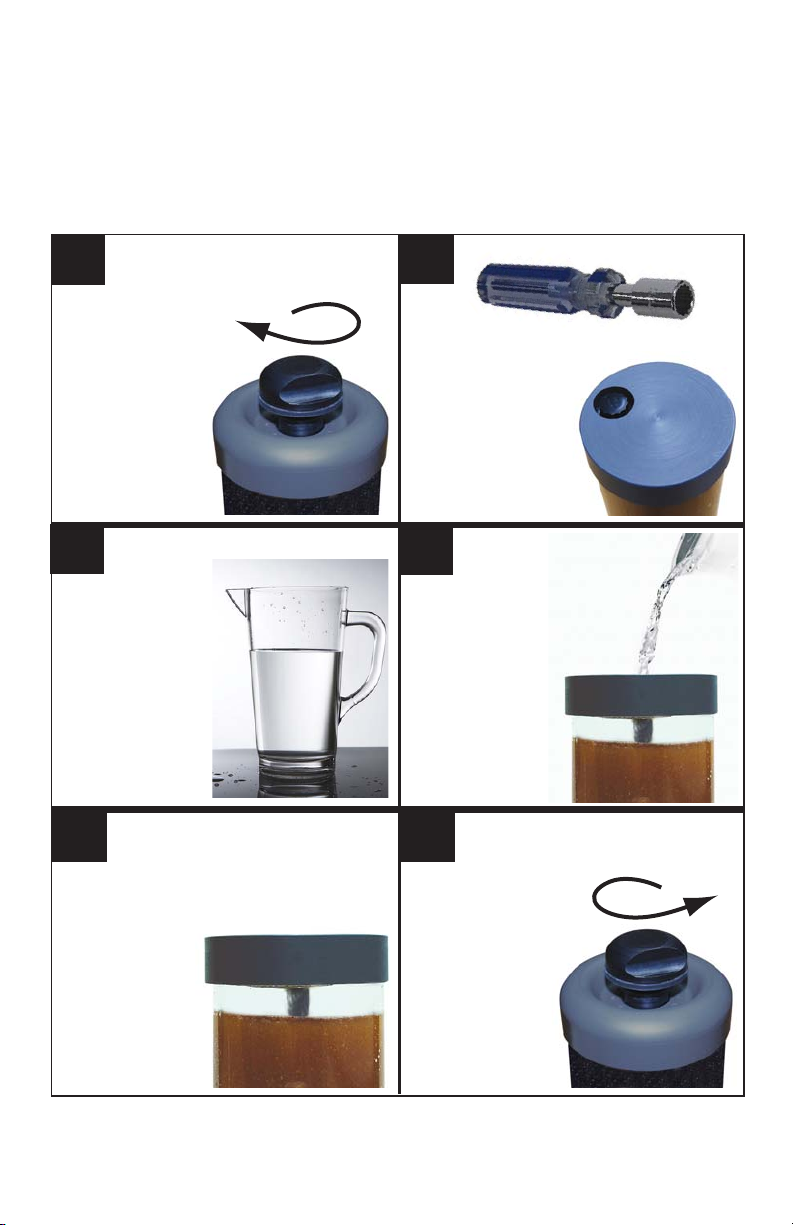
Turn the softener upright.
Turn the large black plug
on the top of the
softener
counterclockwise
until it becomes
loosened. Lift
the plug up
about 1”.
Use a 12-point 9/16”
nut driver to remove
the small black
plug on the
bottom of the
sampler.
Fill the softener to 1” from
the top with selected media.
NOTE: To facilitate the filling
process, a funnel can be used or
water can be
added to the
media.
If dry media was
added, fill the
chamber with water
and replace the small
black plug.
NOTE: Do not
overtighten plug.
Lift the plug up about 1”.
Continue turning the plug
counterclockwise
until it can be
removed.
Fill the softener to 1” from
the top with selected media.
NOTE: To facilitate the filling
process, a funnel can be used or
water can be
added to the
media.
1. 2.
3. 4.
5. 6.