Rod End Down
H
H
A
E
Protruding bolt between
Side Panel and Plate
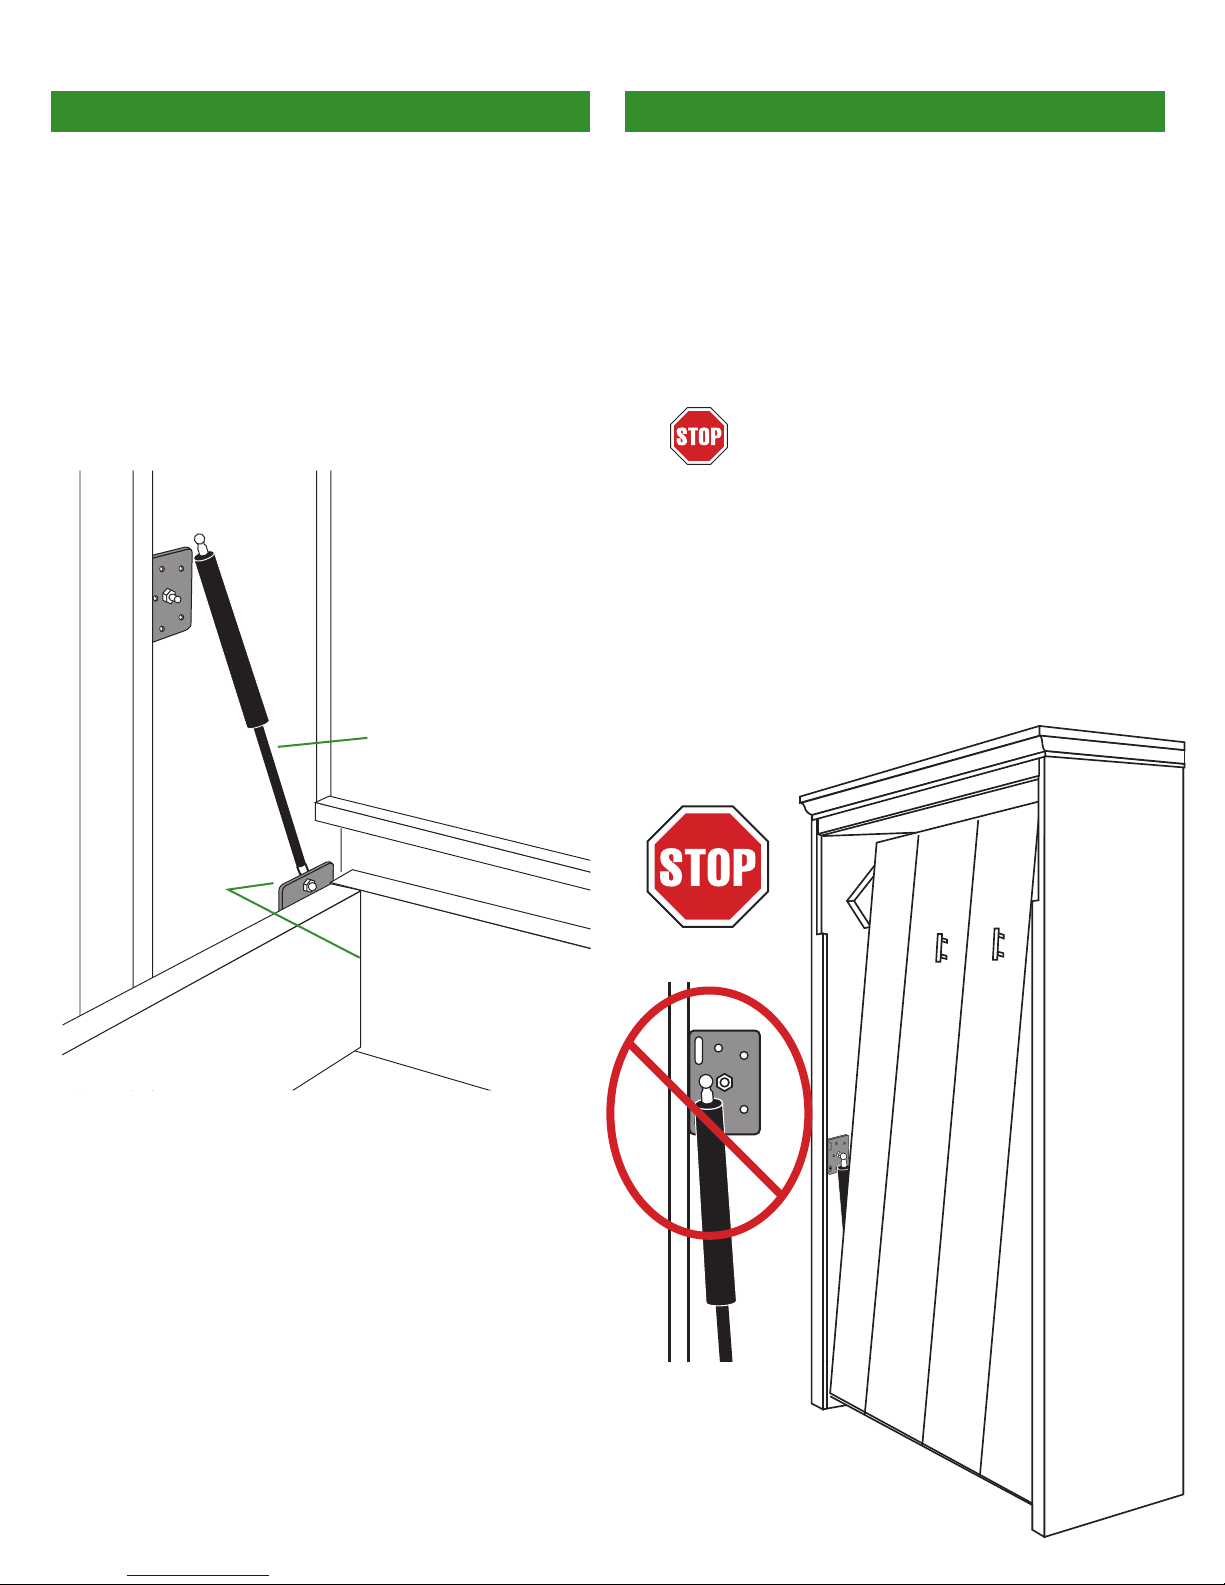
Warning!
Warning! Resting the piston end of the
piston between the ball joint and side
panel as in this drawing will result in
damage to the piston when lowering or
closing the bed.
Incorrect
Rod End Down
H
H
A
E
Protruding bolt between
Side Panel and Plate
Warning!
Page 6 of 8
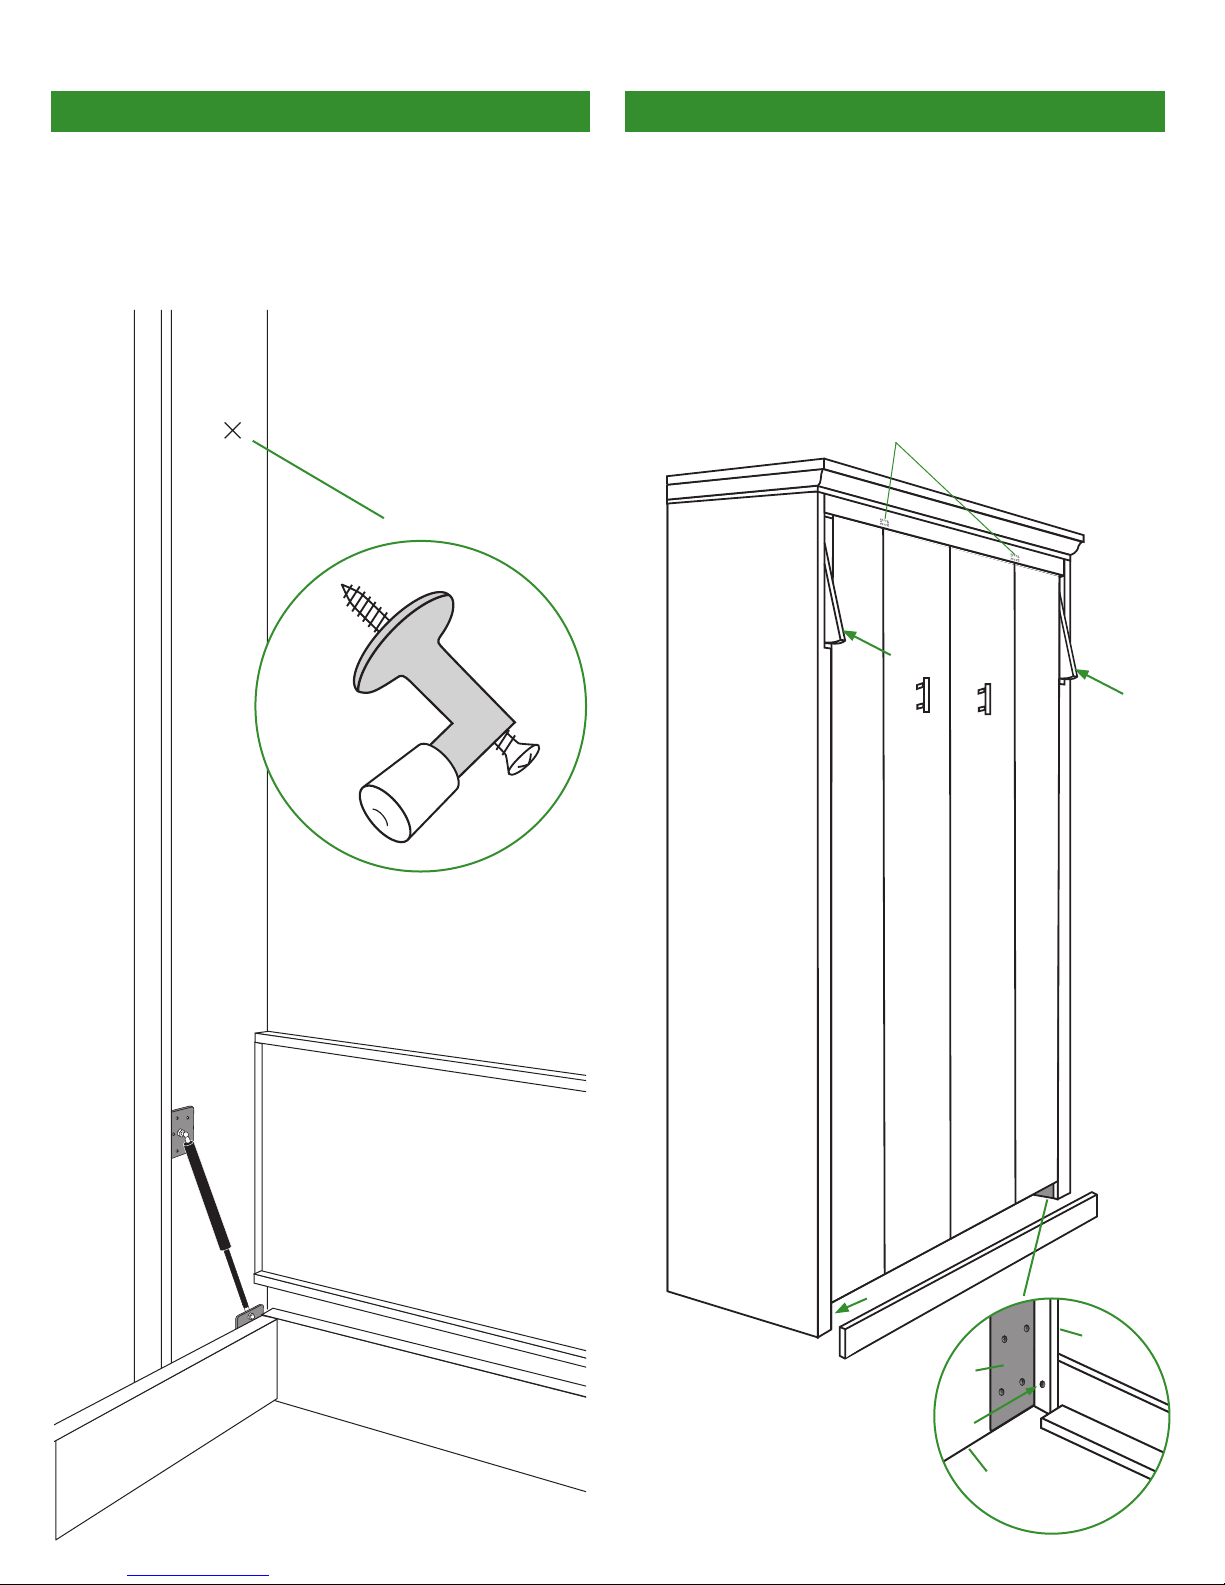
Step 6 – Fasten Bottom of Gas Pistons
Make sure that Pistons are Rod End Down. Securely
snap the head of Rod End of Piston onto the protruding
round end of the bolt on Piston Plate (E).
DO NOT FASTEN TOP OF PISTON TO PISTON PLATE (H).
Rest the top of the piston above the ball nut which would
be towards the letter H in the drawing below.
Repeat on other side.
Step 7 – Fasten Top of Gas Pistons
Slowly lift bed to wall. Close the bed further than
the normal closed position until the Piston Plate (H) and
piston are visible. If you lift the bed and the
unfastened piston falls down or is not visible resting on
the Side Panel, you will need to make sure any unfastened
piston is pushed back away from the H plate which is
towards the wall that the Murphy Bed is attached to for
the piston to be in the correct positioning
(See WARNING below) before lowering the bed
back down to repeat step 7.
When visible, snap the piston onto the Piston Plate (H)
making sure that the piston is fully secured onto the plate.
The Piston plate is preinstalled loose to allow the plate to
move which will help with attaching the piston onto the
ball head. It is important to add the additional screws and
tighten the preinstalled screws to secure the piston plate
to the side cabinet
Repeat on other side.
Be sure not to rest the Piston
under the ball nut as it could
jam when the face panel is
lowered.