Laney CUB8 User manual

CUB-8
https://projects.headstockgroup.com/#files/4463141
8

CUB-8
2
INTRODUCTION
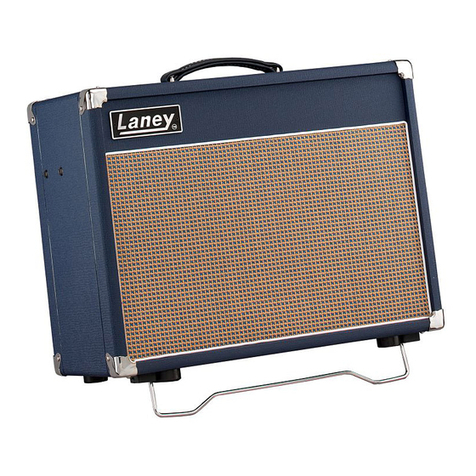
The CUB-8 is a straight forward easy to use all tube combo amplifier housed in a stylish ‘boutique ‘ cabinet.
Its 5W Single Ended Class A output stage oozes classic tube tones through a Premium 8" speaker.
The black front panel features vintage simplicity. Flick ON the chrome toggle switch, set the tone and volume controls and you
are ready to Rock.
The cabinet is finished in two tone black leather grain vinyl and includes a comfortable soft grip handle for easy transportation.
Moving round to the rear panel, the Cub gets its claws out with an extension cabinet socket, to which any of the cabinets in the
Laney range could be connected. The internal loudspeaker and valves are protected by the rugged rear grille.
We hope you get a kick out of using your CUB-8, we certainly did designing and making it.
Best wishes from all at Laney.

CUB-8
3
FEATURES
Experiment with both inputs to find your best sound. To avoid poor sound only use good quality guitar cables.
5 – LO INPUT – ‘LO’ stands for low gain. This input is attenuated down approximately 50% from the ‘HI’ input and is
designed for full range clean sounds
4 – VOLUME – Sets how loud the amplifier is. Try cranking it up a little to drive the power tube harder for that real retro
sound and feel, that only a quality tube amplifier can deliver. Now use your guitar volume to control the amount of distortion.
6 – HI INPUT – ‘HI’ stands for high gain. This input is designed to enable the amplifier to be overdriven more easily and
has a restricted low frequency range to avoid a “mushy” sound from high output guitars.
2 – POWER INDICATOR – This lamp will illuminate once the amplifier is switched on.
3 – TONE – The tone control works in a similar fashion to the Tone control you probably have on your guitar except that it
uniquely works at the other end of the amplification chain. This has the ability to not only control the overall top end response,
but also reduce upper end harmonics on the output stage and preamplifier overdrive sounds. This will give you bright cutting
sounds at high settings and smooth rounded sounds at lower settings. (Midway (5) is a good starting point).
1 – POWER SWITCh – Main power switch for the unit. Tube amplifiers take between 30 seconds and 2 minutes to
warm up and be ready to play after switching on, this is normal.
123456
LO HI
VOLUME
POWER
TONE
INPUT

CUB-8
4
FEATURES CONTINUED
EXTERNAL SPEAKER
IMPEDANCE
8-16 OHMS
CAUTION - RISK OF ELECTRIC SHOCK DO NOT OPEN
ATTENTION - LE RISQUE DE DÉCHARGE ÉLECTRIQUE NE S'OUVRENT PAS
SUPPLY VOLTAGE
50 WATTS 50/60Hz
MAXIMUM POWER CONSUMPTION
~120V
~220V
~230V
~240V
T500mA L 250V
~100V
T250mA L 250V
7
89 10 11
MODEL: CUB-8
SN: ABC1234567890
DESIGNED & ENGINEERED IN THE UK
BY LANEY ELECTRONICS LTD
11 – MAINS FUSE TRAY – This drawer contains the main safety fuse for the unit. The fuse protects the amplifier from
damage in the event of fault by disconnecting the mains power supply. USE ONLY THE CORRECT SIZE AND RATING
SPECIFIED ON THE PANEL. If a fuse blows or fails and a replacement of the same size and rating is installed which in turn
blows, the amplifier has suffered a malfunction and needs immediate service from a qualified technician. DO NOT TRY A
FUSE OF HIGHER RATING - Using a fuse that is too large in current rating may cause serious, irreparable damage to the
amplifier and presents a serious fire hazard. The mains fuse ratings are detailed in the Specifications section of this manual,
as well as printed on the rear of the amplifier. There is a spare fuse located in the fuse drawer of the mains power inlet in the
event of a failure.
10 – POWER SOCKET – Connected the supplied IEC power cord here.
9 – SERIAL NO – Displays the model details and serial number of the unit.
8 – EXTENSION CABINET – Using a good quality speaker cable, connect an external cabinet (8-16 Ohm) here.
Recommended suggestions include the CUB-112 and CUB-212 cabinets. If an alternative is used, please note a mismatched
impedance will reduce the amplifiers performance and in some cases may cause damage to your amplifier. When an external
loudspeaker is connected, the Onboard loudspeaker will be muted.
7 – SAFETY WARNINGS – Please adhere to the warnings for your safety and the prolonged operation of the Cub-8
amplifier.
Always switch off and disconnect the power cord when not in use.

CUB-8
5
Technical Specifications
In the interest of continued product develo ment, aney rp L eserve the right to amend product specification without prior notice.
Packed Weight (Kg): 7.5
EAN: 5060109457391
(8 - 16 Ohm Impedance)
1xECC83/12AX7 Preamp tube
Hi and Lo Gain Inputs
Size (H*W*D) (mm): 303*304*197
Unit Weight (Kg): 6.5
Mains Fuse: (~220V>240V = T250mA L 250V) (~100>120V = T500mA L 250V)
1x6V6GT Power Tube
Tone and Volume Controls
(Operating voltage Factory set)
Loudspeaker output: Extension speaker socket
Input Impedance: 1MOhm
Loudspeaker (Internal): Premium HH 8" Driver - 8 Ohm
Output Power Rating: 5W
Features: Power Switch
Pure Single Ended Class A Valve tone
Power Consumption: 50W
Model: CUB-8
Type: Tube
Description: Vintage single-ended Class A design,
generating 5 watts RMS of tube tone.
Nominal Supply Voltage: ~100V, ~115V, ~220V, ~230V, 50/60Hz
INTERNAL
LOUDSPEAKER
HI INPUT
EXT. LOUDSPEAKER
8-16 OHMS
LO INPUT
PAD
V1a V1b V2
TONE
TONE
CONTROL
VOLUME
VOLUME
CONTROL
BLOCK DIAGRAM

CUB-8
In order to take full advantage of your new product and enjoy long and trouble-free performance, please read this owner's manual carefully, and keep it in a
safe place for future reference.
3) Cables: Never use shielded or microphone cable for any speaker connections as this will not be substantial enough to handle the amplifier load and could
cause damage to your complete system.
4) Servicing: The user should not attempt to service these products. Refer all servicing to qualified service personnel.
1) Unpacking: LaneyOn unpacking your product please check carefully for any signs of damage that may have occurred whilst in transit from the factory to
your dealer. In the unlikely event that there has been damage, please re-pack your unit in its original carton and consult your dealer. We strongly advise you
to keep your original transit carton, since in the unlikely event that your unit should develop a fault, you will be able to return it to you dealer for rectification
securely packed.
2) Amplifier Connection: In order to avoid damage, it is advisable to establish and follow a pattern for turning on and off your system. With all system parts
connected, turn on source equipment, tape decks, cd players, mixers, effects processors etc, BEFORE turning on your amplifier. Many products have large
transient surges at turn on and off which can cause damage to your speakers.
By turning on your amplifier LAST and making sure its level control is set to a minimum, any transients from other equipment should not reach your loud bass
speakers. Wait till all system parts have stabilised, usually a couple of seconds. Similarly when turning off your system always turn down the level controls on
your amplifier and then turn off its power before turning off other equipment.bass
CAUTION:
PRECAUCION:
ATTENTION:
VORSICHT:
WARNING:
ADVERTENCIA:
ADVERTISSEMENT:
ACHTUNG:
Intended to alert the user to the presence of uninsulated ‘Dangerous Voltage’ within the products enclosure that may be sufficient to constitute a risk of electrical
shock to persons.
Ce symbole est utililise pur indiquer a l’utilisateur de ce produit de tension non-isolee dangereuse pouvant etre d’intensite suffisante pour constituer un risque de choc
electrique.
Este simbolo tiene el proposito de alertar al usuario de la presencia de ‘(voltaje) peligroso’ que no tiene aislamiento dentro de la caja del producto que puede tener una
magnitud suficiente como para constituir riesgo de corrientazo.
To reduce the risk of electrical shock, do not remove the cover. No user serviceable parts inside. Refer servicing to qualified personnel.
Riesgo de corrientazo - no abra
Dieses Symbol soll den Anwender vor unsolierten gefahrlichen Spannungen innerhalb des Gehauses warnen, die von Ausrichender Starke sind, um einen elektrischen
Schlag verursachen zu konnen.
Intended to alert the user of the presence of important operating and maintenance (Servicing) instructions in the literature accompanying the product.
Risk of electrical shock - DO NOT OPEN.
Dieses Symbol soll den Benutzer auf wichtige Instruktionen in der Bedienungsanleitung aufmerksam machen, die Handhabung und Wartung des Produkts betreffen.
Dieses Symbol soll den Anwender vor unsolierten gefahrlichen Spannungen innerhalb des Gehauses warnen, die von Ausrichender Starke sind, um einen elektrischen
Schlag verursachen zu konnen.
Este simbolo tiene el proposito de la alertar al usario de la presencis de instrucccones importantes sobre la operacion y mantenimiento en la literatura que viene conel
producto.
Afin de reduire le risque de choc electrique, ne pas enlever le couvercle. II ne se trouve a l’interieur aucune piece pouvant etre reparee par l’utilisateur. Confier
l’entretien a un personnel qualifie.
Risques de choc electrique - NE PAS OUVIRIR
Para evitar corrientazos o peligro de incendio, no deja expuesto a la lluvia o humedad este aparato Antes de usar este aparato, lea mas advertcias en la guia de
operacion.
Um das Risiko eines elektrischen Schlages zu vermeiden, nicht die Abdeckung enfernen. Es befinden sich keine Teile darin, die vom Anwender repariert werden Konnten.
Reparaturen nur von qualifiziertem Fachpersonal durchfuhren lassen.
Um einen elektrischen Schalg oder Feuergefahr zu vermeiden, sollte dieses Gerat nicht dem Regen oder Feuchtigkeit ausgesetzt werden. Vor Inbetriebnahme unbedingt
die Bedienungsanleitung lesen.
Afin de prevenir les risques de decharge electrique ou de feu, n’exposez pas cet appareil a la pluie ou a l’humidite. Avant d’utiliser cet appareil, lisez les advertissments
supplentaires situes dans le guide.
Risiko - Elektrischer Schlag! Nicht offen!
Para disminuir el risego de carrientazo, no abra la cubierta. No hay piezas adentro que el pueda reparar. Deje todo mantenimiento a los tecnicos calificadod.
To prevent electrical shock or fire hazard, do not expose this appliance to rain or moisture. Before using this appliance please read the operating instructions for further
warnings.
IMPORTANT SAFETY INSTRUCTIONS
GENERAL INSTRUCTIONS
EN
6

CUB-8
FCC COMPLIANCY STATEMENT
2009/125/EU
Hereby, Laney Electronics Ltd. declares that the radio equipment is in compliance with Directives 2014/53/EU, 2011/65/EU,
---------------------------------------------------------------------------------------------------------------------------------------------------------
support.laney.co.uk/approvals
Full text of the EU declaration of conformity is available at the following internet address:
---------------------------------------------------------------------------------------------------------------------------------------------------------
1) This device may not cause harmful interference
Increase the separation between the equipment and receiver.
This device complies with Part 15 of the FCC rules Operation is subject to the following two conditions:
Warning: Changes or modification to the equipment not approved by Laney can void the user's authority to use the equipment.
Note: This equipment has been tested and found to comply with the limits for Class B digital device, pursuant to Part 15 of the FCC Rules.
These limits are designed to provide reasonable protection against harmful interference in a residential installation. This equipment
generates, uses and can radiate radio frequency energy and if not installed and used in accordance with the instructions, may cause
harmful interference to radio communications. However, there is no guarantee that interference will not occur in a particular installation. If
this equipment does cause harmful interference to radio or television reception, which can be determined by turning the equipment off and
on, the user is encouraged to try and correct the interference by one or more of the following measures.
Connect the equipment into an outlet on a circuit different from that to which the receiver is connected.
Consult the dealer or an experienced radio/TV technician for help.
CE Mark (93/68/EEC), Low Voltage (2014/35/EU), EMC (2014/30/EU),
RoHS (2011/65/EU), ErP (2009/125/EU).
This product conforms to the requirements of the following European Regulations, Directives & Rules:
Reorient or relocate the receiving antenna.
----------------------------------------------------------------------------------------------------------------------------------------------------
In order to reduce environmental damage, at the end of its useful life, this product must not be disposed of along with normal household
waste to landfill sites. It must be taken to an approved recycling centre according to the recommendations of the WEEE (Waste Electrical
and Electronic Equipment) directive applicable in your country.
----------------------------------------------------------------------------------------------------------------------------------------------------
SIMPLIFIED EU DECLARATION OF CONFORMITY
2) This device must accept any interference received, that may cause undesired operation.
EN
7

CUB-8
CAUTION:
WARNING:
1. Read these instructions.
WARNING: When using electrical products, basic cautions should always be followed, including the following:
2. Keep these instructions safe.
3. Heed all warnings.
To prevent electrical shock or fire hazard, do not expose this appliance to rain
or moisture. Before using this appliance please read the operating
instructions.
5. Do not use this apparatus near water.
20. Symbols & nomenclature used on the product and in the product manuals, intended to alert the operator to areas where extra caution may be necessary, are as
follows:
If your appliance features a tilting mechanism or a kickback style cabinet,
please use this design feature with caution. Due to the ease with which the
amplifier can be moved between straight and tilted back positions, only
use the amplifier on a level, stable surface. DO NOT operate the amplifier
on a desk, table, shelf or otherwise unsuitable non-stable platform.
a) The wire that is coloured green and yellow must be connected to the terminal that is marked by the letter E‚ the earth symbol‚ coloured green or
13. The mains plug or appliance coupler is used as the disconnect device and shall remain readily operable. The user should allow easy access to any mains plug,
mains coupler and mains switch used in conjunction with this unit thus making it readily operable. Unplug this apparatus during lightning storms or when unused
for long periods of time.
12. Use only with a cart, stand, tripod, bracket, or table specified by the manufacturer, or sold with the apparatus. When a cart is used, use caution when moving the
cart/apparatus combination to avoid injury from tip-over.
b) The wire that is coloured blue must be connected to the terminal that is marked with the letter N or the colour black.
18.This electrical apparatus should not be exposed to dripping or splashing and care should be taken not to place objects
containing liquids, such as vases, upon the apparatus.
4. Follow all instructions.
16. If this product is to be mounted in an equipment rack, rear support should be provided.
Intended to alert the user of the presence of important operating and maintenance (Servicing) instructions in the literature accompanying the product.
8. Do not install near any heat sources such as radiators, heat registers, stoves or other apparatus (including amplifiers) that produce heat.
11. Only use attachments/accessories provided by the manufacturer.
15. Never break off the ground pin. Connect only to a power supply of the type marked on the unit adjacent to the power supply cord.
coloured green and yellow.
9. An apparatus with Class I construction shall be connected to a mains socket outlet with a protective connection. Do not defeat the safety purpose of the polarized
or grounding-type plug. A polarized plug has two blades with one wider than the other. A grounding type plug has two blades and a third grounding prong. The
wide blade or third prong is provided for your safety. If the provided plug does not fit into your outlet, consult an electrician for replacement of the obsolete
outlet.
c) The wire that is coloured brown must be connected to the terminal that is marked with the letter L or the colour red.
7. Do not block any of the ventilation openings. Install in accordance with manufacturer’s instructions.
14. Refer all servicing to qualified service personnel. Servicing is required when the apparatus has been damaged in any way, such as when power-supply cord or
plug is damaged, liquid has been spilled or objects have fallen into the apparatus, the apparatus has been exposed to rain or moisture, does not operate normally,
or has been dropped.
17. Note for UK only: If the colours of the wires in the mains lead of this unit do not correspond with the terminals in your plug‚ proceed as follows:
The U.S. Government’s Occupational Safety and Health Administration (OSHA) has specified the following permissible
noise level exposures: According to OSHA, any exposure in excess of the above permissible limits could result in some
hearing loss. Earplugs or protectors to the ear canals or over the ears must be worn when operating this amplification
system in order to prevent a permanent hearing loss, if exposure is in excess of the limits as set forth above. To ensure
against potentially dangerous exposure to high sound pressure levels, it is recommended that all persons exposed to
equipment capable of producing high sound pressure levels such as this amplification system be protected by hearing protectors while this unit is in operation.
Risk of electrical shock - DO NOT OPEN. To reduce the risk of electrical shock, do not remove the cover. No user serviceable parts inside. Refer
servicing to qualified personnel.
19. Exposure to extremely high noise levels may cause a permanent hearing loss. Individuals vary considerably in
susceptibility to noise-induced hearing loss, but nearly everyone will lose some hearing if exposed to sufficiently intense
noise for a sufficient time.
6. Clean only with a dry cloth.
10. Protect the power cord from being walked on or pinched, particularly at plugs, convenience receptacles, and the point they exit from the apparatus.
Intended to alert the user to the presence of high ‘Dangerous Voltage’ within the products enclosure that may be sufficient to constitute a risk of
electrical shock to persons.
EN
1 ½
2
1
8
Duration Per
Day in Hours
3
½
¼ or less
6
4
92
95
90
105
115
slow response
102
110
97
100
Sound Level dBA,
IMPORTANT SAFETY INSTRUCTIONS
8

CUB-8
TRANSLATION
DOCUMENTS
9

CUB-8 ES
123456
LO HI
VOLUME
POWER
TONE
INPUT
Experimente con las dos entradas para encontrar tu mejor sonido. Apenas use cables de alta calidad para evitar sonidos malos
o sin calidad.
2 – Indicador POWER – Esta lampara se ilumina cuando el amplificador es prendido.
4 – Control VOLUME – Ajusta el volumen del amplificador. Trate de aumentar un poquito para hacer con que la válvula
sea rempujada más fuerte y obtener aquel sonido tradicional retro, que solamente un amplificador con alta calidad puede
ofrecer. Ahora, con el control de volumen de su guitarra puedes controlar la cantidad de distorsión.
3 – Control TONe – El control de tono funciona de forma similar al control de tono de tu guitarra, con la diferencia de que
funciona solamente en la otra punta de la cadena de amplificación. Esto permite, no solo controlar la respuesta de la punta de
frecuencias altas, pero también reducir los armónicos de las frecuencias altas en la fase de salida de los sonidos
distorsionados en el preamplificador. Esto te brinda con sonidos cortantes en ajustes de alto volumen y sonidos suaves y
redondos en volúmenes menores. (El ajuste al medio (5) es un buen punto de partida).
5 – Conector LO INPUT – ‘LO’ significa baja ganancia. Esta entrada es atenuada en casi 50% de la señal en la entrada
‘HI’ input y se encuentra diseñada para sonidos limpios de rango completo.
1 – Llave POWER – Llave prende y apaga de la unidad. Después de prender, los amplificadores a válvulas tardan entre 30
segundos a 2 minutos para calentar y estar listo para el uso, esto es normal.
6 – Conector HI INPUT – ‘HI’ significa alta ganancia. Esta entrada permite que el amplificador sea distorsionado más
fácilmente y tiene un rango restricto de frecuencias bajas para evitar un sonido “embarajado” desde guitarras con salida alta.
10
PANEL DE CONTROL

CUB-8 ES
EXTERNAL SPEAKER
IMPEDANCE
8-16 OHMS
CAUTION - RISK OF ELECTRIC SHOCK DO NOT OPEN
ATTENTION - LE RISQUE DE DÉCHARGE ÉLECTRIQUE NE S'OUVRENT PAS
SUPPLY VOLTAGE
50 WATTS 50/60Hz
MAXIMUM POWER CONSUMPTION
~120V
~220V
~230V
~240V
T500mA L 250V
~100V
T250mA L 250V
7
89 10 11
MODEL: CUB-8
SN: ABC1234567890
DESIGNED & ENGINEERED IN THE UK
BY LANEY ELECTRONICS LTD
9 – SERIAL NO – Muestra el numero serial de tu amplificador.
10 – Conector POWER – Conecte el cable de energía que viene con el amplificador aquí.
8 – conector GABINETE EXTRA – Usando un cable de alta calidad, conecte aquí un gabinete extra (con impedancia entre
8-16 Ohm). Recomendamos el uso de nuestros gabinetes CUB-112 y CUB-212. En caso de uso de un gabinete alternativo,
note que una impedancia incorrecta reducirá la capacidad del amplificador y, en algunos casos, puede dañar tu equipo. Al
conectar un gabinete extra el altavoz interno es desconectado.
7 – ALERTA DE SEGURIDAD – Por favor, siga siempre las instrucciones de seguridad para su protección y una duración
prolongada de su amplificador Cub-8.
11 – Bandeja MAINS FUSE – Este cajoncito contiene el fusible de seguridad de la unidad. El fusible protege el
amplificador de daños en caso de falta de energía o al desconectar el cable con el equipo prendido. USE SOLAMENTE
FUSIBLES DEL MISMO TAMAÑO Y ESPECIFICACIÓN QUE LA LISTADA EN EL PANEL. Si un fusible se quema o falla, y al
instalar un nuevo de la misma característica todavía este también se quema, el amplificador ha sufrido un problema de mal
funcionamiento y necesita urgentemente de un reparo a ser hecho solamente pro un técnico cualificado. NO INTENTE UN
FUSIBLE DE MAYOR CAPACIDAD – Usar un fusible que tiene muy alta corriente puede causar serios problemas que pueden
ser irreparables y todavía presenta riesgo de fuego. Las especificaciones del fusible se encuentran detalladas en la sección de
especificaciones en este manual e impresos en el panel del producto. Hay un fusible de remplazo en el cajoncito por la
eventualidad de que sea necesario.
Siempre apague y retire el cable de energía cuando el producto no sea usado.
11

CUB-8
CUIDADO: Cuando use productos electrónicos, debe tomar precauciones básicas, incluyendo las siguientes:
b) El cable coloreado en azul debe ser conectado al terminal que está marcado con la letra N o el color negro.
Para evitar descargas eléctricas o incendios, no exponga este aparato a la lluvia ni a la humedad. Antes de usar este aparato, por favor
lea las instrucciones de funcionamiento.
18. Este aparato eléctrico no debe ser sometido a ningún tipo de goteo o salpicadura y se debe tener cuidado para no poner objetos que
contengan líquidos, como vasos, sobre el aparato.
12. Usar solamente un carro, pie, trípode, o soporte especificado por el fabricante, o vendido junto al aparato. Cuando se use un carro, tenga
cuidado al mover el conjunto carro/aparato para evitar que se dañe en un vuelco.
9. Un aparato con la construcción de clase I deberá conectarse a una toma de corriente que disponga una conexión con protección. No retire la
patilla protectora del enchufe polarizado o con conexión a tierra. Un enchufe polarizado tiene dos clavijas, una más ancha que la otra. Un
enchufe con toma de tierra tiene dos clavijas y un tercer diente de tierra. La clavija ancha (la tercera) se proporciona para su seguridad. Si el
enchufe proporcionado no encaja en su toma de red, consulte a un electricista para que se reemplace por la obsoleta.
6. Limpiar solamente con un trapo seco.
4. Siga todas las instrucciones.
15. Nunca retire la patilla de Tierra. Conecte el aparato sólo a una fuente de alimentación del tipo marcado al lado del cable de alimentación.
14. Para cualquier reparación, acuda a personal de servicio cualificado. Se requieren reparaciones cuando el aparato ha sido dañado de alguna
manera, como cuando el cable de alimentación o el enchufe se han dañado, algún líquido ha sido derramado o algún objeto ha caído dentro del
aparato, el aparato ha sido expuesto a la lluvia o la humedad, no funciona de manera normal, o ha sufrido una caída.
10. Proteja el cable de alimentación para que no sea pisado o pinchado, particularmente en los enchufes, habitáculos y el punto de salida del
aparato.
1. Lea estas instrucciones.
Riesgo de choque eléctrico - NO ABRIR. Para reducir el riesgo de descarga eléctrica, no retire la cubierta. No hay piezas que el
usuario pueda reparar. Solicite la revisión al personal cualificado.
Si el aparato cuenta con un mecanismo de inclinación o un gabinete estilo de contragolpe, por favor use esta característica con
precaución. Debido a la facilidad con que puede ser que el amplificador se mueva entre las posiciones recta e inclinada, utilice sólo
el amplificador sobre una superficie nivelada y estable. NO haga funcionar el amplificador en un escritorio, mesa, estantería o plataforma no
estable o no apta.
La intención de alertar al usuario de la presencia de "tensión peligrosa" alto dentro del recinto los productos puede ser suficiente para constituir
un riesgo de descarga eléctrica para las personas.
20. Símbolos y nomenclatura utilizada en el producto y en los manuales de producto, destinado a alertar al
usuario de las áreas donde la precaución adicional pueden ser necesarias, son las siguientes:
17. Nota para el Reino Unido solamente: Si los colores de los cables en el enchufe principal de esta unidad no corresponden con los terminales en
su enchufe‚ proceda de la siguiente manera:
La intención de alertar al usuario de la presencia de importantes de operación y mantenimiento (servicio) en la literatura que acompaña al
producto.
7. No bloquear ninguna de las salidas de ventilación. Instalar de acuerdo a las instrucciones del fabricante.
16. Si este producto va a ser instalado en una unidad de rack, use algún tipo de apoyo trasero.
a) El cable de color verde y azul debe ser conectado al terminal que está marcado con la letra E‚ el símbolo de Tierra (earth)‚ coloreado en
verde o en verde y amarillo.
5. No usar este aparato cerca del agua.
8. No instalar cerca de ninguna fuente de calor como radiadores, estufas, hornos u otros aparatos (incluyendo amplificadores) que produzcan
calor.
2. Guarde estas instrucciones.
11. Usar solamente componentes y accesorios proporcionados por el fabricante.
13. El cable de alimentación o conector del aparato se usa como dispositivo de desconexión y debe permanecer accesible. El usuario debe
permitir un acceso fácil a cualquier entrada principal, interruptor haciéndolo así más operativo. Desenchufe este aparato durante tormentas
eléctricas o cuando no se use en largos períodos de tiempo.
c) El cable coloreado en marrón debe ser conectado al terminal que está marcado con la letra L o el color rojo.
3. Haga caso de todos los consejos.
19. La exposición a altos niveles de ruido puede causar una pérdida permanente en la audición. La susceptibilidad a la pérdida de audición
provocada por el ruido varía según la persona, pero casi todo el mundo perderá algo de audición si se
expone a un nivel de ruido suficientemente intenso durante un tiempo determinado. El Departamento para
la Salud y para la Seguridad del Gobierno de los Estados Unidos (OSHA) ha especificado las siguientes
exposiciones al ruido permisibles:
De acuerdo al OSHA, cualquier exposición que exceda los límites arriba indicados puede producir algún
tipo de pérdida en la audición. Protectores para los canales auditivos o tapones para los oídos deben ser
usados cuando se opere con este sistema de sonido para prevenir una pérdida permanente en la audición, si
la exposición excede los límites indicados más arriba. Para protegerse de una exposición a altos niveles de
sonido potencialmente peligrosa, se recomienda que todas las personas expuestas a equipamiento capaz de
producir altos niveles de presión sonora, tales como este sistema de amplificación, se encuentren protegidas
por protectores auditivos mientras esta unidad esté operando.
ES
INSTRUCCIONES IMPORTANTES DE SEGURIDAD
CAUTION:
WARNING:
12

CUB-8 FR
123456
LO HI
VOLUME
POWER
TONE
INPUT
1 – Interrupteur général – Permet de mettre l'ampli en marche et de le couper. Les amplis à lampes mettent entre
30 secondes et 2 minutes pour préchauffer et être prêt à jouer après la mise en marche. Ce fonctionnement est normal.
2 – VOYANT – Ce voyant s'allume lorsque l'ampli est en marche.
3 – TONALITÉ – Le contrôle de tonalité fonctionne de la même manière que celui que vous avez probablement sur votre
guitare à part le fait qu'il agit à l'autre bout de la chaîne d'amplification. Il a la capacité de non seulement contrôler les
fréquences aiguës, mais également de réduire les harmoniques élevées dans les sons saturés du préampli et de l'étage de
sortie. Ceci vous procure des sonorités claires et percutantes avec des réglages forts et des sonorités douces et rondes avec
des réglages plus faibles (la position médiane (5) est un bon réglage de départ).
Experiment with both inputs to find your best sound. To avoid poor sound only use good quality guitar cables.
Expérimentez les deux entrées pour trouver celle qui convient à votre son. Pour éviter un son médiocre, n'utilisez que des
câbles instruments de qualité.
5 – ENTRÉE LO – ‘LO’ veut dire gain faible. Cette entrée est atténuée d'environ 50 % par rapport à l'entrée ‘HI’ et est
conçue pour profiter de toute la puissance des sonorités claires.
4 – VOLUME – Ajuste le volume de l'ampli. Essayez de le pousser un peu pour saturer la lampe de puissance afin de
retrouver ce bon vieux son vrai et rétro et sentir ce que seul un ampli à lampes de qualité peut fournir. Utilisez le volume de
votre guitare pour contrôler le niveau de saturation.
6 – ENTRÉE HI – ‘HI’ veut dire gain élevé. Cette entrée est conçue pour saturer plus facilement l'ampli et réduit les
fréquences graves pour éviter une sonorité baveuse des guitares à haut niveau.
13
PANNEAU DE CONFIGURATION

CUB-8 FR
EXTERNAL SPEAKER
IMPEDANCE
8-16 OHMS
CAUTION - RISK OF ELECTRIC SHOCK DO NOT OPEN
ATTENTION - LE RISQUE DE DÉCHARGE ÉLECTRIQUE NE S'OUVRENT PAS
SUPPLY VOLTAGE
50 WATTS 50/60Hz
MAXIMUM POWER CONSUMPTION
~120V
~220V
~230V
~240V
T500mA L 250V
~100V
T250mA L 250V
7
89 10 11
MODEL: CUB-8
SN: ABC1234567890
DESIGNED & ENGINEERED IN THE UK
BY LANEY ELECTRONICS LTD
7 – AVERTISSEMENTS DE SÉCURITÉ – Veuillez suivre ces conseils pour votre sécurité et pour prolonger la vie de votre
ampli Cub-8.
8 – PRISE POUR ENCEINTE EXTERNE – Vous pouvez brancher une enceinte externe dans cette prise à l'aide d'un câble pour
enceinte de bonne qualité.
L'enceinte externe doit avoir une impédance de 8 à 16 ohms. Les suggestions recommandées sont l'enceinte CUB-112 ou
CUB-212. Si vous utilisez une autre enceinte, notez qu'une mauvaise adaptation d'impédance réduira les performances de
l'ampli et peut, dans certains cas, entraîner des dégâts à votre ampli. Lorsqu'une enceinte externe est branchée, le haut-
parleur interne est coupé.
9 – NUMÉRO DE SÉRIE – Affichage des détails du modèle et du numéro de série de l'ampli.
11 – TIROIR DU FUSIBLE PRINCIPAL – Ce tiroir contient le fusible principal de l'appareil. Le fusible protège l'ampli dans le
cas d'une panne en coupant l'alimentation générale. N'UTILISEZ QUE DES FUSIBLES DE MÊME TAILLE ET DE MÊME CALIBRE
IDENTIQUES À CELUI INDIQUÉ SUR LE PANNEAU ARRIÈRE. Si un fusible saute et qu'après son remplacement, il saute
encore, l'ampli présente un défaut et doit immédiatement être réparé par un technicien qualifié. NE METTEZ PAS EN PLACE
UN FUSIBLE DE CALIBRE SUPÉRIEUR – L'utilisation d'un fusible de calibre supérieur peut entraîner des dégâts sérieux et
irréparables à l'ampli et constitue un risque sérieux d'incendie. Les caractéristiques du fusible principal sont détaillées dans la
partie Données Techniques de ce mode d'emploi et sont reprises sur le panneau arrière de l'ampli. Dans le tiroir porte-fusible
se trouve un fusible de rechange dans l'éventualité d'une panne.
10 – PRISE D'ALIMENTATION – Branchez le câble d'alimentation IEC fourni dans cette prise.
Toujours éteindre l'ampli et débrancher le câble d'alimentation lorsque vous n'utilisez pas votre ampli.
14

CUB-8
5. N'utilisez pas cet appareil à proximité de plans d'eau.
7. N'obstruez pas les systèmes de refroidissement de votre appareil et installez votre appareil en fonction des instructions de ce manuel.
9. Un appareil avec la construction de la classe I sera relié à une prise munie d'une liaison à la terre. Branchez toujours votre appareil sur une alimentation munie
de prise de terre utilisant le cordon d'alimentation fourni.
ATTENTION: L'utilisation de tout appareil électrique doit être soumise aux précautions d'usage incluant:
1. Lisez ces instructions
2. Gardez ce manuel pour de futures références.
3. Prêtez attention aux messages de précautions de ce manuel.
4. Suivez ces instructions.
6. N'utilisez qu'un tissu sec pour le nettoyage de votre appareil.
8. Ne positionnez pas votre appareil à proximité de toute source de chaleur.
11. N'utilisez que des fixations approuvées par le fabriquant.
10. Protégez les connecteurs de votre appareil et positionnez les câblages pour éviter toutes déconnexions accidentelles.
12. Lors de l'utilisation sur pied ou perche de support, assurez dans le cas de déplacement de l'ensemble enceinte/support de prévenir tout basculement
intempestif de celui-ci.
13. La fiche secteur est utilisée pour couper l'alimentation de l'appareil et doit rester facilement accessible. Débranchez cet appareil pendant les orages ou s'il
est inutilisé pendant de longues périodes.
14. Seul un technicien agréé par le fabriquant est à même de réparer/contrôler votre appareil. Celui-ci doit être contrôlé s'il a subi des dommages de
manipulation, d'utilisation ou de stockage (humidité, …).
15. Ne déconnectez jamais la prise de terre de votre appareil.
16. Si votre appareil est destiné à être monté en rack, des supports arrière doivent être utilisés.
17. Note pour le Royaume-Uni : Si les couleurs des fils du câble d'alimentation ne correspondent pas aux fiches de la prise secteur, procédez comme suit:
a) Le fil vert et jaune doit être branché sur la borne repérée par la lettre E, ou le symbole de terre, ou par les couleurs vert ou verte et jaune.
b) Le fil bleu doit être branché sur la borne repérée par la lettre N, ou par la couleur noire.
c) Le fil marron doit être branché sur la borne repérée par la lettre L, ou par la couleur rouge.
18. Cet équipement électrique ne doit en aucun cas être en contact avec un quelconque liquide et aucun objet contenant un
liquide, tels qu'un vase ou autre récipient.
19. Une exposition à de hauts niveaux sonores peut entraîner des dommages irréversibles de l'audition. La sensibilité au
bruit varie considérablement d'un individu à l'autre, mais la majorité de la population ressentira une perte d'audition
après une exposition à une forte puissance sonore pendant une durée prolongée.
L'organisme de la santé américaine (OSHA) a produit le guide ci-dessous en rapport à l'exposition autorisée aux niveaux
de bruit:
D'après les études menées par l'OSHA, toute exposition au delà des limites décrites ci-dessous entraînera des pertes de
audition chez la plupart des sujets. Le port de système de protection (casque, oreillette de filtrage, etc…) doit être observé lors de l'utilisation de cet appareil
sans quoi des dommages irréversibles peuvent être occasionnés. Le port de ces systèmes doit être observé par toutes personnes susceptibles d'être exposées à
des conditions au delà des limites décrites ci-dessous.
20. Symboles utilisés sur les produits et dans les manuels des produits, destinés à alerter l'opérateur des zones ou des précautions supplémentaires pouvant être
nécessaires:
Ce symbole est utilisé pour prévenir l'utilisateur de la présence d'instructions d'utilisation et de maintenance dans le mode d'emploi accompagnant
l'appareil.
Afin de prévenir tout risque de choc électrique et d'incendie, n'exposez pas cet appareil à la pluie ou à l'humidité. Avant d'utiliser cet appareil, lisez attentivement les
instructions d'utilisation de ce mode d'emploi.
Risque de choc électrique – NE PAS OUVRIR Afin de réduire les risque de choc électrique, ne pas ouvrir le capot. Il n'y a aucune pièce à l'intérieur pouvant
être réparée par l'utilisateur. Veuillez confier la maintenance à un personnel qualifié.
Ce symbole est utilisé pour prévenir l'utilisateur de la présence d'une tension non isolée dangereuse à l'intérieur du boîtier de l'appareil, et pouvant être
suffisante pour constituer un risque de choc électrique.
Si votre appareil est équipé d'un mécanisme de basculement ou si son boîtier est conçu comme retour, veuillez utiliser cette caractéristique avec prudence. En
raison de la facilité avec laquelle l'amplificateur peut être basculé entre les positions droite et inclinée, utilisez uniquement l'amplificateur sur une surface plane
et stable. NE PAS faire fonctionner l'amplificateur sur un bureau, une table, une étagère ou autre plate-forme inappropriée.
CONSIGNES DE SÉCURITÉ IMPORTANTES
CAUTION:
WARNING:
FR
15

CUB-8
6.高增益输入:“HI”代表高增益。这种输入设计使放大器更容
易被过载,并有一个限制低频范围,以避免“糊状”声音当使用高
输出吉他。
4.音量:设置放大器的音量。试着把它开大一点,以驱动功率管
更努力的获得真正的复古声音和感觉,只有高质量的电子管放大器
可以提供。现在使用你的吉他音量来控制失真的数量。
5.低增益输入:“LO”代表低增益。这种输入衰减下来大约50%的
Hi输入,并被设计为全范围清音。
尝试两种输入来找到你最好的声音。为了避免声音差,只能使用
高质量的吉他电缆。
3.音调:这个音调控制器的工作类似于您吉他上面可能有的音调
控制器。只是它工作在放大链的尾端。这不仅能够控制总体上的顶
端响应,而且还减少了输出级和前置放大器的过载声音上的顶端谐
波。这将给你明亮的切割声音在高设置位置和平滑圆润的声音在低
设置位置。(中件位置是一个好的起点)。
1.电源开关:该设备的主电源开关。电子管功率放大器在开机后
等待30秒到2分钟左右才能进入使用状态,这个是正常现象.
2.电源指示:当功放电源开关打开时,灯会点亮.
123456
LO HI
VOLUME
POWER
TONE
INPUT
CN
控制面板
16

CUB-8
控制面板
7.安全警告:请阅读并遵守关于您的安全和CUB-8放大器的长时间
运行的警告。
保险丝保护放大器免受损害,在发生故障时,断开电源。只使用面
板上指定的正确尺寸和额定值。如果保险丝烧断或故障,而更换相
同尺寸和额定功率的保险丝又烧断,则说明功放出现故障,需要专
业技术人员立即维修。不要尝试较高的保险丝-使用电流额定值过大
的保险丝可能会对放大器造成严重的、无法弥补的损坏,并有严重
的火灾危险。电源保险丝额定值详细在本手册的规格部分,以及打
印在放大器的后面。在电源入口的保险丝抽屉里有一个备用保险
丝,以防发生故障。
9.序列号: 显示设备的型号和序列号。
10.电源线连接器:连接所提供的IEC电源线。
11.电源保险丝抽屉:这个抽屉里有这个装置的主安全保险丝。
8.外部扬声器:使用高质量的扬声器电缆,连接一个外部的音箱
(8-16欧姆)。推荐的方案包括CUB-112和CUB-212音箱。如果使用
替代方案,请注意,不匹配的阻抗会降低放大器的性能,在某些情
况下可能会对放大器造成损坏。当外接扬声器连接时,本体扬声器
将被静音。
不使用时,一定要关掉和断开电源线
EXTERNAL SPEAKER
IMPEDANCE
8-16 OHMS
CAUTION - RISK OF ELECTRIC SHOCK DO NOT OPEN
ATTENTION - LE RISQUE DE DÉCHARGE ÉLECTRIQUE NE S'OUVRENT PAS
SUPPLY VOLTAGE
50 WATTS 50/60Hz
MAXIMUM POWER CONSUMPTION
~120V
~220V
~230V
~240V
T500mA L 250V
~100V
T250mA L 250V
7 7
89 10 11
MODEL: CUB-8
SN: ABC1234567890
DESIGNED & ENGINEERED IN THE UK
BY LANEY ELECTRONICS LTD
中国制造
警告:未经允许不得打开机壳,有触电风险
警告: 此 设备必须 接 地
请不要在雨中或潮湿环境中使用此设备
警告: 为 降低火灾 风 险使用相 同 款式和额 定值的保 险 丝来替换
警告: 为 了降低火 灾 和触电风 险
请将维修交于被许可人员
请不要 移 除外罩,里面 不 含用户可 用 的任何配 件
CN
17

CUB-8
9. 与 I类建筑设备连接时,应连接到带保护的电源插座上。不要忽视极性或接地类型插头的安全作用。极性插头具有两个片状电
极,其中一个较宽。接地类型插头具有两个片状电极和第三只接地脚。宽片状电极或第三只接地极用于保证使用者及电器的安
全。如所提供的插头不适用于插座,须请专业人员更换,切勿自行更换电源插座。
5. 请勿在近水处使用该电器。
告:使用电产品时,应终基本的注事项,括各项:
11. 仅可采用制造商提供的附件或配件。
1. 阅读这些说明。
6. 仅可用干布清洁该电器。
8. 请勿将该电器安装在靠近热源,如散热器、热风机、炉子或其他发热设备(包括功率放大器)。
4. 请遵守所有说明。
2. 确保此类说明放置于安全处。
12. 仅可使用制造商指定的、或与该电器一同出售的货车、台架、三脚架、支架或台桌。使用货车,及移动货车/搬运该电器时,须
注意,避免倾翻产生损坏。
14. 当该电器受到任何方式的损坏时,如:电源线或插头被损坏、液体泼溅或物体落入电器内、该电器放置于有雨水或潮湿处、及
该电器坠落后,无法正常运行,需进行检修时,必须请有资格认证的维修人员进行维修。
16. 如此电器须安装在设备架上,应提供后部支架。
15. 请勿折断电源插头上的接地极。仅可连接到在插头的片状电极旁边已标注符号的极性上。
7. 请勿堵塞该电器上的任何通风口。根据制造商的说明进行安装。
10. 保护电源线,不被踩踏或挤压,尤其在插头、插座以及电源线的连接处。
3. 注意所有警告。
13. 电源插头或该电器的转接插头,应保持其易操作性。用户应使用与该电器匹配的电源插头、连接器和电源开关,应易于操作。
在雷雨或长时间不使用时,拔下该电源插头。
17. 仅适用于英国的注意事项。如该电器的电源线中电缆颜色与插头片状电极不相符,请按照以下步骤进行操作:
a) 黄绿色电缆须连接至标有字母“E”的电极,为接地符号。颜色为黄绿色或绿色。
b) 蓝色电缆须连接至标有字母“N”的电极,颜色为蓝色或黑色。
18. 该电器不能放置于有水滴或有水溅出的地方,须注意,不要将盛有液体的容器,如花瓶放在该
电器上。
19.如果人处于极高噪音级中可能会造成永久失聪。每个人受噪音导致听力损害的差异很大。然而
若长时间处于极强噪音中,任何人几乎都会造成不同程度的听力损害。美国政府职业安全健康管
理局(OSHA)指定了以下允许范围内的噪音级别,见右表:根据OSHA,任何超出上述允许的
极限范围可导致不同程度的听力损害。在运行该电器时,人体处于超出了以上设定的限制,须佩
戴耳塞或配备耳朵的保护装置,以预防永久性听力损害。为避免可能处于强声压程度的危险,该
电器运行时,建议处于强声压程度下的所有人均配备听力保护装置。
20. 用于产品和说明书上的符号和术语是为了提醒操作人员注意需要额外注意的地方,具体如下:
c) 棕色电缆须连接至标有字母“L”的电极,颜色为棕色或红色。
旨在提醒使用者小心产品空箱内的未绝缘“危险电压”,这可能足以对人构成触电危险。
旨在提醒使用者与产品一起提供的说明书中的重要操作和维护(保修)说明。小心触电-不能打开
为了降低触电风险,请不要打开盖子。里面不含任何用户可用的配件。请将维修交于被许可的人员。
为避免触电或火灾,请不要将本产品置于雨中或潮湿环境中。在使用本产品前,请仔细阅读操作说明。
CN
重要安全说明
如果你的产品是倾斜的结构或是后倾款式的箱体,请小心使用该设计征。由于功可在和后倾式间转
换,请在平坦、固的面使用该产品。请不要在桌子、架子或其不合、不固的平上使用该功。
2000m
该产品仅适用于非热带气候条件下安全使用该产品仅用于2000m地全使用
21.
CAUTION:
WARNING:
18

CUB-8 PT
123456
LO HI
VOLUME
POWER
TONE
INPUT
1 – Chave POWER – Esta chave liga e desliga a unidade. Após ligados, os amplificadores a válvulas demoram entre 30
segundos a 2 minutos para esquentar e estar pronto para o uso, isto é normal.
3 – Controle TONE – O controle de tone funciona de forma similar ao controle de tom de sua guitarra, com a diferença
que funciona somente na outra ponta da cadeia de amplificação. Isto permite, não só controlar a resposta da ponta de
frequências agudas, mas também reduzir os harmônicos dos agudos no estágio de saída dos sons distorcidos pelo pré
amplificador. Isto traz sons cortantes nos ajustes de volume mais altos e mais suaves e redondos nos volumes mais baixos. (O
ajuste no meio (5) é um bom ponto de partida).
5 – Conector LO INPUT – ‘LO’ significa baixo ganho. Esta entrada é atenuada em quase 50% do sinal na entrada ‘HI’
input e se encontra desenhada para sons limpos Full range.
2– Indicador POWER – Esta lâmpada se ilumina quando o amplificador é ligado.
4 – Controle VOLUME – Ajusta o volume do amplificador. Trate de aumentar um pouquinho para fazer com que a válvula
seja empurrada mais forte e obter aquele som retro tradicional, que somente um amplificador de alta qualidade pode oferecer.
Agora, com o controle de volume da guitarra, você pode controlar a quantidade de distorção.
6 – Conector HI INPUT – ‘HI’ significa alto ganhoi. Esta entrada permite que o amplificador seja distorcido mais
facilmente e possui uma faixa de frequências graves restrita para evitar um som “embaralhado” desde guitarras com saídas
altas.
Experimente com as duas entradas para encontrar teu melhor ajuste. Apenas use cabos de alta qualidade para evitar sons
indesejados ou pobres.
19
PAINEL DE CONTROLE

CUB-8 PT
EXTERNAL SPEAKER
IMPEDANCE
8-16 OHMS
CAUTION - RISK OF ELECTRIC SHOCK DO NOT OPEN
ATTENTION - LE RISQUE DE DÉCHARGE ÉLECTRIQUE NE S'OUVRENT PAS
SUPPLY VOLTAGE
50 WATTS 50/60Hz
MAXIMUM POWER CONSUMPTION
~120V
~220V
~230V
~240V
T500mA L 250V
~100V
T250mA L 250V
7
89 10 11
MODEL: CUB-8
SN: ABC1234567890
DESIGNED & ENGINEERED IN THE UK
BY LANEY ELECTRONICS LTD
7 – ALERTA DE SEGURANÇA – Por favor, siga sempre as instruções de segurança para sua proteção e duração prolongada
de seu amplificador Cub-8.
8 – Conector GABINETE EXTRA – Usando um cabo de alta qualidade, conecte aqui um gabinete extra (com impedância
entre 8-16 Ohms). Recomendamos o uso de nossos gabinetes CUB-112 e CUB-212. Em caso de uso de um gabinete
alternativo, note que a impedância incorreta pode reduzir a capacidade do amplificador e, em alguns casos, danificar seu
equipamento. Ao conectar um gabinete extra, o alto-falante interno é desligado.
11 – Bandeja MAINS FUSE – Esta gaveta contém o fusível de segurança da unidade. O fusível protege o amplificador de
danos em caso da falta de energia ou ao desconectar o cabo de força com o aparelho ligado. USE UNICAMENTE FUSÍVEIS DO
MESMO TAMANHO E ESPOECIFICAÇÃO QUE O LISTADO NO PAINEL. Se um fusível queima ou falha, e ao instalar outro
idêntico, esta queima de novo, o amplificador sofreu um dano e deve ser reparado por um técnico qualificado. NÃO TENTE
COLOCAR UM FUSÍVEL DE MAIOR CAPACIDADE – Usar um fusível de maior corrente pode causar sérios problemas e danos
irreparáveis, além do risco de incêndio. As especificações do fusível se encontram detalhadas na parte de Especificações
deste manual e no painel do aparelho. Tem um fusível para substituição na gaveta caso seja necessário.
9 – SERIAL NO – Mostra o número de série de seu amplificador.
10 – Conector POWER – Conecte o cabo de força incluso aqui.
Sempre desligue e retire o cabo de força quando o aparelho não estiver em uso.
20
Other manuals for CUB8
2
Table of contents
Other Laney Amplifier manuals

Laney
Laney LX12 User manual

Laney
Laney LV300 User manual

Laney
Laney TT20 User manual

Laney
Laney VC30-112-210-212 User manual

Laney
Laney Richter RBW100 User manual

Laney
Laney A50 User manual

Laney
Laney Audiohub AH-Freestyle User manual

Laney
Laney CUB8 User manual

Laney
Laney LX20 User manual

Laney
Laney CUB10 User manual
Popular Amplifier manuals by other brands

Sennheiser
Sennheiser A 200 audioport instruction manual

Crown
Crown PL-4 Schematic diagram

Hifonics
Hifonics BRUTUS BRX160.2 user guide

YORKVILLE
YORKVILLE Custom Valve YCV50 Service schematics

Premier Builders Guild
Premier Builders Guild Two-Rock Jet 22 owner's manual

Tenor
Tenor Audio 300 HP owner's manual