IMPORTANT! READ CAREFULLY AND
KEEP FOR FUTURE REFERENCE English
• Intended for use with only one child at a time from approximately 2 years of age and with a maximum weight of 22kg (48 lb).
• Never use the BuggyBoard™ if any part is damaged, worn, torn ,or missing.
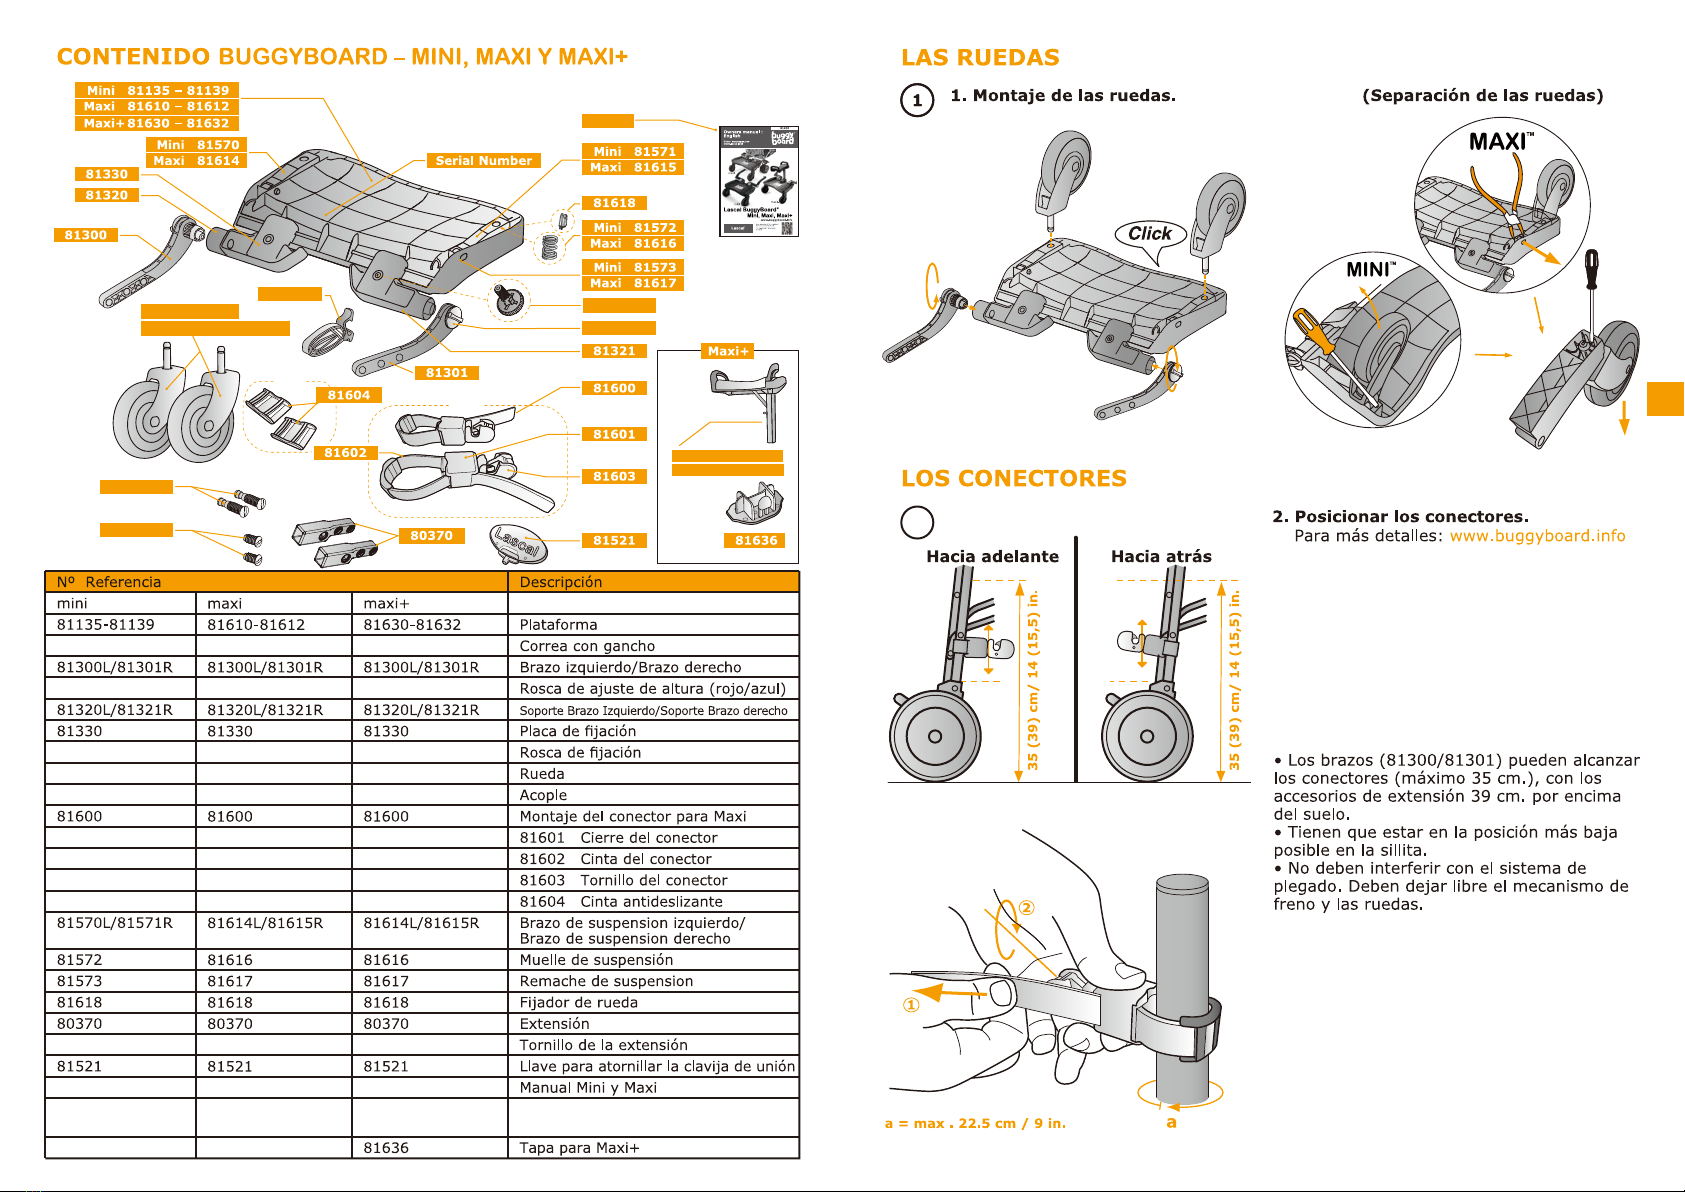
• Before each use, check the connectors and tighten if necessary.
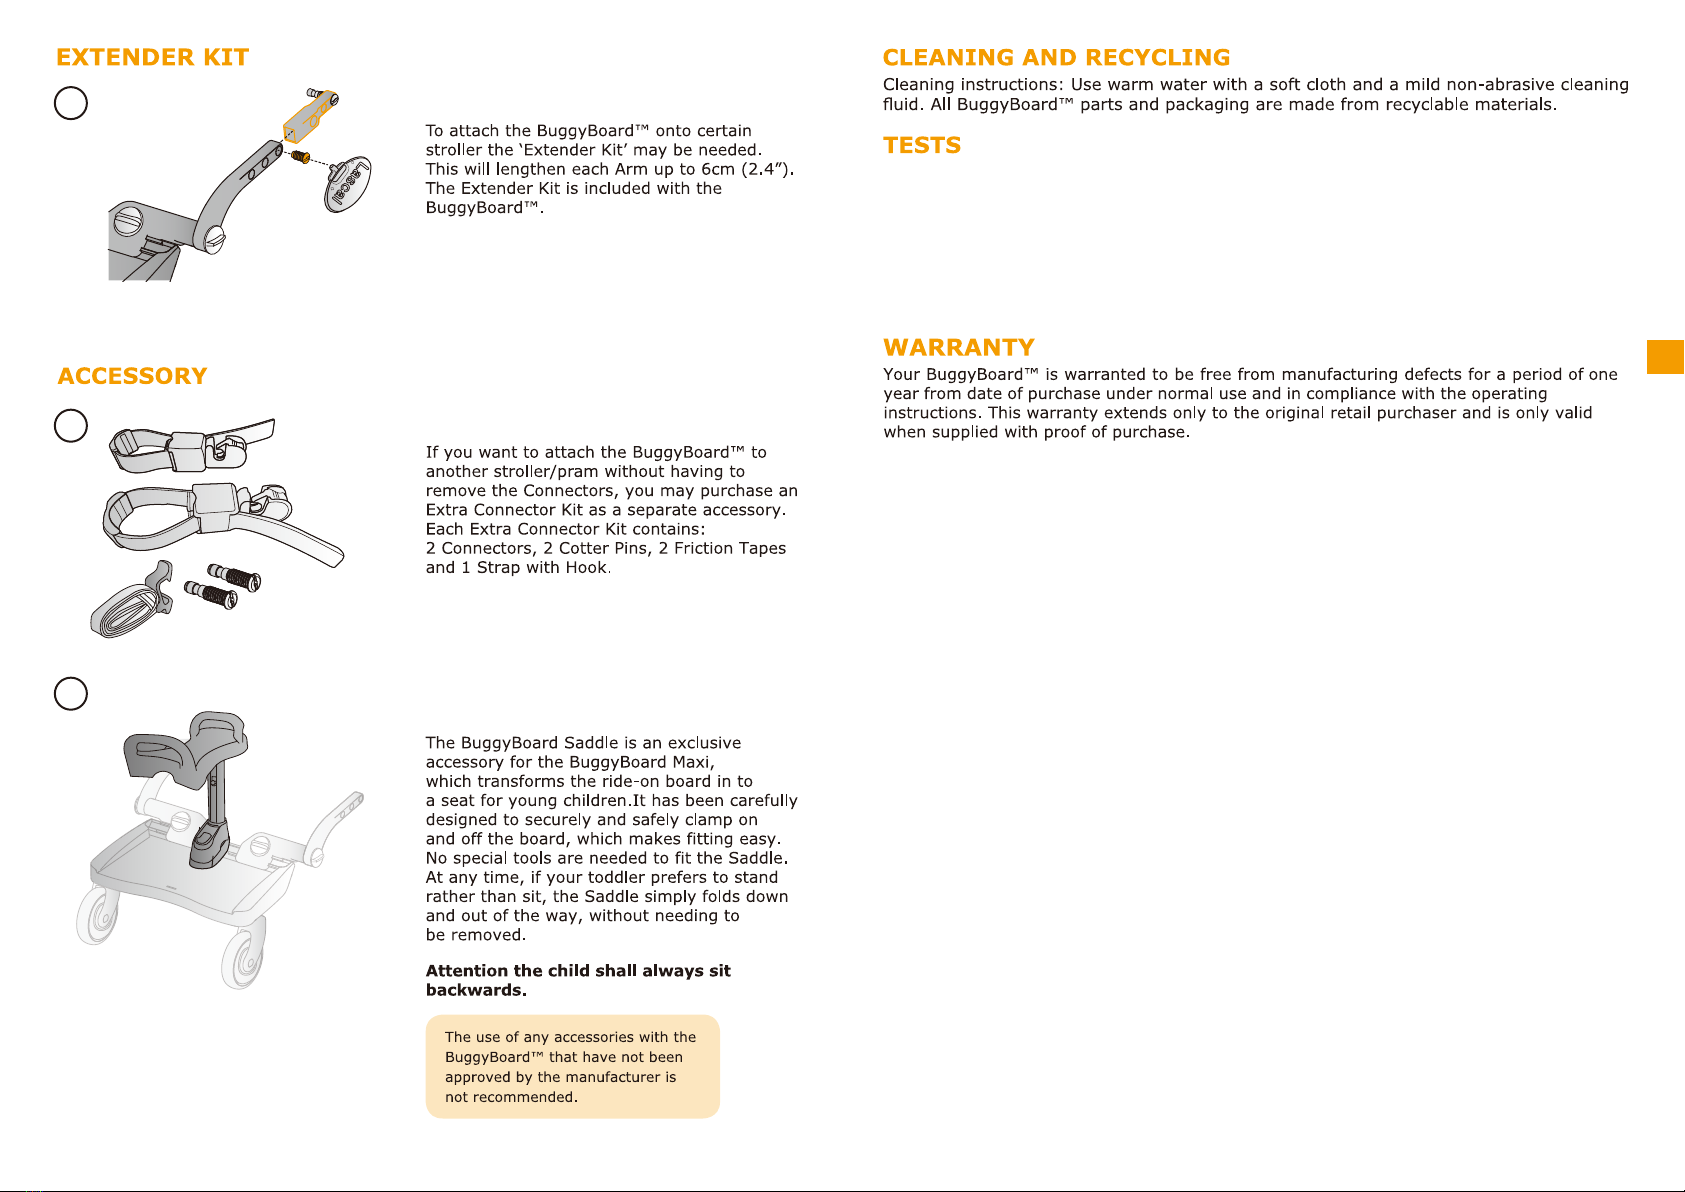
• The strap with hook must be removed when the BuggyBoard™ is in use and not reachable for children to avoid the risk of strangling.
• Always keep your hands on the stroller when your child is standing on the BuggyBoard™. Never leave your child unattended while
he/she is standing on the BuggyBoard™.
• Make sure your child is always standing with both feet on the anti-slip rear portion of the BuggyBoard™.
• Never use the stroller’s parking brake while your child is standing on the BuggyBoard™.
• Do not go up and down kerbs or steps when a child is on the platform.
• Never use the platform for pushing the pushchair/stroller like a skate board.
• The child should always sit facing backwards if using a BuggyBoard™ Saddle.
• Never let children play with the BuggyBoard™.
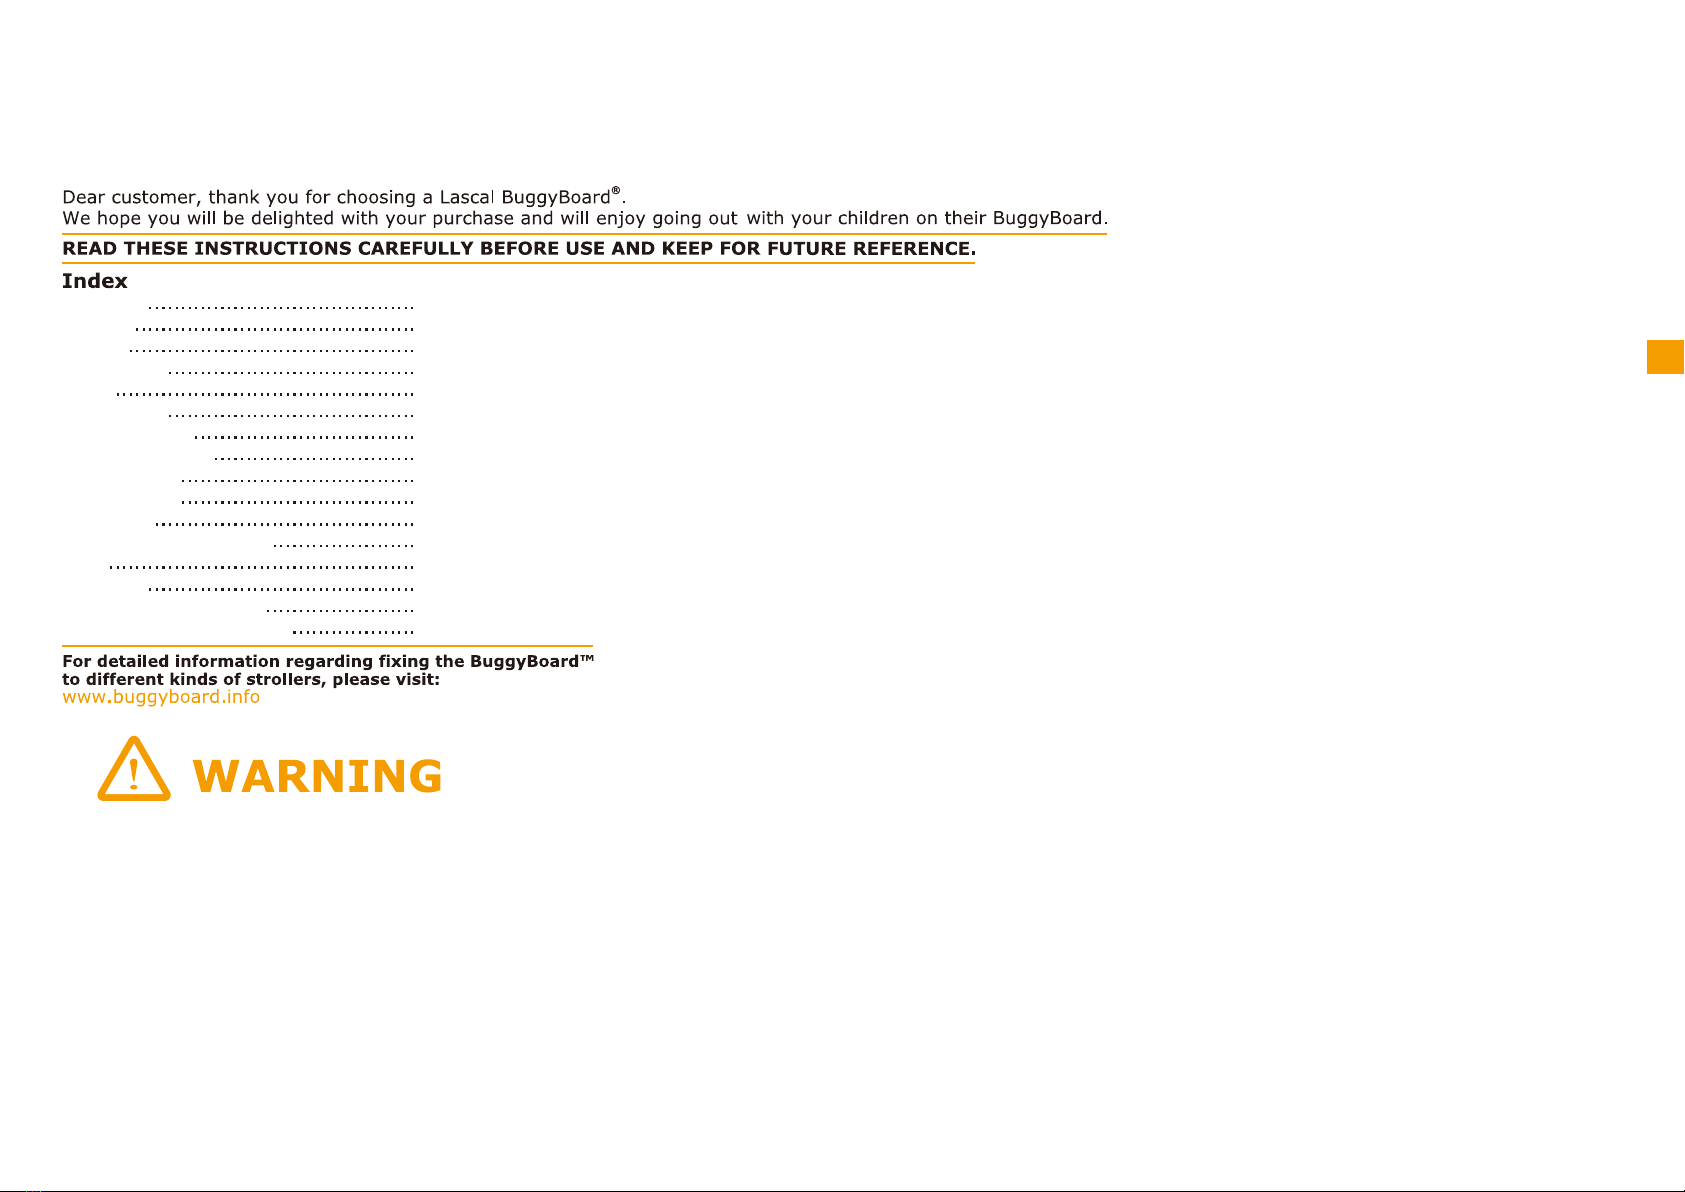
Warnings
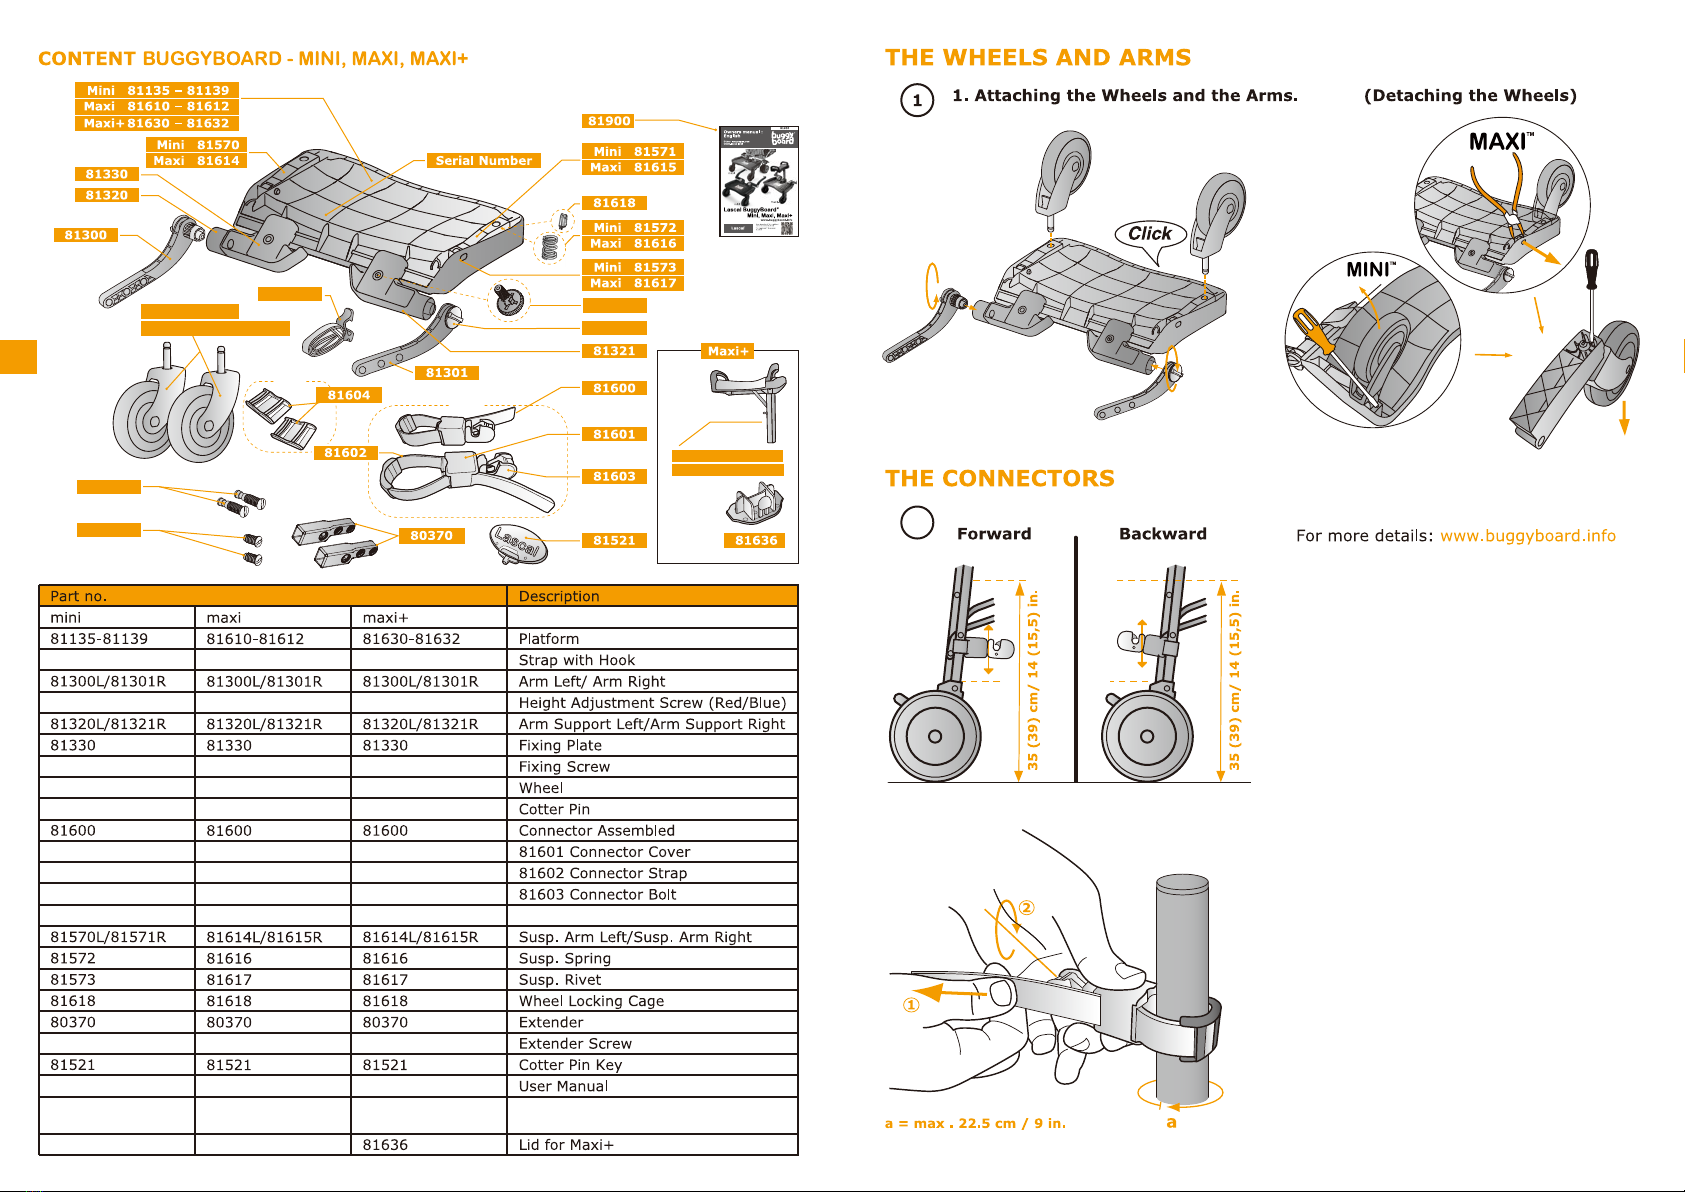
Content
Wheels
Connectors
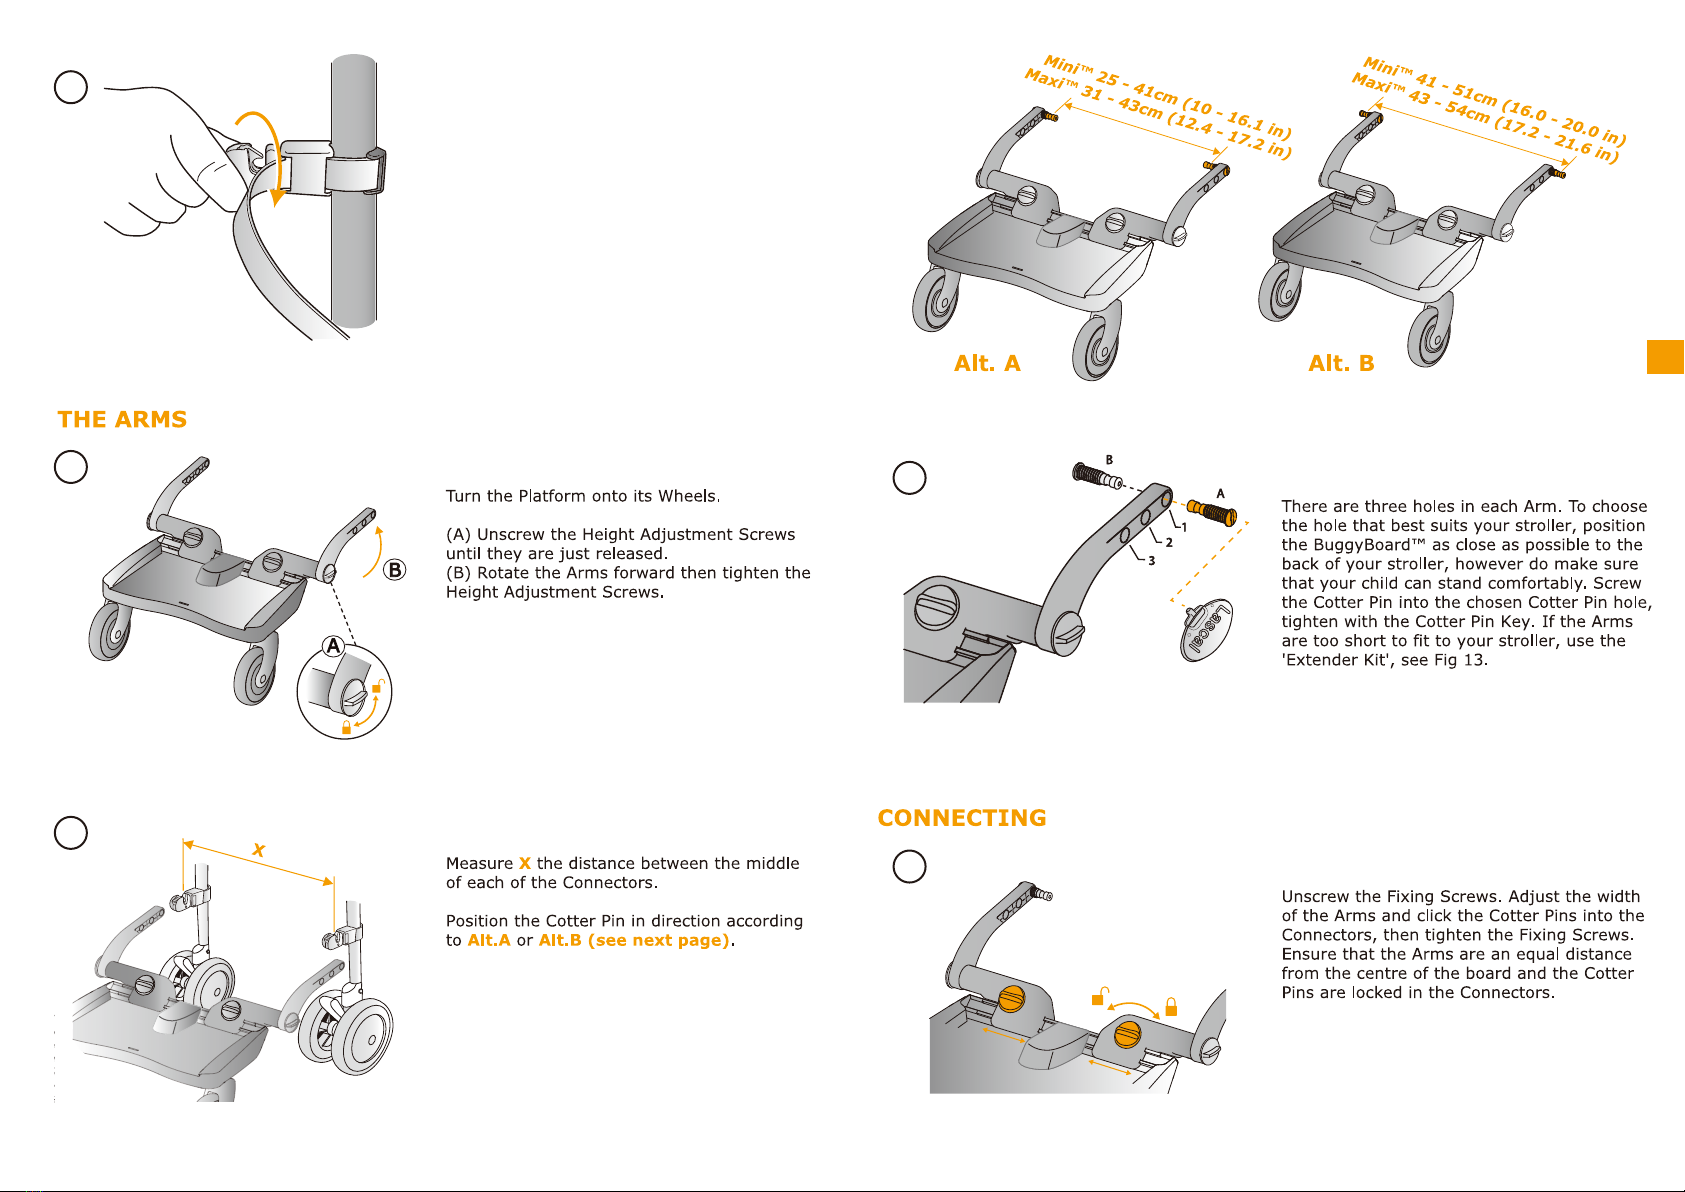
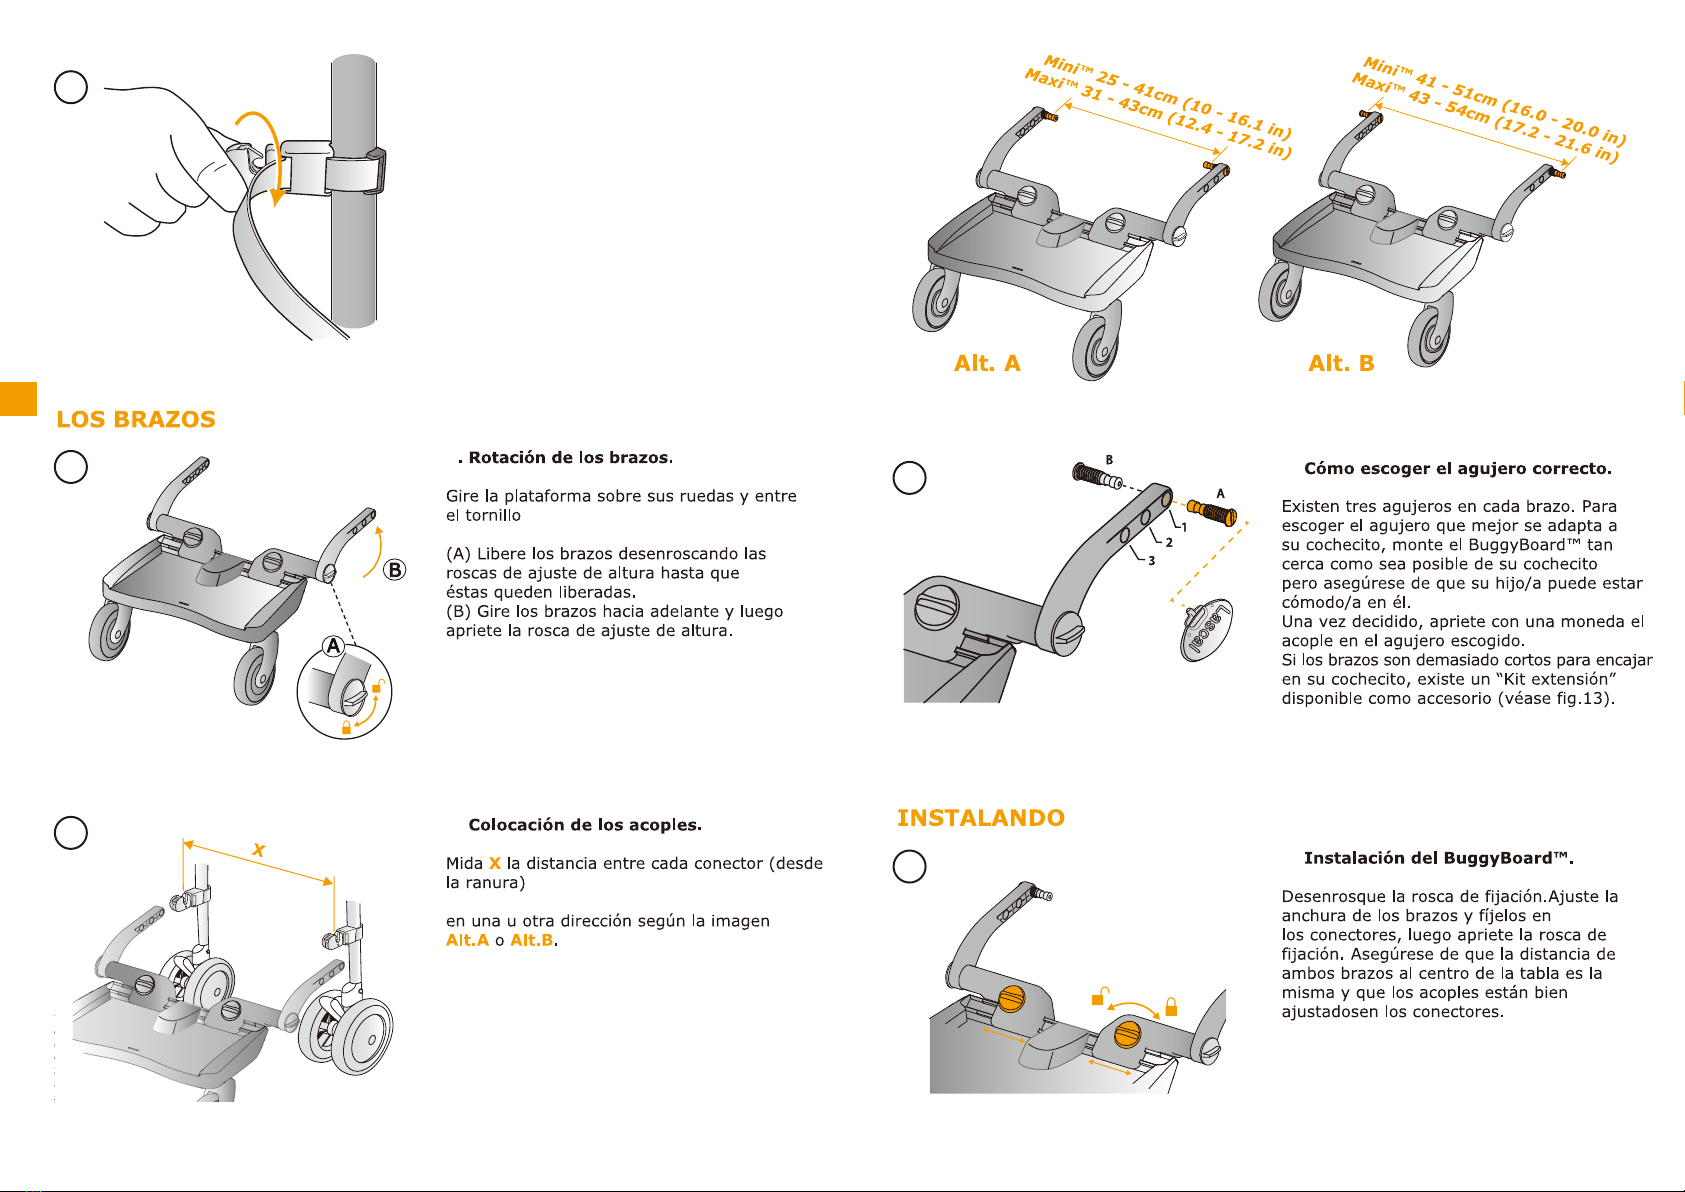
Arms
Connecting
Disconnecting
When not in use
Final Checks
Extender Kit
Accessory
Cleaning and recycling
Tests
Warranty
Other Lascal products
Product registration card
2
3
3
3
4
4
5
5
5
6
6
6
6
6
17-18
18-19
- 2 -
EN