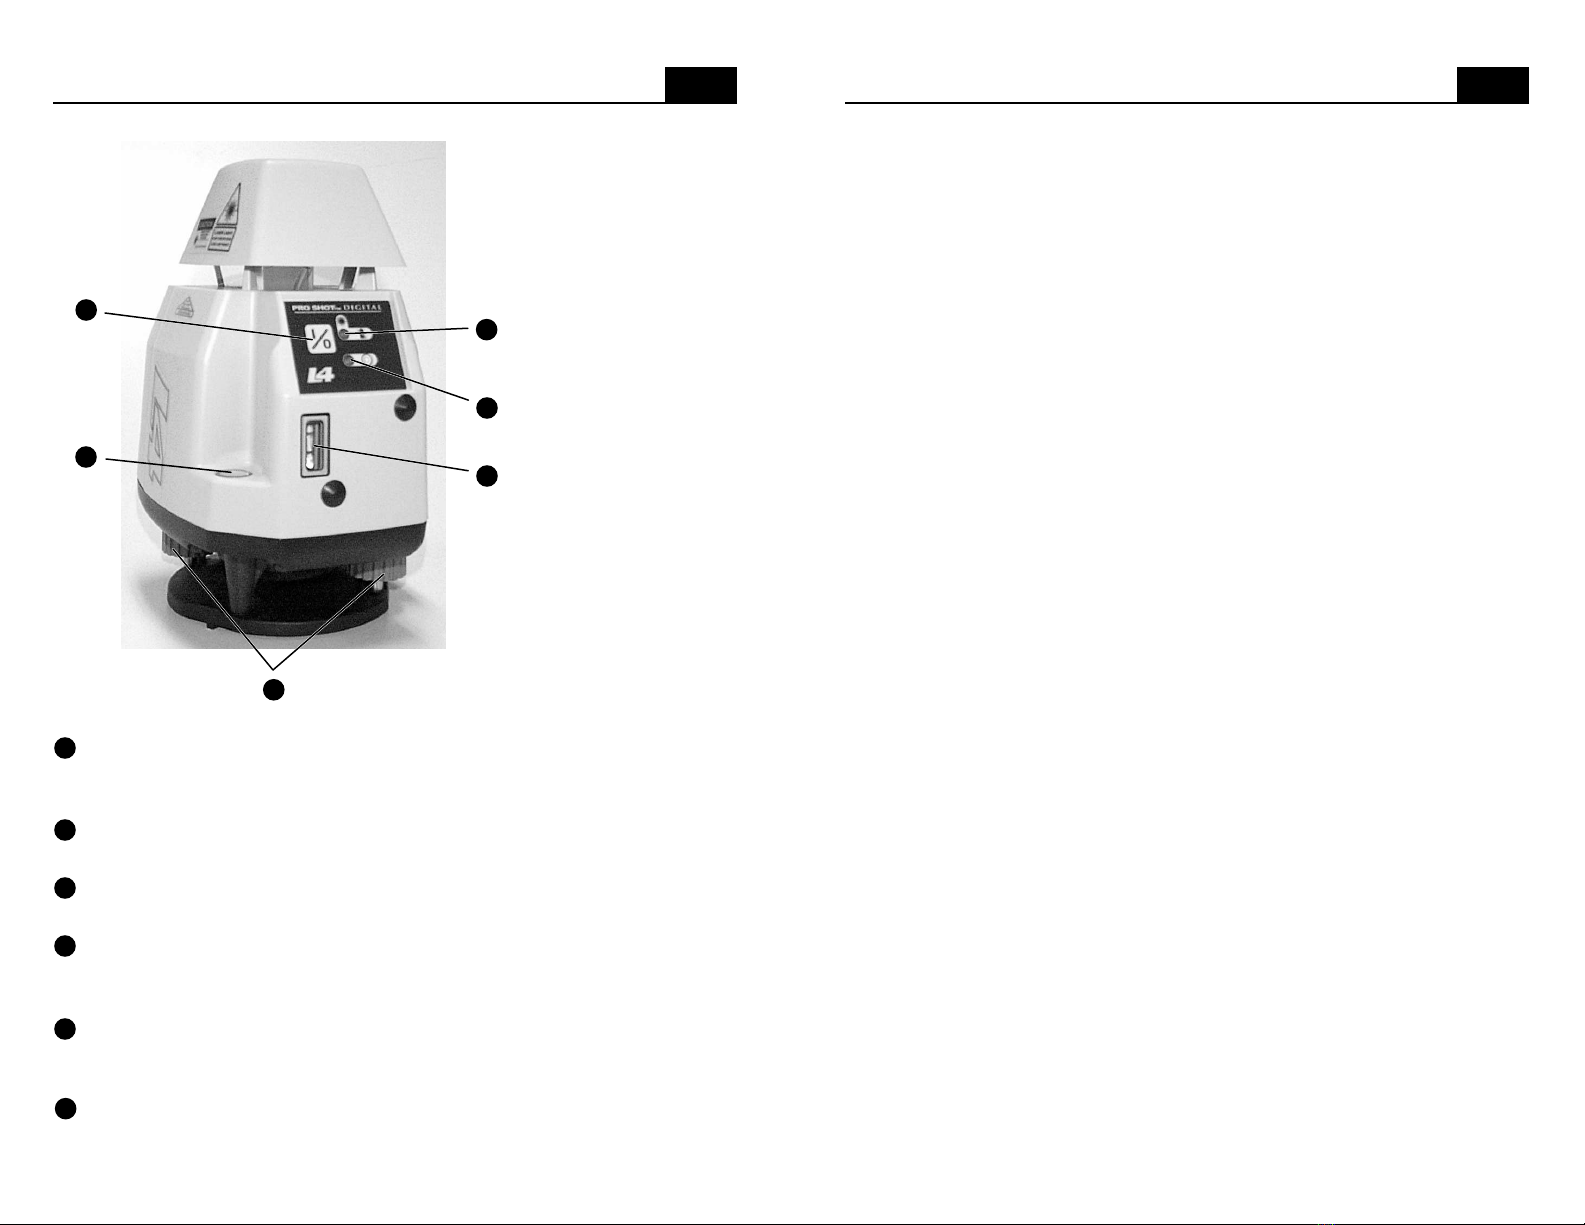
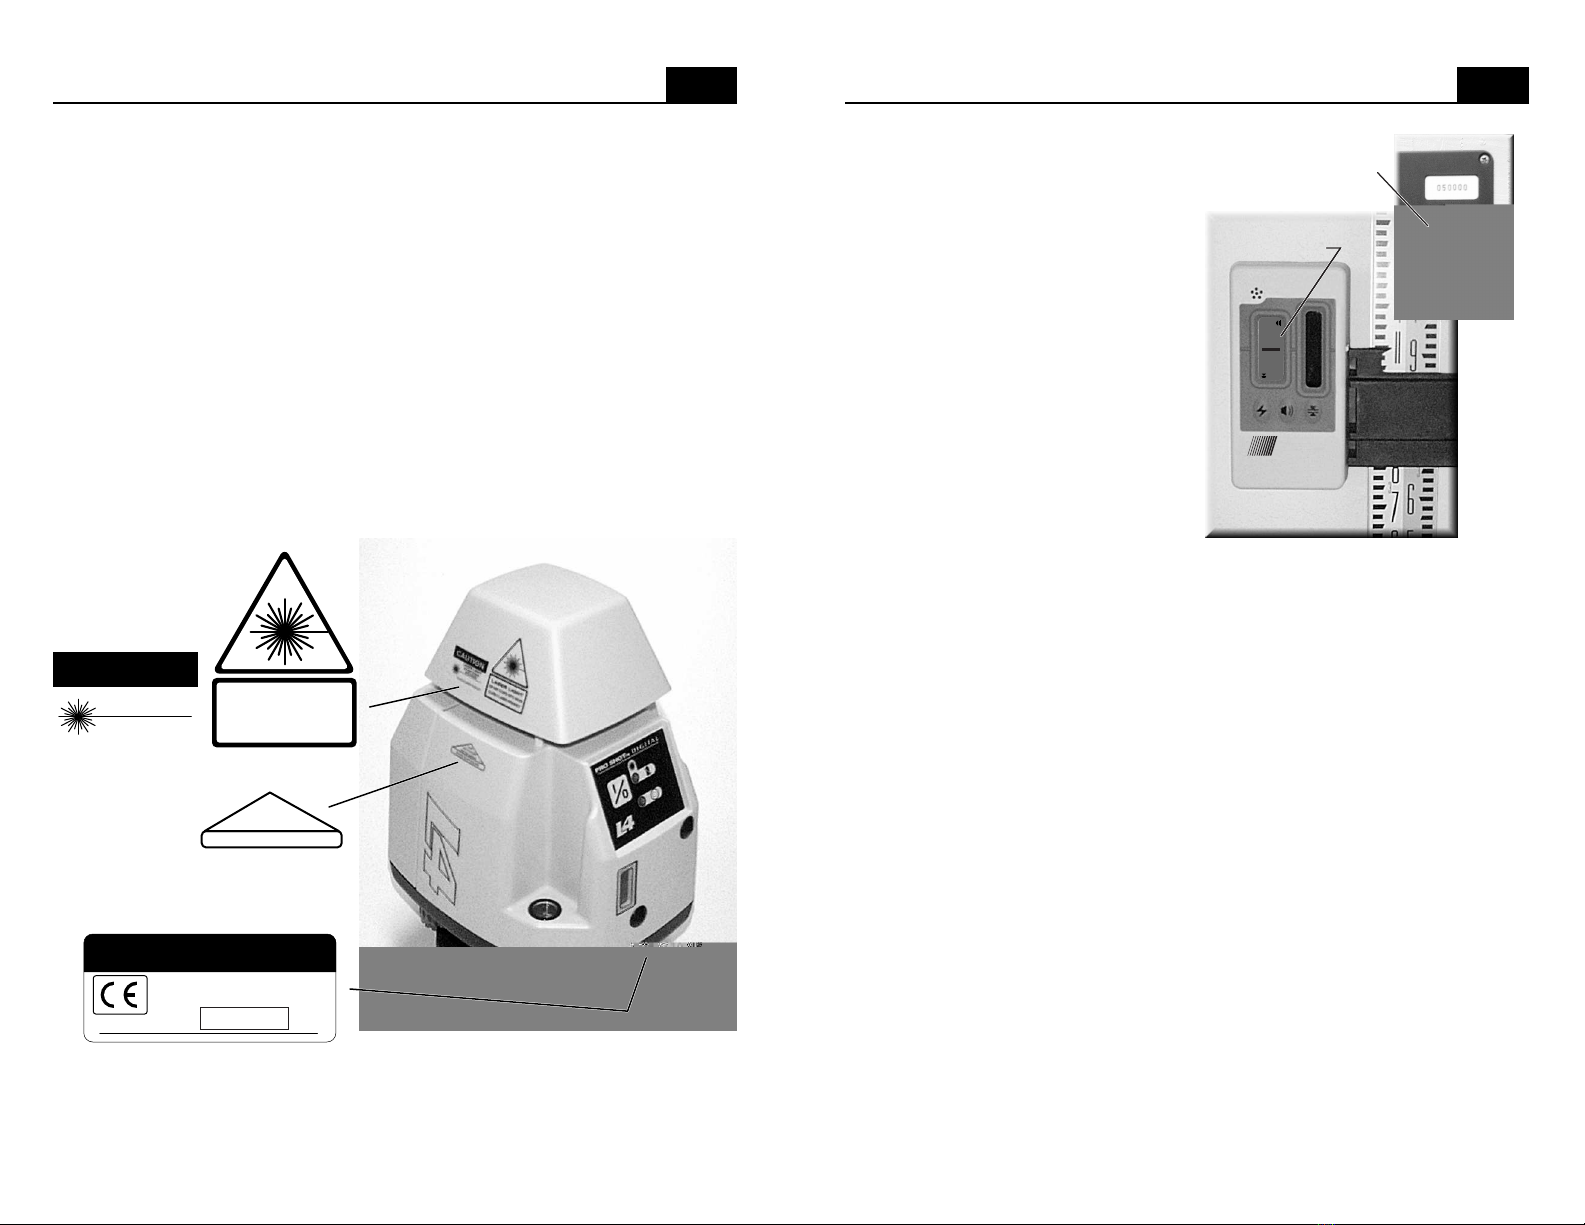
Controls and Displays
•
L4
+
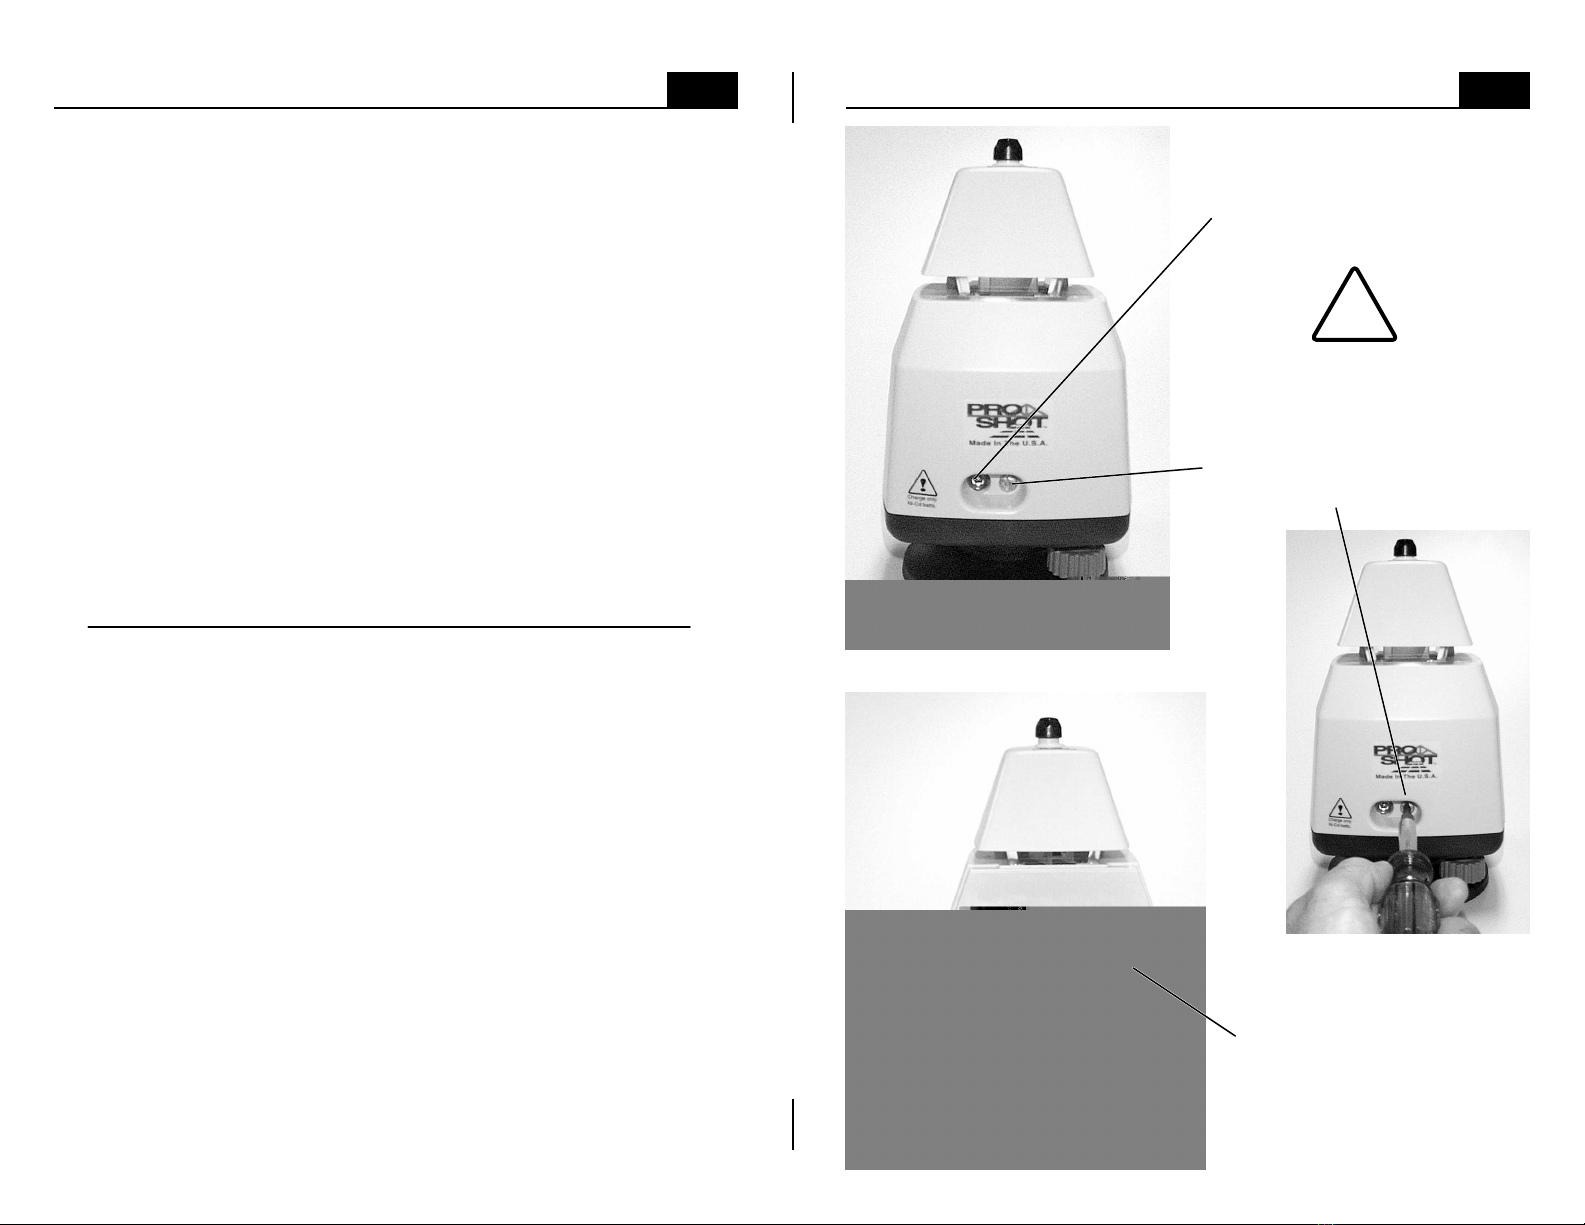
note: The leveling screws are
at 90ºto the leveling pivot
point, which is directly below
the circular vial. As you face
the control panel and look
down at the circular vial, the
leveling screw on your right
controls bubble movement
from left to right. The leveling
screw at the back, below the
battery door, controls bubble
movement from front to back.
Turning the leveling screw on
your right in a clockwise
motion will move the bubble to
the right and turning the back
leveling screw in a clockwise
motion will move the bubble to
the back. Turning each screw
counter-clockwise will have
the opposite effect.
Power button • Press the power button to turn the laser on or off.
Circular level vial • Indicates when the laser is close enough to level to
allow the automatic compensator to function.
Leveling screws • Used to center the bubble in the circular level vial.
The knobs are also used during vertical alignment (see page 13)
Leveling limit indicator • If the L4+is powered on, but not level enough
to automatically compensate, the limit indicator will flash, the rotating
mirror will not spin, and no laser beam will be projected.
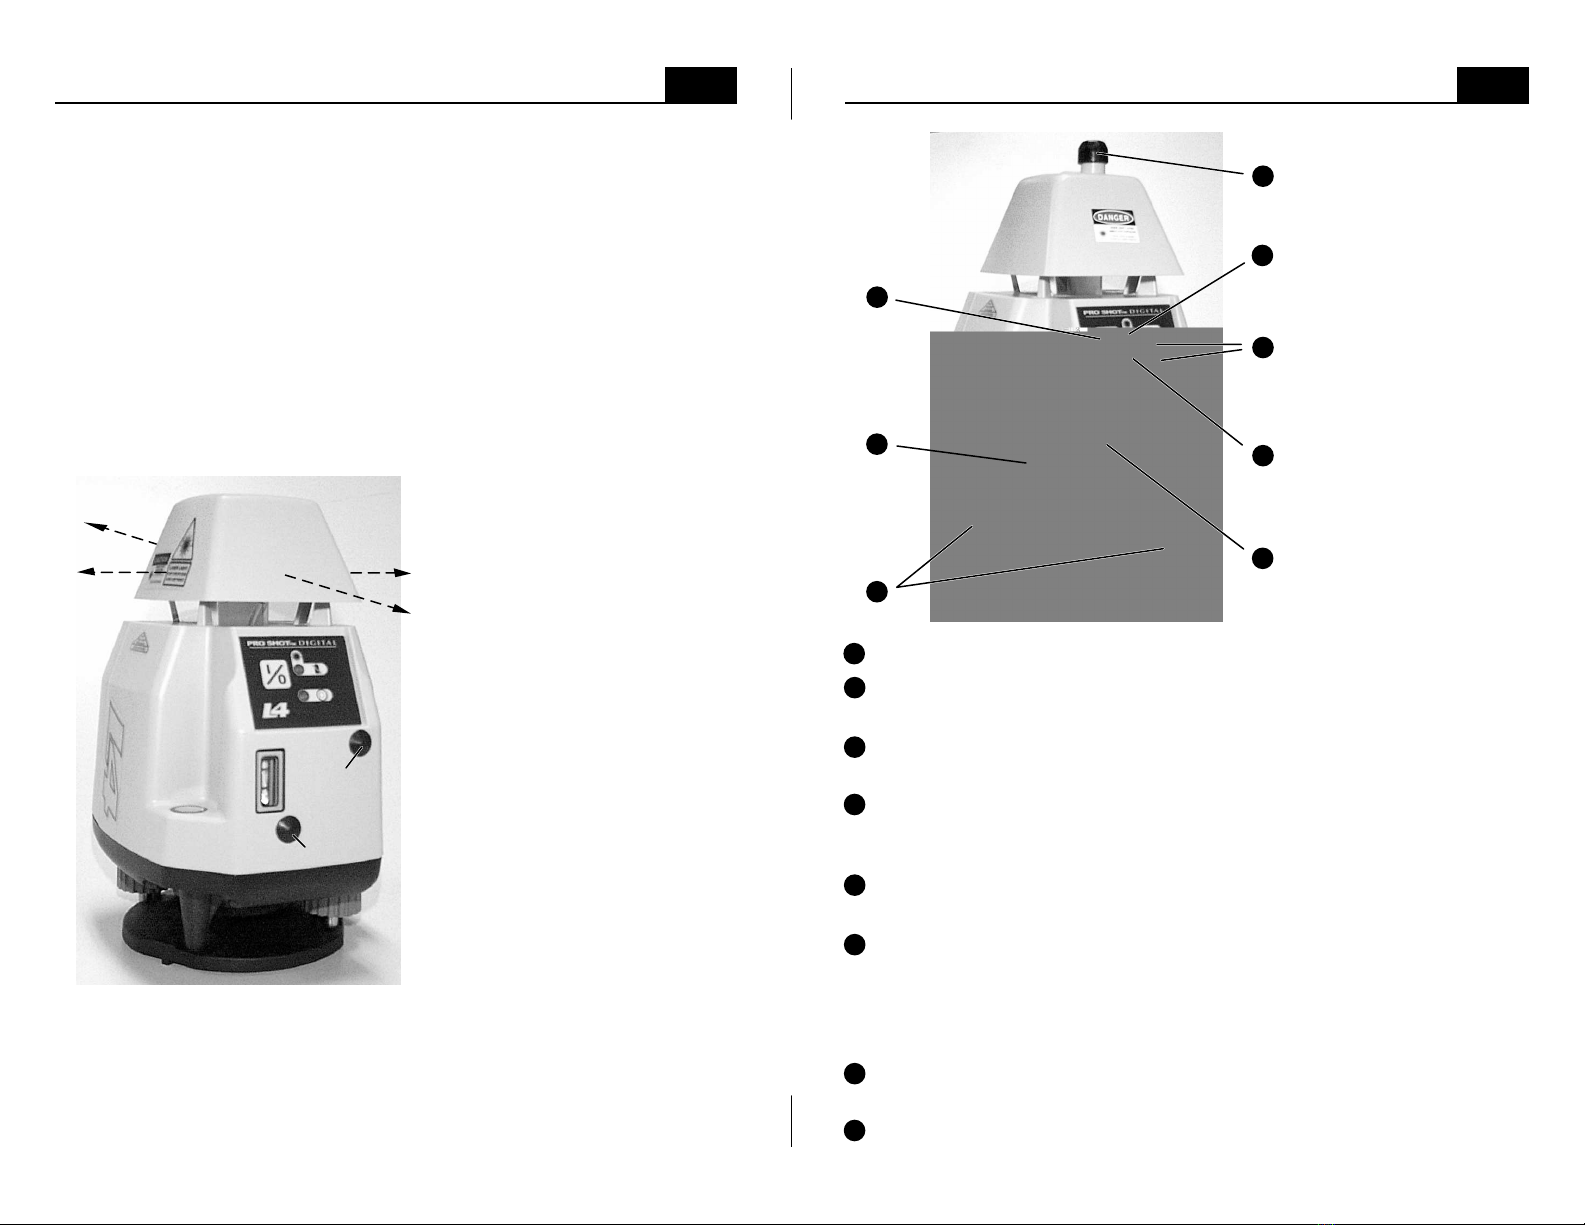
Power and low battery indicator • Displays a green light when the laser
is powered on. The light will flash red if the batteries need to be replaced.
Speed control buttons • The (+) and (-) buttons adjust rotation speed. A
single push will make the speed slightly faster or slower. If you push and
hold the (+) button, the rotation will adjust to full speed. You will know
that full speed has been reached when the green power indicator flashes.
If you push and hold the (-) button, the rotation will slow and then stop.
Beam aiming knob • When the rotation is stopped, push and turn this
knob to aim the beam. Push the knob in and hold it in while turning.
Vertical vial • The vertical vial is used to plumb the plane of laser light
when the laser is in the vertical mode (see page 13).
3
14
Checking & Adjusting Calibration
Calibration is your responsibility, check it often.
Although the L4 and L4+are exceptionally rugged lasers, it is well worth the
effort to check calibration before you first use them and then at regular
intervals to insure that you are doing the highest quality work possible.
Always check calibration if the laser has been handled roughly.
Calibration procedure.
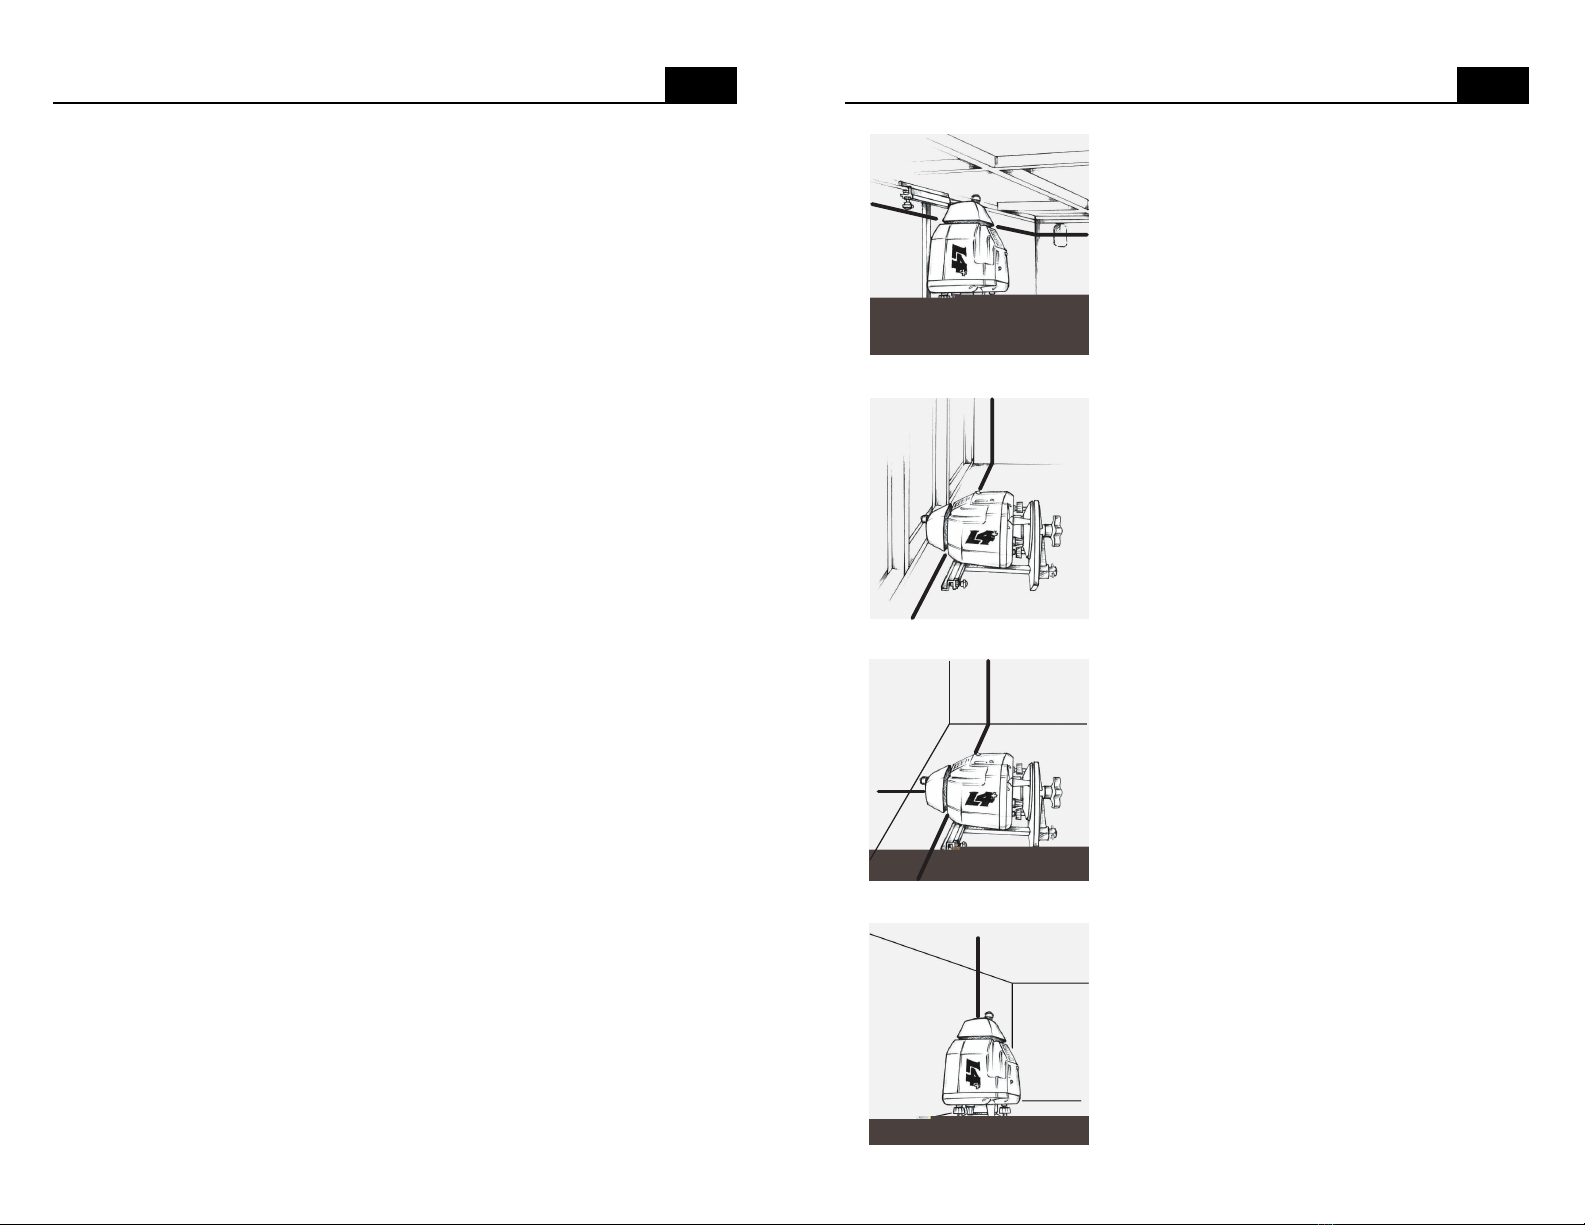
1. Attach the laser to a stable tripod or stand approximately 100 feet (30m)
from a wall or other stable vertical surface. We will call the vertical surface
the target. Make the tripod head level enough to allow the laser to be aimed
in different directions with minimal re-leveling of the circular level vial.
2. Turn the entire laser so that either direction of the x-axis (picture below) is
aimed at the target. Note: the axes are the same for both models.
3. Center the circular level vial
and turn the laser on.
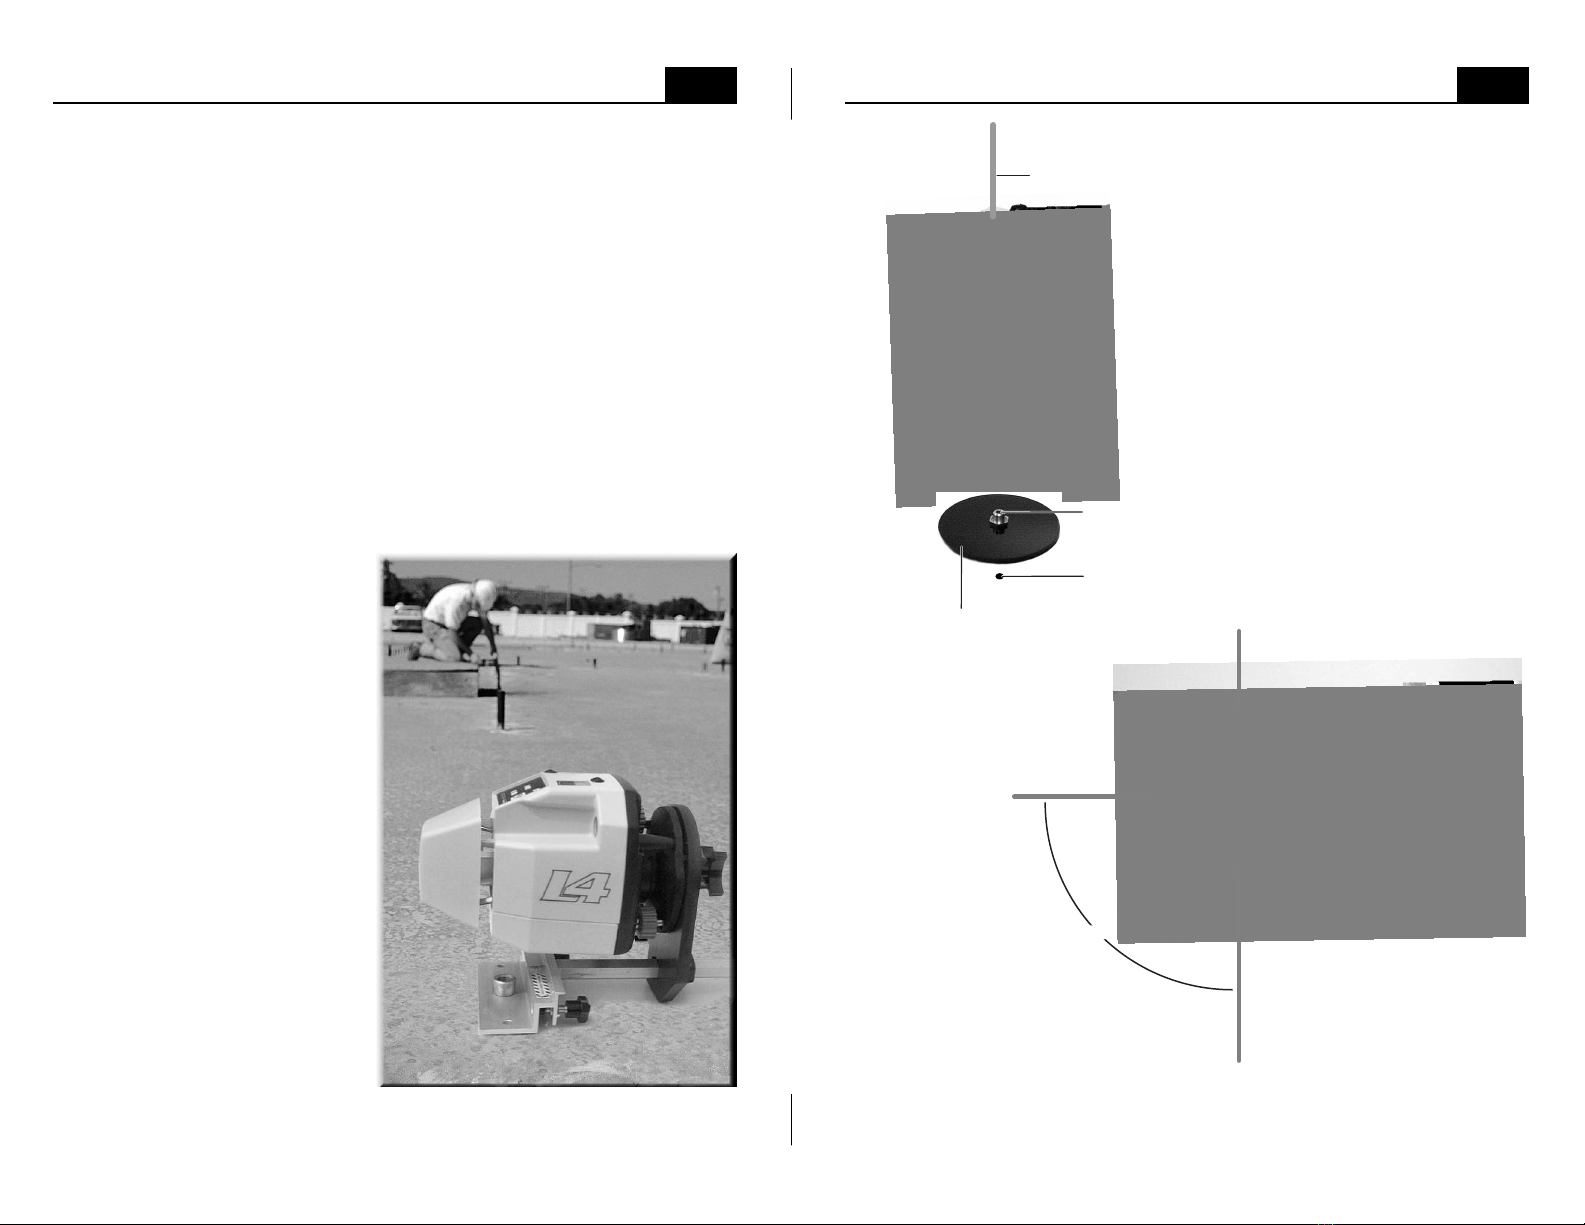
4. Take the receiver to the
target and find the height of the
laser beam. All receivers have
a "deadband" at their center.
The most precise way to take a
reading is to make two marks.
Slowly move the receiver from
above until you get an on-grade
display and make a mark. Next,
slowly move the receiver from
below until you get an on-grade
display and make a second
mark. Half way between these
two marks is the exact reading.
5. Return to the laser and rotate
it 180 degrees. The opposite X-
axis direction should now be
aimed at the target. Re-center
the bubble in the circular level.
Find and mark the laser beam
height at the target.
6. The difference between the two marks (if any) is double the difference
between how the laser is calibrated and true level for the X-axis. Half way
between these two marks is true level. Make a long mark at true level. If the
difference between either outer mark and true level is within your working
tolerance, go on to step 9. If not, continue with the next step.
+X axis
-X axis
-Y axis
+Y axis
X axis
Y axis
1
5
8
3
2
6
7
4
5
8
6
7
4
1
3
2