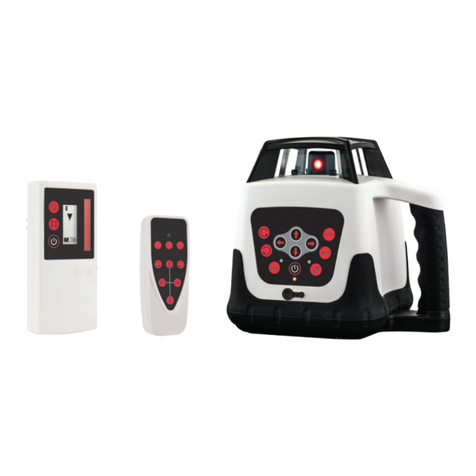
Lasertec HV2R User manual

HV2R
ROTARY LASER
INSTRUCTION MANUAL

2

3
SAFETY 4
ITEM CHECKLIST 6
LASER OVERVIEW 7
REMOTE CONTROL OVERVIEW 10
DETECTOR OVERVIEW 12
USING YOUR LASER 14
Power Supply 14
Horizontal Set-up 15
Vertical Set-up 15
Operation 16
Using Your Remote Control 17
Using Your Detector 18
USING THE MOUNT 20
CHECKING CALIBRATION 22
TROUBLE SHOOTING 23
CARE & MAINTENANCE 24
WARRANTY 25
CUSTOMER SUPPORT 27
SPECIFICATIONS 28
CONTENTS

4
SAFETY
Read the following safety instructions before
attempting to operate this product.
Keep these instructions in a safe place or store in the
carry case for future reference.
SAVE ALL WARNINGS AND INSTRUCTIONS FOR
FUTURE REFERENCE.
WARNING: Read and understand all
instructions.
• Use the laser only with the specifically designated
batteries.
• Store the laser out of reach of children and other
untrained persons. Lasers are dangerous in the
hands of untrained users.
• Use only accessories that are recommended for
your model.
• Tool service must be performed only by qualified
repair personnel. Repairs, service or maintenance
performed by unqualified personnel will void the
warranty. Only approved and authorised service
technicians can carry out warranty repairs.
• Do not use optical tools such as a telescope or
transit to view the laser beam. Serious eye injury
could result.
• Do not place the laser in a position which may
cause anyone to intentionally or unintentionally
stare into the laser beam. Serious eye injury could
result.
• Do not position the laser near a reflective surface
which may reflect the laser beam toward anyone’s
eyes. Serious eye injury could result.
• Do not use optical tools to view the laser beam.
• Do not set up the tool at a position where the laser
beam can cross any person at head height.
!

5
• Do not let children come in contact with the laser.
• Turn the laser off when it is not in use. Leaving
the laser on increases the risk of staring into the
laser beam.
• Do not operate the laser around children or allow
children to operate the laser. Serious eye injury
may result.
• Do not remove or deface warning labels.
• Position the laser securely on a level surface.
Damage to the laser or serious injury could result
if the laser falls.
WARNING: Do Not Disassemble The Laser.
There are no user serviceable parts inside.
Disassembling the laser will void all warranties on
the product. Do not modify the product in any way.
Modifying the tool may result in hazardous laser
radiation exposure.
!
!
CAUTION: Class 2 Laser Product
• Never look into the laser beam directly and
intentionally.
• Do not use optical tools to view the laser beam.
• Do not set up the tool at a position where the
laser beam can cross any person at head height.
• Do not let children come in contact with the laser.

6
ITEM CHECKLIST
Please ensure the following items are included with your laser level.
If anything is missing please contact your retailer.
Remote
control
Lasertec HV2R Laser target
INCHES CM
1
1
2
3
4
5
6
7
2
3
Detector & clamp Laser glasses
Mount
4x AA rechargeable
batteries (laser level)
Charger Carry case 1x 9V alkaline
battery (detector)
2x AAA alkaline
batteries (remote)

7
LASER OVERVIEW: FRONT
Rotating laser port
Charging port
Control panel
Battery screw

8
LASER OVERVIEW: BASE
5/8” x 11 thread for
horizontal operation
on a tripod
Battery screw
Battery door
Vertical mounting point

9
LASER OVERVIEW: CONTROL PANEL
Power
Tilt alarm indicator
Power indicator
Tilt alarm
Manual / automatic mode
Manual / automatic
mode indicator

10
Manual / automatic mode
Button indicator
Grade adjustment
Grade adjustment
Grade adjustment
Grade adjustment
REMOTE CONTROL OVERVIEW: FRONT

11
REMOTE CONTROL OVERVIEW: BACK
Battery compartment

12
Sound on / off
Coarse / fine detection
LCD display screen
Laser sensor
Speaker
Power
DETECTOR OVERVIEW: FRONT

13
DETECTOR OVERVIEW: BACK
Battery compartment
Staff clamp thread
LCD display screen

14
POWER SUPPLY
• The instrument is supplied with four AA Ni-Mh
batteries as its standard power source.
• The instrument can also be powered by four AA
alkaline batteries.
Rechargeable Ni-Mh batteries
• The instrument is supplied with four rechargeable
Ni-Mh batteries that are located in the base of the
instrument.
• The rechargeable batteries are supplied only
partially charged. Charge the rechargeable
batteries before use.
• Battery capacity decreases at low temperatures;
depleted batteries may not function when cold.
USING YOUR LASER
Indoor charger
• The indoor charger is for indoor use only.
• Do not store in locations where moisture can be
present or where the charger could be exposed to
extreme temperatures.
• If a charger becomes damaged, stop using
immediately and seek a replacement.
WARNING: Only use the supplied charger.
Using an incorrect charger will void the
warranty. Do not charge alkaline batteries.
!

15
Charging the rechargeable batteries
• Insert the charger into the charging port on the
instrument. Progress will be shown by the power
indicator display on the charger as below:
Red (flashing) = Charger and battery
are not connected.
Red (constant) = Battery is charging
Green (constant) = Battery is charged
• Charging time is approximately 5 hours for
depleted batteries.
Removing & inserting the rechargeable batteries
• Unscrew and remove the battery cover door and
the batteries.
• Insert the batteries according to polarity and
replace the battery door.
HORIZONTAL MEASUREMENT SET UP
Level surface set up
• Select a place as close and practical to the work
site as possible, and ensure that the location is
clear of traffic.
• Place the laser level onto a reasonably level
surface with the control panel facing upwards.
VERTICAL MEASUREMENT SET UP
Level surface set up
• Select a place as close and practical to the work
site as possible, and ensure that the location is
clear of traffic.
• Place the laser level onto a reasonably level
surface with the lighthouse facing upwards.

16
OPERATION
Powering on
• Press the power button once and the instrument
will power on and begin automatically
self-levelling. When this levelling process is
complete, the penta prism inside the lighthouse
will start rotating.
• If the instrument is outside the self levelling range
the instrument will not level causing the laser beam
to flash continuously. If this occurs, reposition the
instrument onto a level surface until the instrument
can level off.
Powering off
• Press the power button once and the instrument
will power off.
Tilt alarm
• Once the instrument has been levelled off the tilt
alarm can be enabled by pressing the tilt alarm
button on the instrument. The tilt alarm indicator
light will flash continuously whilst active.
• If the instrument is disturbed while the alarm is
active the instrument will stop rotating and will
need to be powered off and on again to reset its
level position.
Setting up a grade / slope
• To create a slope / grade, enter into manual mode
by pressing the manual / automatic mode button
on either the instrument or remote control.
• The manual / automatic mode indicator on the
instrument will light up when manual mode is
active.

17
• To adjust the grade, press the grade adjustment
arrows on the remote control. These arrows will
adjust the grade on either the x-axis or y-axis.
• To cancel out of manual mode press the manual /
automatic mode button on either the instrument
or remote control.
When in manual mode the instrument will not
self level and correct for vibrations and/or
disturbances.
i
USING YOUR REMOTE CONTROL
Power supply
• The remote is powered by two AAA alkaline
batteries.
Battery replacement
• Remove the battery door cover.
• Insert the batteries according to polarity and
replace the battery door.
Remote operation
• Ensure the instrument is turned on and the laser
head is rotating.
• To create a grade / slope press the grade
adjustment arrows.

18
USING YOUR DETECTOR
Power supply
• The detector is powered by a 9V alkaline battery.
Mounting the staff clamp
• Insert the staff clamp screw into the staff clamp
thread.
• Rotate the nut until the clamp is secured in place.
Battery replacement
• Remove the battery door cover.
• Insert the battery according to polarity and replace
the battery door.
Detector operation
• Switch the detector on by pressing the power
button. The speaker will beep once indicating the
instrument is operating.
• The LCD screen will display the battery level,
detection mode and speaker function.
• To change between coarse and fine mode press
the coarse / fine mode button.
• Move the detector into the path of the laser beam.
• Hold the detector upright for horizontal beams.
Rotate the detector 90° for vertical beams.
• The direction arrows or level line on the LCD
screen will indicate the position of the laser beam.
The detector will emit a constant beep once the
level position has been located.

19
Detector position for horizontal beams Detector position for vertical beams

20
USING THE MOUNT
Screw fixing point
Hook
Screw fixing point
5/8” x 11 thread for
vertical operation
on a tripod
5/8” x 11 thread for
vertical operation
on a tripod
Locking lever
OVERVIEW
Table of contents
Other Lasertec Measuring Instrument manuals
Lasertec
Lasertec RDR12M User manual

Lasertec
Lasertec H1R User manual

Lasertec
Lasertec HV1G User manual

Lasertec
Lasertec CX2G User manual

Lasertec
Lasertec LDM120 User manual

Lasertec
Lasertec HV2G User manual

Lasertec
Lasertec TruPulse L2 User manual

Lasertec
Lasertec HV3R User manual
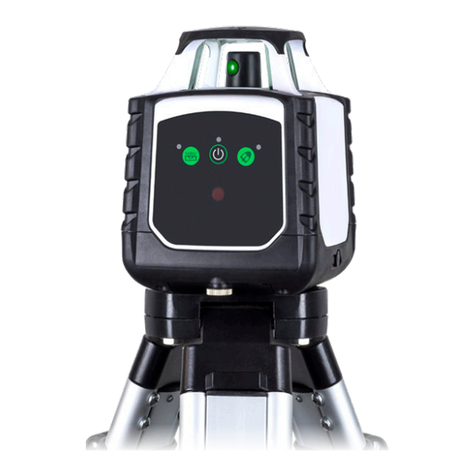
Lasertec
Lasertec LDM25 User manual
Lasertec
Lasertec CL3 HYBRID User manual
Popular Measuring Instrument manuals by other brands

PASCO
PASCO PS-3237 quick start guide

Medical International Research
Medical International Research Spirolab III user manual

Larson Davis
Larson Davis System 824 Technical reference manual

Mitutoyo
Mitutoyo IT-012U user manual

BEKA
BEKA FOUNDATION BA444NDF-F manual

Interacoustics
Interacoustics PA5 Instructions for use