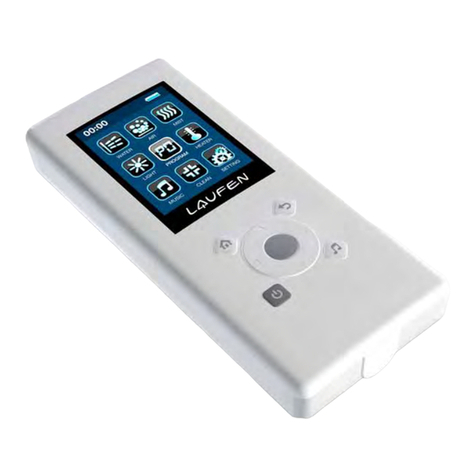
Laufen CLEANETINTEGRATED User manual

EN
8.2188.9.000.000.1
CLEANETINTEGRATED Remote Control
Note:
Guarantee/Liability only when assembled by an approved specialist in accordance with the instructions and local regulations
within the pressure range 1 - 7 bar.
暖風
CLEANETINTEGRATED

2
EN
Important Safety Instructions ___________________________________________________________________________ 3
Grounding Instructions ________________________________________________________________________________ 4
Important Safeguards ______________________________________________________________________________ 5 – 6
Specification / Default Settings _________________________________________________________________________ 7
Parts List / Parts Description ___________________________________________________________________________ 8
Installation / Remote Installation ____________________________________________________________________ 9 – 10
Before Use / Standard Operational Instructions __________________________________________________________ 11
Operation Guide ________________________________________________________________________________ 12 – 19
Service ________________________________________________________________________________________ 20 – 21
Complete Detachment / Troubleshooting________________________________________________________________ 22
Contents

3
EN
Important Safety Instructions
When using electrical products, especially when children are present, basic safety precautions should always be followed,
including the following:
1. This appliance is not intended for use by persons (including children) with reduced physical, sensory or mental
capabilities, or Iack of experience and knowledge, unless they have been given supervision or instruction concerning
use of the appliance by a person responsible for their safety.
2. Children should be supervised to ensure that they do not play with the appliance.
3. Do not dispose of electrical appliances as unsorted municipal waste, use separate collection facilities. Contact your local
government for information regarding the collection systems available. lf electrical appliances are disposed of in landfills
or dumps, hazardous substances can leak into the groundwater and get into the food chain, damaging your health and
well-being. When replacing old appliances with new ones, the retailer is legally obliged to take back your old appliance
for disposal at least for free of charge.
Read all instructions before installation & use
Danger -To reduce the risk of electric shock:
1. Do not place or store the CLEANETINTEGRATED where it can fall down or be pulled into a tub, sink or tank.
2. Do not place in or drop the product into water or other liquid.
3. Do not reach for a product that has fallen into water. Unplug immediately.
Warning -To reduce the risk of burns, electric shock, fire, or injury:
1. Close supervision is necessary when this product is used by children or the disabled.
2. Use this product only for its intended use as described in this manual. Do not use attachments other than
recommended by the manufacturer.
3. Do not operate this product with damaged cord or plug, or after the product malfunctions, or has been
damaged in any way, or dropped into water. Return product to the nearest Authorized Service Center for
examination, repair, or adjustment.
4. Keep the cord away from heated surfaces.
5. Never use while sleeping or drowsy.
6. Never drop or insert any object into any opening or hose.
7. Do not use outdoors with the AC adapter or operate where aerosol spray products are being used or where
oxygen is being administered.
8. Connect this product to a properly grounded outlet only. See Grounding lnstructions.
9. Through poor conditions of the electrical mains, shortly voltage drops can appear when starting the
EQUIPMENT. This can influence other equipment (e.g. blinking of a lamp) – you may contact your local supply
authority for further information.
10. Do not cut the power cord supplied with the product.
11. Do not remove any screw assembled on the product.
Save these instructions!

4
EN
Grounding Instructions
The plug must be inserted into an outlet that is properly
installed and grounded. ln the event of an electrical short
circuit, grounding reduces the risk of electric shock. The
electrical outlet, which must be a 100-240V~, 50/60Hz,
and at least a 15-Amp grounded outlet, should be located
on the wall within reach of the unit’s power cord. A ground
fault interrupter residual current device (RCD) should be
installed on the circuit supplying power to each local
regulation.
Danger - lmproper use of the grounding plug
can result in a risk of electric shock. Repair or
replacement of cord or plug should be done by
authorized personel. Make sure grounding is
correct. Do not use extension cable.
AThe WC must be installed in the protection
volume 3 of the bathroom. Neither component
or connection of the WC must be installed out of
this area. No electrical device must be introduced
inside the WC. This product must be installed
by qualified personnel, in accordance with the
national current regulation.
(cm)
Volume
1
Volume
0
Volume
2
Volume
3
60
60
225
10 0
25 0
30 0
~195
40 5
66 0
40 0 12 5
~230
16 5
30 5
17 8
68
2400
25A IDn 0.03A
220-240V~
50/60Hz
1300W
15A

5
EN
r
=
m
i
n
.
5
0
m
m
Important Safeguards
For safety reasons, please read this entire manual before use and keep this manual where you can refer to it easily.
Do not put inflammable objects such as
cigarettes on the product. Glowing cigarettes and
other burning materials must not be thrown into
the toilet.
Do not splash water or any other liquid on this
product. Do not spray water directly on the
product or power cord. Failure to comply could
result in an electric shock or fire.
Attention to electric safety instruction before use:
Please read page 4 electric safety instruction
before use to ensure the product is supplied in
suitable voltage. Keep the bathroom in good air
circulation. Keep the plug dry and clean of dust.
Please unplug the power cord when the product
will not be used for a long time.
Do not use inflammable liquids (such us alcohol)
to clean the product. Use only mild soap and a
soft cloth for cleaning.
Keep the product out of direct sunlight or it could
cause colour variation and unstable temperature. Please do not climb on this product. Do not
press heavily on Iid or seat.
Please do not press hose and power cord. This
will affect water supply and cause unstable flush
function. Do not place heavy things on the power
cord.
Please install plug properly. Plug should be
connected with socket firmly, otherwise, the
heat of plug might cause fire. When this product
will not be used for a long time, please unplug it.
Please do not use multiple socket outlets.
Please do not install other power cord or use
extension cord which might lead to the danger of
fire or electrocution.

6
EN
Important Safeguards
For safety reasons, please read this entire manual before use and keep this manual where you can refer to it easily.
Please do not disassemble without
professional authorized technician.
Please do not use plug while your
hands are wet which might lead to
the danger of electrocution.
Only use domestic water connected to cold
water.
CAUTION FOR MILD BURN
Please adjust the seat and water temperature at the lowest level if the product is used by:
1. Children, elderly or disabled patients
2. Person whose skin is easier to be allergic.
3. Person who takes medicine (sleeping pill, medicine for cold…, etc) which might cause drowsy or tiredness.
Please use lower temperature ( 33 °C) in order to prevent mild burn occurring while using this product in contact with same position of skin
for a long time, please turn off seat heater function. Please refer to page 13 of the manual for operation instruction.
Please clean the dust on the socket and never use power cord and socket if it has already been broken or loosen.
If there is dust amassed on the socket or the socket is damaged or loose which might cause humidity and lead to fire.
Please be sure to unplug the power cord while moving this product.
If the power cord does not unplug while moving this product, this will cause power cord to be broken and lead to the danger of fire and
electrocution with product damage.

7
EN
Specification CLEANETINTEGRATED with Remote Control
Default Settings CLEANETINTEGRATED
Cleaning Front and rear cleaning •
Adjustable nozzle position 5 levels
Oscillating cleaning mode •
Pulsating cleaning mode •
Adjustable water pressure (0.2 - 0.8l/min) 5 levels
Adjustable water temperature (33-39 °C) 5 levels
Instant water heating •
Automatic self cleaning of nozzle •
Safety Device Thermal Fuse
Dryer Dryer function •
Dryer speed 12 m/s
Adjustable temperature (40-60 °C) 5 levels
Seat Heated seat with adjustable temperature (33-39 °C) 5 levels
Softclosing lid and seat •
Remote activated/automatic lid and seat opening and closing •
Others Manual/automatic deodorizing function •
Manual/automatic night light function (Led) •
User setting mode •
Power saving mode •
Technical Power supply 220-240V~,50/60Hz
Maximum power consumption 1300 W
Maximum heater capacity 1200 W
Maximum dryer heater capacity 350 W
Seat heater capacity 47 W
Water inlet connection G½“
Tap water pressure 0.07MPa (min flow 20L/min)~0.7MPa (static)
Product weight ca. 45 kg
Flushing Remote activated/automatic flush, siphonic for 4.5 l single flush,
with lateral holes •
Above specifications have been measured under room temperature of 25 °C and incoming water temperature between 15 °C and 30 °C and water
pressure of 0.2MPa. Incoming water temperature out of this range can cause unstable temperature of the water coming out through the nozzle.
SEAT HEATING OFF
DRYER TEMPERATURE Level 1
WATER TEMPERATURE OFF
REAR CLEANING PRESSURE Level 3
FRONT CLEANING PRESSURE Level 3
NOZZLE POSITION REAR AND FRONT Level 3
PULSATING OFF
OSCILLATING OFF
DEODORIZER OFF
NIGHT LIGHT OFF
AUTO OPEN ON (LID, Distance-3)
AUTO FLUSH ON
POWER SAVING OFF
UV OFF
BUZZER ON
Note:
In case of power failure CLEANETINTEGRATED will remember last time settings.

8
EN
Parts List
Parts Description
Remote unit
TOP
FRONT
BOTTOM
Lid
Night light
Dryer
Deodorizer
Seat
Nozzle
User presence sensor
Porcelain
Power-outlet *
Power-plug
Water supply hose
Spare control button
Water shut off valve
*Items not supplied with the product

10 s
min. 3.5 liters
42
42
305
b
c
d
Ø
10 a
13
a
b
✔
b
a
c
305
b
a
c
d
4 x
45
45
Ø
10
b
a
9
EN
Installation
1
4
7
10 11
8 9
5 6
2 3

10
EN
b
c
a
Installation
Remote Installation
klick b
a
45 45
80 ≈ 110
60
Ø 6 mm
(cm)
12b
13
14 15a 15b
b
a
a
12a
Power Supply
220-240V~,50/60Hz
G½"
OPEN

暖風
11
EN
Before Use
Standard Operational Instructions
Be sure to read this manual before use with correct operation.
1 To confirm if installation is done properly
Please confirm if porcelain is properly installed according to the product installation guide.
Turn on T-valve for water supply.
2Power
Connect this product with power (Please confirm voltage is 220-240V~, 50/60Hz).
3Main function operation test
To check the function, please put the dummy cover and place your hand on the sensor
area. If not user is detected no function will be operative.
NOTE: If the function is not able to be activated, please refer to “Troubleshooting” in this
manual.
1 Approach to the integrated toilet
The integrated toilet seat will be automatically open.
(Please kindly refer to page 18) of manual for toilet seat/lid operational instructions.)
2The seat is occupied
The sensor will be activated once the toilet seat is occupied, all the functions of
CLEANETINTEGRATED may be used under this situation.
3How to activate and stop the function of cleaning and dryer
Use remote control to operate the functions.
Recommendation: Please kindly sit further backwards on the toilet seat which is easier
to align with the cleaning nozzle position.
4User walks away from the integrated toilet , it will be flushed automatically
The auto flush function will be activated in 7 seconds while no user is detected within
sensor range. Please kindly refer to page 17 of manual for toilet auto flushing settings.
5User is not within sensor detection range
The toilet seat and lid will be closed automatically.
Please kindly refer to page 18 of manual for toilet seat/lid operational instructions.

12
EN
Operation Guide
1 Cleaning Function
2 Cleaning Massaging Function
Oscillating Cleaning
Pulsating Cleaning
With activating the oscillating cleaning function, the nozzle will move back and forth
for widening the cleaning range.
With activating the pulsating cleaning function, the water pressure cycles between strong and soft water
pressure in a certain rhythm for cleaning.
Please occupy the toilet seat in order to activate the sensor installed in the seat.
FRONT
FRONT
FRONT
FRONT
1Cleaning
1Cleaning
1Cleaning
2Oscillating Cleaning
2Pulsating Cleaning
2Water Pressure Adjustment
3Nozzle Position
4Stop
Select REAR or FRONT cleaning to activate
the cleaning function.
Select REAR or FRONT cleaning
to activate the cleaning function.
Select REAR or FRONT cleaning
to activate the cleaning function.
With cleaning function activated, press to activate
or deactivate OSCILLATING cleaning mode.
With cleaning function activated, press to activate
or deactivate PULSATING cleaning mode.
Press to increase or to decrease water
pressure while the cleaning function activated.
5-level adjustment:
While the cleaning function activated, press or to
adjust the stretching length of nozzle.
STOP rear or front cleaning.
01 ↔02 ↔03 ↔04 ↔05
Note: Both cleaning functions cannot work at the same time. Cleaning
function will automatically stop after 5 min, please push the button again to
stop the function. (To change the 5 min go to page 14).

13
EN
Operation Guide
3 Temperature Adjustment Function
Adjust Water Temperature
Adjust Air Dryer Temperature
Adjust Seat Temperature
FRONT
FRONT
BOTTOM
↔01↔02↔03↔04↔05
01↔02↔03↔04↔05
1Seat Temperature
2Seat Temperature Adjustment
Press SEAT HEATER button to activate.
Press SEAT HEATER button again to adjust
temperature until desired setting.
5-level adjustment:
Note: It will take a few minutes to heat the seat.
The setting of desired temperature will be saved
and locked in memory.
→01→02→03 →04→ 05
Temperature: OFF Low Medium High
Temperature: Off Low Medium High
Temperature: Low Medium High
1Cleaning
1Dryer Temperature
2Dryer Temperature Adjustment
3Stop
3Stop
2Water Temperature Adjustment
Select REAR or FRONT cleaning
to activate the cleaning function.
Press DRYER button to activate.
Press DRYER button again to adjust
temperature until desired setting.
5-level adjustment:
STOP the dryer.
STOP rear or front cleaning.
Press to increase or to decrease
water temperature while cleaning
function activated.
5-level adjustment:
Note: For the first time it will take some seconds to heat the water.
Note: Do not insert finger or any objects into the fan.
Dryer function will stop automatically after 5 minutes.
Please push the button again to stop the function.
(To change the 5 min go to page 14.)

14
EN
Operation Guide
4 Time setting for Cleaning and Dryer Function
Rear cleaning time setting
Front cleaning time setting
Dryer time setting
Cleaning/Dryer function duration may be adjusted in order to automatically stop.
1REAR cleaning duration
1FRONT cleaning duration
1DRYER duration
2Adjustment setting
2Adjustment setting
2Adjustment setting
3Confirm
3Confirm
3Confirm
Press REAR button button for 3 consecutive
seconds to adjust REAR cleaning duration.
Press FRONT button for 3 consecutive
seconds to adjust FRONT cleaning duration.
Press DRYER button button for 3 consecutive
seconds to adjust DRYER duration.
Press or button for DRYER duration
adjustment.
7 setting levels:
Press or button for REAR cleaning
duration adjustment.
7 setting levels:
Press or button for FRONT cleaning
duration adjustment.
7 setting levels:
Press STOP button or wait 5 seconds to
confirm.
Press STOP button or wait 5 seconds to
confirm.
Press STOP button or wait 5 seconds to
confirm.
10↔20↔30↔40↔50↔60↔
10↔20↔30↔40↔50↔60↔
10↔20↔30↔40↔50↔60↔
Note: By setting , REAR function will stop automatically after 5 min. Please
press the REAR button again to resume the function.
Note: By setting , FRONT function will stop automatically after 5 min.
Please press the FRONT button again to resume the function.
Note: By setting , DRYER function will stop automatically after 5 min.
Please press the DRYER button again to resume the function.
FRONT
FRONT
FRONT

15
EN
4Confirm
Press STOP button or wait 5 seconds to
confirm.
5 User Settings
6 Night Light
Operation Guide
LED lights which are installed at the rim of the toilet seat help to see the toilet at night.
6 user profiles can be stored.
FRONT
FRONT
BOTTOM
1Night Light
2Auto Night Light
3Adjustment Time
Press LIGHT button to activate and deactivate
light function manually.
Press LIGHT button for consecutive 3 seconds
to switch between (auto night light) and
(auto night light off)
Example:
Select 8H starting at 22:00pm. The night light will be activate daily from 22:00pm to 6:00am.
With mode, press or button for time
adjustment.
24h 6:0018:00
12:00
00:00
Setting
times
1Select User Setting Parameter
2Save User Settings
3Confirm
Select User
Select your prefered setting parameter for:
- Water pressure
- Water temperature
- Nozzle position
- Massage(Pulsating/Oscillating)
- Dryer temperature
- Cleaning and dryer duration
To save the already chosen setting
parameters, press USER button for 3 seconds
and user number will start blinking. You can
save and select the appointed user setting by
repeatedly pressing the USER button.
Press STOP to confirm the settings.
Press USER button to select the desired user
from one of the stored 6 users.

16
EN
7 Power Saving
Main power consumption will turn off automatically when power saving is set. The main power will resume once the toilet seat is
occupied again by user. There are 2 types of power saving mode which can be selected:
Operation Guide
FRONT
BOTTOM
Smart ( ) : CLEANETINTEGRATED stores data about using time and automatically set power saving.
Time set ( ) : By setting the time of power saving the system would start the power saving daily at the saved time.
Example:
From 23:00 to 6:00 and 9:00 to 19:00 will automatically enter into power saving.
Example:
The setting time as 9:00, the range of time setting as 10 hours; once setting start,
daily 9:00~19:00 would dnter in to power saving mode.
1POWER SAVING
1Select POWER SAVING Mode
2Time Set Mode
3Confirm
Press POWER SAVING button
to activate or decativate.
Press POWER SAVING button for 3
consecutive seconds to switch between.
smart ( ) or time setting ( )
With time set mode selected (display shows
blinking), press to increase or to
reduce the hours of power saving.
Starting time is defined as the moment
the time is set.
Press STOP to confirm or wait for 5 seconds.
TIME18:00 6:00
0:00
12:00
ON
ON
Setting
time
Setting
time
TIME18:00 6:00
0:00
12:00
ON
Setting
time
Smart TIME setting
Note: Either Smart POWER SAVING or Time set POWER SAVING will
only be working if power saving is set as on.

17
EN
8 Deodorizer
10 Flushing Operational Instructions
Activated carbon filter is used to remove the odor. You may manually activate deodorizer by pressing deodorizer button or set auto deodorizer. Auto
deodorizer will automatically activates once the toilet seat is occupied and it will automatically switches off while the toilet seat in not occupied for more
than 1 minute.
9 Silent Mode
Operation Guide
Remote Control Flush
Auto Flush Setting
TOP
TOP
FRONT
1
Deodorizer
1
Auto Flush Setting
User Occuppies the Seat User is Standing for using the Toilet
1
Auto Deodorizer
1Silent Mode
Flush
Press DEODORIZER button to activate and
deactivate deodorizer function manually.
Press DEODORIZER button for consecutive
3 seconds to switch between (auto
deodorizer) and (auto deodorizer off).
Press and hold button for over 3 seconds
to enable beeping sound, and repeat to return
to silent mode.
Press flush button for 4.5L flush.
NOTE:
In case of power failure, CLEANETINTEGRATED can be flushed by using spare button (see page 19).
Repeatedly to press FLUSH button for consecutive 3
seconds, setting (Auto flush) (Seat sensor
flush function) (Auto flush off).
Auto flush function off.
User require to sit on the toilet, and auto flush function will be activate after 7 seconds seat not occupied.
Auto flush function will be activated when user sits or stand in front of CLEANET. Auto flush will be activate 7 seconds after no
user detection.
>10 sec >10 sec>7 sec >7 sec
( and mode ) ( only )

18
EN
Remote Control Open/Close
Auto Open Setting
Auto Closure Delay Setting
11 Toilet seat/lid open and close operational instructions
TOP
TOP
BOTTOM
TOP
FRONT
FRONT
Operation Guide
Auto Lid Open
1Auto Open Distance Adjustment
1Toilet seat / Lid auto close time
2Adjustment setting
2Adjustment Setting
Auto Lid/Seat Open
Lid/Seat Open
Lid Open
Lid/seat closed
Press LID OPEN button for consecutive 3
seconds to lid auto open when user approaches.
Press again during 3 seconds to set off.
Press NOZZLE CLEAN button for consecutive
3 seconds to adjust auto open distance.
Press LID/SEAT CLOSE button for consecutive
3 seconds.
Press or button to set delay time
for lid and seat closure.
Press or button for auto open distance
adjustment. 5-level distance adjustment.
Press lid/seat open button for consecutive 3
seconds to set seat and lid auto open when user
approaches. Press again during 3 seconds to
set off.
Press LID/SEAT OPEN button to open lid and
seat.
Press LID OPEN button to open lid.
Press LID/SEAT CLOSE button to close seat
and lid.
Auto lid open ON Auto lid open OFF
Auto lid/seat open ON Auto lid/seat open OFF
01↔02 ↔03 ↔04↔05
15↔30 ↔45 ↔60
Set auto closure delay time in order to adjust
the time for seat and lid closure after no user
detection.
1. Lid will automatically open when user is approaching the toilet. Lid will automatically close when the user is out of detection range.
2. After closing the lid or seat by hand or remote control, lid auto open can only be activated again after 10 seconds.
Toilet lid will open automatically.
Auto open of toilet seat or lid will be activated
based on auto open setting.
The toilet is in use. Toilet lid and seat will be closed automatically.
3Confirm
3Confirm
Press STOP to confirm or wait for 5 seconds.
Press STOP to confirm or wait for 5 seconds.
Adjustable 15–60 sec

19
EN
12 UV Light
13 Auxiliary Control Panel Operation
Cleaning Function
14 Filter Cleaning
Service
Operation Guide
An ultraviolet disinfection process it‘s implemented to the nozzle head after cleaning function use and seat not occupied.
In case that power of remote control batteries is insufficient, user can use auxiliary panel to operate main function.
UV Light
Press button for consecutive 3 seconds for
switching ON/OFF UV light auto activation.
UV light desinfection process start automatically
after seat not and turns off after 1 minute.
Stop
Dryer
Rear
Full flush
1
Cleaning
2
Stop Cleaning
3
Dryer
4
Flush
Note:
Press rear button to activate rear cleaning.
Repeatedly press the same button for adju-
sting water pressure.
Press Stop button.
Press Stop button.
Press Full flush button to activate full flush.
1. It is exclusively used for rear cleaning function. Lady cleaning function can-
not be provided by operating auxiliary panel.
2. Flushing function may be operated for 1 day main power supply shortage
(estimated 20 flushes/day).
3
5
4
1 2
1. Apply with screw to turn the flow rate knob for stopping angle
2. Remove filter cover to clean the filter.
3. After finishing the cleaning steps, have filter net to be re-installed, turn on flow rate knob. Please be aware if the packing is missing during filter cover
installation.
FRONT

Open
Old
Pull
New
Open
Pull
Push
20
EN
15 Remote Control Cleaning and Battery Change
16 Deodorizer
The number shown in display will flicker to indi-
cate low battery.
Please use AA Alkaline Battery. Do not mix the
new and used batteries nor different brands.
Please take out the batteries before cleaning.
Please wipe it softly with dampened cloth.
If the remote is too dirty, you may use diluted
neutral detergent to clean it.
It is forbidden to wash this product with
water or detergent directly.
When the deodorizer decreases or have strange odour, please follow steps below to replace the carbon filter.
Service
1
4
2 3
5
Table of contents
Other Laufen Remote Control manuals
Popular Remote Control manuals by other brands
PowerBox Systems
PowerBox Systems ATOM manual
Firstech
Firstech CompuSTAR 2WFMR user guide
One Forall
One Forall URC-6820 user manual
REV
REV iComfort 84471-B operating instructions
Nearby Express Technology
Nearby Express Technology TT-DL095 quick start guide
Skytech
Skytech AF-4000TSS02 operating instructions
