Laufen Option 056 User manual

EN
Bathtub with Whirl System and Remote Control
The warranty/liability only applies when the installation is effected as per the instructions by
qualified personnel.
Option 056 Bathtub with whirl system
including air massage, water massage, disinfection,
heating, LED light and remote control (incl. music)
Option 057 Bathtub with whirl system
including air massage, water massage, disinfection,
heating, LED light, mist and remote control (incl. music)

2
EN
General Information 3
Whirl Tub Components 3
Technical Data 3
Preliminary Operations 5
Remote Control 5
Display and Icon Description 7
Function Description
(LED Light, Water Massage, Air Massage, Mist, Programs, Heater, Disinfection, Music, Settings) 9
Malfunctions 27
Care Instructions 27
Service Instructions 27
Changes allowed: LAUFEN reserves the right to make changes or modifications on any of its products without notice.
Contents

3
EN
Dear customer,
Thank you for choosing a LAUFEN bathtub with whirl system.
Each bathtub with whirl system has been individually tested and must meet strict technical requirements, guaranteeing the quality of the
materials used and the functioning of all the components.
In this user manual, you will find instructions, tips and suggestions which will help you to get the most out of your bathtub with whirl sys-
tem. It is recommended that you read this manual carefully. If you require any further information, please contact your LAUFEN distribu-
tor.
General comments
For the installation of your bathtub with whirl system, please follow the mounting instructions which were provided separately to this
user manual. The water massage system must be supplied with sufficient ventilation. If the bathtub is installed with a panel, a gap of at
least 10mm must be left between the panel and the floor. This gap may not be blocked with towels, bath mats or similar since it guar-
antees perfect ventilation.
Safety
While installing the bathtub, a series of simple steps must be followed in order to prevent possible accidents. The installation must be
carried out by qualified technicians. Please follow the instructions included in the installation manual that has also been provided with
the bathtub. The bathtub must be connected to a voltage of 230V AC at 50Hz. The appliance must be supplied through a residual
current device (RCD), having a rated residual operating current that does not exceed 30mA. Additionally, the electrical installation
should be equipped with an electrical switch to ensure all-pole disconnection from the power supply. An equipotential connection must
be made between the metallic elements of the bath, in accordance with the corresponding regulations of each country.
Warning
• Let out the water after each bath.
• People with limited mobility should take extra care when using the bathtub with whirl system.
• Small children should not be allowed to use the whirlpool unless they are properly supervised.
• Use only diluted essences, perfumes and bath salts. Employ only products that are specifically approved for bathtubs with whirl
systems.
• Regular disinfection guarantees hygienic bathing:
- First disinfection: a first disinfection is to be run before using the whirlpool bath for the first time.
- Recommended regular disinfection cycle: after using the bath 3 times, run the disinfection procedure (regular germ killing).
- After a long period of non-use: after about 3 weeks of non-use of the whirlpool bath, it should likewise be disinfected before reuse.
• Parts containing live components, except parts supplied with safety extra-low voltage not exceeding 12V, must be inaccessible to a
person in the bath.
• Parts incorporating electrical components, except remote control devices, must be located or fixed so that they cannot fall into the
bath.
• The RCD of the electrical installation has to be tested according to guidance of testing and resetting.
• Please make sure that all manuals delivered with the bathtub will be available to subsequent owners and users.
• The bathtub has to be set up or repaired only by installers who can demonstrate to the appropriate authorities awareness and com-
petence in the application of National Regulatory requirements for safety, i. e. electrical and water supply/disposal.
• The use of a whirlpool bath can lower the blood pressure and stimulate circulation. Persons with circulatory problems should there-
fore firstly ask their family doctor, who can give tips as to the best way of using the bath.
• Do not stare directly at operating lamp. May be harmful to the eyes.
General Information

4
EN
Bathtub with Whirl System
Remote control
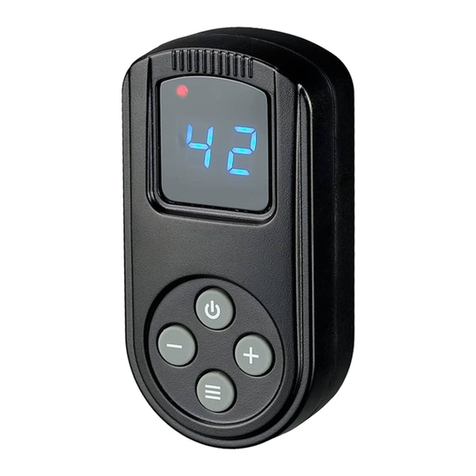
The remote control can operate all electronic functions of the bathtub. All information is shown on the display. The remote control can
regulate the air and water massage functions plus many other features which are described later on in this user manual.
The remote control is waterproof (degree of protection IPX7) and it can swim on the surface of the water. Furthermore, it has a magnet
holder that allows you to stick the remote control to the tub edge.
Air massage
The air massage system has air vents that are integrated into the bottom of the bathtub. Ozoned warm air reaches the water via air
ducts under the bottom of the tub and through the air outlet holes. The system is extremely hygienic and easy to maintain. The air ducts
have their own water-drainage channel leading to the drain so that they are always completely emptied. The LAUFEN air massage sys-
tem runs no risks on aging. The blower fan turns on automatically after each use of the whirlpool bath in order to dry the air ducts, even
if you use the bath only for showering.
Water massage
Unlike the air massage system, the water massage system uses water jets to achieve the desired massage effects. Depending on the
model, your bath may feature between 10 and 14 massage water nozzles. There are six water nozzles at the sides of the bathtub. Their
direction and intensity can be changed either via a touch sensor or manually. Rotary micronozzles are installed in the back and foot
areas of the bathtub and can be varied in intensity. Generally, it is not recommended to direct the nozzles perpendicular to the body but
rather at a slight angle.
Water heating
This system only works when the water massage is turned on and will allow you to maintain the existing water temperature as soon as
the corresponding function is activated from the remote control. It is important to take into account that this element does not heat the
water by several degrees but rather maintains the desired temperature. This is especially useful for large bathtubs, in which the water
cools down faster.
LED light
The two LED spotlights provide a special lighting effect to give your bathtub the pleasure of chromo-therapy. This light produces a re-
laxed atmosphere in your tub, which increases your feeling of well-being whether combined with air massage or not. The innovative RGB
LED technology produces extremely strong light effects with small dimension, flat design and low power consumption. The user can
select between a cycle of six colours and the direct selection of individual colours. The colours are: white, yellow, orange, blue, green
and red.
Mist (option 057 only)
Mist is a feature to enhance the relaxation experience. There are hidden LED lights integrated in the mist outlet which correspond to the
lighting colour in the bathtub. The remote control clearly shows when the mist tank needs to be refilled. How to refill is described in the
chapter “Service Instructions” of this user manual.
Disinfection
The LAUFEN bathtub uses an automatic disinfection cycle for cleaning and germ killing. It can be started using the remote control and
applies a disinfection liquid to the tub.

5
EN
Preliminary Operations
Filling the bathtub
LAUFEN bathtubs with whirl system are equipped with a safety device that
prevents the operation of the water massage if the water level in the bathtub is
too low, thus preventing the motor from overheating. For this reason it must be
ensured that the water level covers the highest water nozzle by at least 20mm
before using the water massage system – see picture 1.
First disinfection
A first disinfection has to be run before using the bathtub with whirl system for the
first time. Please see detailed instructions in the chapter about disinfection later on.
m
i
n
.
2
0
m
m
1
Technical Data
Total power Air massage blower Water massage pump
Option 056 – 3.00 kW
Option 057 – 3.01 kW
Power 750 W
(450 W for blower + 300 W for heating and
ozoniser for disinfection)
230 V AC 50/60 Hz
Power 1300 W
230 V AC 50 Hz
LED light Remote Control
RGB LED: power 1 W
5 V DC
EN 60825-1:2003
IPX8
Rechargeable lithium battery
2.4” LCD screen
2GB flash memory
Bluetooth 2.0 A2DP
2.4 GHz wireless signal
IPX7

6
EN
Preliminary Operations
+
-
4
2 3
Types of water massage nozzles
Every bathtub with whirl system incorporates two different types of water massage nozzles: side jets and back jets. The side jets are
available in a basic and an exclusive version. Depending on your bathtub model, different jet types and variable number of nozzles are
present.
Adjusting the exclusive side jets
In order to adjust the side jets, direct the nozzles towards the part of the body that you want to have massaged. Simply move the noz-
zle to the desired direction – see picture2. The intensity of the water massage can be adjusted manually or via the remote control (as
described later on). Simply turn the nozzle clockwise for less intensity and anti-clockwise for more intensity as shown in picture3. The
changes of intensity for the exclusive side jets are gradual and you feel a slight latching resistance while turning the nozzle.
Adjusting the basic side jets
In order to adjust the side jets, direct the nozzles towards the part of the body that you want to have massaged. Simply move the noz-
zle to the desired direction – see picture4. The intensity of the water massage can be adjusted manually or via the remote control (as
described later on). Simply turn the the cover of the basic side jet clockwise for less intensity and anti-clockwise for more intensity as
shown in picture4. The intensity changes continuously.
Adjusting the back jets
The direction of the jets on the backrest cannot be adjusted, whereas you can change its intensity continuously by turning the nozzle.

7
EN
ON/OFF button
You can turn on the remote control by pressing the ON/OFF button for 3seconds. In order to turn the remote control off, simply press
the ON/OFF button once without holding the button.
When the remote control is powered up you will need to wait for approximately 5–10 seconds before using the various functions so that
the device can carry out initialisation tests.
Power supply adapter
The battery level is shown on the top right side of the remote control screen. When the battery needs to be recharged, simply connect
the remote control, USB cable and plug together and plug into an appropriate socket – see picture below.
Remote Control
Battery status
Back button
“one level back”
OK/Enter button
Music: quick access
to music player
Remaining time
to the end of massage
Home button
“return to main screen”
ON/OFF (power) button
Navigation circle
control arrows
F1 = pup
F2 = uright
F3 = tleft
F4 = qdown
Remote control description
In the figure below you can see the different controls of your remote control:
LCD display
2.5mm plug/jack
connector

8
EN
NOTE
It is important for the remote control to be completely charged before using it for the first time, without interruption, for about 3 hours so
that the battery life will not be reduced. The battery life is equal to at least 200 recharges (1 recharge = estimation of 10 water massage
cycles). The remote control will be efficient for a much longer period, though. In case of damage, you should require a new remote con-
trol. In this case, please contact your local LAUFEN service centre.
Connecting earphones
The remote control allows you to connect earphones for playing the
music which is stored in the device. Use earphones provided by
LAUFEN only. Take into account that the remote control has a thread in
the earphones jack, so, in order to connect the earphones, plug their
connector into the jack of the remote control and then screw in the
plug clockwise.
To disconnect the earphones, unscrew their plug anti-clockwise and
then pull it out of the jack.
Connecting to a computer (PC/laptop)
Simply connect the remote control with the USB cable and plug the
USB side to your computer source – see picture below. The reason for
connecting the remote control to a computer is to either upload music
or to get software updates for the remote control.
Once you have connected the device, select the option USB in the
menu SETTINGS of the remote control. Now you will see a new remov-
able disk drive on your PC (e.g. a new drive named F:). The appear-
ance and the functions are as any other external disk or USB memory
that you connect to your PC. You can copy the MP3 songs that you
wish to play directly to this disk drive.
For a correct connection, you have to assign a connection address to
your remote control.
Step 1: cut off the power supply of the tub at your electrical installa-
tion, wait a moment and turn the power on again. Select the GET
ADDRESS option quickly, within a period of 5 seconds after the
electronic system of the tub has been powered on. After this period
of 5 seconds, the tub will not transmit its address anymore. To get the
connection address once again, you will have to disconnect the power
of the bathtub once more, wait for about 5 seconds and then power
on the tub again. Once the address is obtained, an OK message will
be displayed.
Step 2: please select SET ADDRESS inmediately after performing step
1. When pressing the ENTER button, the address of the bathtub will be
stored in the remote control.
Step 1 Step 2
2.11.1
1.2

9
EN
Display and Icon Description
Welcome screen Default screen
Display
The LCD display is a part of the user interface of
the LAUFEN remote control and shows the current
device status, active bathtub functions, available
functions, options and settings.
After turning on the remote control, you can see the
welcome screen. After a few seconds, the default
screen will be shown (see pictures).
The remote control uses icon symbols to represent
the different functions and options available.
Icon description
In the table below, you can see the icons that are used by the remote control and their respective description.
Icon Function Description
WATER This icon represents the water massage function of the bathtub.
AIR This icon represents the air massage function of the bathtub.
MIST This icon represents the mist generation function of the bathtub; note that this function is only available in
bathtubs of option 057 but not in bathtubs of option 056.
LIGHT This icon represents the LED light function of the bathtub.
PROGRAM This icon represents the program functions of the bathtub.
HEATER This icon represents the heater function of the bathtub.
MUSIC This icon represents the radio and music/MP3 options of the remote control.
CLEAN This icon represents the disinfection function of the bathtub.
SETTINGS This icon represents the settings options of the remote control.

10
EN
Display and Icon Description
Function not active: function is not in operation
Function selected: the cursor is on the function icon
Function active: function is in operation
Alarm: information about a problem
1. WATER: not enough water in the bathtub. Water level has to
be 20mm above the highest water nozzle
2. MIST: missing liquid – mist tank needs to be refilled
3. CLEAN: a) missing disinfection liquid
b) necessity to do the disinfection cycle
Alarm selected: the cursor is on the alarm icon
Description of icons in different states
Each icon can be displayed in different manners and thus inform you about the status of the available functions of the remote control
and the LAUFEN bathtub. Sometimes icons are highlighted in a special way in order to notify you about alarm events and the need of a
user interaction.
Remote control icons Current state
Example of display
This picture is an example screen of the remote
control which contains icons in different states.
Program not
active
Disinfection
alarm
Heater active
Mist function
not active
Water massage
active
Music icon
selected
LED light active
Air massage
active

11
EN
Function Description
Function description
This chapter describes the different functions of your LAUFEN bathtub which you can manage using the remote control. In each section
you will find a figure that shows graphically the steps to be made for the respective function.
In the upper row of each figure you can see the remote control screen that is visualised in each step. Note the red arrows that indicate
the change of state.
In the row below or the two rows below you can see the keys on the remote control that are used to realise the user action. The keys to
be pressed are marked by red circles.
On many menu screens of the LCD display, you can see cursor symbols for selection (p,u,t,q). Sometimes, these symbols are filled
(e. g. u). In this case, the selection is possible, whereas the selection is not possible when the symbol is not filled (e. g. w).
LED light
The LED light function allows you to control the
LED illumination of your LAUFEN bathtub.
Step 1: you turn on the LED light function.
Step 2: here you can select the desired light colour.
Step 3: in multicolour mode, the colour changes
automatically every 10, 20, 30, 60, 90 or 120
seconds. Select here the desired colour changing
interval.
Other functions of the bathtub like air massage
and water massage turn off automatically after 20
minutes of operation. However, the LED light does
not turn off automatically, so you have to turn it off
manually after use.
2.11.1
2.2
3.1
3.2
Step 1 Step 2 Step 3

12
EN
Function Description
Water massage
The water massage function allows you to turn on
the water massage and adjust its intensity and pul-
sation. Please note that a built-in timer turns off the
massage functions after 20 minutes of operation.
You can follow the steps shown in the figure on the
right.
Step 1: you turn on the water massage.
Step 2: in this step, you adjust the intensity of the
sides and feet jets of the water massage by press-
ing the right or left keys of the remote control. The
bar indicator above the SIDES/FEET JETS bar
shows the selected intensity. If you adjust the 1st
level, i. e. only the first light of the bar indicator is lit,
the water massage will be very weak. The 10th and
last level is reached when all indicator lights are lit.
In this case, the water massage will be strong.
Please note that you can also adjust the intensity
manually by turning the nozzles in the tub.
Step 3: here you can adjust the intensity of the back
jets. The bar indicator above the BACK JETS bar
shows the selected intensity. Like in the previous
step, the 1st level means weak and the 10th level
means strong water massage.
Step 4: this step is to adjust the pulsation set-
tings. The 1st level means that the pulsation is fast,
whereas the 4th level stands for slow pulsation.
Alarm: in the case that there is not enough water
in the bathtub, this alarm screen will be visualised.
Please fill more water into the tub so that the water
level is at least 20mm above the highest nozzle.
00:20
2.11.1
2.2
3.1
3.2
Step 1 Step 2 Step 3
Alarm!
Not enough water
in the bathtub
4.1
4.2
Step 4 Alarm

13
EN
Function Description
2.11.1
2.2
3.1
3.2
Air massage
The air massage function allows you to turn on the
air massage and adjust its intensity and pulsation.
Please note that a built-in timer turns off the mas-
sage functions after 20 minutes of operation.
Step 1: you turn on the air massage.
Step 2: in this step, you adjust the intensity of the
air massage on the bottom of the tub by pressing
the right or left keys of the remote control. The bar
indicator above the AIR bar shows the selected
intensity. If you adjust the 1st level, i. e. only the first
light of the bar indicator is lit, the air massage will be
very weak. The 10th and last level is reached when
all indicator lights are lit. In this case, the air mas-
sage will be strong.
Step 3: this step is to adjust the pulsation settings.
The 1st level means that the pulsation is fast. In
this case, the air massage changes its speed from
minimum to maximum and back from maximum
to minimum quickly. The 4th and last level means
slow pulsation, the air massage changes its speed
slowly.
Please note that the blower turns on automatically
after each use of the whirlpool bath in order to
dry the air ducts, even if you use the bath only for
showering.
Step 1 Step 2 Step 3
Mist
The mist function allows you to control a chromed,
LED-illuminated outlet which creates a hazy mist
over the water surface.
The mist function can only be ensured if the tank is
full. Use only distilled water. Other fluids can form
deposits that would impair the function. Pour maxi-
mum 100 ml into the tank. Aroma essences should
be added in the ratio 1:20.
Step 1: you turn on the mist function.
Step 2: here you control the intensity of mist gen-
eration. You can select 50 % to get light mist or you
can select 100 % to set the full mist intensity.
Alarm: if there is not enough liquid in the mist tank,
this alarm screen will be visualised. In this case,
please follow the steps described in the section
“Refilling the mist tank” of the chapter “Service
instructions”.
Alarm!
Refill mist tank
Step 1 Step 2 Alarm
2.11.1

14
EN
Function Description
Emptying the mist tank
You should change the liquid inside your mist tank
regularly. LAUFEN recommends to do this once
a week. Please use distilled water and aroma
liquids provided by LAUFEN only.
Step 1: the OFF button is highlighted, press the q
key to go to EMPTY TANK.
Step 2: select the option EMPTY TANK and go on
by pressing the ukey.
Step 3: press 4 times the ukey (you have to press
4 times in order to avoid accidental starts of this
process).
Step 4: press the qkey in order to start the empty
tank operation.
Step 5: once the remote control has started empty-
ing the mist tank, you will have to wait 10s until the
tank is empty.
Step 6: after emptying the mist tank, this alarm
screen will be visualised to indicate that the mist
tank is empty. Before using the mist function again,
please follow the steps described in the section
“Refilling the mist tank” of the chapter “Service
instructions”.
Please note that the alarm screen will also appear
if the mist liquid has been consumed entirely by
normal mist operation.
Alarm!
Refill mist tank
4x
Step 1 Step 2 Step 3
Step 4 Step 5 Step 6
2.11.1
4.1
3.1

15
EN
Function Description
Step 1 Step 2
Programs
The program function allows you to select preset bathtub programs or to define your own custom-made setups. The preset programs
are VITALITY, BEAUTY and RELAX which adjust massage and LED light either for stimulating or for soothing your body and spirit.
Activating a preset program
Step 1: select the desired preset program (in this
example the VITALITY program).
Step 2: activate the selected program.
Please note that you cannot enter the menus for
water massage, air massage, LED light, mist, heater
and disinfection while a preset program is active.
Remaining
massage time
VITALITY:
The bath starts with a low-intensity modulated air and water massage. A yellow light helps to stimulate the intense body regeneration.
The next stage consists in modulating the force of both massages. Quickly changing colourful lighting stimulates blood circulation and
facilitates the relaxation of muscles exposed to strong streams of water.
After some time, the force of both massages increases to reach their peak: very strong water and air massage. At the same time, light
turns vitalising orange to become energy-boosting red at the end.
BEAUTY:
The first stage of the bath is a muscle relaxing water massage of medium intensity. After a while, air massage will start, replace the water
massage and gradually increase its intensity. The neutral white light colour turns to stimulating orange and red.
At the next stage, the air and water massage become modulated: first less and then highly intense. After a short moment, the air mas-
sage stops and the water massage turns strong again to become less powerful after several minutes. The light turns to gentle blue.
The second half of the program treats your body with the transition of both massage types into a mode of high intensity. This massage is
the basis of the BEAUTY program – it improves skin blood supply, makes it taut and well-toned. The light turns from blue, to red and via
blue to white again.
RELAX:
At the first stage of the bath you experience the action of steady air massage of low intensity, which is followed by a water massage after
a while. Tense muscles relax and a yellow light refreshes your mind.
After a few minutes the water massage and the relaxing air massage start becoming more intense to a medium level, constantly mas-
sage you for a while and finally become even more intense. The senses are exposed to soft green and blue light, helping regain inner
harmony and balance.
A few minutes of calm and relaxation is followed by relaxing and intense water massage, vanishing with the light turning into vitalising
yellow.
The RELAX program is finished by a sequence of steady air massage of low intensity during a few minutes, helping the body to calm
down. The blue light fading out to white light accompanies the final program stage.
2.11.1

16
EN
Function Description
Switch from one preset program to another.
You can easily switch from an active program to
another.
Step 1: press the qkey to select the desired preset
program (in this example the RELAX program).
Step 2: press the ukey.
Step 3: press the ukey again to activate the new
program.
1.1 2.1
Step 1 Step 2 Step 3
2x
Saving the current system setup as a
custom program
If you want to save the current settings as a custom
program, you can do this using this option. Please
adjust at first the values for water massage, air
massage, LED light, heater and mist as desired (see
prior sections of this chapter). Once your personal
settings are active, enter the program function and
follow these steps:
Step 1: select the desired custom program (in this
example custom program P4).
Step 2: press the qkey.
Step 3: now the new custom program is saved.
Step 1 Step 2 Step 3
1.1 2.1
1.2
3.1

17
EN
Function Description
Activating a custom program
If you want to activate custom bathtub settings that
you have saved previously, enter the program func-
tion and follow these steps:
Step 1: press the qkey to select the desired cus-
tom program (in this example custom program P4).
Press the ukey.
Step 2: press the ukey.
Step 3: activate the custom program.
Please note that before activating a custom pro-
gram for the first time, you have to save a program
in the remote control (see section “Saving the cur-
rent system setup as a custom program” above).
Step 1 Step 2 Step 3
2.11.1
2.2
Heater
The heater function allows you to switch on the wa-
ter heater and to set the desired water temperature
of your LAUFEN bathtub.
The heater function is only available when the water
massage is active at the same time. Please note
that the heater is not capable to rise the water
temperature a wide range from cold to hot. In-
stead, it is only designed to maintain the water tem-
perature at a certain value. Thus, you must fill the
bathtub with warm water that has already reached
approximately the desired water temperature.
Step 1: turn on the heater function.
Step 2: select the desired water temperature.
Step 1 Step 2
Desired water
temperature
Current water
temperature
2.11.1
1.2
3.1

18
EN
Function Description
Refill
disinfection
liquid!
Clean
The disinfection function allows you to disinfect your
LAUFEN bathtub. Start a disinfection cycle to clean
the tub before its first use and then regularly after
every third usage and after long periods of inactivity
(more than 3weeks).
Step 1: select the clean function.
Step 2: press the ukey 4times (you have to press
4 times in order to avoid accidental starts of this
process).
Step 3: the disinfection cycle starts after pressing
the qkey.
Please note that you have to turn off water mas-
sage, air massage, LED light and mist before start-
ing the disinfection process. During the disinfection
cycle, all function of the remote control except
Music and Settings are blocked.
The disinfection process takes about 20 minutes.
After disinfecting, you have to empty the tub and
the drying system will be activated automatically.
Once the drying process finishes, you can operate
the tub normally.
Step 1 Step 2 Step 3
4x
Disinfection reminder
A built-in timer counts the days since executing the
last disinfection cycle. After 7days, an alarm will
remind you that a new disinfection is necessary.
Step 1: select the clean function.
Step 2: press the ukey.
Alarm: this screen shows that the disinfection tank
is empty. You must refill it with disinfection liquid.
Please follow the steps described in the section
“Refilling the disinfection tank” of the chapter “Ser-
vice instructions”.
Step 1 Step 2 Alarm
2.11.1
2.11.1 3.1

19
EN
Function Description
Music
The remote control has a built-in music player function. You can either listen to the radio or play MP3 sound files which are stored in the
internal memory or in an external source. External sources are connected to the remote control by a Bluetooth connection.
Selecting the music source
Step 1: select the MP3 option.
Step 2: select the music source (internal or exter-
nal). Here you can enter the internal MP3 menu or
the external MP3 menu.
Step 3: you have entered the internal MP3 menu to
play music files stored on the internal flash disk of
the remote control.
The section “Connecting to a computer” of the
chapter “Remote control” describes how you can
load MP3 songs onto the remote control.
Step 1 Step 2 Step 3
Playing internal MP3 files
You can choose the songs either by artist, by
album or by song. This is an example to play music
selected by artist.
Step 1: select the artist option.
Step 2: select the artist to be played. The next
screen will show a list of songs of the selected art-
ist. Once you choose a song of this list, you enter
step3.
Step 3: here you can start and stop songs, select
the previous or the next track and increase the vol-
ume. Use the keys t, u, p, qand the OK button
to control the music functions.
Please note that if the amplifier has been turned off
and you start to play MP3 songs, you will have to
wait at least 10 seconds because the audio ampli-
fier must establish at first the Bluetooth connection.
You can check the current status selecting the
BLUETOOTH option in the MP3 internal menu (see
section “Bluetooth connection” of this chapter).
Step 1 Step 2 Step 3
2.1
2.1
2.2
2.2
1.1
1.1

20
EN
Function Description
Shortcut to current song
The PLAYING option of the internal MP3 menu is a
shortcut to show the current song.
Step 1: select the desired option.
Step 2: the current song is shown.
Step 1 Step 2
Bluetooth connection
You can listen to the MP3 songs stored on the re-
mote control either using earphones or you can play
them using the amplifier which is an internal part of
your bathtub.
Step 1: select the BLUETOOTH option.
Step 2: select the CONNECT option.
Step 3: the remote control shows the connection
status. LRC stands for LAUFEN Remote Control,
AMP means amplifier.
The connection status can show four different
values:
UNCONNECTED: no device is connected.
LINKING: the connection is being established.
INTERNAL: the internal device is connected.
EXTERNAL: the external device is connected.
Step 1 Step 2 Step 3
Connection
status
2.11.1
1.1
1.2
This manual suits for next models
1
Table of contents
Other Laufen Remote Control manuals
