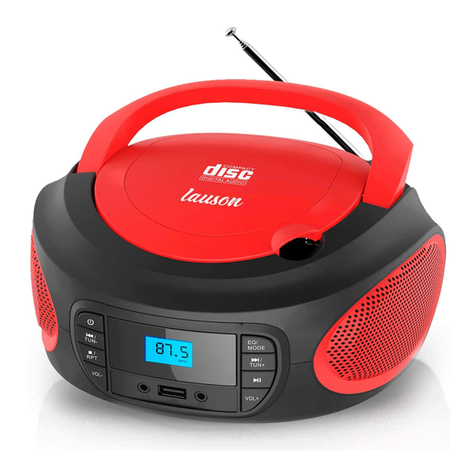
lauson CP45 Series User manual

1
EN
PARTY LIGHTS EFFECT BOOMBOX WITH
AM/FM STEREO RADIO AND LIGHT SHOW
EFFECT
USER MANUAL
CP451 –CP452
Dear Customer,

2
EN
Thank you for purchasing our Turntable Lauson. Please read and follow these instructions, in order
to avoid damaging the item. We do not cover any damage that may arise from improper use of the
item of the disregard of the safety instructions.
SPECIFICATIONS
As part of our policy of continuous improvement, manufacturers reserves the right to make design
and specification changes for product improvement without prior notice.
The performance specification figures indicated are nominal values of production units. There may
be some deviations from these values in individual units.
Tuner:
Frequency Range: FM 87.5 - 108 MHz / AM 530 - 1600 kHz
CD Play:
Type: Single disc multi-play compact disc player
Signal readout: Non-contact, 3-beam semiconductor laser pickup
D/A converter: Multi bit D/A converter
Frequency response: 20 - 20,000 Hz
USB host
Interface: Complies with USB 1.1 / 2.0 Mass Storage Class.
Power Sources: 230V~ 50Hz 18W
Power stand-by: 0.45W
Frequency band: 2.400GHz - 2.480GHz
Bluetooth Profile: A2DP (Advanced Audio Distribution Profile), AVRCP (Audio/Video Remote
Control Profile) Bluetooth 2.1 +EDR
GENERAL
●Please ensure that the equipment is positioned in a well ventilated area and ensure that there is
at least 10 cm (4”) of free space along the sides and top of the equipment.10 cm (4”) 10 cm (4”)
●Use the unit on a firm, level surface free from vibration.
●Place the unit at least 30 cm (12”) away from any CRT TV to avoid colour variations across the
TV screen. If the variations persist, move the unit further away from the TV. LCD TV is not prone
to such variation.
●Keep the unit away from direct sunlight, strong magnetic fields, excessive dust, humidity and
electronic/electrical equipment (home computers,facsimiles, etc.) which generate electrical noise.
●Do not place anything on top of the unit.
●Do not expose the unit to moisture, to extreme temperatures.
●If your system does not work properly, disconnect the AC power lead from the wall socket. Plug
the AC power lead back in, and then turn on your system.
●In case of an electrical storm, unplug the unit for safety.
●Hold the AC power plug by the head when removing it from the wall socket, as pulling the lead
can damage internal wires.
●The AC power plug is used as a disconnect device and shall always remain readily operable.
●Do not remove the outer cover, as this may result in electric shock. Refer internal service
to your local service facility.
●The apparatus shall not be exposed to dripping or splashing and that no objects filled with liquids,
such as vases, shall be placed on the apparatus.

3
EN
LOCATION OF CONTROLS
1. CD Door
13. Function Switch
(OFF/AM/FM/CD/AUX/USB/BT)
2. Stop Button
BT PAIR Button
14. Volume Control Knob
3. Play mode Button
15. Left Speaker
4. ALBUM Button
16. Right Speaker
5. CD Door Open
17. Light ON/OFF Switch
6. Play/Pause Button
USB/BT/CD FUNCTION Button
18. Tuning Control Knob
7. Skip/Search Forward Button
19. Telescopic Antenna
8. Skip/Search Backward Button
20. AUX-IN Jack
9. Power Indicator
21. Carrying Handle
10. LCD Display
22. Headphone Jack
11. FM Stereo Indicator
23. AC Power Socket
12.USB jack
24. Battery Compartment Door
POWER SOURCES
This unit operates on AC 230V~ 50Hz or 6 pieces of 1.5V “C”(UM-2) batteries. Do not attempt

4
EN
to operate the radio on any other power source. You could cause damage to the unit and void
your warranty.
A. BATTERY OPERATION
1. Remove the Battery Door.
2. Install 6 x DC1.5V “C” (UM-2) batteries (not included) according to the polarity diagram
inside the battery compartment.
IMPORTANT: Be sure that the batteries are installed correctly. Wrong polarity may
damage the unit.
BATTERY NOTE AND CARE
1. Danger of explosion if the battery is replaced incorrectly. Replace only with the same or
equivalent type
2. Do not mix old and new batteries.
3. Do not mix alkaline, standard (carbon-zinc) or rechargeable (nickel-cadmium) batteries.
4. If the unit is not to be used for an extended period of time, remove the batteries. Old or leaking
batteries can cause damage to the unit and may void the warranty.
5. Do not try to recharge batteries not intended to be recharged; they can overheat and rupture.
(Follow battery manufacturer’s directions).
6. Do not dispose of batteries in fire, batteries may leak or explode.
BATTERY REPLACEMENT
When the output sound of this unit becomes distorted or the CD player operation appears
unstable, the batteries are weak. You need to replace all the exhausted batteries at the same
time as soon as possible to avoid battery leakage.
B. AC OPERATION
Plug the detachable AC cord into a standard AC outlet (230V~50Hz).
1. When the AC power cord (included) is connected to the AC Power Socket on the back of
the unit and the other end is plugged into a 230V AC~ 50Hz wall outlet, the unit will
disconnect the batteries automatically, and operate on AC Power only.
2. Slide the FUNCTION SWITCH to “CD/AUX/USB/BT” for AUX or CD play, “FM” for FM radio,
“AM” for AM radio and “OFF” for unit power off.
RADIO OPERATION
1. Slide the FUNCTION SWITCH to “FM”or “AM”as desired, the POWER Indicator will light.
2. Rotate the TUNING CONTROL KNOB to your desired radio station according to the DIAL
SCALE on the knob.
3. Rotate the VOLUME CONTROL KNOB to adjust to the desired output level.
4. To turn off the radio, slide the FUNCTION SWITCH to “OFF”position. The POWER
Indicator will go off.
Please Note: LED light show may interfere with the AM radio reception. If you experience weak or
noisy AM reception when the LED light show is ON, please turn off the LED light
show by sliding the LIGHT switch to OFF position.
TIPS FOR BEST RECEPTION
AM –The AM antenna is located inside the cabinet of the unit. If AM reception is weak, change
the position of unit until the internal antenna picks up the strongest signal.
FM –If a stereo broadcast program is being received, the FM STEREO INDICATOR will light.
During FM or FM Stereo reception, always keep the FM TELESCOPIC ANTENNA fully

5
EN
extended for best performance. However, if FM reception is weak, try repositioning the
unit near an open window until you get the best reception.
CD OPERATION
PLEASE READ THIS IMPORTANT INFORMATION:
If playback does not start, it is likely due to the quality of the CD-R/RW disc and/or the compatibility
of the CD compilation software. The manufacturer is not responsible for the playback quality of CD-
R/RW discs. Do not attach a label or seal to either side of the CD-R/RW disc. It may cause a
malfunction.
DISC PLAY MODE
1. Slide the FUNCTION SWITCH to the “CD/AUX/USB/BT” position. The LCD DISPLAY will
light.
2. Open the CD DOOR, load a CD with the label side facing upward and then close the CD
door. A few seconds later the total number of tracks on the CD will appear on the LCD display.
3. Press the PLAY/PAUSE BUTTON to start playing the CD from the first track. The
PLAY/PAUSE Indicator will light steadily.
4. While playing, press the BUTTON once to pause, the PLAY/PAUSE Indicator will flash.
Press the BUTTON again to resume playing.
5. Adjust the VOLUME CONTROL to the desired volume level.
6. Press STOP ■ BUTTON to stop playing.
7. To turn off the CD player, slide the FUNCTION SWITCH to “OFF” position. The LCD
DISPLAY and Power Indicator will go off.
NOTE: If skipping occurs during CD play, try turning the volume down. Do not open the CD
DOOR when a CD is playing.
REPEAT MODE
1, Press the “MODE” button one time during playback or pause mode, is displayed with
flashing, the current single track can be repeated.
2, CD disc playing, press the “MODE” button two times during playback or pause mode, is
displayed, the current all tracks can be repeated
3, MP3 playing, press the “MODE” button two times during playback or pause mode, is
displayed, the current folder can be repeated
4, Press the “MODE” button three times during playback or pause mode, is displayed without
flashing, all tracks can be repeated.
4, Press the “MODE” button four times during playback or pause mode, is displayed,
repeating cancelled.
SKIP AND SEARCH MODE
1. During Play or Pause mode, tap the SKIP/Search Forward or SKIP/Search Backward
BUTTON to go to the next track or go back to the beginning of the current track.
2. During Play mode or Pause mode, press and hold the or BUTTON to search within
the current track with audible high speed playback.
PROGRAM PLAY MODE
This function allows music tracks to be played in a programmed sequence.
NOTE: Program can only be set in STOP mode.
1. Press the “MODE” button short time during stop mode , LCD display will show P01 and flash.
2. Press the SKIP/Search Forward or SKIP/Search Backward BUTTON to select the
track to be programmed.
3. Press the “MODE” button again to store the selection. The Program Number will advance

6
EN
to “02”and flash to prompt for the next input.
4. You may repeat steps #2 to #3 above to program up to 20(CD)/99(MP3,WMA) tracks. As
soon as you have entered the 20(CD)/99(MP3,WMA)th track, the LCD DISPLAY will
automatically show the programmed tracks one by one in their correct sequence starting
from the first. At the end of program review, Program Number “01”and the PROGRAM
INDICATOR will both flash.
5. Press the PLAY/PAUSE BUTTON to complete and start program play. Press the STOP ■
BUTTON to stop program play.
6. To edit a programmed track, first press the PROGRAM BUTTON until you reach the
program number whose track you want to change then press the or
BUTTON to select a new track and then press PROGRAM BUTTON again to confirm.
7. To cancel program play, press the ■BUTTON twice or open the CD DOOR in STOP mode,
Program Indicator will go off.
8. To turn off the CD player, slide the FUNCTION SWITCH to “OFF”position. The LED
DISPLAY and Power Indicator will go off.
USB/MP3 PLAYER
1. Press “USB/BT” button long time to change CD to USB and BT mode
2. Press the ALBUM button to select desired playback folder. To start playback with
folder mode on, go to step .
3. Select desired file to be played back by pressing the""or""button.
4. Press the PLAY button. Playback will start and the file name will be displayed.

7
EN
BLUETOOTH OPERATION
1. Slide the FUNCTION SWITCH to the “CD/AUX/USB/BT” position.
2. Press “USB/BT” button long time to change BT mode
3. If the BOOMBOX has never been paired before or cannot find the last paired device, the
flashing “bt” on LCD will indicate the boombox is in search mode. You need to follow the
pairing instructions below to link the BOOMBOX with your Bluetooth device.
If required, enter the pass code “0000” to pair (link) the BOOMBOX with your device.
4. After successfully pairing (linking), display will change to show “bt”steadily, the Bluetooth icon
also will show in display.
5. After selecting, press PLAY/PAUSE Button on the unit to play or pause the song.
6. Press or Button on main unit to skip to previous or next song.
7. Press and hold the STOP/PAIR Button for 3 seconds or turn off the Bluetooth function of
device currently paired with BOOMBOX.
Notes: If your Bluetooth enabled device does not support A2DP profile, it will not play the music
through the speaker, even if paired (linked).
LED LIGHT SHOWS
The LED light shows inside the speaker and around the center display of the unit are created
automatically based on the music source being played at the time
To turn ON/OFF the LED light show, slide LIGHT switch to ON/OFF position.
Note: If the brightness is glaring, turn on room lights or turn off LED light show
AUX IN OPERATION
1. Connect the headphone jack of your external device to the AUX IN jack located on the back of
this CD player (The connection cable is not included).
2. Turn on the CD player and slide the FUNCTION SWITCH to CD/AUX/USB/BT position, unit
will enter the AUX function mode once an external device is plugged into the CD/AUX/USB/BT
jack.
3. Start to play your iPod, MP3 player or other external audio device.
4. Slowly adjust both volume controls on your CD player and the external device.
5. Turn off your iPod, MP3 player and etc. when finish listening. Turn the CD player off and
unplug the AUX IN jack.
Remark: Once the AUX IN jack is plugged, the CD player will automatically enter the AUX mode
when the FUNCTION SWITCH is in CD mode. Remember to disconnect the cable from
the unit after use in order to be able to listen to the CD player again.

8
EN
CARE AND MAINTENANCE
1. Children should be supervised when using this appliance.
2. Clean your unit with a damp (never wet) cloth. Solvent or detergent should never be used.
3. Keep your unit away from heating appliances and sources of electrical noise such as
fluorescent lamps or motors.
4. If drop-outs or interruptions occur in the music during CD play, or if
the CD fails to play at all, its bottom surface may require cleaning.
Before playing, wipe the disc from the center outwards with a good
soft cleaning cloth.
This symbol on the product or on its packaging indicates that this product shall not be
treated as household waste. Instead it shall be handed over to the applicable collection
point for the recycling of electrical and electronic equipment.
By ensuring this product is disposed of correctly, you will help prevent potential negative
This symbol on the battery or on the packaging indicates that the battery provided with
this product shall not be treated as household waste. On certain batteries this symbol
might be used in combination with a chemical symbol. The chemical symbols for mercury
(Hg) or lead (Pb) are added if the battery contains more than 0.0005% mercury or 0.004%
lead. By ensuring these batteries are disposed of correctly, you will help prevent potentially
negative consequences
This symbol indicates that this product incorporates double insulation
between hazardous mains voltage and user accessible parts.

9
EN
TROUBLESHOOTING GUIDE
Symptom
Possible Cause
Solution
Noise or sound
distorted on AM or FM
broadcast
- Station not tuned properly for AM or
FM.
- FM: FM telescopic antenna is not
extended.
- AM: The bar antenna is not positioned
correctly
- Retune the AM or FM broadcast
station.
- FM: Extend FM telescopic antenna.
- AM: Reposition the unit until the
best reception is obtained.
AM or FM no sound
- Unit not in “AM” or “FM” function
mode.
- Volume set at minimum
- Slide FUNCTION SWITCH to “AM” or
“FM”
position.
- Increase Volume.
CD player will not play
- Unit not in CD function mode.
- AUX IN jack is plugged
- CD is not loaded properly.
- If the CD is self-compiled, the media
used may not be compatible with the
player.
- Exhausted battery
- Select CD function mode.
- Unplug cable plugged in AUX IN jack.
- Load CD with label side up.
- Use better quality blank media and
retest.
- Replace all old batteries.
CD skips while playing
- Disc is dirty or scratched.
- Wipe CD with clean cloth or use
another disc.
Intermittent sound from
CD player
- Dirty or defective disc
- Dirty pick up lens
- Player is subject to excessive shock
or vibration
- Clean or replace the defective disc.
- Use a CD lens cleaning disc to
clean the lens.
- Relocate the player away from
shock or vibration.
Sound appears
distorted at
high volume
setting
- Volume control is set to maximum.
- Batteries become low
- Adjust Volume Control to a lower
comfortable level.
- Replace all the old batteries with
new ones.

1
ES
REPRODUCTOR CON LUCES DE FIESTA,
RADIO ESTÉREO AM/FM Y ESPECTÁCULO
LUMINOSO
MANUAL DE USUARIO
CP451 –CP452
Estimado cliente:

2
ES
Gracias por adquirir nuestro reproductor Lauson. Por favor, lea y guarde estas instrucciones para
evitar dañar este producto. La garantía no cubre ningún daño que pueda surgir del mal uso del
producto si no se cumplen las instrucciones de seguridad.
ESPECIFICACIONES
Como parte de nuestra política de mejora continua, los fabricantes se reservan el derecho a
realizar cambios en el diseño y las especificaciones para mejorar el producto sin notificarlo
previamente.
Las especificaciones de rendimiento indicadas son valores nominales de las unidades de
producción. Es posible que haya alguna desviación de estos valores en las unidades individuales.
Radio: Rango de frecuencias: FM 87.5 - 108 MHz / AM 530 - 1600 kHz
Reproducción de CD:
Tipo: Reproductor de discos compactos con varios tipos de reproducción de un único disco
Lectura de la señal: Láser semiconductor de 3 haces sin contacto
Conversor D/A: Conversor D/A multi bit / Respuesta en frecuencia: 20 - 20.000 Hz
Conexión USB
Interfaz: Cumple con la clase USB 1.1 / 2.0 de almacenamiento masivo.
Fuentes de corriente: 230 V~ 50 Hz 18 W
Corriente en espera: 0,45 W
Banda de frecuencias: 2.400 GHz - 2.480 GHz
Tipo de Bluetooth: Bluetooth A2DP (Advanced Audio Distribution Profile), AVRCP (Audio/Video
Remote Control Profile) 2.1 +EDR
GENERAL
● Asegúrese de que el equipo estáubicado en una zona bien ventilada y asegúrese de que al
menos haya 10 cm (4”) de espacio libre entre los laterales y la parte superior del equipo. 10 cm
(4”) 10 cm (4”)
●Use la unidad sobre una superficie firme y nivelada, en la que no se produzcan vibraciones.
●Coloque la unidad al menos a 30 cm (12”) de distancia de cualquier TV CRT para evitar
variaciones de color en la pantalla de la TV. Si persisten las variaciones, aleje la unidad de la TV.
La TV LCD no suele provocar dicha variación.
●Mantenga alejada la unidad de la luz directa del sol, potentes campos magnéticos, exceso de
polvo, humedad y equipos electrónicos/eléctricos (ordenadores, faxes, etc.) que generen ruido
eléctrico.
● No coloque nada sobre la unidad.
● No exponga la unidad a humedad ni temperaturas extremas.
● Si el sistema no funciona con normalidad, desenchufe la toma eléctrica de la pared. Vuelva a
enchufarlo de nuevo y pruebe a encender el sistema.
● En caso de tormenta eléctrica, desenchufe la unidad por seguridad.
● Tire de la toma de corriente directamente cuando la desenchufe de la pared. Tirar del cable
puede dañar el interior del cable.
● La toma de corriente se utiliza para desconectar el dispositivo y siempre debe quedar accesible.
●No retire la cubierta exterior ya que esto puede causar descargas eléctricas. Acuda a su
servicio técnico de la zona si necesita reparaciones en el interior.
● El aparato no debe exponerse a mojaduras o salpicaduras y no se deben colocar objetos con
agua en su interior, como jarrones, sobre el producto.
UBICACIÓN DE CONTROLES

3
ES
1. Puerta del CD
13. Interruptor de funciones
(OFF/AM/FM/CD/AUX/USB/BT)
2. Botón Stop
Botón BT PAIR
14. Control del volumen
3. Botón Play
15. Altavoz izquierdo
4. Botón ALBUM
16. Altavoz derecho
5. Abrir puerta del CD
17. Interruptor luces ON/OFF
6. Botón Play/Pause
Botón USB/BT/CD FUNCTION
18. Sintonizador
7. Botón Skip/Search Forward
19. Antena telescópica
8. Botón Skip/Search Backward
20.Conector AUX-IN
9. Indicador de encendido
21. Asa de transporte
10. Pantalla LCD
22. Toma para auriculares
11. Indicador de estéreo FM
23. Toma de corriente CA
12. Conector USB
24. Puerta del compartimento de pilas
ALIMENTACIÓN
Esta unidad funciona con AC 230V~ 50Hz o 6 pilas de 1.5V tipo “C” (UM-2). No intente usar la

4
ES
radio con ninguna otra fuente de energía. Puede dañar la unidad y anular la garantía.
A. FUNCIONAMIENTO CON PILAS
1. Abra el compartimento de las pilas.
2. Coloque 6 pilas DC1.5V “C” (UM-2) (no incluidas) de acuerdo con el diagrama de
polaridades que aparece en el interior del compartimento de las pilas.
IMPORTANTE: Asegúrese de que las pilas están correctamente colocadas Colocar
mal las polaridades puede hacer que la unidad se dañe.
NOTA Y CUIDADOS DE LAS PILAS
1. En caso de colocar las pilas de forma incorrecta existe peligro de explosión. Cambie las pilas
por otras del mismo tipo o equivalentes
2. No mezcle pilas usadas con nuevas.
3. No mezcle pilas alcalinas, estándar (carbono-cinc) ni recargables (níquel-cadmio).
4. Si no va a usar la unidad durante un largo periodo de tiempo, saque las pilas. Las pilas
antiguas o sulfatadas pueden dañar la unidad y anular la garantía.
5. No trate de cargar las pilas que no estén destinadas a ello, puede calentarse en exceso y
explotar. (Siga las instrucciones del fabricante de las pilas).
6. No arroje las pilas al fuego ya que pueden sulfatarse o explotar.
CAMBIO DE LAS PILAS
Cuando el sonido de la unidad comience a oírse distorsionado o el funcionamiento del
reproductor no sea normal, significa que quedan pocas pilas. Necesita cambiar las pilas
gastadas al mismo tiempo lo antes posible para evitar que se sulfaten.
B. FUNCIONAMIENTO CON CA
Conecte el cable de CA desmontable en un enchufe de CA estándar (230V~50Hz).
1. Cuando el cable de corriente AC (incluido) se conecte en la toma de la parte posterior de
la unidad y en el otro extremo en una toma de corriente de 230V AC~ 50Hz, la unidad
desconectaráel funcionamiento de las pilas automáticamente y solamente funcionarácon
CA.
2. Deslice el interruptor de función hasta "CD/AUX/USB/BT" para reproducir AUX o CD, "FM"
para radio FM, "AM" para radio AM y "OFF" para apagar la unidad.
FUNCIONAMIENTO DE LA RADIO
1. Deslice el interruptor de función hasta "FM" o "AM" según desee, el indicador de encendido
se iluminará.
2. Gire el sintonizador hasta la emisora de radio que desee según la escala del dial que
aparece en el regulador.
3. Gire el control del volumen para ajustarlo a su gusto.
4. Para apagar la radio, deslice el interruptor de función hasta la posición "OFF". El indicador
de encendido se apagará.
Por favor, tenga en cuenta: La luz LED puede causar interferencias con la recepción de la radio
AM. Si tiene una mala recepción de AM, o con ruido, cuando la luz LED está
encendida, apáguela colocando el interruptor de la luz en la posición OFF.
CONSEJOS PARA UNA MEJOR RECEPCIÓN
AM: La antena para AM estásituada en el interior de la unidad principal. Si la recepción de AM
es débil, cambie la posición del aparato hasta que la antena interna recoja una señal AM

5
ES
más potente.
FM: Si una emisora emite en estéreo, se encenderáel indicador de FM estéreo.
Durante la recepción de FM o FM estéreo, extienda totalmente la antena telescópica de
FM para obtener un mejor resultado. Si la recepción de FM sigue siendo pobre, pruebe a
reubicar la unidad cerca de una ventana abierta hasta que consiga la mejor recepción.
FUNCIONAMIENTO DEL CD
LEA ESTA INFORMACIÓN IMPORTANTE:
Si la reproducción no se inicia, es posible que sea debido a la calidad del disco CD-R/RW y/o a la
compatibilidad del software de compilación del CD. El fabricante no es responsable de la calidad
de reproducción de los discos CD-R/RW. No pegue ninguna etiqueta ni sello en ninguna cara del
disco CD-R/RW, ya que puede provocar su mal funcionamiento.
MODO REPRODUCCIÓN
1. Deslice en interruptor de función hasta la posición "CD/AUX/USB/BT". La pantalla LCD se
encenderá.
2. Abra la puerta del CD, coloque un disco con la etiqueta hacia arriba y después cierre esta
puerta. Pocos segundos después apareceráel número total de pistas del CD en la pantalla
del LCD.
3. Pulse el botón PLAY/PAUSE para comenzar la reproducción del CD desde la primera
pista. El indicador PLAY/PAUSE se encenderáde forma continua.
4. Durante la reproducción, pulse el botón una vez para pausar la reproducción,
parpadearáel indicador Play/Pausa. Pulse de nuevo el botón para reanudar la
reproducción.
5. Ajuste el control de volumen al nivel que desee.
6. Pulse el botón STOP ■ para detener la reproducción.
7. Para detener la reproducción del CD, deslice el interruptor de función hasta la posición
"OFF". El indicador de encendido y la pantalla LCD se apagarán.
NOTA: Si se producen saltos durante la reproducción del CD, pruebe a bajar el volumen. No
abra la puerta del CD mientras se estáreproduciendo un disco.
MODO REPEAT (REPETICIÓN)
1. Pulse el botón "MODE" una vez en modo reproducción o pausa, aparecerá parpadeando,
indica que se repetirála pista actual.
2. Durante la reproducción de un CD, pulse el botón "MODE" dos veces en modo reproducción o
pausa, aparecerá , indica que se repetirán todas las pistas
3. Durante la reproducción de MP3, pulse el botón "MODE" dos veces en modo reproducción o
pausa, aparecerá , indica que se repetirála carpeta actual
4. Pulse el botón "MODE" tres veces en modo reproducción o pausa, aparecerá sin
parpadear, indica que se repetirán todas las pistas.
4. Pulse el botón "MODE" tres veces en modo reproducción o pausa, aparecerá sin
parpadear, indica que se repetirán todas las pistas.
MODO SKIP Y SEARCH (SALTAR Y BUSCAR)
1. En el modo reproducción o pausa, pulse el botón SKIP/Search Forward o SKIP/Search
Backward para ir a la pista siguiente o volver al principio de la pista actual.
2. En el modo reproducción o pausa, mantenga pulsado el botón o para buscar dentro
de la pista actual con reproducción audible a alta velocidad.
MODO REPRODUCCIÓN DE PROGRAMA

6
ES
Esta función permite que todas las pistas se reproduzcan según una
secuencia programada. NOTA: El programa solamente se puede
configurar en modo STOP.
1. Pulse el botón "MODE" brevemente en modo Stop, en la pantalla LCD aparecerá P01 y
parpadeará.
2. Pulse el botón SKIP/Search Forward o SKIP/Search Backward para seleccionar la
pista que desea programar.
3. Pulse el botón "MODE" de nuevo para guardar la selección. El número de programa
avanzaráhasta "02" y parpadearápara pedirle que seleccione la siguiente entrada.
4. Puede repetir los pasos 2 y 3 anteriores para programar hasta 20 (CD)/99 (MP3, WMA)
pistas. En cuanto introduzca la pista 20ª(CD)/99ª(MP3, WMA), en la pantalla LCD
aparecerán automáticamente las pistas programadas una a una en la secuencia correcta
desde la primera. Cuando finalice la revisión del programa, parpadearán el número del
programa "01" y el indicador del programa.
5. Pulse el botón para finalizar y comenzar la reproducción del programa. Pulse el botón
STOP ■ para detener la reproducción del programa.
6. Para editar una pista programa, primero pulse el botón Program hasta que llegue al número
de programa que contenga la pista que desea cambiar, después pulse el botón o
para seleccionar una nueva pista y luego seleccione de nuevo el botón Program para
confirmar.
7. Para cancelar un programa. pulse el botón ■ dos veces o abra la puerta del CD en modo
Stop, el indicador del programa se apagará.
8. Para detener la reproducción del CD, deslice el interruptor de función hasta la posición
"OFF". El indicador de encendido y la pantalla LED se apagarán.
REPRODUCTOR DE USB/MP3
1. Pulse el botón "USB/BT” prolongadamente para cambiar de CD a modo USB y BT.
2. Pulse el botón ALBUM para seleccionar la carpeta que desea reproducir. Para comenzar la
reproducción con el modo carpeta activado, vaya al paso .
3. Seleccione el archivo que desee reproducir pulsando los botones "" o "".
4. Pulse el botón Play. La reproducción comenzaráy apareceráel nombre del archivo.

7
ES
FUNCIONAMIENTO DEL BLUETOOTH
1. Deslice en interruptor de función hasta la posición "CD/AUX/USB/BT".
2. Pulse el botón “USB/BT” prolongadamente para cambiar al modo BT
3. Si el reproductor nunca se ha emparejado o no se puede encontrar el último dispositivo
emparejado, el símbolo "bt" parpadeando indicará que el reproductor está en modo de
búsqueda. Necesita seguir las siguientes instrucciones de emparejamiento para conectar el
reproductor con su dispositivo Bluetooth.
●Si es necesario, introduzca el código "0000" para emparejar (vincular) el reproductor con
su dispositivo.
4. Tras emparejar (vincular) correctamente los aparatos, en la pantalla aparecerá"bt" sin
parpadear, el icono del Bluetooth también se mostrará.
5. Después de seleccionarlo, pulse el botón PLAY/PAUSE en la unidad para reproducir o
pausar la canción.
6. Pulse el botón o en la unidad principal para ir a la canción anterior o a la siguiente.
7. Mantenga pulsado el botón STOP/PAIR durante 3 segundos o apague la función Bluetooth
del dispositivo actualmente emparejado con el reproductor.
Notas:
1.) Si el dispositivo con Bluetooth activado no soporta A2DP, no reproducirámúsica a través del
altavoz, incluso aunque estéemparejado (vinculado).
ESPECTÁCULO DE LUCES LED
♦El espectáculo de luces LED del interior del altavoz y alrededor de la pantalla central de la
unidad se crea automáticamente según la música que se estéreproduciendo en ese momento
♦Para encender/apagar el espectáculo de luces LED, deslice el interruptor LIGHT hasta la
posición ON/OFF.
Nota: si el brillo resulta deslumbrante, enciente las luces de la habitación o apaga el espectáculo
luminoso FUNCIONAMIENTO DE LA ENTRADA AUX
1. Conecte la toma de auriculares de su dispositivo externo a la entrada AUX IN situada en la
parte posterior de este reproductor de CD (no se incluye el cable de conexión).
2. Encienda el reproductor de CD y deslice el interruptor de función hasta la posición
CD/AUX/USB/BT, la unidad entraráen modo AUX cuando se conecte un dispositivo externo
en esta toma CD/AUX/USB/BT.
3. Comience la reproducción de su iPod, reproductor de MP3 u otro dispositivo de audio
externo.
4. Ajuste lentamente los controles de volumen de su reproductor de CD y el del dispositivo
externo.
5. Apague el iPod, reproductor de MP3, etc. cuando termine de escuchar música. Apague el
reproductor de CD y desenchufe la toma AUX IN.
Nota: Cuando la toma AUX IN estéconectada, el reproductor de CD entraráautomáticamente en
modo AUX cuando el interruptor de función esté en modo CD. Acuérdese de
desconectar el cable de la unidad después de su uso para poder escuchar de nuevo el
reproductor de CD.
CUIDADO Y MANTENIMIENTO

8
ES
1. Los niños deben estar supervisados cuando utilicen este aparato.
2. Limpie la unidad con un paño húmedo (no mojado). Nunca utilice disolventes ni detergentes.
3. Mantenga alejada la unidad de fuentes de calor o que causen ruido eléctrico, como lámparas
fluorescentes o motores.
4. Si se producen cortes o interrupciones en la música durante la
reproducción de un CD, o si el CD no se reproduce completamente, es
posible que tenga que limpiar la superficie inferior. Antes de reproducir,
limpie el disco del centro hacia fuera con un buen paño limpiador suave.
Este símbolo, que aparece en el producto y el embalaje, significa que este producto no
debe tirarse junto con el resto de basura del hogar. En su lugar, debe llevarse a un punto
de recogida adecuado para el reciclaje de equipos electrónicos y eléctricos.
Asegurándose de que este producto se desecha correctamente ayudaráa evitar
potenciales efectos negativos
Este símbolo que aparece en las pilas y el embalaje, significa que las pilas de este
producto no deben tirarse junto con el resto de basura del hogar. En algunas pilas este
símbolo puede aparecer en combinación con un símbolo químico. Los símbolos químicos
del mercurio (Hg) o el plomo (Pb) se añaden si la pila contiene más de 0,0005% de mercurio o
0,004% de plomo. Asegurándose de que las pilas se desechan correctamente ayudaráa evitar
potenciales efectos negativos
Este símbolo indica que este producto cuenta con aislamiento doble
entre el voltaje eléctrico peligroso y las piezas a las que puede acceder el
usuario.

9
ES
RESOLUCIÓN DE PROBLEMAS
Síntoma
Posible causa
Solución
Ruido o sonido
distorsionado en la
recepción
de AM o FM
- Emisora mal sintonizada en AM o
FM.
- FM: La antena telescópica para
FM no estáextendida.
- AM: La antena no estábien
colocada
- Vuelva a sintonizar la emisora de
AM o FM.
- FM: Extienda la antena telescópica
para FM.
- AM: Vuelva a colocar la
unidad hasta obtener una
buena recepción.
AM o FM no se oye
- La unidad no funciona en "AM" o
"FM"
.
- Volumen al mínimo
- Deslice el interruptor de función
hasta "AM" o
"FM".
- Suba el volumen.
El reproductor de CD
no funciona
- La unidad no estáen modo CD.
- La toma AUX IN estáconectada
- El CD no estácorrectamente
cargado.
- Si el CD estáautocompilado,
puede que los ficheros no sean
compatibles con el reproductor.
- Pilas agotadas
- Seleccione la función CD.
- Desconecte el cable enchufado en
la toma AUX IN.
- Cargue el CD con la etiqueta hacia
arriba.
- Utilice un medio de mejor
calidad y compruebe de nuevo.
- Reemplazar todas las pilas
usadas.
El CD salta mientras
se reproduce
- El disco estásucio o rayado.
- Limpie el CD con un paño o utilice
otro disco.
Sonido intermitente
Reproductor de CD
- Disco sucio o defectuoso
- Lente sucia
- El dispositivo sufre demasiados
golpes o vibraciones
- Limpie o reemplace el disco
defectuoso.
- Utilice un disco limpiador de
lentes de CD para limpiar la
lente.
- Recoloque el reproductor
lejos de golpes o
vibraciones.
El sonido parece
distorsionad
o a volumen
alto
- El control de volumen estáal
máximo.
- Las pilas tienen poca carga
- Ajuste el Control de Volumen a un
nivel confortable más bajo.
- Reemplace las viejas pilas por
unas nuevas.

1
PT
BOOMBOX COM EFEITO DE LUZES DE
FESTA, RÁDIO ESTÉREO AM/FM E
ESPETÁCULO DE LUZES
MANUAL DE INSTRUÇÕES
CP451 - CP452

2
PT
Caro Cliente,
Agradecemos a sua preferência ao adquirir um produto Lauson. Deveráler as instruções abaixo
para evitar danificar o aparelho. Nós não cobrimos qualquer dano que possa ser provocado por
uso indevido do aparelho devido a negligência das instruções de segurança.
ESPECIFICAÇÕES
De acordo com a nossa política de aperfeiçoamento contínuo, o fabricante reserva-se o direito de
fazer alterações em termos de design e especificações para melhoria do produto sem aviso prévio.
Os valores das especificações de desempenho indicados correspondem aos valores nominais das
unidades de produção. No caso de aparelhos individuais, poderáhaver alguma divergência de
valores.
Sintonizador:
Intervalo de Frequência: FM 87.5 - 108 MHz / AM 530 - 1600 kHz
Leitor CD:
Tipo: leitor de CD multi-suportes, um sóCD
Leitura de sinal: sem contacto, cabeça de leitura laser semicondutora com 3-feixes
Conversor D/A: conversor D/A multi bit
Resposta de frequência: 20 - 20,000 Hz
Dispositivo USB
Interface: compatível com Classe de Armazenamento em Massa USB 1.1 / 2.0.
Fontes de Alimentação: 230V~ 50Hz 18W
Consumo em stand-by: 0,45W
Banda de frequência: 2.400GHz - 2.480GHz
Perfil Bluetooth: A2DP (Perfil Avançado de Distribuição de Áudio), AVRCP (Perfil de Controlo
remoto de Áudio/Vídeo) Bluetooth 2.1 + EDR
GERAL
●Certifique-se de que o equipamento écolocado numa zona bem ventilada e de que há, pelo
menos, 10 cm (4”) de espaço livre de lado e por cima do aparelho.
●Use o aparelho numa superfície sólida e nivelada, não sujeita a vibração.
●Coloque o aparelho a, pelo menos, 30 cm (12”), de qualquer televisão CRT para evitar que a cor
do ecrãda TV sofra alterações. Se notar variações de cor, afaste mais o aparelho da TV. As
televisões LCD não sofrem este tipo de influência.
●Mantenha o aparelho afastado de luz solar direta, de campos magnéticos fortes, de póem
excesso, de humidade e de equipamento eletrónico/elétrico (computadores pessoais, faxes, etc.)
que produzam interferências elétricas.
● Não coloque nada por cima do aparelho.
● Não exponha o aparelho àhumidade nem a temperaturas extremas.
● Se o sistema não funcionar corretamente, desligue o cabo de alimentação AC da tomada de
parede. Volte a ligar o cabo AC e, depois, ligue o sistema.
● Em caso de trovoada, por uma questão de segurança, desligue o aparelho.
● Quando desligar o cabo da tomada de parede, segure-o pela ficha. Se puxar pelo fio, poderá
danificar fios internos.
● O cabo de alimentação AC éusado como dispositivo para desligar o aparelho, devendo estar
sempre disponível.
●Não remova a estrutura exterior, uma vez que poderáprovocar choque elétricos.
Qualquer reparação interna deveráser efetuada por um centro de assistência técnica.
DESCRIÇÃO DO APARELHO
This manual suits for next models
2
Table of contents
Languages:
Other lauson Portable Stereo System manuals
