LavorPro HK070F-A User manual

OPERATION MANUAL
KEROSENE FORCED AIR
Model Numbers
HK070F-A
HK125FW-A
HK175FW-A
HK215FW-A
© 2013 BE Pressure Supply Pty Ltd
1 / 105 Mulgrave Road, Mulgrave, NSW, 1756
Fax: 02-4577-3184 (PDLOVDOHV#EDUJURXSFRPDX
CONSUMER: READ AND SAVE THESE INSTRUCTIONS
ABN 48459810125
GENERAL HAZARD WARNING:
READ AND UNDERSTAND ALL OF THE INSTRUCTIONS IN THIS MANUAL
%()25($66(0%/,1*67$57,1*256(59,&,1*7+(+($7(5Be sure to comply with the
instructions and warnings provided with this heater. Failure to comply can result in fire or explosion
that can cause property loss, bodily injury, or loss of life. Only persons who can follow and
understand these instructions should operate or service this heater.
DANGER
NOT FOR USE IN RESIDENTIAL LIVING AREAS OR IN ENCLOSED SPACES
:,7+287$'(48$7(9(17,/$7,2172%(86(',1:(//9(17,/$7('
&200(5&,$/,1'8675,$/2&&83$1&,(6This is an unvented portable heater that uses
air (Oxygen) from within the area in which it is used. Failure to provide adequate combustion and
ventilation air will result in asphyxiation, carbon monoxide poisoning, bodily injury or death. Refer to
“Ventilation” on Page 7.
DANGER

© 2013, Lavorwash 2Oil Fired Radiant Heater User’s Manual
NEVER LEAVE HEATER UNATTENDED WHILE
BURNING, CONNECTED TO A POWER SOURCE
OR WHILE CONNECTED TO A FUEL SOURCE.
© 2013, BE Pressure Supply Pty Ltd Kerosene Forced Air Heater User’s Manual
NEVER LEAVE HEATER UNATTENDED
WHILE BURNING, CONNECTED TO A
POWER SOURCE OR WHILE
CONNECTED TO A FUEL SOURCE.
1
Table Of Contents
Safety Information.............................................1-2
)HDWXUHVDQG6SHFL¿FDWLRQV
HK070F-A Assembly............................................4
HK125FW / 175FW / 215FW-A Assembly..........5-6
Operation..........................................................7-6
Ventilation.............................................................7
Maintenance....................................................9-11
Wiring Diagram...................................................11
Troubleshooting Guide.......................................12
([SORGHG9LHZ
Parts List............................................................14
6DIHW\,QIRUPDWLRQ
),5(%851,1+$/$7,21$1'(;3/26,21+$=$5'Keep combustibles such
as; building materials, paper or cardboard a safe distance away from the heater
as recommended by these instructions. Never use the heater in spaces which contain products
such as; gasoline, solvents, paint thinners, dust particles, volatile or airborne combustibles or any
unknown chemicals. This is an unvented portable heater. It uses air (Oxygen) from the area in
which it is used. Adequate combustion and ventilation air must be provided. Refer to “Ventilation”
on page 7. Bulk fuel storage should be a minimum of 25 feet from heater.
WARNING
DO NOT OPERATE THIS HEATER UNTIL YOU HAVE READ AND THOROUGHLY
81'(567$1'7+(6(6$)(7<$1'23(5$7,1*,16758&7,216
Failure to comply with the precautions and instructions provided with this heater can result in death,
serious bodily injury, property loss or damage from the hazards of fire, soot production, explosions,
burns, asphyxiation or carbon monoxide poisoning. Only persons who can read and understand
these instructions should use or service this heater.
WARNING
Look for this icon throughout the manual for helpful tips on how to
assemble, use and clean your KFA Heater.
'212767$577+(+($7(5:+(1(;&(662,/+$6$&&808/$7('
WARNING
'212767$577+(+($7(5:+(17+(&+$0%(5,6+27
WARNING
THE INSTALLATION OF THIS HEATER SHALL COMPLY WITH THE REGULATIONS OF THE
$87+25,7,(6+$9,1*-85,6',&7,21

© 2013, Lavorwash 3Oil Fired Radiant Heater User’s Manual
NEVER LEAVE HEATER UNATTENDED WHILE
BURNING, CONNECTED TO A POWER SOURCE
OR WHILE CONNECTED TO A FUEL SOURCE.
© 2013, BE Pressure Supply Pty Ltd Kerosene Forced Air Heater User’s Manual
NEVER LEAVE HEATER UNATTENDED
WHILE BURNING, CONNECTED TO A
POWER SOURCE OR WHILE
CONNECTED TO A FUEL SOURCE.
2
6DIHW\,QIRUPDWLRQ
The products described in this manual are
NHURVHQHGLUHFW¿UHGIRUFHGDLUKHDWHUV
Kerosene forced air heaters are primarily
intended for use for temporary heating of
buildings under construction, alteration or repair.
'LUHFW¿UHGPHDQVWKDWDOORIWKHFRPEXVWLRQ
products of the heater enter the heated space.
This appliance is rated at 98% combustion
HI¿FLHQF\EXWGRHVSURGXFHVPDOODPRXQWVRI
carbon monoxide.
Carbon monoxide is toxic. Humans can tolerate
only small amounts of carbon monoxide and so
precautions should be taken to provide proper
ventilation. Failure to provide proper ventilation
in accordance with the instructions in this manual
can result in death.
People with breathing problems should consult a
physician before using this heater.
Early signs of carbon monoxide poisoning
UHVHPEOHWKHÀX6\PSWRPVRILPSURSHU
ventilation / carbon monoxide poisoning are:
+HDGDFKH'L]]LQHVV Nausea 'U\0RXWK
6RUH7KURDW%XUQLQJRI1RVHDQG(\HV
If you experience any of these symptoms:
GET FRESH AIR AT ONCE! Have your heater
serviced and check for proper ventilation. Some
people are more affected by carbon monoxide
than others. These include: pregnant women,
those with heart or lung problems, anemia or those
under the influence of alcohol or at high altitudes.
8VHWKLVKHDWHULQRQO\ZHOOYHQWLODWHGDUHDV
3URYLGHDWOHDVWDWKUHHVTXDUHIRRW
VTFPRSHQLQJRIRXWVLGHDLUIRU
HYHU\%WX+UKHDWHUUDWLQJ5HIHUWR
³9HQWLODWLRQ´RQSDJHIRUIXUWKHULQVWUXFWLRQV
ALWAYS use only the electrical power (voltage and
frequency) specified on the model plate of the heater.
ALWAYS use only three-prong, grounded outlet and
extension cord.
ALWAYS use only 14 AWG or better extension cord.
ALWAYS unplug the heater when not in use.
ALWAYS install the heater so that it is not directly
exposed to water spray, rain, dripping water, or wind.
NEVER use fuels such as gasoline, benzine, paint
thinners or other oil compounds in this heater.
NEVER refill the heater’s fuel tank while the
heater is operating or still hot. This heater is
EXTREMELY HOT while in operation.
NEVER block air inlet (rear) or air outlet (front).
NEVER use duct work in front or rear of heater.
NEVER move or handle heater while still hot.
NEVER transport heater with fuel in tank.
NEVER use with an external fuel tank.
Keep all combustible materials away from this heater.
0LQLPXP&OHDUDQFH)URP&RPEXVWLEOHV
HK070F-A HK125FW-A HK175FW-A HK215FW-A
Top 1.2 m 1.2 m 1.2 m 1.2 m
6LGHV 1.2 m 1.2 m 1.2 m 1.2 m
Front 2.4 m 2.4 m 2.4 m P
ALWAYS locate heater on a stable and level surface.
If your heater is equipped with a thermostat,
once it is plugged in, it can start at anytime in
accordance with the thermostat setting.
RISK OF INDOOR AIR
POLLUTION!
WARNING
CARBON MONOXIDE POISONING
MAY LEAD TO DEATH!
WARNING
RISK OF BURNS, FIRE AND
EXPLOSION!
WARNING
RISK OF ELECTRIC SHOCK!
WARNING
CAUTION! HOT WHILE IN
23(5$7,21'2127728&+
KEEP CHILDREN, ANIMALS, CLOTHING AND
&20%867,%/(6$:$<)520+($7(5
WARNING

© 2013, Lavorwash 4Oil Fired Radiant Heater User’s Manual
NEVER LEAVE HEATER UNATTENDED WHILE
BURNING, CONNECTED TO A POWER SOURCE
OR WHILE CONNECTED TO A FUEL SOURCE.
© 2013, BE Pressure Supply Pty Ltd Kerosene Forced Air Heater User’s Manual
NEVER LEAVE HEATER UNATTENDED
WHILE BURNING, CONNECTED TO A
POWER SOURCE OR WHILE
CONNECTED TO A FUEL SOURCE.
6SHFL¿FDWLRQV
Features
Model # HK070F-A
HK125FW-A HK175FW-A HK215FW-A
Rating: Kw / Btu/Hr 20.5 / 70,000 51.2 / 175,000
Fuel Consumption: L/Hr 2.00 5.07 6.17
Fuel Tank Capacity: Liters 19 49 49
Pump Pressure: psi /BAR 4.0 / 0.26 7.5 / 0.45 9.0 / 0.55
Volts: AC/Hz 240VAC / 50Hz 240VAC / 50Hz 240VAC / 50Hz 240VAC / 50Hz
Amps 1.5 2.7 2.8
Phase Single Single Single Single
6SHFL¿FDWLRQVVXEMHFWWRFKDQJHZLWKRXWQRWLFH
Hot Air Outlet Upper Shell
Lower Shell
Fuel Tank
Fan Guard
Pressure Gauge
Fuel Gauge
Fuel Cap
Side Cover
Thermostat Knob
Lamp
Power Cord
Power/Reset Switch
Handle Extension
Cord Wrap
Hot Air Outlet
Lower Shell
Upper Shell Digital
Temperature
Display
Front Handle
Extension
Cord Wrap
Rear Handle
Fan Guard
Pressure
Gauge
Storage Drawer
Fuel
Gauge
Fuel Cap
Power Cord
Power/Reset Switch
Lamp
Side Cover
Thermostat Knob
Fuel Tank
Drain Plug
Model: HK070F-A
Models: HK125FW-A / HK175FW-A / HK215FW-A
Figure 1
Figure 2

© 2013, Lavorwash 5Oil Fired Radiant Heater User’s Manual
NEVER LEAVE HEATER UNATTENDED WHILE
BURNING, CONNECTED TO A POWER SOURCE
OR WHILE CONNECTED TO A FUEL SOURCE.
© 2013, BE Pressure Supply Pty Ltd Kerosene Forced Air Heater User’s Manual
NEVER LEAVE HEATER UNATTENDED
WHILE BURNING, CONNECTED TO A
POWER SOURCE OR WHILE
CONNECTED TO A FUEL SOURCE.
4
$VVHPEO\,QVWUXFWLRQV
Models: HK070F-A
:KDW¶V,Q7KH%R[
Cord Wraps (2) Carry Handle (1) Black Screws (4)
Carry Handle Assembly
1. Align holes in the upper housing with the 2
KROHVLQWKHKDQGOHDVVKRZQLQ)LJXUH
2. Insert screws and tighten firmly.
Cord Wrap Assembly
1. Insert tabs into square slots in shell support
and line up screw holes as shown in Figure 4.
2. Insert screws and tighten firmly.
Tools Needed:
- Phillips Head Screw Driver
)LJXUH Figure 4
- Remove the heater and all packaging materials
from the shipping carton
1RWH6DYHWKHER[DQGSDFNDJLQJPDWHULDOV
IRUIXWXUHVWRUDJH

© 2013, Lavorwash 6Oil Fired Radiant Heater User’s Manual
NEVER LEAVE HEATER UNATTENDED WHILE
BURNING, CONNECTED TO A POWER SOURCE
OR WHILE CONNECTED TO A FUEL SOURCE.
© 2013, BE Pressure Supply Pty Ltd Kerosene Forced Air Heater User’s Manual
NEVER LEAVE HEATER UNATTENDED
WHILE BURNING, CONNECTED TO A
POWER SOURCE OR WHILE
CONNECTED TO A FUEL SOURCE.
5
- Remove the heater and all packaging
materials from the shipping carton.
Tools Needed:
- Phillips Head Screw Driver
- 8 mm open end wrench
- 19 mm open end wrench
$VVHPEO\,QVWUXFWLRQV
Models: HK125FW-A / HK175FW-A / HK215FW-A
:KDW¶V,Q7KH%R[
50 mm Screws (4) PP6FUHZV 8 mm Nuts (12) Cord Wraps (2)
Tires (2) Axle Nuts (2)
Spacers (2) Washers (2)
Spare Drain Plug (1)
Front Handle
Axle
Rear Handle
Wheel Support Frame
Tip: Be sure to remove the axle from the
side of the Styrofoam packaging. Tip: Use a power screwdriver and
locking wrench for easier assembly.

© 2013, Lavorwash 7Oil Fired Radiant Heater User’s Manual
NEVER LEAVE HEATER UNATTENDED WHILE
BURNING, CONNECTED TO A POWER SOURCE
OR WHILE CONNECTED TO A FUEL SOURCE.
© 2013, BE Pressure Supply Pty Ltd Kerosene Forced Air Heater User’s Manual
NEVER LEAVE HEATER UNATTENDED
WHILE BURNING, CONNECTED TO A
POWER SOURCE OR WHILE
CONNECTED TO A FUEL SOURCE.
$VVHPEO\,QVWUXFWLRQV
Models: HK125FW-A / HK175FW-A / HK215FW-A
1. Insert axle through holes in wheel support.
2. Slide washer, then spacer onto axle.
Slide wheel onto axle with the air valve facing
out and hold in place with the axle nuts. (See
Figure 5).
4. Place heater on wheel support and line up
holes on the fuel tank lip.
5. Attach front handle with (2) long screws
(50 mm) and (2) nuts through the second
hole from the front on both sides of the tank
lip and wheel support frame and tighten
firmly.
6. ,QVHUWVKRUWVFUHZVPPWKURXJKWKH
first hole from the front in the tank lip and
tighten firmly. Make certain all (4) screws are
secure.
7. Attach rear handle with (2) long screws
(50 mm) and (2) nuts through the third hole
from the rear of the heater on either side.
(See Figure 6)
8. Tilt the heater up gently so it is resting on the
front handle.
127('2127GRWKLVLIWKHUHLVIXHOLQWKHWDQN
9. Remove the wheels to secure the second set
of screws through the rear handle.
10.Secure the rear handle with (2) short screws
PPDQGQXWVDQGWLJKWHQILUPO\
11.Replace wheels with the valve facing out and
tighten with the wheel nuts.
12.Tilt heater back down onto wheels and check
all screws and nuts to make sure they are
secure.
Figure 5
Axle
Axle Nut Washer
Spacer
Tire
Wheel Support Frame
6
Tip: Do not tighten the nuts fully. You will
need to remove the wheels in a later step.
Tip: You will secure the back of the rear
handle in a later step by tilting the heater
up the front handle as shown in figure 7
Figure 6
Front Handle Rear Handle
Unused Hole
Wheel Support Frame
Tank Lip
Figure 7
12

© 2013, Lavorwash 8Oil Fired Radiant Heater User’s Manual
NEVER LEAVE HEATER UNATTENDED WHILE
BURNING, CONNECTED TO A POWER SOURCE
OR WHILE CONNECTED TO A FUEL SOURCE.
© 2013, BE Pressure Supply Pty Ltd Kerosene Forced Air Heater User’s Manual
NEVER LEAVE HEATER UNATTENDED
WHILE BURNING, CONNECTED TO A
POWER SOURCE OR WHILE
CONNECTED TO A FUEL SOURCE.
2SHUDWLRQ
)XHOLQJ7KH+HDWHU
.HURVHQH.
For optimal performance of this heater, it is
strongly suggested that 1-K kerosene be used.
.NHURVHQHKDVEHHQUH¿QHGWRYLUWXDOO\
eliminate contaminants, such as sulfur, which can
cause a rotten egg odor during the operation of
the heater. Using diesel fuel can cause excess
soot production. Do not use Bio-Diesel as this
IXHOZLOOGDPDJH\RXUKHDWHU¶VVHDOVDQG¿OWHU
- NEVER use fuel such as, benzene, alcohol, white
glass, camp stove fuel, paint thinners, or other oil
compounds in this heater. THESE ARE VOLATILE
FUELS THAT CAN CAUSE A FIRE OR
EXPLOSION.
- NEVER store kerosene in the living space.
Kerosene should be stored in a well ventilated area
outside the living area.
- NEVER store kerosene in direct sunlight or near a
source of heat.
- NEVER use kerosene that has been stored from
one season to the next. Kerosene deteriorates
over time. OLD KEROSENE WILL NOT BURN
PROPERLY IN THIS HEATER.
127(.HURVHQHVKRXOGRQO\EHVWRUHGLQDEOXH
FRQWDLQHUWKDWLVFOHDUO\PDUNHG³.HURVHQH´
1HYHUVWRUHNHURVHQHLQDUHGFRQWDLQHU5HGLV
DVVRFLDWHGZLWKJDVROLQH
9HQWLODWLRQ
5LVNRILQGRRUDLUSROOXWLRQDQG&DUERQ
0RQR[LGH3RLVRQLQJ8VHKHDWHURQO\LQZHOO
YHQWLODWHGDUHDV
5HIHUWR6DIHW\,QIRUPDWLRQRQSDJHVIRU
LQIRUPDWLRQDERXW&DUERQ0RQR[LGH3RLVRQLQJ
- ALWAYS provide a fresh air opening in the heated
space of at least 2,800 square centimeters
VTIWIRUHDFK%WX+URIKHDWHURXWSXW
Provide a larger opening if more heaters are being
used.
As an example, a HK125FW-A will require:
- A two car garage door open 16 cm or
- A single car garage open 22 cm, or
7ZRFPZLQGRZVRSHQFP
0LQLPXP9HQWLODWLRQ2SHQLQJ1HHGHG
HK070F-A
HK125FW-A HK175FW-A HK215FW-A
2.1 ft.² IWð IWð 6.5 ft.²
64 cm² 116 cm² 162 cm² 199 cm²
NEVER FILL THE FUEL TANK
,1'2256$/:$<6),//
7+(7$1.287'2256%(685(7+$7
THE HEATER IS ON LEVEL GROUND WHEN
)8(/,1*$1'1(9(529(5),//7+(7$1.
CAUTION
NEVER REFUEL THIS HEATER
WHILE IT IS HOT OR
23(5$7,1*),5(25(;3/26,21&28/'
5(68/7
DANGER
CARBON MONOXIDE POISONING
MAY LEAD TO DEATH!
DANGER
7
DO NOT USE GASOLINE OR
&5$1.&$6('5$,1,1*6
WARNING

© 2013, Lavorwash 9Oil Fired Radiant Heater User’s Manual
NEVER LEAVE HEATER UNATTENDED WHILE
BURNING, CONNECTED TO A POWER SOURCE
OR WHILE CONNECTED TO A FUEL SOURCE.
© 2013, BE Pressure Supply Pty Ltd Kerosene Forced Air Heater User’s Manual
NEVER LEAVE HEATER UNATTENDED
WHILE BURNING, CONNECTED TO A
POWER SOURCE OR WHILE
CONNECTED TO A FUEL SOURCE.
2SHUDWLRQ
6WDUWLQJWKH+HDWHU,JQLWLRQ
1. Fill the tank with kerosene or other approved
fuel until needle on fuel gauge points to “F”.
2. Replace fuel cap and tighten firmly.
Connect the heater to a three prong
(grounded) power source. You must use a
three prong (grounded) extension cord that is
at least 1.8 meters long and is a minimum of
14 AWG rating.
4. Turn thermostat control knob to desired
temperature setting. The thermostat set range
LVIURP&WR&
5. Move power switch to “On” position. The
power indicator light and room temperature
display will illuminate and heater will ignite.
(See Figure 10)
127(,ILIWKHKHDWHUVWLOOGRHVQRWLJQLWHUHIHUWR
³7URXEOHVKRRWLQJ*XLGH´RQSDJH
127(7KH+.)$GRHVQRWKDYH
DURRPWHPSHUDWXUHGLVSOD\IHDWXUH
The room temperature display will indicate the
following:
- When the temperature is less than -17.8 ºC the
display says “LO”.
:KHQWKHWHPSHUDWXUHLVPRUHWKDW&WKH
display says “HI”.
- Between -17.8 °&DQG°C the display shows
actual temperature.
6WRSSLQJ5HVWDUWLQJ+HDWHU
- To stop the heater, move the power switch to the
“Off” position and unplug the power cord.
- To restart the heater; wait 10 seconds and follow
ignition steps.
Figure 9
Power Switch
Power Switch
Thermostat Knob
Temperature Display
Figure 10
8
TIP: If the heater does not ignite, the
thermostat may be set too low. Turn
the control knob to a higher setting until the
heater ignites. If the heater does not ignite;
move switch to “Off” position, check steps 1-3
above and then move switch to “On” position.

© 2013, Lavorwash 10 Oil Fired Radiant Heater User’s Manual
NEVER LEAVE HEATER UNATTENDED WHILE
BURNING, CONNECTED TO A POWER SOURCE
OR WHILE CONNECTED TO A FUEL SOURCE.
© 2013, BE Pressure Supply Pty Ltd Kerosene Forced Air Heater User’s Manual
NEVER LEAVE HEATER UNATTENDED
WHILE BURNING, CONNECTED TO A
POWER SOURCE OR WHILE
CONNECTED TO A FUEL SOURCE.
0DLQWHQDQFH
Long Term Storage:
Model HK070F-A:
1. Use an approved siphon to drain fuel through the
fuel cap opening.
Models / HK125FW-A / HK175FW-A / HK215FW-A:
1. Drain fuel through the drain plug in the bottom
of the fuel tank.
2. To remove the drain plug, pull the plug grip
downward and remove the seal head from the
drain hole in the tank. (See Figure 11)
Using a small amount of kerosene, rinse and
swirl the kerosene inside of the fuel tank,
empty the tank fully.
4. To replace the drain plug; push the drain head
fully into the drain hole and secure by pushing
the seal cap fully into the head hole.
(See Figure 12)
,03257$171HYHUVWRUHOHIWRYHUNHURVHQHEHWZHHQ
VHDVRQVXVLQJROGIXHOFDQGDPDJHKHDWHU
6HUYLFH
DO NOT TAMPER WITH THE UNIT. HAVE
A COMPETENT SERVICEMAN MAKE ANY
NECESSARY ADJUSTMENT OR REPAIRS.
Use only original equipment parts. The use of
alternate or third party components can cause unsafe
operating conditions.
We suggest following a maintenance schedule as follows:
FUEL / FUEL TANK:
Flush tank every 200 hours of operation or as needed.
'2127ÀXVKZLWKZDWHUXVHIUHVK.NHURVHQHRQO\
AIR FILTERS:
7KHDLULQWDNH¿OWHUVKRXOGEHUHSODFHGRUZDVKHG
with soap and water and dried thoroughly every 500
hours of operation or less depending on conditions.
7KHRXWSXWDQGOLQW¿OWHUVVKRXOGEHUHSODFHG
every 500 hours of operation or less depending
on conditions.
127(8VHRIGLHVHOIXHOPD\UHTXLUH
DGGLWLRQDOPDLQWHQDQFH
Drain Plug
Drain Plug Grip
(Pull Down)
Figure 11
Figure 12
Drain Plug
Fuel Tank
Seal Head
Head Flange
Seal Cap
Air Output Filter
Intake Filter
Lint Filter End Filter
)LJXUH
9
TIP: Follow the long term storage
LQVWUXFWLRQVWRÀXVKWKHWDQN
1HYHUVHUYLFHKHDWHUZKLOHLWLV
SOXJJHGLQRUKRW
WARNING

© 2013, Lavorwash 11 Oil Fired Radiant Heater User’s Manual
NEVER LEAVE HEATER UNATTENDED WHILE
BURNING, CONNECTED TO A POWER SOURCE
OR WHILE CONNECTED TO A FUEL SOURCE.
© 2013, BE Pressure Supply Pty Ltd Kerosene Forced Air Heater User’s Manual
NEVER LEAVE HEATER UNATTENDED
WHILE BURNING, CONNECTED TO A
POWER SOURCE OR WHILE
CONNECTED TO A FUEL SOURCE.
0DLQWHQDQFH
6HUYLFH&RQWLQXHG
FAN BLADES:
Blades should be cleaned at least once per
heating season, depending on conditions.
Remove all accumulated dust and dirt with a
damp cloth, taking care not to bend any of the
fan blades. Be sure the blades are dry before
re-starting the heater. For fan assembly removal
see Figure 14.
FUEL FILTER:
The fuel filter should be cleaned at least twice
per heating season. Clean the filter by rinsing
it in clean 1-K Kerosene. Contaminated fuel
could make cleaning the fuel filter necessary
immediately.
127(7RUHPRYHWKHILOWHUIURPPRGHO
+.)$WXUQILOWHUFORFNZLVH7R
UHPRYHWKHILOWHUIURPPRGHOV+.):$
+.):$+.):$WXUQILOWHU
FRXQWHUFORFNZLVH6HH)LJXUH
SPARK PLUG:
Clean and re-gap every 600 hours of operation, or
replace as needed. After removing the spark plug,
clean the terminals with a wire brush. Re-gap the
WHUPLQDOVWR´PP6HH)LJXUH
PHOTOCELL:
The photocell should be cleaned using a cotton
swab dipped in alcohol or water at least once
per heating season, or more depending on
conditions. See Figure 17.
Figure 14
Fan Blade
Motor Shaft
Set Screw
Figure 15
Fuel Filter
Fuel Line
Side Cover
Figure 16
Ignitor Wire
Spark Plug
Gap
Burner Head
XX
Figure 17
Photocell Photocell lens
Photocell Wire
10

© 2013, Lavorwash 12 Oil Fired Radiant Heater User’s Manual
NEVER LEAVE HEATER UNATTENDED WHILE
BURNING, CONNECTED TO A POWER SOURCE
OR WHILE CONNECTED TO A FUEL SOURCE.
© 2013, BE Pressure Supply Pty Ltd Kerosene Forced Air Heater User’s Manual
NEVER LEAVE HEATER UNATTENDED
WHILE BURNING, CONNECTED TO A
POWER SOURCE OR WHILE
CONNECTED TO A FUEL SOURCE.
:LULQJ'LDJUDP
0DLQWHQDQFH
PUMP PRESSURE:
While heater is operating, turn adjusting screw
clockwise to increase, counter-clockwise to
decrease pressure. Correct pump pressure is as
follows:
Model Number Pump Pressure
HK070F-A 4.0 PSI / 0.26 BAR
HK125FW-A 36,%$5
HK175FW-A 7.5 PSI / 0.45 BAR
HK215FW-A 9.0 PSI / 0.55 BAR
7ROHUDQFH
NOZZLES:
Nozzles should be cleaned or replaced at least
once per heating season. Contaminated fuel could
make this necessary immediately. To clean dirt
from nozzle, blow compressed air through nozzle
front. It may be necessary to soak the nozzle in
1-K kerosene to loosen any dirt particles.
Figure 18
Adjusting Screw
Pressure Valve
Figure 19
Nozzle
Nozzle Face
Burner Head
11
)LJXUH+.)$+.):$+.):$+.):$
CONTROL PCB
CN1
ORANGE
PINK
BLACK
BLACK
BLACK
WHITE
EARTH
GREEN
SPARK PLUG
IGNITOR
PUMP
MOTOR
CAPACITOR
3.5UF/450VAC
(HK070F-A)
7uF/450VAC
(HK125FW-A)
(HK175FW-A)
(HK215FW-A)
MOTOR 1
MOTOR 2
ACIN 2
*
*
*
BLEU: HK070F-A
RED: HK125FW-A / HK175FW-A/
HK215FW-A
ACIN 1
FUSE
5A/250AVC
GREEN
EARTH
BLACK
WHITE
AC 240V
50Hz
POWER
PLUG
BLACK
POWER
SWITCH
LIMIT
CONTROL
PHOTOCELL
BLACK
BLACK
YELLOW
WHITE
WHITE
BLACK
BLACK
ROOM
SENSOR
R-TH
CN2CN2 CDS
POWER LAMP
(LED)
THERMOSTAT
(TEMP. CONTROL
NOTE:
Models 125 / 175 / HK215FW-A
have a digital display.

© 2013, Lavorwash 13 Oil Fired Radiant Heater User’s Manual
NEVER LEAVE HEATER UNATTENDED WHILE
BURNING, CONNECTED TO A POWER SOURCE
OR WHILE CONNECTED TO A FUEL SOURCE.
© 2013, BE Pressure Supply Pty Ltd Kerosene Forced Air Heater User’s Manual
NEVER LEAVE HEATER UNATTENDED
WHILE BURNING, CONNECTED TO A
POWER SOURCE OR WHILE
CONNECTED TO A FUEL SOURCE.
12
7URXEOHVKRRWLQJ*XLGH
Problem Possible Cause Solution
Heater Ignites, but main PCB shuts
off after a short period of time.
/DPSÀLFNHUVDQG/('GLVSOD\
shows “E1”.
1. Incorrect pump pressure.
2. 'LUW\LQSXWRXWSXWRUOLQW¿OWHU
'LUW\IXHO¿OWHU
4. Nozzle is dirty.
5. Photocell lens is dirty.
6. Photocell not installed properly.
7. Photocell is defective.
8. Improper electrical connection
between main PCB and photocell.
1. Adjust pump pressure.
2. &OHDQUHSODFHDLURUOLQW¿OWHU
&OHDQUHSODFHIXHO¿OWHU
4. Clean / replace Nozzle.
5. Clean / replace photocell.
6. Adjust photocell position
7. Replace photocell
8. Check wiring connections
(see wiring diagrams on page 11).
Heater will not operate or motor
runs for a short time.
/DPSÀLFNHUVDQG/('GLVSOD\
shows “E1”.
1. No kerosene in the fuel tank.
2. Incorrect pump pressure.
Corroded spark plug or incorrect
plug gap.
4. 'LUW\IXHO¿OWHU
5. Dirty nozzle.
6. Moisture in fuel tank.
7. Improper electrical connection
between transformer and circuit
board.
8. Ignitor wire not connected to spark
plug.
9. Defective ignitor.
1. Fill tank with fresh kerosene.
2. Adjust pump pressure.
Clean / replace spark plug.
4. &OHDQUHSODFHIXHO¿OWHU
5. Clean / replace nozzle.
6. Rinse fuel tank with clean, fresh
kerosene.
7. Inspect all electrical connections.
(See wiring diagrams on page 11.)
8. Re-attach ignitor wire to spark plug.
9. Replace ignitor.
Fan does not operate when heater
is plugged in and power switch is
in the “ON” position. The lamp is
ÀLFNHULQJRUDQG/('GLVSOD\VKRZV
“E1” or “E2”.
1. Thermostat is set too low.
2. Broken electrical connection
between main PCB and motor.
1. Rotate thermostat to a higher
setting
2. Inspect all electrical connections
(see wiring diagrams on page 11).
/DPSLVÀLFNHULQJDQG/('GLVSOD\
VKRZV³(´
1. Thermostat switch has failed. 1. Replace thermostat switch (see
Wiring diagrams on page 11).
Poor combustion and / or excess
soot production.
1. 'LUW\LQSXWRXWSXWRUOLQW¿OWHU
2. 'LUW\IXHO¿OWHU
Poor quality of fuel.
4. PSI is too high or too low.
1. &OHDQUHSODFHDLURUOLQW¿OWHU
2. &OHDQUHSODFHIXHO¿OWHU
Flush fuel tank and refuel heater.
4. Use proper pressure.
Heater does not turn on and the
lamp is not lit.
1. Temperature limit sensor has
overheated.
2. No electrical power.
Fuse is blown.
4. Improper electrical connection
between temperature limit sensor
and circuit board.
1. Push power switch to “OFF and
allow heater to cool for 10 minutes.
Restart heater.
2. Check power cords for proper
connection and test the power
supply.
Check / replace the fuse.
4. Inspect all electrical connections
(see wiring diagrams on page 11).

© 2013, Lavorwash 14 Oil Fired Radiant Heater User’s Manual
NEVER LEAVE HEATER UNATTENDED WHILE
BURNING, CONNECTED TO A POWER SOURCE
OR WHILE CONNECTED TO A FUEL SOURCE.
© 2013, BE Pressure Supply Pty Ltd Kerosene Forced Air Heater User’s Manual
NEVER LEAVE HEATER UNATTENDED
WHILE BURNING, CONNECTED TO A
POWER SOURCE OR WHILE
CONNECTED TO A FUEL SOURCE.
13
17
1416
11
15
12 40
43
34
4
19
17
3
535
8
7
1
2**
9
28
29
27
32
21
22
23
31 26
30
29
18
54**
46*
48**
51
39
38
6
45
44
36
42**
10
41
20
33
37
51**
50**
52**
47**
55
* HK070F-A Only
** HK125FW-A / HK175FW-A / HK215FW-A Only
([SORGHG9LHZ

© 2013, Lavorwash 15 Oil Fired Radiant Heater User’s Manual
NEVER LEAVE HEATER UNATTENDED WHILE
BURNING, CONNECTED TO A POWER SOURCE
OR WHILE CONNECTED TO A FUEL SOURCE.
© 2013, BE Pressure Supply Pty Ltd Kerosene Forced Air Heater User’s Manual
NEVER LEAVE HEATER UNATTENDED
WHILE BURNING, CONNECTED TO A
POWER SOURCE OR WHILE
CONNECTED TO A FUEL SOURCE.
)XHO7DQN$VVHPEO\
2 Drain Plug – 70-002-0105 70-002-0105 70-002-0105
)XHO*DXJH$VVHPEO\
)XHO)LOWHU$VVHPEO\
5 Fuel Cap 70-006-0100 70-006-0100 70-006-0100 70-006-0100
3RZHU&RUG
3RZHU6ZLWFK
8 Window Display – 70-040-0100 70-040-0100 70-040-0100
7KHUPRVWDW&RQWURO.QRE
10 Lower Shell – – – –
$LU/LQH
12 Thermostat Limit Control 70-019-0100 70-019-0205 70-019-0100 70-019-0200
&RPEXVWLRQ&KDPEHU$VVHPEO\
14 Photocell Bracket 70-010-0101 70-010-0101 70-010-0101 70-010-0101
)XHO/LQH
16 Photocell Assembly 70-016-0100 70-016-0100 70-016-0100 70-016-0100
%XUQHU+HDG$VVHPEO\
1R]]OH.LW
19 Spark Plug Kit 70-052-0100 70-052-0200 70-052-0200 70-052-0200
20 Motor and Pump Assembly 70-020-0570 70-020-0575 70-020-0580 70-028-0580
21 Motor 70-021-0501 70-021-0511 70-021-0521 70-021-0521
22 Pump Body 70-020-0101 70-020-0101 70-020-0101 70-020-0401
5RWRU.LW
24 End Pump Cover 70-020-0102 70-020-0102 70-020-0102 70-020-0102
25 Filter Kit 70-054-0100 70-054-0100 70-054-0100 70-054-0100
26 Lint Filter 70-054-0102 70-054-0102 70-054-0102 70-054-0102
27 Output Filter 70-054-0100 70-054-0100 70-054-0100 70-054-0100
28 Intake Filter 70-054-0101 70-054-0101 70-054-0101 70-054-0101
(QG)LOWHU&RYHU
3OXJ3XPS$GMXVWPHQW.LW
1LSSOH
&DSDFLWRU
)DQ$VVHPEO\
,JQLWRU
5LJKW6LGH&RYHU
/HIW6LGH&RYHU
)DQ*XDUG
0DLQ3&%$VVHPEO\
)XVH
40 Clip Nut 70-001-0105 70-001-0105 70-001-0105 70-001-0105
41 Upper Shell – – – –
6WRUDJH%R[ ±
%XVKLQJ*URPPHW
44 Air Pressure Gauge 70-025-0100 70-025-0100 70-025-0100 70-025-0100
&RUG%XVKLQJ
+DQGOH ± ± ±
47 Front Handle – 70-042-0100 70-042-0200 70-042-0200
5HDU+DQGOH ±
49 Wheel Support Frame – 70-041-0101 70-041-0201 70-041-0201
50 Wheel Axle – 70-041-0115 70-041-0205 70-041-0205
51 Wheel (Pneumatic) – 70-041-0150 70-041-0150 70-041-0150
52 Wheel Nut – 70-041-0550 70-041-0550 70-041-0550
+DUGZDUH.LW
&RUG:UDS
55 Motor Supporter 70-020-0600 70-020-0610 70-020-0610 70-020-0610
Item Part Number for Models:
1R 'HVFULSWLRQ HK070F-A HK125FW-A HK175-FW HK215FW-A
14
3DUWV/LVW

© 2013, Lavorwash 16 Oil Fired Radiant Heater User’s Manual
NEVER LEAVE HEATER UNATTENDED WHILE
BURNING, CONNECTED TO A POWER SOURCE
OR WHILE CONNECTED TO A FUEL SOURCE.
© 2013, BE Pressure Supply Pty Ltd Kerosene Forced Air Heater User’s Manual
NEVER LEAVE HEATER UNATTENDED
WHILE BURNING, CONNECTED TO A
POWER SOURCE OR WHILE
CONNECTED TO A FUEL SOURCE.
15
____________________________________________________________
____________________________________________________________
____________________________________________________________
____________________________________________________________
____________________________________________________________
____________________________________________________________
____________________________________________________________
____________________________________________________________
____________________________________________________________
____________________________________________________________
____________________________________________________________
____________________________________________________________
____________________________________________________________
____________________________________________________________
____________________________________________________________
____________________________________________________________
____________________________________________________________
____________________________________________________________
____________________________________________________________
____________________________________________________________
____________________________________________________________
____________________________________________________________
____________________________________________________________
____________________________________________________________
____________________________________________________________
____________________________________________________________
____________________________________________________________
____________________________________________________________
____________________________________________________________
____________________________________________________________
____________________________________________________________
____________________________________________________________
This manual suits for next models
3
Table of contents
Other LavorPro Heater manuals
Popular Heater manuals by other brands
Master
Master BLP 11 User and Maintenance Book
Harvia
Harvia M45 Instructions for installation and use
Aurora
Aurora Mini Series technical information

Avenir
Avenir ABASK installation guide
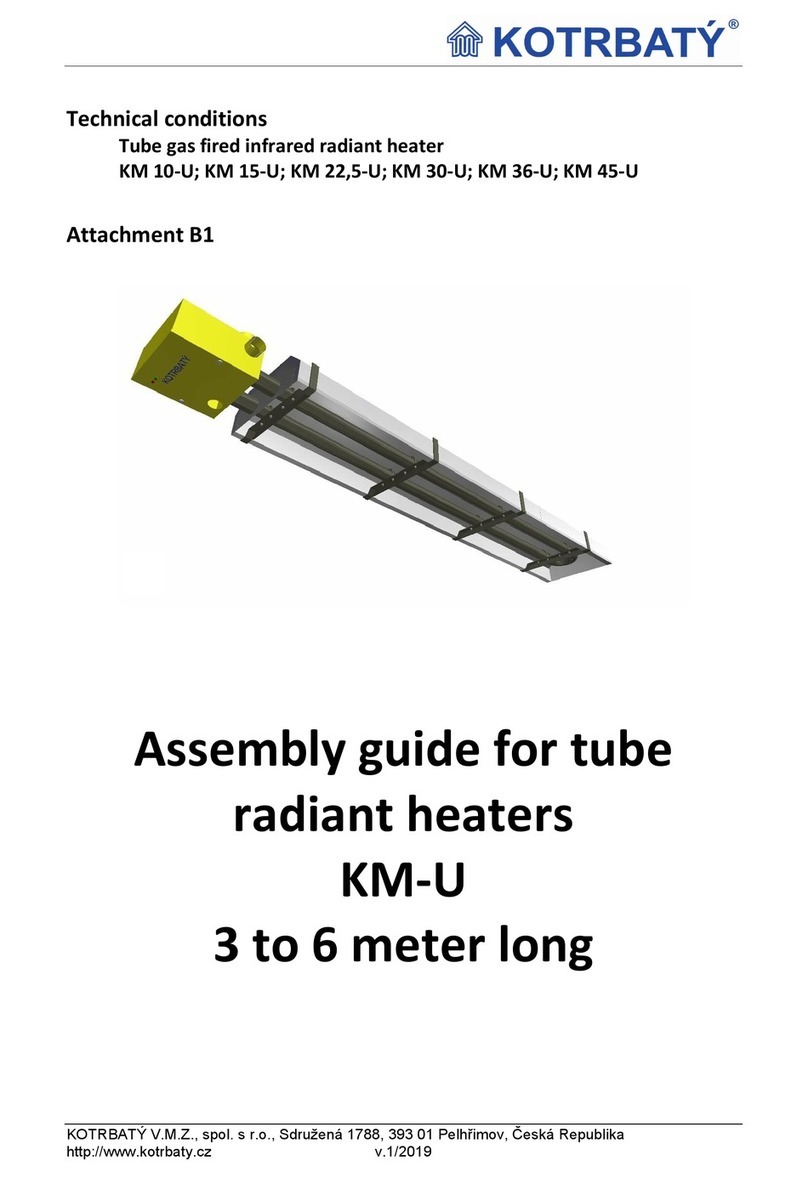
KOTRBATY
KOTRBATY KM-U Series Assembly guide

Superior Radiant
Superior Radiant Premier VS-VH Installation, operation and maintenance instructions
