LavorPro TEKNA Series User manual
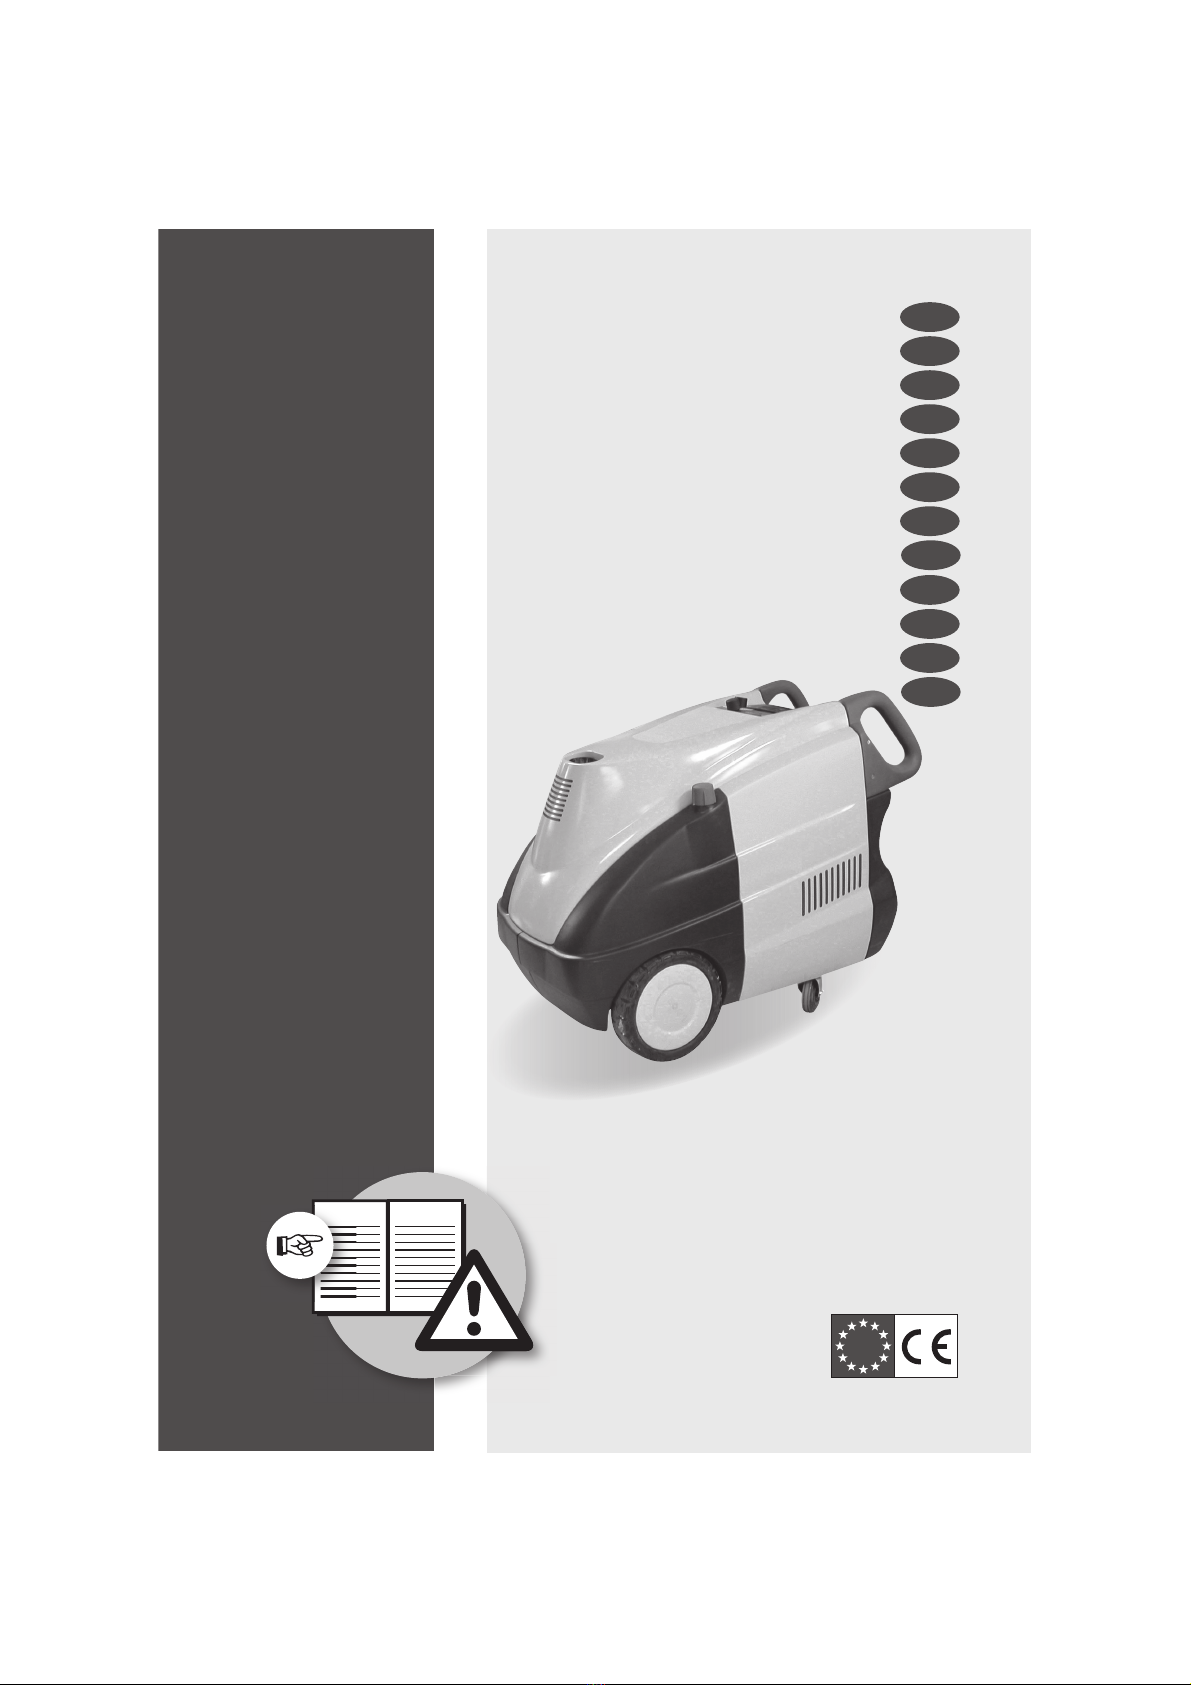
TEKNA MAXIMA HYPER T
IT
EN
FR
DE
ES
FI
NL
RU
EL
HR
(IT) ATTENZIONE: LEGGERE LE ISTRUZIONI PRIMA DELL’ UTILIZZO.
(EN) WARNING: READ THE INSTRUCTIONS CAREFULLY BEFORE USE.
(FR) ATTENTION: LIRE ATTENTIVEMENT LES ISTRUCTIONS AVANT L’USAGE.
(DE) ACHTUNG: DIE ANWEISUNGEN BITTE VOR GEBRAUCH SORGFÄLTIG LESEN.
(ES) ADVERTENCIA: LEER ATENTAMENTE LAS ADVERTENCIAS ANTES EL USO DE APARADO.
(NL) LET OP: VÓÓR GEBRUIK DE GEBRUIKSAANWIJZING AANDACHTIG LEZEN.
(EL) ΠΡΟΣΟΧΗ: ΔΙΑΒΑΣΤΕ ΤΙΣ ΟΔΗΓΙΕΣ ΠΡΙΝ ΤΗ ΧΡΗΣΗ.
(PT) ATENÇÃO: LER ATENTAMENTE AS INTRUÇÕES ANTES DA UTILIZAÇÃO.
(FI) HUOMIO: LUE OHJEET ENNEN KÄYTTÖÄ.
(RU) ВНИМАНИЕ: ПЕРЕД ИСПОЛЬЗОВАНИЕМ ПРОЧИТАЙТЕ ИНСТРУКЦИЮ ПО ЭКСПЛУАТАЦИИ.
(HR) PAŽNJA: PRIJE UPOTREBE PROČITAJTE UPUTE.
(SL) POZOR: PRED UPORABO PREBERITE NAVODILA.
PT
SL

TARGHETTA DATI TECNICI
Controllare che i dati tecnici riportati sulla targhetta siano corrispondenti con quelli della rete
elettrica e idrica a cui si vuole collegare la macchina.
TECHNICAL DATA PLATE
Check if the technical data on the plate correspond to those of the electricity-and waternet,
to which the machine has to be connected.
PLAQUE DONNÉES TECHNIQUES
Contrôler que les données techniques reportées sur la plaque correspondent à celles des
réseaux électriques et hydriques auxquels la machine sera branchée.
FABRIKSCHILD MIT TECHNISCHEN DATEN
Die auf dem Fabrikschild angegebenen Daten müssen mit der anliegenden Netzspannung
und Wasserleitung übereinstimmen.
PLACA DATOS TECNICOS
Controlar que los datos técnicos indicados en la placa correspondan con los de la red
eléctrica e hidraulica a las cuales se desea conectar la màquina.
TECHNISCHE GEGEVENS PLAATJE
Controleer of the technische gegevens op de plaatje corresponderen met die van het
electriciteits-en waterleidingnet waaraan de machine wordt gekoppeld.
ΠΛΑΚΕΤΑ ΤΕΧΝΙΚΩΝ ∆Ε∆ΟΜΕΝΩΝ
Ελέγχετε ότι τα τεχνικά δεδομένα που αναφέρονται στη πλακέτα αντιστοιχούν με εκείναι του
ηλεκτρικού και υδατικού δικτύου στο οποίο θέλετε να συνδέσετε τη μηχανή.
PLAQUETA DADOS TÉCNICOS
Controle que os dados técnicos indicados ne plaqueta correspondam com aqueles da rede
eléctrica e hídrica onde se dereja ligar a máquina.
TEKNISET TIEDOT SISÄLTÄVÄ KILPI
Tarkasta, että kilvessä olevat tekniset tiedot vastaavat verkkojännitettä ja vesijohtoverkostoa,
johon laite halutaan kytkeä.
ТАБЛИЧКА С ТЕХНИЧЕСКИМИ ДАННЫМИ
Проверить, чтобы технические данные, приведенные на табличке соответствовали
электрической и гидравлической сети, к которой будет подсоединяться машина.
TABLICA SA TEHNIČKIM PODACIMA
Kontrolirajte da li se tehnički podaci navedeni na tabli sa podacima podudaraju s onima
električne i vodovodne mreže na koju se želi obaviti povezivanje mašine.
TABLICA S TEHNIČNIMI PODATKI
Preverite, da so na tablici navedeni tehnični podatki skladni s podatki električnega in
vodovodnega omrežja, na kateri nameravate stroj priključiti.
6
7
12
9
8
10
11
Fig. 1
> PRINCIPALI ORGANI DI COMANDOtMAIN CONTROLStPRINCIPAUX ORGANES
DE COMMANDEtHAUPTSCHALTERtPRINCIPALES ÓRGANOS DE CONTROLtHOOFDSCHAKELAARtΚΥΡΙΑ ΟΡΓΑΝΑ ΕΛΕΓΧΟΥtPRINCIPAIS ÓRGÃOS DE COMANDO
tPÄÄOHJAUSLAITTEET tОСНОВНЫЕ ОРГАНЫ УПРАВЛЕНИЯtGLAVNI KOMANDNI
DIJELOVI tGLAVNI DELI ZA UPRAVLJANJE
34
2
1
5

(IT)
1Interruttore elettropompa
2Interruttore bruciatore con regolatore
3Regolatore detergente
4Manometro
5Spie
6Uscita acqua alta pressione
7Entrata acqua + filtro
8Pistola
9Lancia
10 Tubo alta pressione
11 Raccordo portagomma
12 Ugello
(EN)
1Electropump switch
2Burner switch with regulator
3Detergent regulator
4Pressure gauge
5Pilot lights
6High pressure water outlet
7Water inlet + filter
8Gun
9Lance
10 High pressure hose
11 Rubber hose fitting
12 Nozzle
(FR)
1Interrupteur électropompe
2Interrupteur brûleur avec régulateur
3Régulateur détérgent
4Manomètre
5Voyants
6Sortie eau haute pression
7Entrée d’eau avec filtre
8Pistolet
9Lance
10 Flexible H.P.
11 Raccord porte-joint
12 Buse
(DE)
1Schalter Elektropumpe
2Schalter Brenner mit Einstellung
3Reinigungsmittel-Dosierknopf
4Manometer
5Kontrolllampen
6Wasseraustritt Hochdruck
7Einlauf + filter
8Pistole
9Lanze
10 Hochdruckschlauch
11 Anschluß Gummischlauch
12 Düse
(ES)
1Interruptor eléctrobomba
2Interruptor quemador con regulador
3Regulador detergente
4Manómetro
5Testigos
6Salida agua alta presión
7Entrada + filtro
8Pistola
9Lanza
10 Tubo alta presión
11 Racor del porta manguera
12 Boquilla
(NL)
1Schakelaar van de elektro pomp
2
Schakelaar van de verwarmer met regelaar
3Schoonmaakmiddelregelaar
4Manometer
5Controlelichtjes
6Hogedruk water uitlaat
7Wateringang met filter
8Pistool
9Lans
10 Hogedrukslang
11 Rubberslang verbindingsstuk
12 Spuitdop
(EL)
1∆ιακόπτης ηλεκτρικής αντλίας
2∆ιακόπτης καυστήρα με ρυθμιστή
3Ρυθμιστής απορρυπαντικού
4Μανόμετρο
5Προειδοποιητικές λυχνίες
6Έξοδος νερού υψηλής πίεσης
7Είσοδος νερού + φίλτρο
8Πιστόλι
9Σωλήνας εκτόξευσης
10 Σωλήνας υψηλής πίεσης
11 Συνδετικό εύκαμπτου σωλήνα
12 Ακροφύσιο
(PT)
1Interruptor bomba eléctrica
2
Interruptor do queimador com regulação
3Regulador detergente
4Manómetro
5Indicadores luminosos
6Saída água alta pressão
7Entrada água + filtro
8Pistola
9Lança
10 Tubo alta pressão
11 Junção porta borracha
12 Bico injector

(FI)
1Sähköpumpun katkaisin
2Polttimen katkaisin säätimellä
3Pesunesteen säädin
4Painemittari
5Merkkivalot
6Korkeapaineveden ulostulo
7Veden sisäänmeno + suodatin
8Pistooli
9Suihkuputki
10 Korkeapaineputki
11 Letkuliitos
12 Suutin
(RU)
1Выключатель электронасоса
2выключатель горелки с регулятором
3Регулятор моющего средства
4Манометр
5Индикаторы
6Выход воды под высоким давлением
7Вход воды + фильтр
8Пистолет
9Трубка опрыскивателя
10 Шланг высокого давления
11 Патрубок держателя шланга
12 Горелка
(HR)
1Prekidač električne pumpe
2Prekidač gorionika s regulatorom
3Regulator deterdženta
4Manometro
5Kontrolna svjetla
6Izlaz vode pod visokim pritiskom
7Ulaz za vodu + filtar
8Pištolj
9Usmjerivač
10 Cijev pod visokim pritiskom
11 Spojnica nosač gumice
12 Prskalica
(SL)
1Stikalo električne črpalke
2Stikalo gorilnika z regulatorjem
3Regulator čistila
4Manometer
5Signalne lučke
6Izstop vode z visokim tlakom
7Vstop vode + filter
8Brizgalka
9Brizgalna cev
10 Visokotlačna cev
11 Priključek gumijaste cevi
12 Šoba
INDICE pag.
Simboli - Installazione 5
Avviamento - Fuori servizio 6
Indicazioni generali - Avvertenze generali 7
Alimentazione idrica - Tubo ad alta pressio-
ne - Alimentazione elettrica 8-9
A.S.S. - Automatic Stop System 9
Uso previsto della macchina 9
Disimballo 10
Installazione ed avviamento 10
Aspirazione del detergente 10
Elementi di comando 11
Manutenzione 11
Inconvenienti e rimedi 12
Riparazioni - Ricambi 14
Pulizia caldaia 14
Condizioni di garanzia - Smaltimento 15
Caratteristiche tecniche 118-120
Certificato CE di Conformità 121
IT INDEX page
Symbols - Installation 5
Starting up - Switching off 6
General information - Safety precautions 16
Water supply - High pressure hose - Electric-
ity supply 17
A.S.S. - Automatic Stop System 18
Suitable use of the machine 18
Unpacking 18
Installation and start-up 18
Detergent suction 19
Control components 19
Maintenance 20
Troubleshooting 20
Repairs - Spare parts 23
Boiler cleaning 23
Warranty conditions - Disposal 24
Technical data 118-120
CE Certificate of Conformity 121
EN
SOMMAIRE page
Symboles - Mise en place 5
Demarrage - Extinction de l’appareil 6
Indications générales - Avertissements 25
Alimentation en eau - Tuyau haute pression
- Alimentation électrique 26-27
A.S.S. - Automatic Stop System 27
Utilisation prevue de la machine 27
Deballage 27
Installation et mise en marche 28
Aspiration du detergent 28
Éléments de commande 29
Entretien 29
Inconvenients et remèdies 30
Reparations - Pièces de rechange 32
Nettoyage chaudière 32
Conditions de garantie - Èlimination 33
Caracteristiques tecniques 118-120
Certificat CE de Conformité 121
FR INHALTSVERZEICHNIS Seite
Symbole - Installation 5
Inbetriebnahme - Betrieb beenden 6
Allgemeine Hinweise - Warnhinweise 34
Wasserversorgung - Hochdruckschlauch -
Stromversorgung 35
A.S.S. - Automatic Stop System 36
Einsatzbereiche der Maschine 36
Auspacken der MAschine 36
Installation und Anlassen 36
Ansaugen des Reinigungsmittels 37
Betätigungselemente 37
Wartung 38
Störungen und Abhilfen 39
Reparaturen - Ersatzeile 41
Kesselreinigung 41
Garantiebedingungen - Entsorgung 42
Tecnische Angaben 118-120
CE-Konformitätsbescheinigung 121
DE
SISÄLTÖ sivu
Symbolit - Asennus 5
Käyttöönotto - Käytön lopetus 6
Yleiset ohjeet - Varoitusohjeet 80
Vedensyöttö - Korkeapaineletku - Sähkön-
syöttö 81-82
A.S.S. - Automatic Stop System 82
Koneen käyttötarkoitus 82
Pakkauksesta purkaminen 82
Asennus ja käyttöönotto 83
Pesuaineen imu 83
Ohjauslaitteet 84
Huolto 84
Viat ja niiden korjaus 85
Korjaukset - Varaosat 87
Kuumavesisäiliön puhdistaminen 87
Takuuehdot - Romutus 88
Tekniset tiedot 118-120
EU-Vaatimustenmukaisuusvakuutus 122
FI ОГЛАВЛЕНИЕ стр.
Символы - Монтаж 5
Пуск - Хранение 6
Общие Указания - Общие Предупреждения 89
Подача воды - Шланг высокого давления
- Система Электропитания 90-91
A.S.S. - Система автоматического останова 91
Предусмотренное пользование машиной 91
Распаковка 92
Установка и запуск 92
Всасывание моющего средства 92
Элементы управления 93
Техобслуживание 94
Неисправности и способы их устранения 94
Ремонт - Запасные части 96
Чистка котла 96
Условия гарантии - Утилизация 96-97
Технические характеристики 118-120
Сертификат Соответствия ЕС 122
RU
SADRŽAJ str.
imboli - Instalacija 5
Pokretanje – Van uporabe 6
Opće indikacije – Opća upozorenja 100
Napajanje vodom – Cijev pod visokim
pritiskom -Električno napajanje 101-102
A.S.S. - Automatic Stop System 102
Predviđena uporaba stroje 102
Uklanjanje ambalaže 103
Instalacija i pokretanje 103
Usisavanje deterdženta 103
Elementi komande 104
Održavanje 104
Problemi i rješenja 105
Popravljanje – Rezervni dijelovi 107
Čišćenje grijalice(kotla) 107
Garantni uvjeti - Odbacivanje 108
Tehničke karakteristike 118-120
Izjava CE o Prikladnosti 123
HR KAZALO str.
Simboli - montaža 5
Zagon – mirovanje 6
Splošna navodila – splošna opozorila 109
Dovod vode – visokotlačna cev -električno
napajanje 110-111
A.S.S. - Automatic Stop System 111
Predvidena uporaba stroja 111
Odpakiranje 112
Namestitev in zagon 112
Sesanje čistila 112
Elementi za upravljanje 113
Vzdrževanje 113
Težave in rešitve 114
Popravila - nadomestni deli 116
Čiščenje kotla 116
Garancijski pogoji - odstranjevanje 117
Tehnične lastnosti 118-120
CE izjava o ustreznosti 80
SL

5
OFF
optional
1. 2. 3. 4.
JODItNN
5. 5B. 6. 7.
CLICK!
5÷40°C
NJOMNJOtNBY.1B
NJO
8. 9.
ATTENZIONE! Prestare attenzione per motivi di sicurezza.
CAUTION! It is important to be careful on safety grounds.
ATTENTION! Redoublez d’attention pour des motifs de sécurité.
ACHTUNG! Wichtiger Hinweis, der aus Sicherheitsgründen zu beachten ist.
¡ATENCIÓN! Prestar atención por motivos de seguridad.
ATTENTIE! Uit veiligheidsoverwegingen goed opletten.
ΠΡΟΣΟΧΗ! Σημαντική υπόδειξη που πρέπει να τηρηθεί για λόγους ασφαλείας.
ATENÇÃO! Informação importante a ser tida em consideração por motivos de segurança.
HUOMIO! Tärkeä ohje joka on turvallisuussyistä otettava huomioon.
ВНИМАНИЕ! Для обеспечения безопасности будьте внимательны.
UPOZORENJE! Pripazite iz sigurnosnih motiva.
POZOR! Bodite pozorni iz varnostnih razlogov
*.1035"/5&t*.1035"/5t*.1035"/5t8*$)5*(t*.1035"/5&t#&-"/(3*+,tƨƝƢƗƣƩƟƠƥt*.1035"/5&t53,&tǭǟǯǞDZǧDZǤВНИМАНИЕ t7"Ç/0t10.&.#/0> SIMBOLItSYMBOLStSYMBOLEStSYMBOLEtSÍMBOLOStSYMBOLENtΣΥΜΒΟΛΑtEXPLICAÇÃO DOS SÍMBOLOS tSYMBOLITtСИМВОЛЫtSIMBOLI tSIMBOLI
> INSTALLAZIONEtINSTALLATIONtMISE EN PLACEtINSTALLATIONtINSTALACIÓNtINSTALATIEtΕΓΚΑΤΑΣΤΑΣΗtINSTALAÇÃO tASENNUS tМОНТАЖ tINSTALACIJA t.0/5"Ç"

OK
6
OFF
1. 2. 3. 4.
5. 6. 7.
0°C
> AVVIAMENTOtSTARTING UPtDEMARRAGEtINBETRIEBNAHMEtPUESTA EN MARCHA
tINGEBRUIKNAMEtΘΕΣΗ ΣΕ ΛΕΙΤΟΥΡΓΙΑtCOLOCAÇÃO EM FUNCIONAMENTO tKÄYTTÖÖNOTTO tПУСК tPOKRETANJE tZAGON
> FUORI SERVIZIOt48*5$)*/(0''tEXTINCTION DE L’APPAREILtBETRIEB BEENDEN
tPARA DEL APARATOtAPPARAAT UITSCHAKELENtΤΕΡΜΑΤΙΣΜΟΣ ΛΕΙΤΟΥΡΓΙΑΣ tTERMINAR A OPERAÇÃO tKÄYTÖN LOPETUS tХРАНЕНИЕ tVAN UPORABE tMIROVANJE

EN
16
> GENERAL INFORMATION
t5IJTBQQMJBODFTQFSGPSNBODFBOEVTFSG-
riendliness make it suitable for PROFES-
SIONAL use.
t5IFBQQMJBODFDBOCFVTFEGPSXBTIJOHsurfaces outdoors, whenever pressurised
water is required to remove dirt.
t8JUITQFDJBMPQUJPOBMBDDFTTPSJFTJUDBObe used for foaming and sandingblasting,
and for washing with a rotary brush for ap-
plication to the gun.
> SAFETY PRECAUTIONS
E$"65*0/*UJTJNQPSUBOUUPCFDBSFGVMPOTBGFUZHSPVOETE8"3/*/(This appliance is for outdoor
use only.
E8"3/*/(Always disconnect the elec-
tricity and water supplies on completion
of every job.
E8"3/*/(Never use the appliance if the
electrical cable or important parts of the
appliance are damaged, e.g. safety devic-
es, high pressure hose, gun, etc.
E8"3/*/(This appliance has been de-
signed for use with the detergent provided
or the detergent specified by the manu-
facturer, such as a neutral shampoo based
on biodegradable anionic surface active
detergents. The use of other detergents or
chemicals may put the appliance’s safety
at risk.
E8"3/*/(Never use the appliance with
people in the vicinity, unless they are
wearing protective clothing.
E8"3/*/(Do not direct the nozzle to-
ward mechanical parts containing lubri-
cant grease, as the grease will dissolve and
spread over the surrounding ground. Vehi-
cle tyres/tyre valves may only be cleaned
from a minimum distance of 30 cm, oth-
erwise the vehicle tyre/tyre valve could
be damaged by the high-pressure jet. The
first indication of this is a discoloration
of the tyre. Damaged vehicle tyres/tyre
valves can be deadly dangerous.
E8"3/*/(High pressure jets may be dan-
gerous if improperly used. Jets must never
be pointed at people, animals, life electri-
cal equipment or the appliance itself.
E8"3/*/(The hoses, accessories and
high pressure couplings are important for
the appliance’s safety. Use only hoses, ac-
cessories and couplings recommended by
the manufacturer (it is extremely impor-
tant to protect these components against
damage by avoiding their improper use
and protecting them against bending,
knocks and scratches).
E8"3/*/(the gun is fitted with a safety
catch. Whenever use of the machine is
interrupted it is important to operate the
safety catch to prevent accidental activa-
tion of the jet.
- Never point the jet at yourself or others to
clean clothing or footwear.
- Never allow children or untrained people
to use the appliance.
- Safety features: gun equipped with safety
locking device, appliance equipped with
(Class I) overload cutout, pump equipped
with by-pass valve or shutdown device.
- The safety button on the gun is not there
to lock the lever during operation, but to
prevent its accidental operation.
E8"3/*/(Appliances not equipped with
A.S.S. – Automatic Stop System: must not
be left in operation for more than 2 min-
utes with the gun released. The recycled
water heats up considerably, seriously
damaging the pump.
E8"3/*/(Appliances equipped with
A.S.S – Automatic Stop System: these ap-
pliances should not be left in standby for
more than 5 minutes.
E8"3/*/(Switch the appliance off com-
pletely (master switch on OFF) whenever it
is left unattended.
E8"3/*/(Every machine is tested in its
operating conditions, so it is normal for a
few drops of water to be left inside it.
E8"3/*/(Take care not damage the elec-
17
EN
tric cable. Have a damaged power cord
replaced immediately by an authorized
service point or an electrical specialist.
E8"3/*/(Appliance with fluid under
pressure. Keep a firm hold on the gun and
be prepared to take the kickback pressure.
Only use the high pressure nozzle provid-
ed with the appliance.
E8"3/*/(The high pressure hose is de-
signed and produced to withstand high
pressures. To avoid damage, it must be
handled with special care. Misuse may
lead to premature breakages or damage
and cause the loss of warranty cover.
E8"3/*/(The appliance is not to be used
by children or persons with reduced physi-
cal, sensory or mental capabilities, or lack
of experience and knowledge, unless they
have been given supervision or instruc-
tion.
E8"3/*/(Children being supervised not
to play with the appliance.
E8"3/*/(Never start the high-pressure
cleaner without first completely unwind-
ing the high-pressure hose.
E8"3/*/(When winding and unwinding
the pipe take care not to cause the high-
pressure cleaner to overturn.
E8"3/*/(Before unwinding or wind-
ing the hose, switch the machine off and
release the pressure in the hose itself
(switching off).
> 8"5&34611-:8BUFSTVQQMZDPOOFDUJPO$BVUJPO%BOHFSOnly clean or filtered water should be used
for intake. The delivery of the water intake tap
should be equal to the double of the maximum
pump range.
Minimum delivery rate: 30 l/ min.-
Maximum intake water temperature: 40°C-
Max inlet water pressure: 1Mpa-
Place the cleaner as close to the water supply
system as possible.
Water supply from the water main
t$POOFDUBTVQQMZIPTFOPUJODMVEFEUPthe water inlet of the unit (ref. 6, pos. 1)
and to the water supply (max. pressure 10
bar).
tConnect high pressure hose to the ma-
chine connection (ref. 6, pos. 2) and turn
on the water tap.
The cleaner can be connected directly to the
mains drinking water supply hose is fitted with
a backflow preventer valve as per current regu-
lations in force.
Make sure that the hose is at least Ø 13 mm and
that it is reinforced.
Failure to comply with the above conditions
causes serious mechanical damage to the
pump and the loss of warranty cover.
> HIGH PRESSURE HOSE
E8"3/*/(The high pressure hose is de-
signed and produced to withstand high
pressures. To avoid damage, it must be
handled with special care.
Misuse may lead to premature breakages or
damage and cause the loss of warranty cover.
(See illustrations).
> ELECTRICITY SUPPLY
- The appliance’s electrical connection must
comply with the IEC 364 standard.
Before connecting the appliance, make
sure that the nameplate data are the same
as those of the electrical mains and that
the socket is protected by a differential
security breaker with tripping sensitivity
below 0.03 A - 30 ms.
- If the appliance’s plug is not compatible
with the socket, have the socket replaced
with another of suitable type by profes-
sionally qualified staff.
- Never use the appliance in ambient tem-
peratures below 0° C if it is equipped with
a PVC (H VV-F) cable.
E8"3/*/(Inadequate extension cords
can be dangerous.

EN
18
- If an extension lead is used, the plug and
socket must be watertight and the cable
must have the dimensions shown in the
table below. JGmUUFE
PLEASE NOTE: This water cleaner is equipped
with the A.S.S. (Automatic Stop System), which
stops the machine during the bypass phase. To
start the water cleaner, it is therefore necessary
to set the switch on position “ON”; after that
press the pistol trigger: the Automatic Stop
System will start the machine and will stop it
automatically when the trigger is released. It is
advisable to put on the safety of the pistol trig-
ger whenever the machine is stopped, in order
to avoid unintentional starting.
t"OZBVUPNBUJDTUBSUPGUIFNBDIJOFXJUI-
PVUQSFTTJOHUIFHVOUSJHHFSJTBUUSJCVUBCMFUPBJSCVCCMFTJOUIFXBUFSPSPUIFSTJNJMBSQIFOPNFOBXIJDIEPOPUJNQMZUIFFYJTU-
FODFPGBOZEFGFDUTJOUIFNBDIJOFt%POPUMFBWFUIFBQQMJBODFVOBUUFOEFEEVSJOHUIFTUBOECZGPSNPSFUIBONJOVUFT$POUSBSJMZGPSUIFTBGFUZPGUIFBQQMJBODFJUJTOFDFTTBSZUPSFUVSOUIFTXJUDIJOUPUIFOFF position.
t1MFBTFDIFDLUIBUUIFDPVQMJOHPGUIFIJHIQSFTTVSFIPTFXJUIUIFBQQMJBODFBOEUIFHVOTVQQMJFEBTTUBOEBSEFRVJQNFOUTNBEFDPS-
SFDUMZUIBUJTUPTBZXJUIPVUBOZXBUFSMFBL*GUIFBQQMJBODFJTFRVJQQFEXJUIBQSFTTVSFSFHVMBUPStXIFOUIFQSFTTVSFJTTFUUPNJOJNVNUIF"44NBZOPUUSJHHFS5IFSFGPSFEPOPUBM-
MPXUIFBQQMJBODFUPGVODUJPOJOCZQBTTGPSNPSFUIBONJOVUFtEPOPUBDUPOUIFHVOMFWFSUPPGSFRVFOUMZUIJTNBZDBVTFBNBMGVODUJPO> SUITABLE USE OF THE MACHINE
The performances of the machine are suitable
for a professional use. Structural technologies
have been studied to assure high reliability and
safety levels, and long life. It is absolutely for-
bidden to use the machine in potentially explo-
sive environments or areas.
The working temperature must range between
+ 5° and + 50°C. It is forbidden to carry out any
modification to the structure and to any ele-
ments of the machine.
CORRECT USE OF THE MACHINE
t5IFDMFBOFSNVTUCFQMBDFEPOBmSNTUBCMFsurface and must be horizontal.
t*ODBTFPGPQFSBUJPOJOEPPSTBEFRVBUFWFOUJ-
lation and gas venting must be assured.
t8IFOFWFSVTJOHUIFIJHIQSFTTVSFDMFBOFSusers are urged to hold the gun in the correct
position, with one hand on the grip and the
other on the spray rod.
t5IFXBUFSKFUNVTUOFWFSCFQPJOUFEBUUIFelectrical cables or at the machine.
> UNPACKING
Take out the upper and the lower hooks, which
fix the cardboard box to the pallet, take the card-
board box off, put two wheels of the machine
on ground and take the pallet off (see ref. 2).
> INSTALLATION AND START-UP
1ST START-UP
When starting up for the first time or after a
long period out of use, connect the intake line
only for a few minutes so that any dirt is vented
from the delivery outlet.
ELECTRICAL CONNECTION (Ref. 3)
Check that the mains voltage is the same as
that of your machine, indicated on the techni-
cal data plate. Your electrical system must be
constructed by qualified technicians capable of
working in accordance with the requirements
of the regulations in force (earth connection,
230-240V 400-415V
3G 2,5 mm24G 2,5 mm2
max 20 m max 30 m
19
EN
fuses, differential security breaker, etc).
*ODBTFPGGBJMVSFUPDPNQMZXJUIPOFPGUIFSFHVMBUJPOTTUBUFEBCPWFUIFNBOVGBDUVSFSEFDMJOFTBMMSFTQPOTJCJMJUZGPSUIFTUBõBOEQSPWJEFTOPXBSSBOUZ'*--*/(618*5)'6&-Fill the tank with the fuel indicated on the tech-
nical data plate (Diesel, ref. 4).
Avoid that thetankisemptywhen themachine is
running in order not to damage the fuel pump.
E*ODPSSFDUGVFMTIBMMOPUVTFEBTUIFZBTQSPWJEFIB[BSEFill up the detergent tank with the suggested
products, suitable for the kind of washing to be
carried out (ref. 4).
ECAUTION:.BLFVTFPOMZPGMJRVJEEFUFS-
HFOUEPOPUBCTPMVUFMZVTFBDJEPSUPPNVDIBMLBMJOFQSPEVDUTWesuggest you to
make use of our products, which have been
studied for the use with washer machines.
START-UP
Switch on the machine by pressing the switch
(ref. 1, pos.1) and leave it to run for a few min-
utes to eliminate any dirt and air bubbles from
the water circuit, then switch it off, connect the
high pressure line to the spray gun (ref. 7) and
fit the spray rod (ref. 8). Make sure that the de-
tergent regulator is in the closed position.
When the machine is running again, check that
the jet is even; otherwise, clean the nozzle to
remove any dirt. Wait a few seconds for the op-
erating pressure to be reached, then operate
the gun for two or three short bursts.
To wash with hot water, turn the burner switch
and select the desired temperature setting (ref.
1, pos. 2). To add detergent or disinfectant to
the water jet, open the regulator (ref. 1, pos. 3)
to the setting for the quantity required as de-
scribed in the “DETERGENT SUCTION” section.
> LANCE ASSEMBLY
To fit the lance to the gun, it is sufficient to in-
sert the threaded end of the lance (ref. 8, pos.
1) into the hole on the gun (ref. 8, pos. 2); then
screw the lance as shown by the arrow (A) until
the connection is tight.
> DETERGENT SUCTION
Automatic Detergent suction at tap opening
(ref. 9, pos. 1).
When you start the machine, the mixing of the
detergent with the water is automatic at the
water passage. The quantity of sucked deter-
gent depends on the quantity set with the de-
tergent adjusting knob (ref. 9, pos. 1).
ECAUTION:.BLFVTFPOMZPGMJRVJEEFUFS-
HFOUEPOPUBCTPMVUFMZVTFBDJEPSUPPNVDIBMLBMJOFQSPEVDUTWe suggest you to
make use of our products, which have been
studied for the use with washer machines.
> CONTROL COMPONENTS
$0/530-48*5$)&41Motor pump switch
2Burner switch with regulator
3Detergent regulator
4Pilot lights
4A:Motor pump ON green pilot light
B: Leak pilot light
- flashes when the pistol lever is repeat-
edly operated in a short time or when a
leak occurs in the high pressure circuit.
Remove the leak, referring to an au-
thorized service centre.
- remains ON when the machine is left
1
2
3
4B
4A 4C

EN
20
in stand-by for over 20 minutes.
Switch on and off the motor pump
switch.
C: Burner switch
- flashes when the gasoil tank is emp-
ty; the burner is stopped.
Refuel.
- remains ON when the burner switch-
es on.
> GUN SAFETY DEVICE
Whenever the machine has to be stopped, it is
important to engage the safety catch (S, ref. 10)
on the gun so that it cannot be operated acci-
dentally.
> DESCALING (REF. 5)
The descaling procedure must be carried out pe-
riodically with specific products. The interval de-
pends on the hardness of the water. This opera-
tion should be carried out by our after-sales serv-
ice, since the descaling product may cause wear
of components. Comply with the regulations in
force when disposing of the descaling agent.
tLiquid softener tank (ref. 5, pos. 1)
Fill the softener tank with our products (in all
cases, with non corrosive products). The dis-
pensing rate is set at a medium value; the After
Sales Services will be able to adapt the setting
to local conditions.
> MAINTENANCE
IMPORTANT: #FGPSFEPJOHBOZXPSLPOUIFDMFBOFSEJTDIBSHFUIFQSFTTVSFBOEEJTDPOOFDUUIFFMFDUSJDJUZBOEXBUFSTVQQMJFT.
CHECKING THE PUMP OIL LEVEL
Check the oil level periodically. The oil must
be changed for the first time after 50 working
hours, with subsequent changes every 500
hours. SAE 20/30 oil is recommended - Oil ca-
pacity 0,7 Kg
$)&$,*/(5)&8"5&3*/5",&'*-5&3Inspect and clean the water intake filter (ref. 11)
on the intake union periodically. This is impor-
tant to prevent fouling which may impair op-
eration of the pump.
REPLACING THE SPRAY ROD NOZZLE
Replace the nozzle when the pressure drops
below the normal values.
ELECTRIC MOTOR
If the motor malfunctions, it cuts out. Wait 5-10
minutes before restarting. If the problem per-
sists, refer to the“TROUBLESHOOTING” section.
If you are still unable to eliminate the problem,
stop using the machine and contact an Author-
ized Service Centre.
ELECTRICAL CORD
E8"3/*/(Take care not damage the elec-
tric cable. Have a damaged power cord re-
placed immediately by an authorized serv-
ice point or an electrical specialist.
CLEANING THE FUEL FILTER
Check the fuel filter (ref. 12) periodically and
replace if it has deteriorated or is excessively
dirty.
> ELECTRIC DIAGRAM
See illustrations, page 82.
> 8"5&3%*"(3".See illustrations, page 82.
> TROUBLESHOOTING
Before doing any work on the machine, discon-
nect the electricity and water supplies and dis-
charge the pressure. Proceed systematically to
identify faults following the chart below; if you
are still unable to eliminate the problem, call in
the "VUIPSJ[FE"GUFS4BMFT4FSWJDF.
'BVMU
8IFOUIFNBJOTXJUDIJTUVSOFEPOUIFNBDIJOFEPFTOPUTUBSU
21
EN
$BVTF
tPlug not properly connect-
ed.
tConnection panel fuses
are burnt out.
Repair tCarefully check the plug
and the electric cable.
tCheck them and replace
them.
'BVMU
5IFNPUPSIVNTCVUEPFTnot start
$BVTF
tA phase is missing (in
three phase models).
tLows voltage.
tHigh pressure pump is
blocked.
Repair tContact an authorised
service centre.
tContact an authorised
service centre.
tContact an authorised
service centre.
'BVMU
5IFNPUPSTUPQTTVEEFOMZPSBGUFSBXIJMF
$BVTF
tThe motor-protecting
switch is on because of in-
sufficient mains voltage.
Repair tCheck the value of the
mains voltage.
tContact an authorised
service centre.
'BVMU
8IFOUIFMBODFJTUVSOFEPOQSFTTVSFWBMVFTEF-
DSFBTFBOEJODSFBTF
$BVTF
tThe nozzle is either
clogged or deformed.
tEither boiler coil or lance
are clogged with lime-
stone.
Repair tEither clean it or replace it.
tDescaling.
'BVMU
5PNVDIWJCSBUJPOTBUUIFEFMJWFSZ
$BVTF
tThe valve are worn out or
dirty.
Repair tCheck and/or replace.
'BVMU
5IFQVNQEPFTOPUSFBDIUIFmYFEQSFTTVSFT
$BVTF
tThe pump sucks air.
tThe valves are worn out.
tThe setting valve area is
worn out.
tThe nozzle is unsuitable or
worn out.
tThe seals are worn out.
Repair tCheck the suction pipes.
tCheck and/or replace.
tContact an authorised
service centre.
tContact an authorised
service centre.
'BVMU
*SSFHVMBSQSFTTVSFnVDUVB-
tions
$BVTF
tThe suction and/or deliv-
ery valves are worn out.
tPresence of foreign mat-
ters in the valves, which
generate bad functioning.
tAir suction.
tThe seals are worn out.
Repair tCheck and/or replace.
tCheck and clean the re-
place.
tCheck the suction pipe.
tCheck and/or replace the
seals.
'BVMU
1SFTTVSFMFBLBHF

EN
22 $BVTF
tThe nozzle is worn out.
tThe suction and/or deliv-
ery valves are broken or
down.
tPresence of foreign mat-
ters in the valves, which
generate the valves bad
functioning.
tThe setting valve area is
worn out.
tThe seals are worn out.
Repair tReplace the nozzle.
tCheck and/or replace the
valves.
tCheck and clean the valves.
tCheck and/or replace the
setting valve area.
tReplace the seals.
'BVMU
Noisiness
$BVTF
tAir suction.
tThe suction and/or deliv-
ery valve springs are bro-
ken or down.
tForeign matters in the suc-
tion and delivery valves.
tThe bearings are worn out.
tExtreme liquid tempera-
ture.
Repair tCheck the suction pipes.
tReplace the valve springs.
tCheck and clean the suc-
tion and delivery valves.
tReplace the bearings.
tReduce the liquid temper-
ature.
'BVMU
8BUFSJTJOUIFPJM
$BVTF
tThe O-ring casing is worn
out.
tHigh moisture in the air.
tThe seals are completely
worn out.
Repair tCheck and/or replace the
O-ring.
tReplace the oil with dou-
ble frequency in respect
of the one suggested.
tReplace the seals.
'BVMU
'JMUSBUJPOTPGXBUFSGSPNUIFESBJOTCFUXFFODBTJOHBOEIFBE
$BVTF
tThe seals are worn out.
tThe piston is worn out.
tThe O-ring of the piston
cap is worn out.
Repair tReplace the seals.
tReplace the piston.
tReplace the seal.
'BVMU
'JMUSBUJPOTPGPJMGSPNUIFESBJOTCFUXFFOIFBEBOEcasing
$BVTF
tO-ring seals of casing are
worn out.
Repair tReplace the seals.
'BVMU
5VSOJOHPOUIFCVSOFSTXJUDIUIFCPJMFSEPFTOPUstart
$BVTF
tNo fuel.
tFuel filter is clogged.
tFuel pump is either
blocked or burnt out.
tDamaged thermostat.
tIgnition spark insufficient
or totally lacking.
tThe space among the
electrodes is not correct.
tBurn out fuse.
23
EN
Repair tCheck the level in the tank
and check whether the
rigid suction pipe is clean.
tReplace the line filter.
tReplace it.
tReplace it.
tContact an authorised
service centre.
tCheck the positioning.
tReplace it.
'BVMU
8BUFSJTOPUIPUFOPVHI
$BVTF
tPoor boiler performance.
tBoiler coil clogged with
limestone.
Repair tClean burner nozzle filter.
tClean fuel filter.
tCheck diesel pump pres-
sure.
tDescaling.
'BVMU
5PPNVDITNPLFGSPNUIFDIJNOFZ
$BVTF
tCombustion is not cor-
rect.
tImpurities or water in the
fuel.
Repair tClean fuel filter.
tClean the boiler.
tEmpty the tank and clean
it carefully.
tClean fuel filter as well.
'BVMU
*OTVöDJFOUEFUFSHFOUTVD-
tion
$BVTF
tNo detergent in the tank.
tIncrusted injector.
tEither coil or tube or lance
are clogged.
Repair tFill the detergent tank.
tClean it.
tEither cleaning or descal-
ing.
> REPAIRS - SPARE PARTS
For any problems not mentioned in this manu-
al, or if the machine breaks down, you are urged
to contact an "VUIPSJ[FE"GUFS4BMFT4FSWJDF
for the relative repair or for any replacement of
components with original spare parts. Use ex-
clusively original replacement parts.
> BOILER CLEANING
EATTENTION: 'PSBMMNBJOUFOBODFPGUIFCPJMFSPGUIFIJHIQSFTTVSFQVNQBOEPGUIFNBDIJOFJUJTOFDFTTBSZUPBEESFTTUPRVBMJmFEQFSTPOOFMPSUPBOBVUIPS-
J[FEBTTJTUBODFDFOUFS.
The boiler cleaning must be periodically ex-
ecuted every 180 ÷ 200 hours of working pro-
ceeding as follows:
Carefully remove the nozzle holder flange and
the electrodes holder (boiler head, ref. 13).
Clean with compressed air the nozzle filter and
check the electrodes position. (ref. 14).
Remove the boiler cap unscrewing the 3 nuts,
clean the deflector (ref. 15).
Manually take away the interior cap (ref. 16).
Unscrewing the locking nuts (ref. 17) and take
the boiler coil out.
Clean the coil by an iron brush (ref. 18).
Suck the residuums from the boiler (ref. 19).
Replace every parts doing the operations in the
inverse way.
1MFBTFOPUF5IFHFOFSBMDIFDLJOHBOEDPN-
CVTUJPOSFHVMBUJPONVTUCFQFSJPEJDBMMZFYFDVUFECZTQFDJBMJ[FEQFSTPOOFMBTQSF-
TDSJCFECZUIFMBX

EN
24
> 8"33"/5:$0/%*5*0/4All our machines are subjected to strict tests
and are covered against manufacturing de-
fects in accordance with applicable regulations
(minimum 12 months).The warranty is effective
from the date of purchase. If your high pressure
washer or accessories are handed in for repair, a
copy of the receipt must be enclosed.
(VBSBOUFFSFQBJSTBSFCFJOHNBEFPOUIFGPMMPXJOHDPOEJUJPOT- That defects are attrib-
utable to flaws or defects in materials or work-
manship. -That the directions of this instruction
manual have been thoroughly observed. - That
repair has not been carried out or attempted by
other than authorized service staff. - That only
original accessories have been applied. - That
the product has not been exposed to abuse
such as knocks, bumps or frost. - That only wa-
ter without any impurities has been used. -That
the high pressure washer has not been used for
rental nor used commercially in any other way.
5IFGPMMPXJOHBSFOPUJODMVEFEJOUIFXBS-
SBOUZ- Parts subject to normal wear. - The
high-pressure tube and optional accessories.
- Accidental damage, caused by transport, ne-
glect or inadequate treatment, incorrect or
improper use and installation failing to comply
with the indications in the instruction manual.
- The warranty shall not cover any cleaning op-
erations to which the operative components
may be subjected.
Repairs under this guarantee include replace-
ment of defective parts, exclusive of packing
and postage/carriage. The warranty shall not
cover replacement of the machine or extension
of the guarantee resulting from a breakdown.
The manufacturer declines all responsibility for
damage to persons or property caused by bad
installation or incorrect use of the machine.
8"3/*/(Failures, such as clogged nozzles,
valves and mechanism blocked due to lime-
stones, damaged pressure cleaner accessories
(like kinked high pressure hose) and/or appli-
ances normally working without any defects
ARE NOT COVERED BY THE WARRANTY.
> DISPOSAL
As the owner of electrical or electron-
ic equipment, the law (in accordance
with the EU Directive 2002/96/EC of
27 January 2003 on waste from elec-
trical and electronic equipment and
the national laws of the EU Member
States that have implemented this Directive)
prohibits you from disposing of this product or
its electrical / electronic accessories as munici-
pal solid waste and obliges you to make use of
the appropriate waste collection facilities.
The product can be disposed of by returning it
to the distributor when a new product is pur-
chased. The new product must be equivalent to
that being disposed of.
Disposing of the product in the environment
can cause great harm to the environment itself
and human health.
The symbol in the figure indicates the urban
waste containers and it is strictly prohibited to
dispose of the equipment in these containers.
Non-compliance with the regulations stipulat-
ed in the Directive 2002/96/EC and the decrees
implemented in the various EU Member States
is administratively punishable.

80
FI
> YLEISET OHJEET
t-BJUUFFOPNJOBJTVVEFUKBTFOIFMQQPLÊZU-
tö tekevät sen sopivaksi EI-AMMATTIMAI-
SEEN KÄYTTÖÖN.
t-BJUFUUBWPJEBBOLÊZUUÊÊVMLPUJMPKFOQJOUP-
jen pesemiseen, kun paineen alaista vettä
tarvitaan lian poistoon.
t-BJUUFFTFFOPOTBBUBWJTTBMJTÊWBSVTUFJUBvaahdon levitykseen, hiekkapuhalluksen
tai pesu voidaan suorittaa pesukahvavar-
ren päähän kiinnitettävällä pyörivällä har-
jalla.
> VAROITUSOHJEET
E)60.*05ÊSLFÊPIKFKPLBPOUVSWBMMJ-
TVVTTZJTUÊPUFUUBWBIVPNJPPOEHUOMIO: Laitetta saadaan käyttää aino-
astaan ulkona.
EHUOMIO: Jokaisen käytön jälkeen on säh-
kön- ja vedensyöttö kytkettävä aina pois
päältä.
EHUOMIO: Älä käytä laitetta, jos virtajohto
tai laitteen tärkeät osat ovat vaurioituneet,
esim. turvalaitteet, pesukahvan korkeapai-
neletku jne.
EHUOMIO: Tämä laite on kehitetty valmis-
tajan toimittamien ja määräämien puhdis-
tusaineiden (tyyppi: neutraali biologisesti
hajoaviin anionisiin tensiideihin pohjau-
tuva puhdistusshampoo) käyttöä varten.
Muiden puhdistusaineiden tai kemiallis-
ten aineiden käyttö voi vaikuttaa laitteen
turvallisuuteen.
EHUOMIO: Laitetta ei saa käyttää henkilöi-
den läheisyydessä, jos heillä ei ole suoja-
vaatetusta.
EHUOMIO: Ruiskuputken suihkua ei saa
suunnata voitelurasvaa sisältäviin mekaa-
nisiin osiin: päinvastaisessa tapauksessa
rasva liukenee ja hajoaa maaperään. Au-
ton renkaita/venttiileitä saa pestä vain
vähintään 30 cm etäisyydeltä. Ohjeiden
vastaisesti käytettynä korkeapainesuihku
voi vahingoittaa renkaita/venttiilejä. En-
simmäinen merkki tästä on renkaan vär-
jäytyminen. Vaurioituneet auton renkaat/
venttiilit saattavat olla hengenvaarallisia.
EHUOMIO: Korkeapaineella tuleva vesisuih-
ku voi olla vaarallinen, jos sitä käytetään
epäasianmukaisesti. Älä koskaan kohdista
suihkua henkilöitä, eläimiä, päällekytket-
tyjä sähkölaitteita tai laitetta itseään koh-
den.
EHUOMIO: Korkeapaineletkut, lisätar-
vikkeet ja liitännät ovat tärkeitä laitteen
turvallisuutta varten. Käytä ainoastaan
valmistajan hyväksymiä letkuja, lisätarvik-
keita ja liitäntöjä (on erittäin tärkeää, että
nämä osat pysyvät ehjinä, vältä tämän
vuoksi epäasianmukaista käyttöä ja suojaa
ne taitteilta, iskuilta ja naarmuuntumisel-
ta).
EHUOMIO: Pesukahva on varustettu turva-
lukolla. On tärkeää, että tätä turvalukkoa
käytetään joka kerta, kun laitteen käyttö
keskeytetään, jotta sattumanvarainen
avautuminen estettäisiin.
- Älä kohdista suihkua itseäsi tai muita hen-
kilöitä kohden, puhdistaaksesi kenkiä tai
vaatteita.
- Lapset tai kouluttamattomat henkilöt ei-
vät saa käyttää laitetta.
- Turvalaitteet: Pesukahva turvalukon kans-
sa, kone on varustettu ylikuormitussuojal-
la (luokka 1), pumppu on varustettu ohi-
tusventtiilillä tai pysäytyslaitteella.
- Pesukahvan turvapainikkeella ei lukita vi-
pua käytön aikana, vaan ettei se avaudu
sattumanvaraisesti.
EHUOMIO: Laitteet ilman A.S.S.-järjestel-
mää – Automatic Stop System (automaat-
tinen pysäytysjärjestelmä): ne eivät pesu-
kahvan ollessa vapautettuna saa toimia yli
2 minuuttia. Kiertopiiriin syötetyn veden
lämpötila kohoaa huomattavasti ja aiheut-
taa pumpulle vakavia vaurioita.
EHUOMIO: Laitteet A.S.S.-järjestelmän
kanssa – Automatic Stop System (auto-
maattinen pysäytysjärjestelmä): laitetta ei
tulisi jättää valmiustilaan (stand-by) yli 5
minuutiksi.
EHUOMIO: Kytke ilman valvontaa jäävä lai
81
FI
pumpun maksimaaliseen virtaamaan nähden
kaksinkertainen vedenanto.
Minimivirtaama: 30 l/ min.-
Maksimaalinen vedenlämpötila sisään--
menossa: 40°C
Maksimaalinen vedenpaine sisäänmenos--
sa: 1Mpa
Aseta korkeapainepesuri mahdollisimman lä-
helle vedenjakeluverkkoa.
Vedenotto vesijohdosta
t-JJUÊWFEFOTZÚUUÚMFULVFJLVVMVVWBSVTUVL-
siin) laitteessa olevaan vesiliittimeen (kuva
6, kohta 1) ja vesijohtoon (paine max. 10
baaria).
t-JJUÊQBJOFQVULJVMPTUVMPMFULVVOLVWBkohta 2) ja avaa vesihana.
Korkeapainepesuri voidaan liittää suoraan julki-
seen vesijohtoverkostoon jos syöttöputkistoon
on asennettu virtauksenestolaite tyhjennyk-
sellä voimassa olevien määräysten mukaisesti.
Varmista, että putki on halkaisijaltaan vähin-
tään 13mm ja vahvistettu.
Kyseisten ehtojen noudattamatta jättäminen
saa aikaan vakavia mekaanisia vahinkoja pum-
pulle takuun raukeamisen ohella.
> KORKEAPAINEPUTKI
EHUOMIO: Korkeapaineputki on suunnitel-
tu ja valmistettu kestämään korkeata pai-
netta. Jotta se ei vahingoittuisi, sitä tulee
käsitellä varovaisesti.
Väärä käyttö voi aiheuttaa vahinkoa tai ennen-
aikaista rikkoutumista ja aiheuttaa takuun voi-
massaolon lakkaamisen (ks. kuvat).
> SÄHKÖNSYÖTTÖ
- Laitteen sähköliitännän täytyy olla normin
IEC 364 mukainen.
Varmista ennen laitteen liittämistä, että
tyyppikilven tiedot vastaavat sähköverkon
arvoja ja että pistorasia on suojattu vika-
virtasuojakytkimellä, jonka kytkeytymis-
herkkyys on alle 0,03 A - 30ms.
- Mikäli pistoke ei sovi pistorasiaan, anna
te joka kerta täysin pois päältä (pääkytkin asen-
toon OFF).
EHUOMIO: Jokaiselle koneelle suoritetaan
lopputarkastus käyttöolosuhteissa, joten
on normaalia, että laitteen sisällä on vielä
muutamia vesipisaroita.
EHUOMIO: Huomioi, että virtajohto ei vau-
rioidu. Anna valtuutetun asiakaspalvelun/
sähköalan ammattiliikkeen vaihtaa välittö-
mästi vaurioitunut liitäntäjohto.
EHUOMIO: Laite sisältää paineenalaisia
nesteitä. Pidä lujasti kiinni pesukahvasta,
jotta reaktiovoima estettäisiin. Käytä lai-
tetta vain mukana tulevan korkeapai- ne-
suuttimen kanssa.
EHUOMIO: Korkeapaineletku on kehitetty
ja valmistettu siten, että se kestää korkeita
paineita. Vaurioiden välttämiseksi täytyy
sitä käyttää erityisen varovasti. Epäasian-
mukainen käyttö voi aiheuttaa ennenai-
kaisia vaurioita tai murtumia sekä takuun
raukeamisen.
EHUOMIO: Lapset tai fyysisesti tai henki-
sesti rajoittuneet henkilöt tai henkilöt, joil-
la ei ole laitteen käyttöön vaadittavaa ko-
kemusta tai tuntemusta eivät saa käyttää
laitetta, kunnes he eivät ole saaneet siihen
vaadittavaa koulutusta tai opastusta.
EHUOMIO: Lapset eivät saa leikkiä laitteel-
la, vaikka heitä valvotaan.
EHUOMIO: Käynnistä painepesuri vasta sen
jälkeen, kun olet kelannut korkeapainelet-
kun auki.
EHUOMIO: Varmista, ettei painepesuri pää-
se kaatumaan kumoon letkun kiinni/ auki-
kelaamisen yhteydessä.
EHUOMIO: Varmista ennen letkun kiinni/
aukikelaamisen aloittamista, että painepe-
suri on sammutettuna ja ettei letkussa ole
painetta (ei käytössä).
> VEDENSYÖTTÖ
7FTJMJJUÊOUÊ)VPNJP7BBSBIme pelkästään suodatettua tai puhdasta vet-
tä. Vedenottoon tarkoitetun hanan on taattava
This manual suits for next models
17
Table of contents
Languages:
Other LavorPro Pressure Washer manuals


Popular Pressure Washer manuals by other brands

Kärcher
Kärcher G 3050 OH Operator's manual

Weidner
Weidner Waschbar SE 112 Operating manual / spare parts list

Kärcher
Kärcher HDS 12/14-4 ST Gas instructions

Power
Power APW3200KH Owner's Manual and Operating Instructions

Alto
Alto Speed 4050 X-TRA Repair manual

Kärcher
Kärcher HDS 7/9-4 M Original instructions


