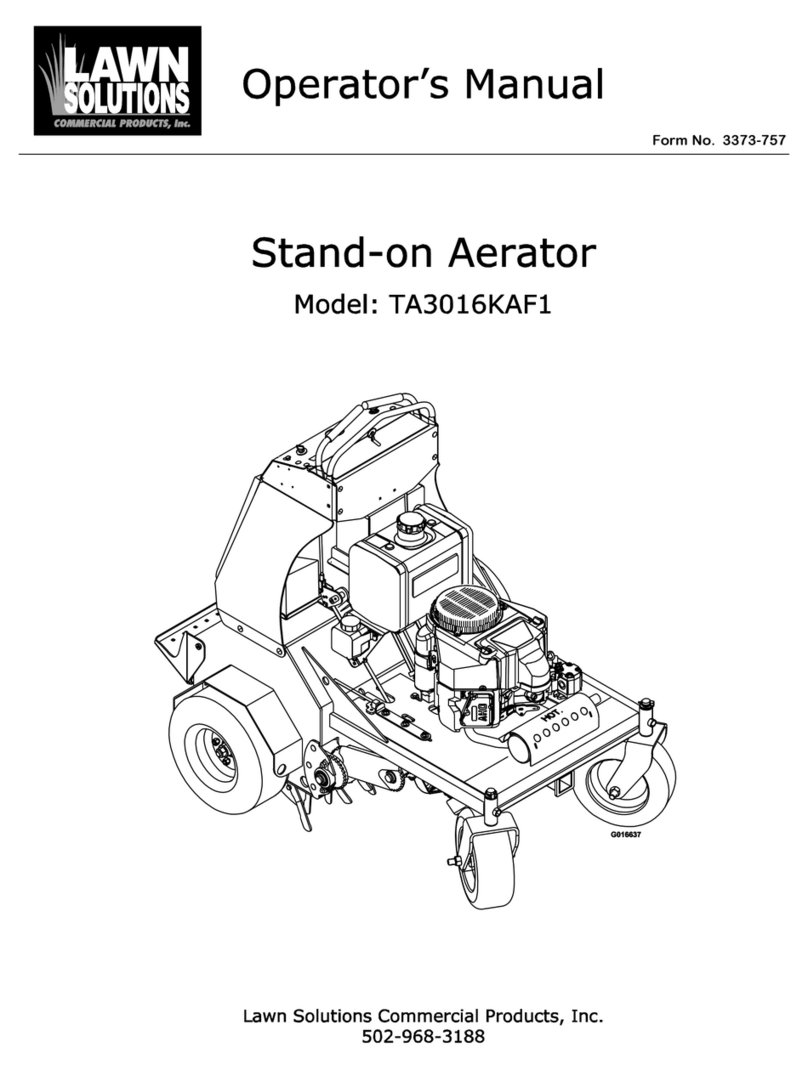
Lawn Solutions TA2106HOF1 User manual

G013071
21-Inch Walk-Behind Aerator
Model: TA2106HOF1
Lawn Solutions Commercial Products, Inc.
502-968-3188
Serial No. LS02001 and Up
Operator’s Manual
Form No. 3370-862

WARNING
CALIFORNIA
Proposition65Warning
Theengineexhaustfromthisproduct
containschemicalsknowntotheStateof
Californiatocausecancer,birthdefects,
orotherreproductiveharm.
ThissparkignitionsystemcomplieswithCanadian
ICES-002.
Important:Thisengineisnotequippedwitha
sparkarrestermufer.ItisaviolationofCalifornia
PublicResourceCodeSection4442touseoroperate
theengineonanyforest-covered,brush-covered,or
grass-coveredland.Otherstatesorfederalareas
mayhavesimilarlaws.
Introduction
Thisaerator,whichiscontrolledbyawalkingoperator,
isintendedtobeusedbytrainedoperatorsinresidential
andcommercialapplications.Itisprimarilydesigned
foraeratingsmalltomid-sizedareasofwell-maintained
lawnsonresidentialgrounds,parks,sportselds,andon
commercialgrounds.
Readthisinformationcarefullytolearnhowtooperate
andmaintainyourproductproperlyandtoavoidinjury
andproductdamage.Youareresponsibleforoperating
theproductproperlyandsafely.
YoumaycontactLawnSolutionsdirectlyat
http://lawnsolutionscp.comforproductandaccessory
information,helpndingadealer,ortoregisteryour
product.
Wheneveryouneedservice,genuineLawnSolutions
parts,oradditionalinformation,contactanAuthorized
ServiceDealerorLawnSolutionsCustomerService
andhavethemodelandserialnumbersofyourproduct
ready.Figure1illustratesthelocationofthemodeland
serialnumbersontheproduct.Writethenumbersin
thespaceprovided.
g013131
1
Figure1
1.Locationofthemodelandserialnumbers
ModelNo.
SerialNo.
Thismanualidentiespotentialhazardsandhassafety
messagesidentiedbythesafetyalertsymbol(Figure2),
whichsignalsahazardthatmaycauseseriousinjury
ordeathifyoudonotfollowtherecommended
precautions.
Figure2
1.Safetyalertsymbol
Thismanualuses2otherwordstohighlightinformation.
Importantcallsattentiontospecialmechanical
informationandNoteemphasizesgeneralinformation
worthyofspecialattention.
Contents
Introduction.................................................................2
Safety...........................................................................3
SafeOperatingPractices.......................................3
SlopeIndicator.....................................................5
SafetyandInstructionalDecals.............................6
Setup...........................................................................7
UnfoldingtheHandle...........................................7
FillingtheCrankcasewithOil...............................7
ProductOverview........................................................7
Controls...............................................................7
Specications.......................................................8
©2011—LawnSolutionsCP
5406ShepherdsvilleRd.
Louisville,KY402282
Contactusathttp://lawnsolutionscp.com.
PrintedintheUSA.
AllRightsReserved

Operation.....................................................................8
CheckingtheEngineOilLevel..............................8
FillingtheFuelTankwithGasoline.......................9
StartingtheEngine.............................................10
StoppingtheEngine...........................................10
DrivingtheMachine...........................................10
Aerating.............................................................11
AddingWeight...................................................11
AdjustingtheCoringDepth................................12
SecuringtheMachineforTransport....................12
OperatingTips...................................................12
Maintenance...............................................................13
RecommendedMaintenanceSchedule(s)................13
PremaintenanceProcedures....................................13
AccessingtheTines............................................13
TippingtheMachine...........................................13
Lubrication.............................................................14
GreasingtheCenterTines..................................14
LubricatingtheDriveChains..............................14
EngineMaintenance...............................................15
ServicingtheAirCleaner....................................15
ChangingtheEngineOil....................................16
ServicingtheSparkPlug.....................................16
DriveSystemMaintenance.....................................17
CheckingtheTirePressure.................................17
CheckingtheTensionofAeratorDrive
Chains............................................................17
BeltMaintenance....................................................18
TineMaintenance...................................................18
Checking/ReplacingTines..................................18
Storage.......................................................................19
Troubleshooting.........................................................20
Safety
Improperuseormaintenancebytheoperator
orownercanresultininjury.Toreducethe
potentialforinjury,complywiththesesafety
instructionsandalwayspayattentiontothesafety
alertsymbol,whichmeans
Caution
,
W ar ning
,or
Danger
—personalsafetyinstruction.Failureto
complywiththeinstructionmayresultinpersonal
injuryordeath.
SafeOperatingPractices
ThefollowinginstructionsareadaptedfromtheANSI
B71.4—2004andB71.8—2004standard.
Training
•ReadtheOperator’sManualandothertraining
material.Iftheoperator(s)ormechanic(s)cannot
readEnglishitistheowner’sresponsibilitytoexplain
thismaterialtothem.
•Becomefamiliarwiththesafeoperationofthe
equipment,operatorcontrols,andsafetysigns.
•Alloperatorsandmechanicsshouldbetrained.The
ownerisresponsiblefortrainingtheusers.
•Neverletchildrenoruntrainedpeopleoperateor
servicetheequipment.Localregulationsmayrestrict
theageoftheoperator.
•Theowner/usercanpreventandisresponsiblefor
accidentsorinjuriesoccurringtohimselforherself,
otherpeopleorproperty.
Preparation
•Evaluatetheterraintodeterminewhataccessories
andattachmentsareneededtoproperlyand
safelyperformthejob.Onlyuseaccessoriesand
attachmentsapprovedbythemanufacturer.
•Wearappropriateclothingincludingsafetyglasses
andhearingprotection.Longhair,looseclothing,or
jewelrymaygettangledinmovingparts.
•Inspecttheareawheretheequipmentistobeused
andremoveallobjectssuchasrocks,toys,andwire
whichcanbecontactedbytheaerator.
•Useextracarewhenhandlinggasolineandother
fuels.Theyareammableandvaporsareexplosive.
–Useonlyanapprovedcontainer.
–Neverremovethegascaporaddfuelwiththe
enginerunning.
–Allowtheenginetocoolbeforerefueling.
–Donotsmoke.
3

–Neverrefuelordraintheaeratorindoors.
•Checkthatthecontrols,safetyswitches,andshields
areattachedandfunctioningproperly.Donot
operateunlesstheyarefunctioningproperly.
Operation
•Neverrunanengineinanenclosedarea.
•Onlyoperateingoodlight,keepingawayfromholes
andhiddenhazards.
•Besurealldrivesareinneutralbeforestartingengine.
•Neveroperatewithouttheshields,covers,orother
guardssecurelyinplace.Besureallinterlocksare
functioningproperly.
•Donotchangetheenginegovernorsettingor
overspeedtheengine.
•Raisethetines,stopthemachine,andstoptheengine
beforeleavingtheoperator’spositionforanyreason.
•Stoptheequipmentandinspectthetinesafter
strikinganobjectorifanabnormalvibrationoccurs.
Makenecessaryrepairsbeforeresumingoperation.
•Keephandsandfeetawayfromthetinearea.
•Nevercarrypassengersandkeeppetsandbystanders
away.
•Bealert,slowdown,andusecautionwhenmaking
turns.Lookbehindandtothesidebeforechanging
directions.
•Slowdownandusecautionwhencrossingroads
andsidewalks.
•Donotoperatetheaeratorundertheinuenceof
alcoholordrugs.
•Lightningcancausesevereinjuryordeath.If
lightningisseenorthunderisheardinthearea,do
notoperatethemachine;seekshelter.
•Useextremecarewhenloadingorunloadingthe
aeratorintoatrailerortruck.
•Usecarewhenapproachingblindcorners,shrubs,
trees,orotherobjectsthatmayobscurevision.
•Alwaysbeawareofobstaclesthatmaybeinthe
areaofoperation.Planyouraerationpathtoavoid
contactwithanyobstaclebyyouorthemachine.
SlopeOperation
•Donotoperateonslopeswhengrassiswet.Slippery
conditionsreducetractionandcouldcausesliding
andlossofcontrol.
•Donotmakesuddenturnsorrapidspeedchanges.
•Reducespeedanduseextremecautiononslopes.
•Removeormarkobstaclessuchasrocks,treelimbs,
etc.fromtheoperatingarea.Tallgrasscanhide
obstacles.
MaintenanceandStorage
•Waitforallmovementtostopbeforeadjusting,
cleaning,orrepairing.Raisethetines,stopthe
machine,stoptheengine,anddisconnectthespark
plugwire.
•Cleangrassanddebrisfromthetines,drives,
mufers,andenginetohelppreventres.Cleanup
oilorfuelspillage.
•Lettheenginecoolbeforestoringanddonotstore
nearame.
•Shutoffthefuelwhilestoringortransportingon
trailers.Donotstorefuelnearamesordrain
indoors.
•Parktheaeratoronlevel,hardground.Neverallow
untrainedpersonneltoserviceit.
•Usejackstandsorsafetylatchestosupportthe
machinewhenworkingunderit..
•Removethesparkplugwirebeforemakingany
repairs.
•Keephandsandfeetawayfrommovingparts.If
possible,donotmakeadjustmentswiththeengine
running.
•Keepallpartsingoodworkingconditionandall
hardwaretightened.Replaceallwornordamaged
decals.
•UseonlyLawnSolutions-approvedattachments.
Thewarrantymaybevoidedifthemachineisused
withunapprovedattachments.
4

SlopeIndicator
G01 1841
Figure3
Thispagemaybecopiedforpersonaluse.
1.Themaximumslopeyoucansafelyoperatethemachineonis20degrees.Usetheslopecharttodeterminethedegreeofslope
ofhillsbeforeoperating.Donotoperatethismachineonaslopegreaterthan20degrees.Foldalongtheappropriateline
tomatchtherecommendedslope.
2.Alignthisedgewithaverticalsurface,atree,building,fencepole,etc.
3.Exampleofhowtocompareslopewithfoldededge.
5

SafetyandInstructionalDecals
Safetydecalsandinstructionsareeasilyvisibletotheoperatorandarelocatednearanyareaof
potentialdanger.Replaceanydecalthatisdamagedorlost.
121-6150
1.Cuttinghazardofhandandfoot–stayawayfrommoving
parts.
121-6151
121–6151
1.Choke3.Continuousvariable
2.Fast4.Slow
119-4672
119-4671
6

Setup
UnfoldingtheHandle
1.Raisethehandletotheoperatingposition.
g013073
1
Figure4
2.Slidetheovallockingringsdowneachsideofthe
upperhandleoverthelowerhandle,lockingthe
handlesectionstogether.
FillingtheCrankcasewithOil
Theenginecrankcaseisshippedwithoutoil.You
mustllitwithapproximately22ounces(0.65l)ofoil
beforestartingtheengine.RefertoCheckingtheEngine
OilLevelinCheckingtheEngineOilLevel(page8),for
oilspecicationsandinstructions.
ProductOverview
g013072
1
2
3
567
8
910
11
12
13
14
15
4
Figure5
1.Fuelshut-offvalve9.Tractioncontrollever
2.Aircleaner10.Throttlelever
3.Sparkplugwire11.Tinecontrollever
4.EngineOn/Offswitch
(ontherightsideofthe
engine)
12.Ovalhandlelockingring
5.Recoilstarter13.Coringdepth,wheelstop
6.Fueltank14.Tie-down/liftloops
7.Rearweights15.Tines
8.Handle
Controls
RecoilStarter
Pulltherecoilstarterhandletostartengine(Figure5).
FuelShut-offValve
Closethefuelshut-offvalvewhentransportingor
storingthemachine(Figure5).
EngineOn/OffSwitch
ToggletheengineonoffswitchtoOntoenablethe
engineelectricalsystemsothatitcanbestarted.Switch
ittoOfftostoptheengine.
ThrottleLever
Beforestartingacoldengine,movethethrottlelever
forwardtotheChokeposition.Aftertheenginestarts,
pullthethrottleleverbacktotheFastposition.
7

Note:Awarmenginerequireslittleornochoking.
TractionControlLever
Thetractioncontrollevercontrolstheforward,
reverse,andneutralactionsofthemachine.Referto
DrivingtheMachine(page10)formoreinformation.
TineControlLever
Thetinecontrolleverliftstherearwheels,causingthe
rearofthemachinetobesupportedontheaerating
tines.Pushthetinecontrolleverdowntoliftthewheels
anddropthetines.Pullituptolowerthewheelsand
raisethetinesoutoftheground.
g013076
1
2
Figure6
1.Tinecontrollever—raised
position
2.Tinecontrol
lever—loweredposition
Specications
Length(operating)61inches(155cm)
Length(withhandlestored)48.5inches(123cm)
Width31inches(79cm)
Height(operating)45.25inches(115cm)
Height(withhandlestored)32.5inches(82.5cm)
Weight(asshippedwith2
weights)
337lb(152.8kg)
Operation
Note:Determinetheleftandrightsidesofthe
machinefromthenormaloperatingposition.
CheckingtheEngineOilLevel
ServiceInterval:Beforeeachuseordaily
Theenginecrankcasecanhold20ounces(0.55liters)
ofoil.Useonlyhigh-qualitySAE10W-30weight
detergentoilthathastheAmericanPetroleumInstitute
(API)serviceclassicationSH,SJ,Slorhigher.
Note:Whenthecrankcaseisempty,pourabout3/4
ofthecrankcasecapacityofoilinthecrankcase,then
followtheprocedureinthissection.
1.Movethemachinetoalevelsurface.
2.Cleanaroundthedipstick(Figure7).
G016924
Figure7
3.Removethedipstickbyrotatingthecap
counterclockwiseandpullingitout.
4.Wipethedipstickcleanwithacleancloth.
5.Insertthedipstickintothellerneck,butdo
notrotatethecapclockwisetosecureit,then
removeit.
6.Readtheoillevelonthedipstick.
7.Iftheoillevelreadingisbelowthelowerlimitmark
onthedipstick,removethedipstickandslowly
pouronlyenoughoilintothellerholetoraisethe
oilleveltotheupperlimitmarkonthedipstick.
Important:Donotoverllthecrankcasewith
oilandruntheengine;enginedamagewill
result.Draintheexcessoiluntiltheoillevel
reachestheupperlimitmarkonthedipstick.
8.Insertthedipstickintothellerneckandrotatethe
capclockwiseuntilitistight.
8

FillingtheFuelTankwith
Gasoline
Forbestresults,useclean,fresh,lead-freegasolinewith
anoctaneratingof87orhigher.Toensurefreshness,
purchaseonlythequantityofgasolinethatyouexpectto
usein30days.Usingunleadedgasolineresultsinfewer
combustiondepositsandlongerenginelife.Youmay
useleadedgasolineifunleadedgasolineisnotavailable.
Important:Donotaddoiltothegasoline.
Important:Donotusemethanol,gasoline
containingmethanol,gasoholcontainingmore
than10%ethanol,premiumgasoline,orwhitegas.
Usingthesefuelscandamagetheengine'sfuel
system.
Important:Donotusegasolinethathasbeen
storedsincethelastseasonorlonger.
DANGER
Incertainconditions,gasolineisextremely
ammableandhighlyexplosive.Areorexplosion
fromgasolinecanburnyouandothersandcan
damageproperty.
•Fillthefueltankoutdoors,inanopenarea,and
whentheengineiscold.Wipeupanygasoline
thatspills.
•Donotllthefueltankcompletelyfull.Add
gasolinetothefueltankuntilthelevelis1/4to
1/2in.(6to13mm)belowthebottomofthe
llerneck.Thisemptyspaceinthetankallows
thegasolinetoexpand.
•Neversmokewhenhandlinggasoline,andstay
awayfromanopenameorwhereasparkmay
ignitethegasolinefumes.
•Storegasolineinanapprovedfuelcontainer
andkeepitoutofthereachofchildren.
•Neverbuymorethana30-daysupplyof
gasoline.
DANGER
Whenfueling,undercertaincircumstances,astatic
chargecandevelop,ignitingthegasoline.Areor
explosionfromgasolinecanburnyouandothers
anddamageproperty.
•Alwaysplacegasolinecontainersontheground
andawayfromyourvehiclebeforelling.
•Donotllgasolinecontainersinsideavehicle
oronatruckortrailerbedbecauseinterior
carpetsorplastictruckbedlinersmayinsulate
thecontainerandslowthelossofanystatic
charge.
•Whenpractical,removegasoline-powered
equipmentfromthetruckortrailerandrefuel
theequipmentwithitswheelsontheround.
•Ifthisisnotpossible,thenrefuelsuch
equipmentonatruckortrailerfromaportable
container,notfromagasolinedispensernozzle.
•Ifyoumustuseagasolinedispensernozzle,
keepthenozzleincontactwiththerimofthe
fueltankorcontaineropeningatalltimesuntil
fuelingiscomplete.
Useafuelstabilizer/conditionerregularlyduring
operationandstorage.Astabilizer/conditionercleans
theengineduringoperationandpreventsgum-like
varnishdepositsfromformingintheengineduring
periodsofstorage.
Important:Donotusefueladditivesotherthan
afuelstabilizer/conditioner.Donotusefuel
stabilizerswithanalcoholbasesuchasethanol,
methanol,orisopropanol.
1.Cleanaroundthefueltankcap(Figure8).
g013080
1
Figure8
1.Fueltankcap
2.Removethecapfromthetank.
9

3.Fillthefueltankwithunleadedgasolinetowithin
1/4to1/2inch(6to13mm)fromthetopofthe
tank.Donotllintothellerneck.
Important:Donotllthetankmorethan1/4
inch(6mm)fromthetopofthetankbecause
thegasolinemusthaveroomtoexpand.
4.Installthefueltankcapandwipeupanyspilled
gasoline.
StartingtheEngine
1.Connectthewiretothesparkplug.
2.OpenthefuelvalveasshowninFigure9)
g016909
Figure9
3.Movethethrottlecontrolallthewayforwardtothe
Chokeposition(Figure9).
Note:Donotusethechokewhentheengineis
warm.
g016910
1
Figure10
1.Throttlecontrol
4.Turntheengineswitchon.
5.Pullthestarterhandlelightlyuntilyoufeel
resistance,thenpullitsharply.Allowtheropeto
returntothehandleslowly.
6.Whentheenginestarts,movethethrottlecontrol
totheFastposition.
Note:Thethrottlesettinggovernsthemaximum
drivespeedoftheaerator.
StoppingtheEngine
1.Releasethetractioncontrolleverandallowitto
returntoneutral.
2.Movethethrottleleverallthewayrearward.
3.Turntheengineswitchoff.
4.Disconnectthewirefromthesparkplugbefore
leavingthemachine.
DrivingtheMachine
•Tomoveforward,pressthecontrolleverforward
(Figure11).Thefurtherforwardyoupushit,the
fasterthemachinewilltravel.
•Tomoveinreverse,pullthecontrolleverrearward
(Figure11).Thefurtherforwardyoupullit,the
fasterthemachinewilltravel.
WARNING
Theaeratortinesaresharpandcanpuncture
yourfeetorotherbodyparts.
Useextremecarewhenmovinginreverseso
thatyoudonotallowyourfeettogoclosetothe
tines.Watchforandavoidobstaclesyoucould
tripover.
10

•Toturnthemachine,moveslowlyandpressdown
onthehandles;turnthemachineinthedesired
directionthenresumenormaloperation.
•Tostop,releasethecontrollever(Figure11).
g013075
3
2
1
Figure11
1.Forward3.Reverse
2.Neutral(Stop)
Aerating
1.Drivethemachinetothedesiredlocationandstop
it.
2.Pushthetinecontrolleverdownandforwardto
raisetherearwheelsandengagethetines.
g013076
1
2
Figure12
1.Tinecontrollever—disengaged
2.Tinecontrollever—engaged
3.Drivethemachinetoaeratethedesiredarea.
Note:Themachinewithaerateinbothforward
andreverse.
4.Whennished,stopthemachineandpullthetine
controlleverrearwardanduptolowertherear
wheelsandliftsthetinesoutoftheground.
Important:Donotdrivethemachineacross
pavementorotherhardsurfaceswithoutrst
raisingthetines.Crossinghardsurfaceswith
thetinesloweredwilldamagethetines.
AddingWeight
Toensurethatthetinespenetratefullyintothesoil,
youcanaddweighttothebackofthemachine.The
machinehasthreeweightpocketsthatholdtheweights
(Figure13).Whenplacingweight,ensurethatyouhave
abalancedload;ifusingonlyoneweight,placeitinthe
centerpocketandifusingtwo,placethemintheside
pockets.
11

g013074
1
Figure13
1.Weight
AdjustingtheCoringDepth
Acoringdepthof2-1/2inches(6.35cm)is
recommended,butyoucanchangethedepthasfollows:
1.Raisethetines,stopthemachine,stoptheengine,
anddisconnectthesparkplugwire.
2.Loosenthenutssecuringthewheelstoponthe
rightsideofthemachine(Figure14).
Figure14
1.Nuts2.Wheelstop
3.Raisethewheelstoptoincreasethecoringdepth
andlowerittoreducethedepthasrequired.
4.Tightenthenutssecurelytolockthewheelstopin
place.
5.Repeatsteps2through4forthewheelstoponthe
leftsideofthemachine.Setthewheelstopstothe
sameheightoneachside.
SecuringtheMachinefor
Transport
Whentransportingthemachineonatrailer,alwaysuse
thefollowingprocedure:
Important:Donotoperateordrivethemachine
onroadways.
1.Drivethemachineontothattrailer,stopthe
machine,stoptheengine,turnoffthefuelvalve,
anddisconnectthesparkplugwire.
Important:Ifyoudonotturnoffthefuelvalve,
theenginemayoodduringtransport.
2.Securethemachinetothetrailerwithchainsor
strapsusingthetie-down/liftloops(Figure5).
OperatingTips
•Forbestperformanceandmaximumtine
penetration,watertheturfthoroughlytheday
beforeaerating.
•Cleantheareaofdebrisbeforeusingthemachine.
•Markandavoidshallowobstaclessuchassprinkler
headsandinvisiblefencewires.
12

Maintenance
RecommendedMaintenanceSchedule(s)
MaintenanceService
IntervalMaintenanceProcedure
Aftertherst5hours•Changetheengineoil.
Aftertherst10hours•Checkthetensionofthedrivechains.
Beforeeachuseordaily
•Checktheengineoillevel.
•Lubricatethepivotarms.
•Inspecttheaircleanerelements.
•Checkthetirepressure.
•Checktheconditionofthecoringtinesandreplaceanythataredamagedor
excessivelyworn.
•Checkforloosefasteners.
Every25hours•Lubricateandcheckthedrivechains.
Every50hours•Changetheengineoil.
•Checkthetensionofthedrivechains.
Every100hours•Inspect,clean,andadjustthesparkplug;replaceitifnecessary.
Every200hours•Replacethesparkplug.
Yearly•Replacetheairlerelement.Replaceitmorefrequentlyindustyoperating
conditions.
Yearlyorbeforestorage•Touchupchippedpaint
Premaintenance
Procedures
AccessingtheTines
Themachinehasarearaccesspanelthatyoucanremove
asillustratedintoaccessandmaintainthetines.
G01691 1
1
Figure15
WARNING
Ifyouoperatethemachinewiththerearaccess
panelremoved,someonecouldbeseverelyinjured
bycontactwiththemovingtinesorbyyingdebris.
Alwayssecurelyinstalltherearaccesspanelbefore
operatingthemachine.
TippingtheMachine
Ifyouneedtoworkontheundersideofthemachine,you
cantipitbackata45degreeangleuntilitisrestingon
thehandle(Figure16).Donottipthemachineforward
oryouwillfoultheaircleanerwithgasoline.Securethe
machinewithajackstandbeforeworkingunderit.
13

Figure16
1.Jackstand
WARNING
Mechanicalorhydraulicjacksmayfailtosupport
machineandcauseaseriousinjury.
•Usejackstandswhensupportingmachine.
•Donotusehydraulicjacks.
Lubrication
GreasingtheCenterTines
ServiceInterval:Beforeeachuseordaily
1.Raisethetines,stopthemachine,stoptheengine,
anddisconnectthesparkplugwire.
2.Removetherearaccesspanel;referto
AccessingtheTines(page13)
3.Manuallyrotatethe2centertineassembliesuntilyou
canseethegreasettings(Figure17).
Figure17
4.Wipethegreasettingswithacleanrag.
5.Installagreasegunontothettingandgentlyapply2
or3pumpsof#2multi-purposelithiumbasegrease.
Important:Excessivegreasepressuremay
damagetheseals.
LubricatingtheDriveChains
ServiceInterval:Every25hours
1.Raisethetines,stopthemachine,stoptheengine,
anddisconnectthesparkplugwire.
2.Raisethefrontofthemachinetogainaccesstothe
chains(Figure18)andblockitinplace.
CAUTION
Ifyoudonotsecurelyblocktheupthefront
ofthemachine,themachinecouldfallonyou
duringservice,injuringyou.
Ensurethatyouplaceajack-standorblock
underthefrontofthemachinetoholditup
securely.
14

Important:Donotraisetherearofthemachine.
Raisingtherearofthemachinewillcausethe
enginetooodandtheaircleanertobefouled
withgasoline.
g013292
1
Figure18
1.Chain(leftsideshown)
3.Applyageneralpurposeoil(10W30)ontothelower
chainspanwhilerotatingthefrontwheeltoexpose
un-oiledchainlinksuntilthewholechainisoiled.
4.Repeatstep3fortheotherchain.
5.Wipeupanyoilthatspilledandlowerthemachine
tothegroundwhennished.
EngineMaintenance
ServicingtheAirCleaner
ServiceInterval:Beforeeachuseordaily—Inspectthe
aircleanerelements.
Yearly—Replacetheairlerelement.
Replaceitmorefrequentlyindusty
operatingconditions.
Important:Donotoperatetheenginewithoutthe
airlterassembly;extremeenginedamagemay
occur.
1.Stoptheengineandwaitforallmovingpartstostop.
2.Disconnectthewirefromthesparkplug.
3.Pressdownonthelatchtabsontopoftheaircleaner
coverandremovethecover(Figure19).
Note:Becarefultopreventdirtanddebrisfrom
fallingintothebase.
g013078
Figure19
4.Removetheairlterelement(Figure19).
5.Inspecttheairlterelementandreplaceitifitis
damagedorwetwithoilorfuel.
6.Iftheelementdirty,tapitonahardsurfaceseveral
timesorblowcompressedairlessthan30psi(207
kPa)throughthelterfromtheenginesideofit.
7.Wipedirtfromthebaseandthecoverwithamoist
rag.
Note:Becarefultopreventdirtanddebrisfrom
enteringtheairductleadingtothecarburetor.
8.Installthelterintotheaircleanerandinstallthe
cover.
15

ChangingtheEngineOil
ServiceInterval:Aftertherst5hours
Every50hours
1.Runtheenginetowarmtheengineoil.
Note:Warmoilowsbetterandcarriesmore
contaminants.
WARNING
Oilmaybehotafterenginehasbeenrun,and
contactwithhotoilcancauseseverepersonal
injury.
Avoidcontactingthehotengineoilwhenyou
drainit.
2.Stoptheengineandwaitforallmovingpartstostop.
3.Disconnectthewirefromthesparkplug.
4.Placeadrainpanonthegroundtotherightofthe
machine.
5.Removethedipstick(Figure20).
G016924
Figure20
6.Tipthemachineontoitsside,withtheairlterup,
todraintheusedoiloutthroughtheoillltube.
7.Tipthemachineuprightagain.
8.Slowlypouroilintotheoillltube,periodically
checkingthelevelwiththedipstick,untilthedipstick
indicatesthattheengineisfullasillustratedinFigure
40.Donotoverll.(Max.ll:20oz.(0.55l),
type:SAE30WdetergentoilwithanAPIservice
classicationofSH,SJ,SL,orhigher.)
Note:Ifyouoverlltheengine,poursomeoilout
ofit.
9.Installthedipsticksecurely.
10.Recycletheusedoilaccordingtolocalcodes.
ServicingtheSparkPlug
ServiceInterval:Every100hours—Inspect,clean,
andadjustthesparkplug;replaceitif
necessary.
Every200hours—Replacethespark
plug.
UseanNGKBPR6ESsparkplugorequivalent.
1.Stoptheengineandwaitforallmovingpartstostop.
2.Disconnectthewirefromthesparkplug.
3.Cleanaroundthesparkplug.
4.Removethesparkplugfromthecylinderhead.
Important:Replaceacracked,fouled,or
dirtysparkplug.Donotcleantheelectrodes
becausegritenteringthecylindercandamage
theengine.
5.Setthegapontheplugto0.030inch(0.76mm)
(Figure21).
Figure21
1.Centerelectrodeinsulator
2.Sideelectrode
3.Airgap(nottoscale)
6.Carefullyinstallthesparkplugbyhand(toavoid
crossthreading)untilitishandtight.
7.Tightenthesparkpluganadditional1/2turnifitis
new;otherwise,tightenitanadditional1/8to1/4
turn.
Important:Aloosesparkplugcanbecomevery
hotandcandamagetheengine;overtightening
asparkplugmaydamagethethreadsinthe
cylinderhead.
8.Connectthewiretothesparkplug.
16

DriveSystem
Maintenance
CheckingtheTirePressure
ServiceInterval:Beforeeachuseordaily
Maintaintheairpressureinthetiresasspecied.Check
thetireswhentheyarecoldtogetthemostaccurate
reading.
Pressure:46psi(317kPa)
1
G003793
Figure22
1.Valvestem
CheckingtheTensionof
AeratorDriveChains
ServiceInterval:Aftertherst10hours
Every50hours
1.Raisethetines,stopthemachine,stoptheengine,
anddisconnectthesparkplugwire.
2.Raisethefrontofthemachinetogainaccesstothe
chainsandblockitinplace.
CAUTION
Ifyoudonotsecurelyblocktheupthefront
ofthemachine,themachinecouldfallonyou
duringservice,injuringyou.
Ensurethatyouplaceajackstandorblockunder
thefrontofthemachinetoholditupsecurely.
Important:Donotraisetherearofthemachine.
Raisingtherearofthemachinewillcasuethe
enginetooodandtheaircleanertobefouled
withgasoline.
3.Pulldownoneachchainneartheopeninginthe
framewith10pounds(4.5kg)offorce(Figure23).
Ifachaincontactsthebottomoftheopeninginthe
frame,tightenitasfollows:
g013126
1
2
Figure23
1.Flexinthechain2.Bottomoftheframe
opening
A.Loosenthenutsecuringtheidlersprocketofthe
chainyouaretensioning(Figure24).
Figure24
1.Idlersprocket
B.Pulldownontheidlersprocketuntiltheslackis
takenoutofthechainandthereismorethan1/4
inch(6mm)ofspacebetweenthechainandthe
bottomoftheopeningintheframewhenyou
apply10pounds(4.5kg)offorcetothechain.
C.Tightentheidlersprocketnutandtorqueitto30
ft-lb(40.6N-m).
17

BeltMaintenanceTineMaintenance
Checking/ReplacingTines
ServiceInterval:Beforeeachuseordaily
1.Raisethetines,stopthemachine,stoptheengine,
anddisconnectthesparkplugwire.
2.Removetherearaccesspanel;referto
AccessingtheTines(page13)
3.Manuallyrotatethetinesontheshaft,inspecting
themforwearordamage.
4.Ifanyaredamagedorbroken,removethenutand
boltsecuringthetinetothetineassembly(Figure25).
Figure25
1.Tineassembly3.Boltandnut
2.Tine
5.Removethetineandreplaceitwithanewone.
Ensurethatthenewtineisfacingthesamedirection
astheothertinesontheassembly.
6.Securethenewtinewiththeboltandnutyou
removedpreviouslyandtorquethemto30ft-lb(40.6
N-m).
7.Whenalltineshavebeeninspectedandreplacedas
needed,lowerthemachinetotheground.
18

Storage
1.Raisethetines,stopthemachine,stoptheengine,
anddisconnectthesparkplugwire.
2.Removedirtandgrimefromtheentiremachine.
Important:Youcanwashthemachinewith
milddetergentandwater.Donotpressurewash
themachine.Avoidexcessiveuseofwater,
especiallyneartheengine.
3.Servicetheaircleaner;referto
ServicingtheAirCleaner(page15).
4.Greasethechainsandoatingtineassemblies;refer
toLubrication(page14).
5.Changetheengineoil;referto
ChangingtheEngineOil(page16).
6.Checkandtightenallbolts,nuts,andscrews.Repair
orreplaceanypartthatisdamaged.
7.Paintallscratchedorbaremetalsurfaces.Paintis
availablefromyourAuthorizedServiceDealer.
8.Storethemachineinaclean,drygarageorstorage
area.
9.Coverthemachinetoprotectitandkeepitclean.
19

Troubleshooting
ProblemPossibleCauseCorrectiveAction
1.ThethrottleleverisintheOffposition.1.MovethethrottlelevertotheChoke
position.
2.Thesparkplugisdisconnected.2.Connectthesparkplug.
3.Thefuelisturnedoff.3.Openthefuelvalve.
Enginewillnotstart.
4.Thetractionleverisnotinneutral.4.Releasethetractionleversoitreturns
toneutral.
Themachinevibratesabnormally.1.Looseboltsand/orbrokenparts.1.Stopthemchineandengine
immediately.Replaceanybrokenor
missingparts.
Themachinewillnotpullitselfuphills.1.Thedrivebelttothehydrostaticpump
isloose.
1.Checkandtightenthepumpdrivebelt.
Thefrontwheelsmovebutthetinesdo
not.
1.Achainordrivesprocketisbroken.1.Replacethebrokenchainorsprocket.
Theenginesmokeswhenstarting.1.Theenginewastippedforward.1.Checktheaircleanerandreplaceitifit
isfouled.Alwaystipthemachineback
whenservicing.
Theengineishardtostartafter
transportingit.
1.Thefuelvalvewasnotclosedbefore
transportandtheengineisooded.
1.Alwaysclosethefuelvalvebefore
transportingthemachine.
20
Table of contents
Other Lawn Solutions Tiller manuals