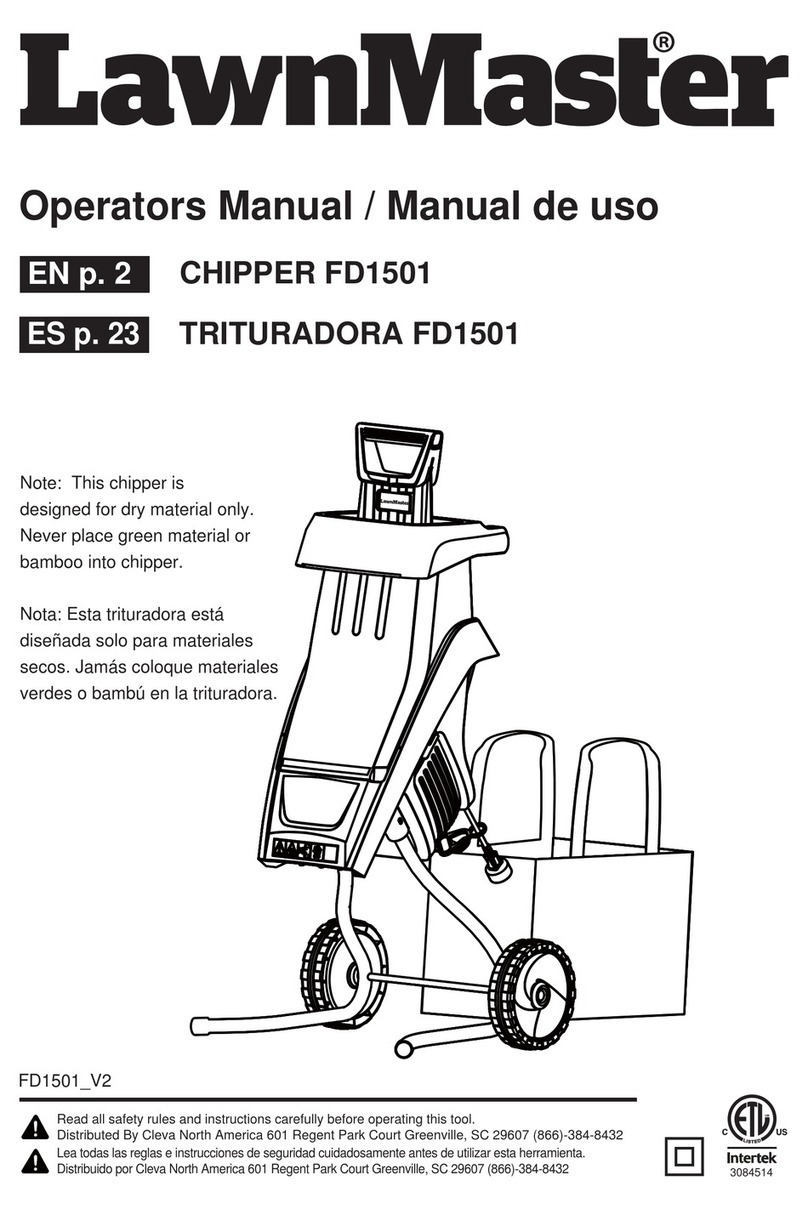
LawnMaster FD1501 User manual

CHIPPER SHREDDER FD1501
3084514
Read all safety rules and instructions carefully before operating this tool.
Distributed By Cleva North America 601 Regent Park Court Greenville, SC 29607 (866)-384-8432
FD1501_V1
EN p. 2
DÉCHIQUETEUR-BROYEUR FD1501
FR p. 22
TRITURADORA DE RAMAS FD1501
SP p. 43
Operator’s Manual
Lisez attentivement toutes les règles de sécurité ainsi que les instructions avant de faire fonctionner cet outil.
Distribué par Cleva North America 601 Regent Park Court Greenville, SC 29607 (866)-384-8432
Lea detenidamente todas las normas de seguridad y las instrucciones antes de utilizar esta herramienta.
Distribuido por Cleva North America 601 Regent Park Court Greenville, SC, 29607 (866)-384-8432

2
CONTENTS 2
PRODUCT SPECIFICATIONS 2
SAFETY INFORMATION 3-4
SYMBOLS 5-6
ELECTRICAL 7-8
KNOW YOUR YARD CHIPPER 9
ASSEMBLY INSTRUCTIONS 10-12
OPERATION 13-15
MAINTENANCE 16-17
WARRANTY 18
EXPLODED VIEW 19
PARTS LIST 20
NOTES 21
CONTENTS
PRODUCT SPECIFICATIONS
CHIPPER SHREDDER FD1501
Nominal Current 15 A
Nominal Voltage 120 V~60Hz
Safety Class II
Idling Speed 3800 rpm
Maximum Cutting Diameter 1-1/2 in. max
Volume Of Collection Bag 15.85 gal
Weight 26.4lbs
The max. branch thickness that can be chipped is dependent on the type of wood and the quality of
the goods being cut, but never thicker than 1-1/2" in diameter.
For hard wood (e.g. oak/beech branches), the max. branch thickness that can be chipped is less than
for soft wood (e.g. pine/spruce wood). For dry or knotted wood, the cutting thickness may also be less.
Helpful Tip!

3
SAFETY INFORMATION
IMPORTANT SAFETY INSTRUCTIONS
READ AND UNDERSTAND ALL INSTRUCTIONS. Failure to follow all instructions listed below
may result in electric shock, fire, and/or serious personal injury.
IMPORTANT
TO AVOID MISTAKES THAT COULD CAUSE SERIOUS INJURY, DO NOT PLUG IN THE CHIPPER
UNTIL THE FOLLOWING STEPS HAVE BEEN READ THOROUGHLY.
5($'DQGEHFRPHIDPLOLDUZLWKWKLVHQWLUHLQVWUXFWLRQPDQXDO/($51WKHWRRO¶VDSSOLFDWLRQV
limitations, and possible hazards.
$92,''$1*(5286&21',7,216'2127XVHSRZHUWRROVLQZHWRUGDPSDUHDVRUH[SRVH
them to rain.
'2127XVHSRZHUWRROVLQWKHSUHVHQFHRIIODPPDEOHOLTXLGVRUJDVHV
.((3%<67$1'(56$7$6$)(',67$1&()520WKHZRUNDUHDZKHQWKHWRROLVRSHUDWLQJ
NEVER allow children near the tool.
'2127)25&(7+(722/WRGRDMREIRUZKLFKLWZDVQRWGHVLJQHG
'5(66)256$)(7<'2127ZHDUORRVHFORWKLQJJORYHVQHFNWLHVRUMHZHOU\ULQJVZDWFKHV
HWFZKHQRSHUDWLQJWRRO/RRVHFORWKLQJFDQJHWFDXJKWDQGSXOO\RXLQWRPRYLQJSDUWV
$/:$<6:($5(<(3527(&7,21
$/:$<6UHPRYHWKHSRZHUFRUGSOXJIURPWKHHOHFWULFRXWOHWZKHQPDNLQJDGMXVWPHQWV
FKDQJLQJSDUWVFOHDQLQJRUZRUNLQJRQWKHWRRO
AVOID ACCIDENTAL START-UPS. Make sure the power switch is in the OFF position before
SOXJJLQJLQWKHSRZHUFRUG
DO NOT abuse the power cord. Do not use it to carry the tool. Keep cord away from heat,
RLOVKDUSHGJHVRUPRYLQJSDUWV5HSODFHGDPDJHGFRUGVLPPHGLDWHO\WKH\PD\FUHDWH
a shock or fire hazard.
1(9(5/($9($5811,1*722/81$77(1'('7XUQWKHSRZHUVZLWFKWR2))'RQRWOHDYH
the tool until it has come to a complete stop.
.HHSSURSHUIRRWLQJDQGEDODQFHDWDOOWLPHV:HDURLOUHVLVWDQWUXEEHUVROHGIRRWZHDU
$/:$<6NHHSWRROFOHDQDQGLQJRRGZRUNLQJRUGHU
&KHFNIRUSURSHUDOLJQPHQWRIPRYLQJSDUWVELQGLQJEUHDNDJHRUDQ\RWKHUFRQGLWLRQVWKDW
PD\DIIHFWWKHWRRO¶VRSHUDWLRQ$Q\SDUWWKDWLVGDPDJHG
'2127RSHUDWHWRROLI\RXDUHXQGHUWKHLQIOXHQFHRIDQ\GUXJVDOFRKRORUPHGLFDWLRQWKDW
could affect your ability to use the tool properly.
'RQRWXVHVROYHQWVEUDNHIOXLGVJDVROLQHRURWKHUSHWUROHXPSURGXFWVWRFOHDQWKHWRROWKH\
PD\GDPDJHSODVWLFSDUWV
WARNING

SAFETY INFORMATION
ALWAYS WEAR EYE PROTECTION.
A yard chipper can throw foreign objects into your eyes which could cause
permanent eye damage.
ALWAYS wear safety goggles (not glasses). Ordinary eyeglasses have only
impact-resistant lenses—they are NOT safety goggles.
4
SPECIFIC SAFETY RULES FOR YARD CHIPPERS
%HWKRURXJKO\IDPLOLDUZLWKWKHRSHUDWLRQRIWKHFKLSSHUEHIRUHLQLWLDOXVH
1(9(5SXW\RXUKDQGVLQWRWKHKRSSHU$OZD\VXVHWKHSXVKVWLFNVXSSOLHGZLWK\RXUFKLSSHUWR
push items into the hopper.
'2127WU\WRIRUFHREMHFWVWKDWH[FHHGWKHUHFRPPHQGHGGLDPHWHUDQGFDSDFLW\RIWKHFKLSSHU
1-1/2" (38 mm).
$92,'$&&,'(17$/67$57836%HVXUHVZLWFKLV2))ZKHQSOXJJLQJLQ
'2127)25&(7+(&+,33(5,WZLOOGRWKHMREEHWWHUDQGZLWKOHVVOLNHOLKRRGRILQMXU\DWWKH
rate for which it was designed.
%HIRUHSXWWLQJREMHFWVLQWRWKHKRSSHUUHPRYHDQ\VWRQHVGHEULVRUREMHFWVWKDWFRXOGGDPDJH
the blades.
'XULQJRSHUDWLRQHQVXUHWKDWWKHUHDUHQRRWKHUSHUVRQVRUDQLPDOVZLWKLQDUDGLXVRIIHHW
Stop using the machine while people, especially children, or pets, are nearby.
1(9(5UHDFKXQGHUWKHFKLSSHUXQWLOLWKDVFRPSOHWHO\VWRSSHG7KHEODGHPD\FRQWLQXHWRURWDWH
for a time after being switched OFF.
0$.(DOODGMXVWPHQWVZLWKWKHSRZHU2))DQGWKHFKLSSHUGLVFRQQHFWHGIURPWKHSRZHUVRXUFH
$/:$<6XVHDFFHVVRULHVSURYLGHGRUUHFRPPHQGHGE\WKHPDQXIDFWXUHU'RQRWXVHVXEVWLWXWHV
.((3JXDUGVLQSODFHDQGLQZRUNLQJRUGHU.HHSEODGHVVKDUS.HHSKDQGVDQGIHHWDZD\IURP
cutting areas.
NEVER PLACE HANDS NEAR DISCHARGE CHUTE. FAILURE COULD RESULT IN SERIOUS
INJURY.
WARNING
WARNING
NEVER REACH INTO THE HOPPER UNTIL THE CHIPPER HAS COME TO A COMPLETE STOP
AND IS UNPLUGGED. THE CHIPPER WILL CONTINUE TO ROTATE FOR A FEW SECONDS
AFTER IT IS SWITCHED OFF

SYMBOLS
Some of the following symbols may be used on this product. Please study them and learn their meaning.
Proper interpretation of these symbols will allow you to operate the product better and safer.
5
n
o
SYMBOL NAME DESIGNATION/EXPLANATION
V Volts Voltage
A Amperes Current
Hz Hertz Frequency (cycles per second)
W Watts Power
min Minutes Time
Alternating Current Type of current
Direct Current Type or a characteristic of current
No Load Speed Rational speed, at no load
Class II Construction Double-insulated construction
/min Per Minute Revolutions, strokes, surface speed, orbits etc.,
per minute
Wet Conditions Alert Do not expose to rain or use in damp locations
Read The Operator’s Manual To reduce the risk of injury user must read and
understand operator’s manual before using this
product.
Eye Protection Wear eye protection when operating this equipment.
Ricochet Thrown objects can ricochet and result in personal
injury or property damage.
Sharp Blade Danger – Keep hands and feet away from blade.
Cutting Capacity Cutting capaciW\1-1/2" (38 mm)
Keep Bystanders Away Keep all bystanders at least 50 ft. away.

SYMBOLS
The following signal words and meanings are intended to explain the levels of risk associated with
this product.
6
Servicing requires extreme care and knowledge and should be performed only by a qualified service
technician. For service we suggest you return the product to your nearest AUTHORIZED SERVICE
CENTER for repair. When servicing, use only identical replacement parts.
SERVICE
To avoid serious personal injury, do not attempt to use this product until you have read this Owner's
Manual thoroughly and understand it completely. If you do not understand the warnings and
instructions in this Owner's Manual, do not use this product.
Call the Toll-free Helpline (1-888-909-6757) for assistance.
WARNING
WARNING
SAVE THESE INSTRUCTIONS
The operation of any power tool can result in foreign objects being thrown into your eyes,
which can result in severe eye damage. Before beginning power tool operation, always wear
safety goggles or safety glasses with side shields and, when needed, a full face shield. We
recommend Wide Vision Safety Mask for use over eyeglasses or standard safety glasses
with side shields. Always use eye protection which is marked to comply with ANSI Z87.1.
SYMBOL SIGNAL MEANING
DANGER Indicates an imminently hazardous situation, which, if
not avoided, will result in death or serious injury.
WARNING Indicates a potentially hazardous situation, which, if not
avoided,could result in death or serious injury.
CAUTION Indicates a potentially hazardous situation, which, if not
avoided,may result in minor or moderate injury.
CAUTION (Without Safety Alert Symbol) Indicates a situation that
may result in property damage.

7
ELECTRICAL
TO AVOID ELECTRIC SHOCK HAZARDS, FIRE HAZARDS, OR DAMAGE TO THE TOOL, USE
PROPER CIRCUIT PROTECTION. YOUR CHIPPER IS WIRED AT THE FACTORY FOR 12O-V
OPERATION. CONNECT TO 120-V, 15-Amp CIRCUIT AND USE A 15-Amp CIRCUIT BREAKER.
TO AVOID SHOCK OR FIRE WHEN THE POWER CORD IS WORN, CUT, OR DAMAGED IN
ANYWAY, REPLACE IT IMMEDIATELY
This yard chipper has a plug that looks like the one shown in Fig. 1. The yard chipper is double
insulated to provide a dual thickness of insulation between you and the tool’s electrical system.
All exposed metal parts are insulated.
DOUBLE INSULATED (See Figure 1)
WARNING
DOUBLE INSULATION DOES NOT TAKE THE PLACE OF NORMAL SAFETY PRECAUTION WHEN
OPERATING THIS TOOL.
WARNING
TO AVOID ELECTRIC SHOCK:
1. Use only identical replacement parts when serving a tool with double insulation. Servicing should be
performed by a qualified technician.
2. Do not use in wet or damp or expose to rain.
WARNING
IN ALL CASES, MAKE CERTAIN THE RECEPTACLE IN QUESTION IS PROPERLY GROUNDED.
IF YOU ARE NOT SURE, HAVE A CERTIFIED ELECTRICIAN CHECK THE RECEPTACLE.
C A U T I O N
1) 2-prong plug
2) Properly grounded extension cord

8
ELECTRICAL
GUIDELINES FOR USING EXTENSION CORDS
MINIMUM GAUGE FOR EXTENSION CORDS (AWG)
(WHEN USING 120 V ONLY)
THIS LAWN TOOL IS FOR OUTDOOR USE ONLY. DO NOT EXPOSE TO RAIN OR USE IN
DAMP LOCATIONS.
Make sure your extension cord is in good condition. When using an extension cord, be sure to use
one of heavy enough gauge to carry the current your product will draw. An undersized cord will
cause a drop in line voltage resulting in loss of power and overheating. The table below shows the
correct size to be used according to cord length and nameplate ampere rating. If in doubt, use the
next heavier gauge. The smaller the gauge number, the heavier the cord.
Be sure your extension cord is properly wired and in good condition. Always replace a damaged
extension cord or have it repaired by a qualified person before using it. Keep your extension cords
away from sharp objects, excessive heat and damp or wet areas.Use a separate electrical circuit for
your tools. This circuit must not be less than 12-gauge cord and should be protected with a 15-amp
time delayed fuse. Before connecting the motor to the power line, make sure the switch is in the
OFF position and the electric current is rated the same as the current stamped on the motor
nameplate. Running at a lower voltage will damage the motor.
WARNING
THIS TOOL MUST BE GROUNDED WHILE IN USE TO PROTECT THE OPERATOR FROM
ELECTRICAL SHOCK.
WARNING
SAVE THESE INSTRUCTIONS
Amp RatinJTotal LeQJth of Cord in Feet PHWHUV)
More Than Not More Than 25' .6 m) 50' m) 100' .4 m) 150' .7 m)
0 6 18 16 16 14
61018161412
10 12 16 16 14 12
12 16 14 12 Not Recommended

9
KN
O
W Y
OU
R YARD
C
HIPPER
S
HREDDE
R
R
ead this operator's manual and sa
f
et
y
rules be
f
ore operatin
g
y
our
y
ard chipper.
C
ompare the
illustration in Figure 2 to your yard chipper in order to familiarize yourself with the location of various
c
ontrols and ad
j
ustments.
S
ave this manual
f
or
f
uture re
f
erence.
A
Ho
pp
er
C
hute
Push
S
tic
k
T
rans
p
ort
H
an
dl
e
Mo
t
o
r
Rese
t
Bu
tt
o
n
H
opper
L
oc
ki
ng
K
no
b
O
n
/
Off
S
witc
h
Power Cord
H
ex
K
e
y
C
hassis
Wheel
Collection Bag
M
ount
i
ng
H
oo
k
L
ower
H
o
pp
er
B
ase Section
Removable Uppe
r
H
o
pp
er
P
ane
l
Collection Ba
g
)LJ

10
ASSEMBLY INSTRUCTIONS
UNPACKING
PACKING LIST (See Figure 3)
This product has been shipped completely assembled.
&DUHIXOO\UHPRYHWKHSURGXFWDQGDQ\DFFHVVRULHVIURPWKHER[0DNHVXUHWKDWDOOLWHPVOLVWHGLQ
the packing list are included.
,QVSHFWWKHSURGXFWFDUHIXOO\WRPDNHVXUHQREUHDNDJHRUGDPDJHRFFXUUHGGXULQJVKLSSLQJ
'RQRWGLVFDUGWKHSDFNLQJPDWHULDOXQWLO\RXKDYHFDUHIXOO\LQVSHFWHGDQGVDWLVIDFWRULO\RSHUDWHG
the product.
,IDQ\SDUWVDUHGDPDJHGRUPLVVLQJSOHDVHFDOOIRUDVVLVWDQFH
)LJ
1
5
6
2
3
8
7
3DUW+RXVLQJ:LWK+RSSHUSFV
Part.2 Hub Cap 2 pcs
Part.3 Transport Wheel 2 pcs
Part.4 Frame Assembly 2 pcs
Part.5 $[OH1 pcs
Part.6 Push Stick 1 pcs
Part.7 Washer 2 pcs
3DUWȕSLQSFV
Part.9 &ROOHFWLRQ%DJ 1 pcs
3DUW+H[.H\SFV
9
10
4

11
ASSEMBLY INSTRUCTIONS
Assembling this YARD Chipper need the follows tools:
PP+H[.H\LQFOXGHG
ZUHQFK
3KLOOLSVVFUHZGULYHU
If any parts are damaged or missing, do not operate this product until the parts are replaced. Failure to
heed this warning could result in serious personal injury.
WARNING
Do not connect to power supply until assembly is complete. Failure to comply could result in accidental
starting and possible serious personal injury.
WARNING
Do not attempt to modify this product or create accessories not recommended for use with this product.
Any such alteration or modification is misuse, and could result in a hazardous condition leading to
possible serious personal injury.
WARNING
3
2
4
5
1
)LJ

N
OTE: Do not over ti
g
hten the screws.
12
ASS
EMBLY IN
S
TR
UC
TI
O
N
S
A
TTA
C
HIN
G
LE
GS
T
O
C
HIPPER
S
HREDDER
(S
ee Figures 4
&
5
)
The le
g
s are attached to the bottom o
f
the chipper.
3ODFHWKHOH
J
V
LQWRWKHKROHV
RQWKHKRXVLQ
J
3XVK
I
LUPO\LQWRSODFH
8VLQ
J
DVFUHZGULYHUWL
J
KWHQWKHVXSSOLHGVFUHZV
WRIUDPH
6OLGHWKHD[OHWKURXJKWKHWZRKROHVIRXQGDWWKHFXUYHVRI
IUDPH
I
6
OLGHDWUDQV
S
RUWZKHHORYHUWKHWKHD[OHVX
SS
RUWULEVGL
U
HF
W
HG
LQ
3ODFHZDVKHURYHUD[OHSXVKVWUDL
J
KWHQGRIWKHFOLSLQWRKROHLQD[OHDQGSUHVVLQWRKROHXQWLOLW
i
s secure
d
.
5
H
S
HDWWUDQV
S
RUWZ
K
HH
O
L
QVWD
OO
DW
L
RQRQRW
K
HUV
LG
H
$OL
J
QDQGSXVKKXEFDSLQWRSODFHRQERWKVLGHV

13
OPERATION
CONNECTING TO POWER SUPPLY (See Figure 6)
This product is designed with a cord lock that prevents the extension cord from being pulled loose
during use.
)RUPDORRSZLWKWKHHQGRIWKHH[WHQVLRQFRUG
,QVHUWORRSSRUWLRQRIH[WHQVLRQFRUGWKURXJKKDOIPRRQVKDSHGRSHQLQJRQWKHUHWDLQHUDQGSODFH
over the rectangular tab on cord lock.
6ORZO\SXOOORRSDJDLQVWWDEXQWLODOOVODFNLVUHPRYHG
3OXJSURGXFWLQWRH[WHQVLRQFRUG
NOTE: Make a loop at the end of the extension cable and hang the loop onto the strain relief on the mains cable.
)LJ
STARTING AND STOPPING THE CHIPPER SHREDDER (See Figure 7)
212))6:,7&+
The ON/OFF switch (1) A circuit breaker/reset button (2) is located beside the switch.
TO OPERATE THE CHIPPER:
3OXJWKHFKLSSHULQWRDSURSHUO\JURXQGHGSURQJRXWOHW
7XUQWKHVZLWFKWRWKH21SRVLWLRQ,IWKHFKLSSHUGRHVQRWVWDUWWXUQWKHVZLWFKWRWKH2))
position and press the reset button (2), then turn the switch to the ON position.
7XUQWKHVZLWFKWRWKH2))SRVLWLRQWRWXUQRIIWKHFKLSSHU$OORZDWOHDVWVHFRQGVIRUWKH
blade to stop rotating.

OPERATION
14
)LJ
21
Do not attempt to chip material that exceeds the capacity of the chipper.
C A U T I O N
WARNING
USING YOUR CHIPPER/SHREDDER (See Figure 8)
The chipper is designed to work on yard waste, debris, sticks and twigs up to 1-1/2" (38 mm) in
diameter. Chipper material will accumulate directly on ground under chipper collection bag is not used.
7XUQ21FKLSSHUVKUHGGHU
3ODFHVWLFNV\DUGGHEULVLQWRQDUURZKRSSHURSHQLQJ1(9(5SODFH\RXUKDQGVLQVLGHKRSSHU
8VHSXVKSDGGOHRQO\WRKHOSIHHG\DUGPDWHULDOLQWRKRSSHU
$/:$<6WXUQFKLSSHUVKUHGGHU2))DQGDOORZLWWRFRPHWRDFRPSOHWHVWRS
NOTE: This chipper/shredder is designed for dry material only. Never place green material into chipper.
DO NOT TRY TO CHIP ANY MATERIAL THAT EXCEEDS THE CAPACITY OF THIS TOOL.
DOING SO MAY CAUSE THE MOTOR TO JAM AND OVERHEAT. NEVER PUT YOUR HANDS IN
THE HOPPER OR NEAR THE BLADE WHEN THE TOOL IS RUNNING.

15
OPERATION
TO PREVENT AN ACCIDENTAL START-UP IF THE RESET BUTTON IS PUSHED, THE ON/OFF
SWITCH SHOULD BE IN THE OFF POSITION AND THE PLUG SHOULD BE REMOVED FROM
THE POWER SOURCE WHILE COOL DOWN TAKES PLACE.
WARNING
ALWAYS ALLOW 5 SECONDS OR MORE FOR THE BLADE TO A SPACE BETWEEN STOP AND
ROTATING AFTER TURNING OFF THE CHIPPER.
WARNING
MOTOR OVERLOAD PROTECTION (See Figure 9)
This yard chipper has a reset overload feature.
The reset button will restart the motor after it shuts off due to overloading or low voltage.
,IWKHPRWRUVWRSVGXULQJRSHUDWLRQ
7XUQWKH212))VZLWFKWRWKH2))SRVLWLRQ
:DLWDERXWILYHPLQXWHVIRUWKHPRWRUWRFRRO
3XVKLQRQWKHUHVHWEXWWRQ
7XUQWKHVZLWFKWRWKH21SRVLWLRQ
)LJ
21
1
)LJ

BLADE MAINTENAN
C
E
(
S
ee Figure 10
)
16
M
AINTENANC
E
3
1
2
ALWAY
S
TURN
O
FF THE T
OO
L AND UNPLU
G
THE P
O
WER
CO
RD FR
O
M THE
O
UTLET BEF
O
RE
P
ERFORMING ANY MAINTAINANCE TO THE CHIPPER.
WARNING
)L
J
NO
TE:
O
nly
f
or dry branch chipping, not designed
f
or leaves or vines
.
NO
TE: ALWAY
S
handle blade with care as it is sharp.
The chipper has a two sided reversible blade that is attached to a rotating support plate.
When one side of the blade becomes dull, it can be turned over in order to use the other side.
Replace or properly sharpen any dull blade.
HOW TO REPLACE CHIPPER BLADE
7XUQRIIFKLSSHUDQGUHPRYHSRZHUSOXJIURPRXWOHW
7XUQWKHXSSHUKRXVLQJ¶VORFNNQREFRXQWHUFORFNZLVHXQWLOWK
HKRXVLQJFRYHUFDQEHRSHQHG
/LIWXSWKHKRXVLQJFRYHUWRH[SRVHWKHVLGHUHYHUVLEHEOD
GH
8VLQJDVFUHZGULYHURUZRRGHQGRZHO
,
align the upper screw hole of the gear box with the hole on
rotating blade support (2) and slide through
to secure blade support (2) from rotating.
8VHWKHVXSSOLHGPP+H[.H\IRXQGRQWKHSRZHUFRUGWRORRVHVDQGUHPRYHWKHVFUHZWKDWKROGV
EODGHWRURWDWLQJEODGHVXSSRUW
7DNHRXWWKHROGEODGH(LWKHUUHLQVHUWWKHEODGHZLWKWKHV
KDUSHGJHLQSRVLWLRQDVWKHFXWWLQJVXUIDFH
or insert a replacement blade.
5HSODFHDQGWLJKWHQEODGHVFUHZWRVHFXUHWKHQHZEODGHWRW
KHURDWLQJEODGHVXSSRUW
3RVLWLRQWKHUHPRYDEOHXSSHUKRSSHUSDQHORQWRWKHORZHUKRS
SHUEDVHVHFWLRQRIXQLWDQGORFN
into place using the hopper locking knob (4). return hex key to power cord location for future use.

CLEANING
17
MAINTENANCE
TO AVOID INJURY, ELECTRIC SHOCK, OR DAMAGE TO THE CHIPPER, NEVER ALLOW A LIQUID
TO FLOW INSIDE THE TOOL.
WARNING
:$51,1*352326,7,21
GENERAL MAINTENANCE
.HHSWKHFKLSSHUFOHDQDQGLQJRRGUHSDLUIRUPD[LPXPSHUIRUPDQFHDQGPDFKLQHORQJHYLW\
%HIRUHHDFKXVHLQVSHFWWKHVZLWFKDQGFRUGIRUGDPDJH
&KHFNIRUGDPDJHGPLVVLQJRUZRUQSDUWV&KHFNIRUORRVHVFUHZVPRYLQJSDUWVWKDWDUHMDPPHG
or any other conditions that may affect the operation.
,IDEQRUPDOYLEUDWLRQRUQRLVHRFFXUVWXUQ2))WKHWRROLPPHGLDWHO\DQGFRUUHFWWKHSUREOHPEHIRUH
further use.
'RQRWXVHWKHFKLSSHUXQWLOLWLVSURSHUO\UHSDLUHGRUUHSODFHG
:LSHWKHRXWVLGHRIWKHFKLSSHUZLWKDGU\VRIWFORWK
5HPRYHWKHKRSSHUIURPWKHKRXVLQJERG\EHIRUHZDVKLQJWKHLQVLGHRIWKHKRSSHU
'RQRWKRVHGRZQRUZDVKWKHWRROZLWKZDWHU
WARNING
TO AVOID DAMAGE OR ELECTRIC SHOCK, DO NOT USE STRONG SOLVENTS OR DETERGENTS
ON THE PLASTIC HOUSING OR PLASTIC COMPONENTS. CERTAIN HOUSEHOLD CLEANERS
MAY CAUSE DAMAGE AND MAY ALSO CAUSE A SHOCK HAZARD.
Some dust created by power sanding, sawing, grinding, drilling and other construction activities contains
chemicals known to the state of California to cause cancer, birth defects or other reproductive harm.
6RPHH[DPSOHVRIWKHVHFKHPLFDOVDUH
/HDGIURPOHDGEDVHGSDLQWV
&U\VWDOOLQHVLOLFDIURPEULFNVDQGFHPHQWDQGRWKHUPDVRQU\SURGXFWVDQG
$UVHQLFDQGFKURPLXPIURPFKHPLFDOO\WUHDWHGOXPEHU
Your risk from these exposures varies, depending on how often you do this type of work. To reduce your
H[SRVXUHWRWKHVHFKHPLFDOZRUNLQDZHOOYHQWLODWHGDUHDDQGZRUNZLWKDSSURYHGVDIHW\HTXLSPHQW
such as those dust masks that are specially designed to filter out microscopic particles.

18
WARRANTY
We take pride in producing a high quality, durable product. This Lawnmaster® product carries a
limited two (2) year warranty against defects in workmanship and materials from date of purchase
under normal household use. If product is to be used for commercial, industrial or rental use, a 30
day limited warranty will apply. Batteries carry a one-year warranty against defects in workmanship
and materials. Batteries must be charged in accordance with the operator's manual directions and
regulations in order to be valid. Warranty does not apply to defects due to direct or indirect abuse,
negligence, misuse, accidents, repairs or alterations and lack of maintenance. Please keep your
receipt/packing list as proof of purchase. This warranty gives you specific legal rights, and you
may have other rights, which vary from state to state. For product service call Customer Service at
(866) 384-8432.
,WHPVQRWFRYHUHGE\ZDUUDQW\
1. Any part that has become inoperative due to misuse, commercial use, abuse, neglect, accident,
LPSURSHUPDLQWHQDQFHRUDOWHUDWLRQ
7KHXQLWLILWKDVQRWEHHQRSHUDWHGDQGRUPDLQWDLQHGLQDFFRUGDQFHZLWKWKHRZQHUVPDQXDO
1RUPDOZHDUH[FHSWDVQRWHGEHORZ
5RXWLQHPDLQWHQDQFHLWHPVVXFKDVOXEULFDQWVEODGHVKDUSHQLQJ
5. Normal deterioration of the exterior finish due to use or exposure.
7UDQVSRUWDWLRQ&KDUJHV7UDQVSRUWDWLRQFKDUJHVIRUWKHPRYHPHQWRIDQ\SRZHUHTXLSPHQWXQLWRU
attachment are the responsibility of the purchaser. It is the purchaser’s responsibility to pay
transportation charges for any part submitted for replacement under this warranty unless such
return is requested in writing by LawnMaster.
SAVE YOUR RECEIPTS. THIS WARRANTY IS VOID WITHOUT THEM.

19
EXPLODED VIEW

20
PARTS LIST
ITEM NO. PART NO. DESCRIPTION QTY
1
2
3
4
5
6
7
8
9
10
11
12
13
14
15
16
17
18
19
20
21
22
23
24
25
26
GS01RS.A0.02
GS01RS.10.02
GS01RS.11.00
GS01RS.10.03
GS06RS.10.01
BOC1YX.X0.01
TJGS02.00.00
GS01RS.30.00
GC10SS.A0.01
GS06RS.A0.02
GC10SS.A0.02
TODXD1.A0.20
TOQTGX.A0.01
GS01RS.A0.07
GS06RS.21.00
GS01RS.21.00
GC01SF.00.08
WODQ10.07.16
TODQ56.12.11
TODQ56.15.12-15
GS01RS.A0.06
GS01RS.20.01
GS01RS.A0.03
GS01RS.A0.04
FG8201.01.01
FG9201.05.01
1
2
1
1
1
2
1
1
1
1
1
1
1
1
1
1
1
1
1
1
1
1
1
1
1
1
Hopper
Plastic Husk
Knob Assembly
Top Cover
Insert-board
Washer & C-clip
Motor & Transmission Assembly
Turbo Collar
Transport Wheel
Axle
Transport Wheel
Power Cable
Impacted Plate
Lower Motor Housing
Switch
Lock
Clip Cable
Electromagnetism Switch
Interlock Switch
Interlock Switch Rubber Cap
Power Switch Assembly
Middle Motor Housing
Material Feeder Plate
Blade Assembly
Push Stick
Hex Key
Other manuals for FD1501
3
Table of contents
Languages:
Other LawnMaster Chipper manuals
Popular Chipper manuals by other brands

Rayco
Rayco RC6D Operation manual

Hansa
Hansa C13RT Operation, maintenance and safety manual
Freud
Freud SD200 Series Setup and configuration guide

Farmi Forest
Farmi Forest CH 160 Operation, maintenance and spare parts

Billy Goat
Billy Goat Termite TKD505H Operator owner's manual

DR
DR Pro 475 Safety & Operating Instructions
