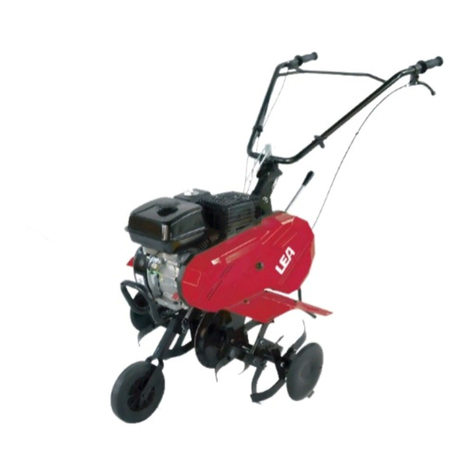
Lea LE41140-40W User manual

Gasoline Tiller
Motozappa A Benzina
Σκαπτικό Βενζίνης
LE41140-40W
LE41173-60W
Original instructions
Istruzioni originali
ΟΔΗΓΙΕΣ ΧΡΗΣΗΣ

1
DESCRIPTION OF THE SYMBOLS
Symbols are used in this manual to attract your attention to possible risks. The safety
symbols and the explications which accompany them must be perfectly understood. The
warning themselves do not prevent the risks and can not be a substitute for proper methods
of avoiding accidents.
ATTENTION! Read the user manual before using the machine.
Keep bystander away.
Wear eye and ear protection.
Wear gloves to protect your hands.
Check that there are not fuel leaks. Stop the engine before refill.
Do not touch a hot silencer or cylinder. You may get burned. These parts get extremely hot
from operation. When turned off they remain hot for a short time.
Petrol is inflammable. Allow engine to cool for at least 2 minutes before refuelling.
Wear safety boots to protect you feet.
Check the engine oil level before start. Capacity: 0.6 litres . Multigrade oil: 20W-40.
Conform to European standards.

2
Danger of injury from rotating parts!
Remove the ignition cable before all maintenance work, and read the instructions for use.
Do not use the tool without oil inside.
Don’t expose to rain.
Start engine creates sparking.
Sparking can ignite nearby flammable gases.
Engines give off carbon monoxide, an odourless, colourless, poison gas.
Breathing carbon monoxide can cause nausea, fainting or death.
For outdoor use only
Strictly no naked flames or smoking near the appliance!
These symbols indicates the requirement of wearing ear protection, eye protection, helm,
respirator and gloves when using the product.

3
Engage
Disengage
GENERAL SAFETY WARNINGS
The machine shall always be used in accordance with the manufacturer’s instructions laid
down in the instruction handbook.
The manufacturer will not be liable in cases of inappropriate use or modifications of the
appliance. Also, follow the safety advice, the installation and operation manual and also to the
valid accident prevention regulations.
Appliances with incorrect or missing parts or without a security case are not to be operated.
The service centre provides you with information concerning replacement parts.
1). Training
a) Read the instruction carefully. Be familiar with the controls and proper use of the
equipment.
b) Never allow children or people unfamiliar with these instructions to use the machine.
Local regulations can restrict the age of the operator.
c) Never work while people, especially children, or pets are nearby.
d) Keep in mind that the operator or user is responsible for accidents or hazards occurring
to other people or their property.
e) Major repair work shall be carried out only by specifically trained personnel.
2). Preparation
a) WARNING-Petrol is highly flammable:
-store fuel in containers specifically designed for this purpose;
-refuel outdoors only and do not smoke while refuelling;
-add fuel before starting the engine. Never remove the cap of fuel tank or add petrol
while the engine is running or when the engine is hot;
-if petrol is spilled, do not attempt to start the engine but move the machine away
from the area of spillage and avoid creating any source of ignition until petrol
vapours have dissipated;
-replace all fuel tank and container caps securely.
b) Replace faulty silencers.
c) Before using, always visually inspect to see that the tools are not worn or damaged.
Replace worn or damaged elements and bolts in sets to preserve balance.
d) Do not smoke near the machine.
e) Do not wear loose clothing, jewellery, or similar items that could be caught in the starter
or other moving parts.
f) Never put any items into the ventilation openings. Non-observance may lead to injury, or
damage to the machine.

4
g) It is necessary reduction in power due to use in higher temperatures, altitudes and
humidity as below conditions.
1) Max Working Temperature: 40°C
2) Max altitudes: 1000 m
3) Max humidity: 95%
3). Operation
a) Do not operate the engine in a confined space where dangerous carbon monoxide
fumes can collect
b) Keep the machine free of oil, dirt and other impurities.
c) Please always place the appliance on even and stable surfaces.
d) Never operate the appliance inside buildings or in an environment without proper
ventilation. Pay attention to air flow and temperature.
e) Do not operate or store the appliance in wet or humid surroundings.
f) Ensure the sound absorber and air filter work properly. These parts serve as flame
protection in case of misfire.
g) To avoid possible burn injuries, do not touch the exhaust system or other parts that
become hot during operation. Pay attention to the warnings on the machine.
h) The engine must not be operated with excessive rotary speed. The operation of the
engine with excessive rotary speed raises the risk of injury. Parts which affect the rotary
speed must not be altered or replaced.
i) Regularly check for leakage or traces of abrasion in the fuel system, such as porous
pipes, loose or missing clamps and damage to the tank or tank cap. Before use all
defects must be repaired.
j) Work only in daylight or in good artificial light.
k) Never pick up or carry a machine while the engine is running
l) Stop the engine:
-whenever you leave the machine
-before refuelling
m) Before checking or adjusting the machine, the ignition plug and the ignition wire
respectively must be removed to prevent accidental starting.
4). Maintenance and storage
a) Keep all nuts and screws tight to be sure the equipment is in safe working condition.
b) Never store the equipment with petrol in the tank inside a building where fumes can
reach an open flame or spark.
c) Allow the engine to cool before storing in any enclosure.
d) To reduce the fire hazard, keep the engine, silencer and petrol storage area free of
vegetative material and excessive grease.
e) Replace worn or damaged parts for safety.
f) If the fuel tank has to be drained, this should be done outdoors.
g) Always clean and maintenance before storage.
h) Never disassembly the guards for cutting attachments.
i) Always store the metal blade in cool and dry place, never use rusted blade. It may cause

5
serous injure during working.
SPECIAL SAFETY WARNINGS FOR TILLER
1) While using the machine, always wear sturdy shoes and long pants. Never use the
machine being barefoot or wearing open sandals.
2) Thoroughly inspect the area where the tiller will be used and remove all objects that
could be launched by the machine.
3) Before using the appliance, always check visually that the tools are not worn or
damaged. Replace teeth and bolts, worn or damaged lots to preserve the balance.
4) The engine shall be stopped when carrying out maintenance and cleaning operations,
when changing tools and when being transported by means other than under its own
power.
5) The hazards may arise when working on slopes.
6) Some special hazards may arise when working on difficult soil (stony, hard, etc.)
7) The machine should only be operated by suitably trained persons.
8) During the operation of the machine, safety shoes should be worn.
9) In order to reduce hazards due to vibration limit the time of operation and wear personal
protection equipment
INTENDED USE
This appliance is only intended as an tiller for lawns and grassy areas in private domestic and
hobby gardens.
TECHNICAL SPECIFICATIONS
Type LE41140-40W LE41173-60W
Engine type SPS1P65F 4-stroke SPS1P70F 4-stroke
Displacement
140 cm3173 cm3
Rated engine power 2.2kW 3kW
Max. Engine rotation speed 3200 /min 3200 /min
Forward Transmission ratio 1:35 1 :35
Volumes of fuel tank 1.0l 1,3 l
Volumes of lubricatin
g
oil tank
0.6 l 0,6 l
Working width 400mm 600mm
Tine rotating diameter 300mm 300mm
Blade thickness 3.5 mm 3.0mm
Net weight (including engine) 30.5 kg 34,5kg
Fuel Unleaded gasoline 90# Unleaded gasoline 90#
Sound pressure level, LpA 80dB(A) k = 3 dB(A) 80dB(A) k = 3 dB(A)
Sound power level, LWA 93 dB(A) k = 3 dB(A) 93 dB(A) k = 3 dB(A)
Vibration emission value 7.76 m/s2 k = 1.5 m/s26,5 m/s2 k = 1.5 m/s2
Noise Information
Measured sound values determined according to EN709.

6
The noise figures quoted are emission levels and are not necessarily safe working levels.
Whilst there is a correlation between the emission and exposure levels, this cannot be used
reliably to determine whether or not further precautions are required. Factors that influence
the actual level of exposure of work-force include the characteristics of the work room, the
other sources of noise, etc. i.e. the number of machines and other adjacent processes, and
the length of time for which an operator is exposed to the noise. Also the permissible
exposure level can vary from country. This information, however, will enable the user of the
machine to make a better evaluation of the hazard and risk.
Wear hearing protection!
Vibration total values (triax vector sum) determined according to EN709:
The vibration emission level given in this information sheet has been measured in accordance
with a standardized test given in EN709 and may be used to compare one tool with another.
It may be used for a preliminary assessment of exposure.
The declared vibration emission level represents the main applications of the tool. However if
the tool is used for different applications, with different accessories or poorly maintained, the
vibration emission may differ. This may significantly increase the exposure level over the total
working period.
An estimation of the level of exposure to vibration should also take into account the times
when the tool is switched off or when it is running but not actually doing the job. This may
significantly reduce the exposure level over the total working period.
Identify additional safety measures to protect the operator from the effects of vibration such
as: maintain the tool and the accessories, keep the hands warm, organization of work
patterns.
LIST OF MAIN PART

7
1. oil tank 2. recoil wire
3. engine 4. muffler
5. air filter 6. support wheel
7. tine 8. guard
9. resistance pole 10. handle lock
11. accelerator lever 12. handlebar
13. clutch lever 14. plastic cover
15 16 sleeve bar
17. sleeve 18 wrench
19 screwdriver 20 accessories bag
ASSEMBLY
WARNING!
Carefully lift the gasoline powered motor hoe out of the box, remove any packing material and
cut any ties holding the handlebar pieces to the gasoline powered motor hoe assembly.
Install the tines
Place and align the tine assembly towards to the shaft (Fig.1). Then fix it by a columniform pin
and insert a pin on the column form pin to prevent it moving out (Fig.2)
Fig. 1 Fig. 2
Install the wheel
Fix the wheel support assembly on the base by a bolt and a nut (Fig. 3), then tauten it by a
spring. And insert a B shape pin on the shaft to prevent the spring moving out(Fig.4) .
Fig. 3 Fig. 4

8
Install the handles
Place and align the handlebar arm on the base, and fix it with 4 bolts (Fig,5).
Assembly the handlebar to the handlebar arm, fix it with 2 bolts of each side. (Fig. 6)
Install the plastic cover on the handlebar. (Fig. 7)
Connect the clutch cable to the handle. (Fig. 8)
NOTE: IF it has been installed already, you need not to do this step.
Fig. 5 Fig. 6
Fig. 7 Fig. 8
Install the resistance pole
Fix the resistance pole on the base with a columniform pin. Then insert a B shape pin on the
columniform pin to prevent it moving out. (Fig.9)
Fig. 9
OPERATION
Before use

9
Please always read the instruction manual carefully and check the machine before operating.
WARNING!
Ensure that the engine has oil. When leaving the factory. This machine has NO OIL in the
engine.
Check the cutting attachment, never use blades that are dull, cracked or damaged.
Make sure the handle and safety features are in good working order. Never use a machine
that lacks a part or has been modified outside its specifications.
The enclosures must be correctly fitted and undamaged before you start the machine.
WARNING!
Please always use quality gloves, foot, ear and eye protector. They should with CE mark and
tested according to PPE (Person Protective Equipment) directive.
The poor equipments may reduce the protection and result in person injure during working.
Check the engine oil
Before starting the machine, ensure the crank case is filled to the top of the neck with either
SAE30 or 10W30, 4 storke oil.
1. before checking or refilling oil , besure the machine is put on even and stable surface.
2. make sure the machine is switched off, by rotating the engine switch to the “off” position.
3. remove the engine oil cap by rotating the cap anti-clockwise.
4. If the oil level is below the top of the oil tank housing neck refill with either SAE30 (Single
viscosity) or 10W30 (Multiviscosity) 4 stroke oil.
5. Screw in the engine oil cap.
WARNING!
The oil will be contaminated or discoloured during use. Please change the oil regularly.
For more information, please see clause: MAINTENANCE
Never use 4-stroke oil intended for water-cooled engines.
Never use oil intended for 2-stroke engines.
A poor oil quality may jeopardise function and decrease the life time of catalytic converters.
Check the engine fuel
Only fuel the machine in well-lit areas. Avoid fuel spillage. Never refuel the machine during

10
operation. Let the engine cool down for about two minutes before refueling.
Refueling must not be carried out near naked flames, control lamps or spark producing
electrical equipment such as electric tools, welders or sanders.
1. Make sure the machine is turned off, by turn the engine switch to the “off” position.
2. Check the fuel by a visual check , remove the fuel cap and reviewing the fuel level.
3. Full unleaded fuel from an approved fuel container into the fuel tank, because of fuel
expands, please fill the tank to the neck of tank only.
4. Turn the fuel cap clockwise to assembly it in position.
WARNING.
•Do not refill fuel while engine is running or hot.
•Make sure fuel is not leaking from the rear outlet tube of fuel drain hole.
Use at least 90 octane fuel. We recommend unleaded petrol as it leaves fewer residues
inside the motor and on the ignition plug, and prolongs the life cycle of the exhaust system.
Never use old or dirty petrol or oil/petrol mixtures. Avoid contamination with dirt or water in
the tank. Occasionally ignition knocking or clanging can be heard with high loads. This is
normal and no cause for alarm. If ignition knocking or clanging occurs during normal loads
and with constant motor speed you should change the petrol quality. If this does not solve
the problem contact an authorized specialist dealer.
When working at continuous high revs a higher octane rating is recommended.
Check the air cleaner
Check the air filter to be sure it is clean and in good condition.
Remove the air cleaner cover, then check the main air filter. Clean or replace the air filter
if necessary.
Accelerator lever adjustment
Adjust the accelerator lever in appropriate position to adjust the running speed of engine. (Fig.
10)
Fig. 10
START THE ENGINE
1. Move accelerator lever to “CHOCK” position. (Fig. 11)
2. Grasp starter handle and pull out slowly. Until it pulls slightly harder.(Fig. 12)

11
3. Pull rope with a rapid full arm stroke until engine runs.
4. After engine starts running, move accelerator lever to the appropriate position. (Fig. 13).
Fig. 11 Fig. 12
Fig. 13 Fig. 14
STOP THE ENIGINE
Move accelerator lever to “OFF” position . (Fig. 14).
NORMAL OPERATION
The clutch engages and disengages the power from the engine to the tines is operated by
clutch levers on the handlebar.
The clutch lever is designed to operation by 2 in-depend actions: Push the handle lock (10)
and push down the lever (13). (Fig 15)
WARNING!
Always set the accelerator lever to the lowest level before use the clutch lever.
Please always hold the machine tightly when operate the clutch lever. Losses control of
machine may cause serous injury.
Never use both clutch levers together!
Forward operation
When the clutch lever (13) is squeezed, the tool is rotate forward.
If the user wants to stop the machine, release the lever. (Fig.15)

12
Fig.15
MAINTENANCE
Good maintenance is essential for safe, economical and trouble-free operation. It will also help
reduce air pollution.
The purpose of the maintenance and adjustment schedule is to keep the machine in the
best operating condition.
Turn off the engine before performing any maintenance. If the engine must be run, make sure
the area is well ventilated. The exhaust contains poisonous carbon monoxide gas
Please always select recommended accessories. The accessories which have not equivalent
quality may damage the machine.
Please never use non approved components and remove the safety devices after or during
maintenance.
Maintenance Daily
maintenance
Weekly
maintenance
Monthly
maintenance
Clean the outside of the machine. X
Check that the engine switch works
correctly.
X
Check that the blades are undamaged
and show no signs of cracking or other
damage. Replace the blades if
necessary.
X
Check that the blade guard is not
damaged or distorted. Replace the
blade guard if it is bent or damaged.
X
Clean the air filter. Replace if
necessary.
X
Check that nuts and screws are tight. X
Check that there are no fuel leaks from X

13
the engine, tank or fuel lines.
Check the starter and starter cord. X
Clean the outside of the spark plug.
Remove it and check the electrode gap.
Adjust the gap to 0.6-0.7 mm or replace
the spark plug. Check that the spark
plug is fitted with a spark plug cap.
X
Clean the machine’s cooling system. X
Clean the outside of the carburetor and
the space around it.
X
Check the flange, cap and nut are
assembled correctly and tightened
X
Clean the fuel tank. X
Check all cables and connections. X
Check the clutch, clutch springs and
the clutch drum for wear. Replace if
necessary by an authorized service
workshop.
X
Replace the spark plug. Check that the
spark plug is fitted with a spark plug
cap.
X
To reduce the fire hazard, clean dirt,
leaves and surplus lubricant, etc from
the muffler and engine.
X
Check the blade X
MAINTENANCE should be carried out
at REGULAR INTERVALS in each of
the indicated months or after a certain
number of hours of operation
(whichever comes first). (1)
Before
use
every
time
Monthly
or after
25
hours
Every three
months or
after 50 hours
Every six
months or
after 100
hours
Engine oil Clean X X(1)
Air filter Clean X(1)
Fuel tank and Clean X(2)

14
filter
Fuel feed line Check (replace if
necessary)
Every three years (2)
(1) If operated in dusty areas carry out maintenance more frequently.
(2) A specialist technician should carry out this maintenance if the owner does not have
the appropriate tools or mechanical knowledge.
Engine oil replacement
1. Place the machine on even and stable surface. Warm up the engine for several minutes
and then stop it.
2. Loose the engine oil cap.
3. Remove the oil drain screw.
4. Drain oil into a container thoroughly by tilting the engine toward the oil filler neck.
5. Once emptied, tilt the machine back and places it in right position.
6. Reinstall the oil drain screw and refill with recommended oil. Fill to the upper limit of the
filler neck.
7. Reinstall the engine oil cap.
Air filter
1. Remove the filter cover.
2. Wash the air filter in soap water or non-combustible solvent.
3. Lubricate the filter using motor oil and then place it in dry place until no oil on it.
4. Reinstall the air filter.
WARNING:
The use of petrol or combustible solvents for cleaning can cause fire or explosion. Therefore
only use soap water or non-combustible solvent. Never operate the machine without the air
filter.
Spark plug
To ensure proper engine operation, the spark plug must be properly gapped and free of
deposits.
1. Remove the spark plug cover from the housing.
2. Remove the spark plug cap.
3. Clean any dirt from around the spark plug base.
4. Use the socket spanner which provided to remove the spark plug.
5. Visually inspect the spark plug. Remove carbon deposits using a wire brush.
6. Check for discoloration on the top of the spark plug. The standard color should be a tan
color.
7. Check the spark plug gap. The acceptable gap should be between 0,6-0,7mm.

15
8. Install /reinstall the spark plug carefully by hand.
9. Once the spark plug has been seated, tighten it with a spark plug wrench.
10. Reinstall the spark plug cap on top of the spark plug.
11. Reinstall the spark plug cover.
Cleaning
1. Keep your machine clean, the outside of the machine can be cleaned using a damp soft
cloth with a mild detergent if required, never use water to clean the machine as it may
cause damage to internal parts.
2. Some maintenance products and solvents may damage the plastic parts, these include
products containing benzene. Trichloroethylene, chloride and ammonia.
3. Take special care to keep the ventilation inlets /outlets free from obstruction. Cleaning
with a soft brush followed by a compressed air jet will usually be sufficient to ensure
acceptable internal cleanliness.
4. Wear eye protection when carrying out cleaning.
Adjusting of carburetor
The carburetor governs the engine’s speed via the throttle control. Air and fuel are mixed in the
carburetor. The air/fuel mixture is adjustable. Correct adjustment is essential to get the best
performance from the machine.
Adjusting the carburetor means that the engine is adapted to local operating conditions, e.g.
climate, altitude, petrol and the type of 2-stroke oil.
The engine has been tested in the factory with initial adjustment. The user need not adjust the
carburetor.
To ensure that it continues to run at peak performance and to minimize harmful exhaust
emissions after the running-in period, please always contact the authorized service to adjust the
carburetor.
Gear
There are two grease input holes on the aluminum part for filling lubricant. Use a grease gun to
fill with grease. This should be done after every 50 working hours. Use special grease which can
withstand high temperature and high pressure, API GL-5 or SAE 85W-140 gear oil can be used.

16
A(grease input hole)
CAUTION!
The gear housing must not be filled completely with grease. The grease expands as the
machine heats up during operation. If the gear housing was completely filled with grease it could
damage the seals and lead to leakage of grease.
The grease in the bevel gear does not normally need to be changed except if repairs are carried
out.
Repairs
Only an authorized service centre should repair the machine.
Problem Check Condition Cause Solution
The engine
stalls, is
difficult to
start or does
not start
Fuel at the
carburetor
The fuel
does not
arrive at the
carburetor
Fuel filter blocked
Clean or replace
Fuel supply
blocked Clean or replace
Carburetor Ask your distributor
for advice
Fuel at the
cylinder
The fuel
does not
arrive at the
cylinder
Carburetor Ask your distributor
for advice
There is fuel
in the
exhaust
The fuel mixture is
too rich
Open the throttle
valve
Clean or replace the
air filter
Adjust the carburetor
Ask your distributor
for advice
Sparks at the
spark plug
There is no
spark Switch in off
position
Set the switch to the
ON position (Run)

17
electrodes
Electrical problem
Ask your distributor
for advice
Locked switch
Sparks at the
spark plug
There is no
spark
Bad spacing of the
electrodes
Adjust the gap to
0,6-0,7 mm
Electrodes
contaminated Clean or replace
Electrodes
contaminated with
fuel
Clean or replace
Defective spark
plug
Replace the spark
plug
The engine
turns, but
stalls or
does not
accelerate
correctly
Air filter Dirty air filter
Fair wear and tear
Clean or replace
Fuel filter Dirty fuel
filter
Dirt or residue in
the fuel Replace
Fuel vent Blocked fuel
vent
Dirt or residue in
the fuel Clean or replace
Spark plug Dirty or worn
spark plug Fair wear and tear
Clean, adjust or
replace
Carburetor Bad
adjustment Vibration Adjust
Cooling
system Excessive
Prolonged use in
dirty or dusty
places Clean
Spark
suppressor
Plate
cracked,
contaminate
d or
perforated
Fair wear and tear
Replace
The engine
does not
engage N/A N/A
Internal engine
problem
Ask your distributor
for advice
STORING
Transporting the machine in a car, please empty the fuel tank completely first to avoid the
leakage.
Empty oil
1. Place the machine on even and stable surface. Warm up the engine for several minutes
and then stop it.

18
2. Loosen the oil drain screw and drain fuel into a container thoroughly.
3. Tighten oil drain screw.
Store the machine, operating instructions and where necessary the accessories in the original
packaging. In this way you will always have all the information and parts ready to hand.
Pack the device well or use the original packaging in order to avoid transit damage.
Store the machine in dry and well ventilated surroundings and with the fuel tank empty. Do
not store fuel next to the machine.

19
Conformity declaration
-------------------------------------------------------------------------------------------------------
The undersigned, hereby certifies that the units described below
GASOLINE TILLER
Model: LE41140-40W(SPSTL14001)/LE41173-60W(SPSTL16001-00-1P)
Power: 2, 2 KW/3,0KW
Measured sound power level: 91,7 dB (A)
Guaranteed sound power level: 93 dB (A)
Conformity assessment procedure concerning directive 2000/14/EC: Annex VI
is in compliance with the provisions of the following European
directives:
2006/42/EC "Machinery"
2004/108/EC “Electro Magnetic Compatibility”
2000/14/EC "Noise outdoor"
97/68/EC "Emissions of pollutants”
And to the following standards:
EN 709:1997+A4:2009
EN ISO 14982:2009
------------------------------------------------------------------------------------------------------------------------
Person authorised to compile the technical file:
Aurelio de Michele--Dunsch Europe SRL.,
Via dell'Artigianato n. 10 ,I-29010 GRAGNANO TREBBIENSE-ITALY
15/01/2015
Made in China
Manufacturing year 2015
This manual suits for next models
1
Table of contents
Languages:
Other Lea Tiller manuals