manuals.online logo
Brands
  1. Home
  2. •
  3. Brands
  4. •
  5. LED Lighting
  6. •
  7. Outdoor Light
  8. •
  9. LED Lighting GA-12S User manual

LED Lighting GA-12S User manual

Other LED Lighting Outdoor Light manuals

LED Lighting Global Light & Power LUKEN LI220107 User manual

LED Lighting

LED Lighting Global Light & Power LUKEN LI220107 User manual

LED Lighting XSY-AL Series User manual

LED Lighting

LED Lighting XSY-AL Series User manual

Popular Outdoor Light manuals by other brands

Kichler Lighting HELEN 37536 instructions

Kichler Lighting

Kichler Lighting HELEN 37536 instructions

Thorn OXANE L installation instructions

Thorn

Thorn OXANE L installation instructions

esotec Solar Globe Light multicolor 20 operating instructions

esotec

esotec Solar Globe Light multicolor 20 operating instructions

mitzi HL200201 ELLIS Assembly and mounting instructions

mitzi

mitzi HL200201 ELLIS Assembly and mounting instructions

HEPER TILA S AFX 3 Module Installation & maintenance instructions

HEPER

HEPER TILA S AFX 3 Module Installation & maintenance instructions

Designplan TRON 180 installation instructions

Designplan

Designplan TRON 180 installation instructions

Sealey LED37 instructions

Sealey

Sealey LED37 instructions

nordlux VEJERS Mounting instruction

nordlux

nordlux VEJERS Mounting instruction

SImx ELITE LED LHTC637 installation instructions

SImx

SImx ELITE LED LHTC637 installation instructions

GEV CAROLINE 10833 manual

GEV

GEV CAROLINE 10833 manual

WE-EF PFL540 LED Installation and maintenance instructions

WE-EF

WE-EF PFL540 LED Installation and maintenance instructions

HEPER DOGO Side LW6048.585-US Installation & maintenance instructions

HEPER

HEPER DOGO Side LW6048.585-US Installation & maintenance instructions

BEGA 84 253 Installation and technical information

BEGA

BEGA 84 253 Installation and technical information

HEPER LW8034.003-US Installation & maintenance instructions

HEPER

HEPER LW8034.003-US Installation & maintenance instructions

HEPER MINIMO Installation & maintenance instructions

HEPER

HEPER MINIMO Installation & maintenance instructions

LIGMAN BAMBOO 3 installation manual

LIGMAN

LIGMAN BAMBOO 3 installation manual

Maretti TUBE CUBE WALL 14.4998.04 quick start guide

Maretti

Maretti TUBE CUBE WALL 14.4998.04 quick start guide

Maxim Lighting Carriage House VX 40428WGOB installation instructions

Maxim Lighting

Maxim Lighting Carriage House VX 40428WGOB installation instructions

manuals.online logo
manuals.online logoBrands
  • About & Mission
  • Contact us
  • Privacy Policy
  • Terms and Conditions

Copyright 2025 Manuals.Online. All Rights Reserved.

GA-12S(optional Motion Sensor)
www.ledlightingbv.nl info@ledlightingbv.nl
NL
GESCHIKT VOOR INSTALLATIE
BINNEN/BUITEN
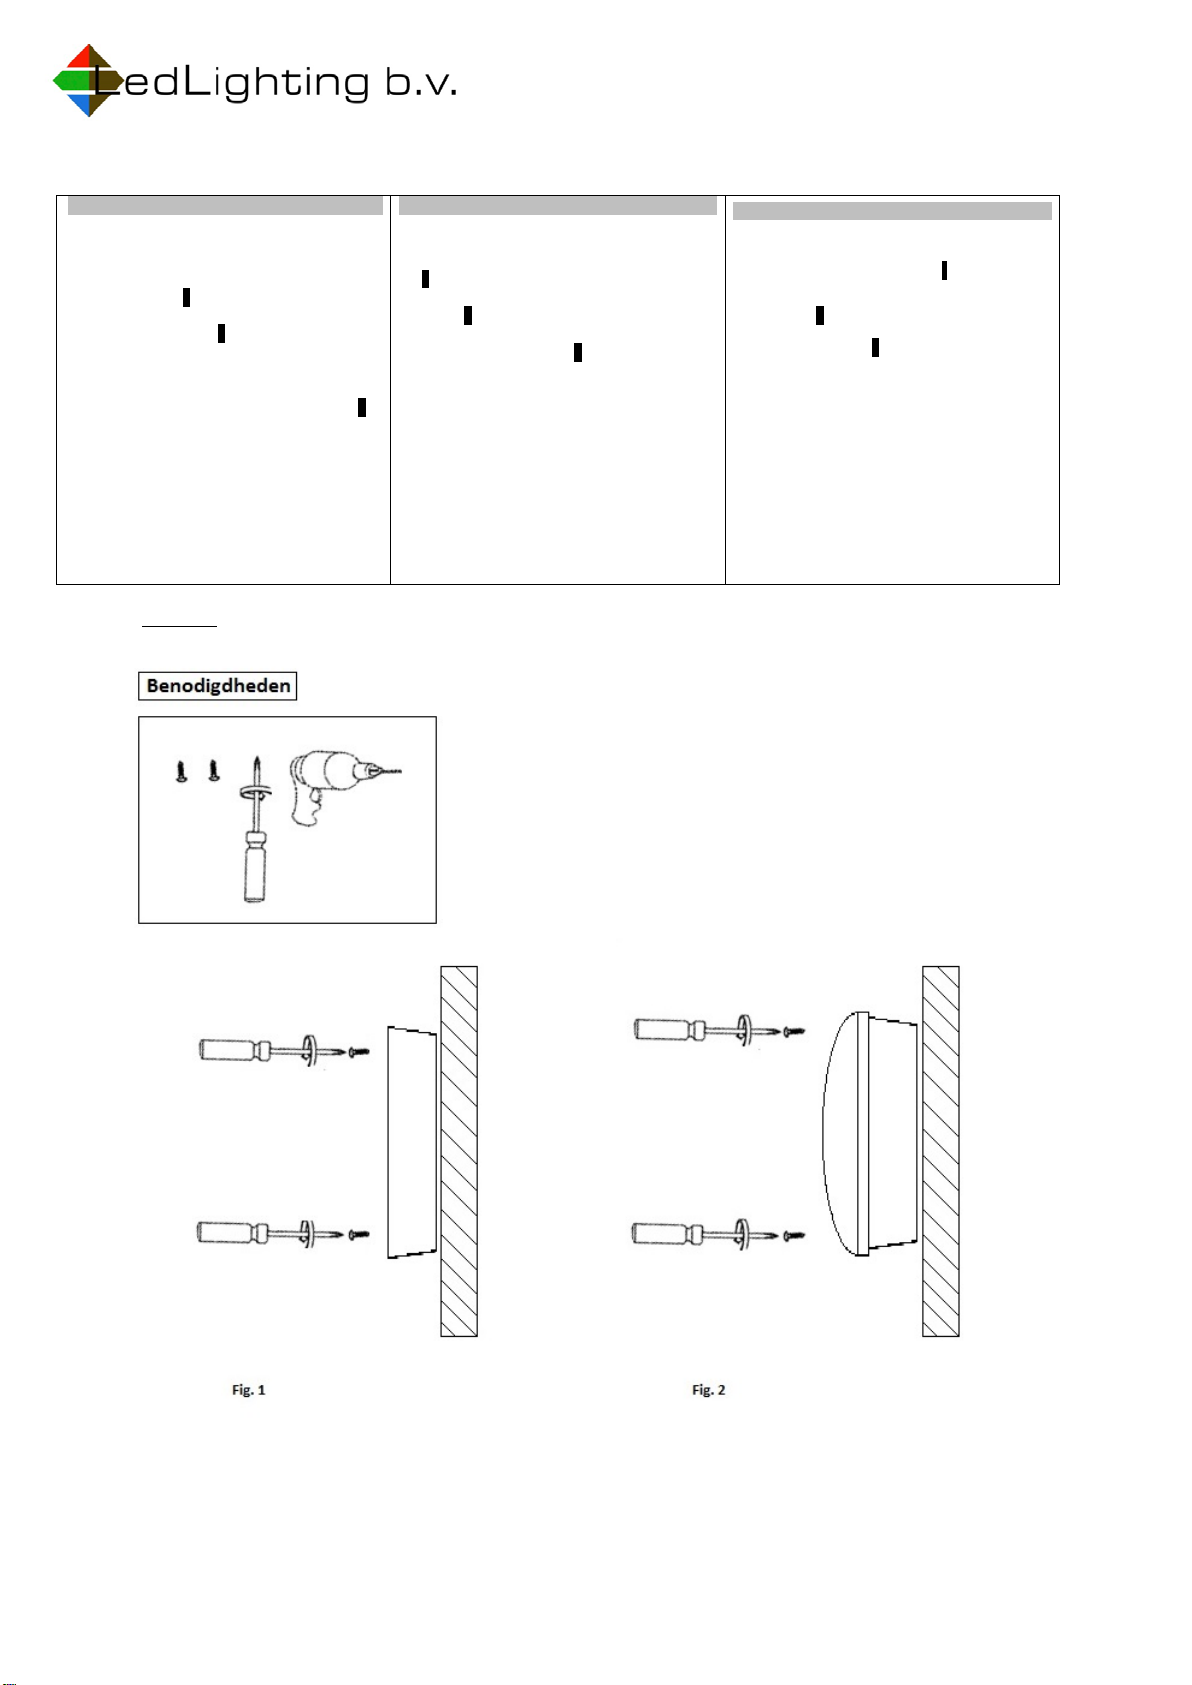
Bevestigdeplasticbasisplaatmetbehulpvande
speciale gleuven(A)
1
De kap demonteren door de schroeven
loste draaien (A-B-C-D.)
2
Om het apparaat aan te sluiten gebruik het juiste
type kabel en plaats de afdicht tule in de behuizing.
De aansluitconnector is zowel geschikt voor
massieve als soepele draad
.
1,5 – 2,5mm² 3
ONDERHOUD
Het is alleen aanwettelijk erkend, gekwalificeerd
personeel toegestaan aan de elektrische
installatie te
werken.
De spanning uitschakelen alvorens de lamp
te
openen en de instructiebladen
bewaren!
Bij oneigenlijk of onvakkundig gebruik
vervaltde
garantie.
UK
OUTDOOR / INDOOR INSTALLATION
Fixtheplasticbasemakinguseofthe
appropriate slot
(A)1
Unscrewthescrewson!heframetoremovethe
screen
(A·B-C-D)
2
Toconnect the fitting useacorrectrubber cable
and
pass
throughtherubber
grummet.
3
MAINTENANCE
Allfittings mustbeconnected by aqualified
electrician.
Switch off the power before opening the lamp and
Keepthis instruction sheet.
Install / Use the product ether than as prescribed
involvesthe loss oftechnical/mechanical
characteristics,consequentlyinvalidatethe
warranty.
DTAUGLICH FÜR MONTAGE ALS INNEN- und
AUSSEN-BELEUCHTUNG
Kunststoffplattefestschrauben (A)
1
MontierenSiedie Schutzkappeab indemSiedie
Schrauben auf dem Rahmenin der Reihenfolge
(A-B-C-D)
2
losdrehen.
Umdie Leuchte an zu schließenverwenden Sie
bitte geeignete Kabel 3
FührenSie dasstromversorgende Kabeldurch
den
Gummischlauch und befestigen Sie es an
der
Grundplatte. Erlaubte Draht Diameter 1,5 bis 2,5mm²
WARTUNG
Änderungen vor zu nehmenistnur rechtlich
qualifiziertemFachpersonalerlaubt.
Vor Armaturen-Öffnung Netzspannung
ausschalten.
Installieren/Benutzen SiedasProdukt anders
als
verschriebenbeinhaltet dass denVerlustvon
technischen/mechanischen Eigenschaften, dadurch
erlischt die Garantie.
Montage
GA-12S(optional Motion Sensor)
www.ledlightingbv.nl info@ledlightingbv.nl
Fig. 3 A
Fig. 3 C (1,5mm – 2,5mm²)
Dipswitch settings
Optional, if motion sensor is connected
Fig. 3 B
Fig. 3 D
100%
70%
40%
30%
20%
OUTPUT
CURRENT
SW2
1 2 3 4
SW1
1 2
NO MOTION/LIGHT SENSOR
SW1
1 2
SENSOR ON
100%
70%
OUTPUT
CURRENT 70%
40%
30%
20%
0%
OUTPUT
CURRENT
SW2
1 2 3 4
SENSOR OFF
WITH MOTION/LIGHT SENSOR
ON
OFF
GA-45 LED DIPSWITCH SETTINGS
DETECTION
AREA
1 32
100%
75%
50%
30%
10%
1 321 32
5s
30s
1min
5min
10min
20min
HOLD TIME DAYLIGHT
SENSOR
disable
50 lux
20 lux
5 lux
2 lux
MOTION SENSOR DIPSWITCH SETTINGS
ON OFF 30min
DAYLIGHT SENSOR ONLY TO BE USED WHEN DIPSWITCH
GA-12 LED PCB IS SET FROM 100% OR 70% TO 0%