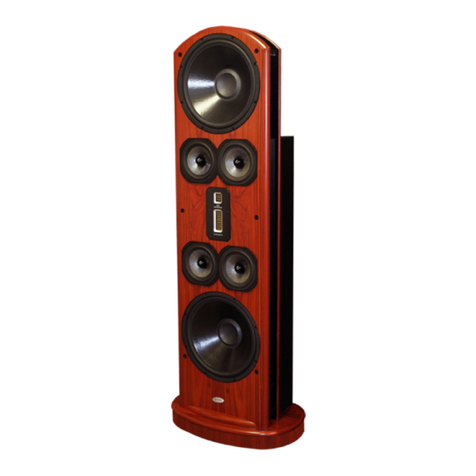
Legacy V System Operation manual

1
Owner’s
Operating
Manual

2
Thank you for purchasing the Legacy V loudspeaker system!
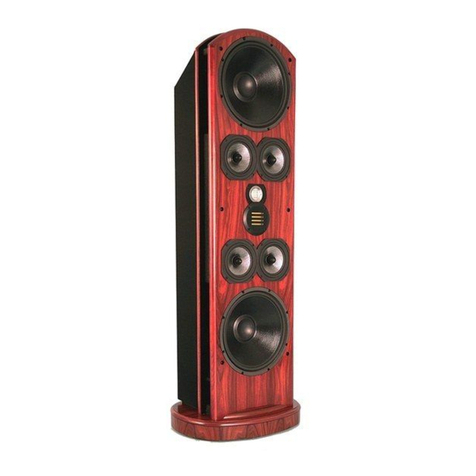
The Legacy V is a full range loudspeaker system utilizing the present state of the art in driver, crossover,
amplifier and acoustic radiation control technologies.
The Legacy speaker system is designed, assembled and tested in Springfield, Illinois by a dedicated group of
engineers, craftsmen and music lovers. The custom processor is designed and fabricated in Lund, Sweden
under the direction of Bohmer Audio. Please take a few moments to learn more about the features and
controls of these instruments to assure full enjoyment.

3
Owners Record
Thank you for selecting a Legacy Loudspeaker System. These handcrafted instruments will provide you with
many years of listening enjoyment. The serial number is located on the rear of each unit. You can record this
number in the space provided below. Refer to this when calling your dealer regarding this product:
Model: V Speaker System
Serial No: ____________________
Date of Purchase: ________________
Share your Legacy speakers with the Legacy community!
Post your Legacy experience and system photos at Facebook.com/LegacyAudio
Like the page to continue receiving the latest Legacy announcements.

4
Uncrating
Each V speaker has been carefully packaged in a specially designed crate to ensure they reach you safely and undamaged.
You will find the Top, Front and Back panels labeled on each crate as well as the Left/Right speaker designation.
Screws that are to be removed will be painted black for your reference.
Unpacking Instructions:
Step 1: First remove the top panel B. Due to the height of the crate, this will likely require a step ladder.
Step 2: Once the top panel is removed, remove internal cross bracing C. There are screws located on each end of the brace.
Step 3: Next, remove the front panel Aand braces D, H.
Step 4: Then, remove the two side panels F, G.
Step 5: Finally, remove the remaining back panel E,leaving the speaker resting on the base I. Due to the substantial weight of the loudspeakers,
we suggest that at least two persons assist in removing each speaker from the base.
Step 6: Remove any additional foam/bagging. Use caution when moving to the final listening position. If a dolly is used, cover with a soft material such as a
blanket to prevent any scratches.
Note: You will find the associated top rear speaker grille bonnets, Wavelet processor unit and cables each boxed separately.

5

6
Inside the Wavelet processor carton packaging you’ll find a hard-case containing a measurement microphone, a 25 ft. XLR
cable and a mic calibration plot. At the opposite end of the carton you will find a power supply with a five pin locking
connector and its 115 V AC cable, a compact remote volume control, a Wi-Pi network connector and a SanDisk USB memory
stick. Also included is a micro USB cable to connect your computer or media server to the Wavelet.

7
V Speaker Specifications
System Type: Frequency and time domain optimized four-way directivity controlled array.
Tweeter: Dual 4” AMT Ribbons configured in post convergent array
Upper Midrange: Dual 6” curvilinear with phase plug configured in dipolar array
Midrange/Midbass: Dual 14” Carbon/pulp, neodymium motor, cast frame, dipolar patter
Bass: 12” Aluminum diaphragm, Aura neodymium motor, sealed enclosure
Subwoofer: 12” Alumium very low frequency radiator driving three 10” mass loaded pneumatic
radiators
Low Frequency Alignment: Compound B6, B2 handing up to dipole
Frequency Response (Hz, +/- 2dB): 16Hz-30kHz
Impendance: 4 Ohm upper range
Sensitivity: 98 dB @ 2.83Volts / 1m in room
Recommended Amplification: Sub and bass sections are powered with 1500 Watts of internal power,
two external channels of 30 Watts or greater required
Crossover: 80Hz, 400Hz, 3kHz
Binding Posts: 2 pair of external binding posts, 2 XLR balanced inputs
Cabinet Dimensions HxWxD (Inches): 72 x 18.75 x 19 Cabinet Weight: 226lbs

8
Wavelet
At the heart of your V loudspeaker system is the Wavelet processor. Wavelet is a control preamp, a premium DAC, a digital crossover with time
alignment for each driver section and an acoustic correction system that will literally ‘learn’ your room.
True digital flexibility
SPDIF, TosLink: up to 96kHz/24bit
USB: All file formats up to 96kHz/24bit are sent directly from the PC to the Wavelet without any conversion. Higher resolution files such as PCM
and DXD can be readily played back using software such as J-River (select: Greater than 192kHz under DSP STUDIO.)
Analog Friendly
Already have a favorite DAC with a volume control? How about a big vinyl collection? Analog lovers can take advantage of balanced XLR or
unbalanced RCA inputs without concern of digital artifacts. An apodizing circuit corrects for the pre-ringing native to CODECs. Wavelet has
adequate headroom to handle these higher level signals while functioning as a crossover and compensating for room resonances. Wavelet
processes at 56 bits of depth in a domain more than one trillion times finer in resolution than that of a 16 bit CD.
The Wavelet is by design upgradable. The unit can download firmware updates directly when you choose.
While the Wavelet offers high quality/ low noise balanced inputs to accept the analog output from any SACD player, ideally one would instead
stream PCM versions of these files to the processor via the USB input. Within software such as J-River, the 1 bit DSD is converted to 64 bit PCM at
1/8 the sample rate. The total amount of data from this conversion grows by 8x, so the process is effectively lossless / perfect. The conversion is
necessary as DSD is inefficient for sophisticated DSP operations.

9
In the J-River software this configuration is located in the Player -> DSP Studio - Output Format section. Setup all sample rates up to and including
96ks to “No Change”. Then set input 176400 to output 88000, 192000 to 96000 and greater than 192000 to 96000. DSD is converted automatically
in the software to PCM. Once you have PCM, it will be 64bit @ 352.8 kHz for DSD, and 64bit @ 705.6 kHz for DSD 2x. The option 'Greater than
192kHz' in DSP Studio > Output Format should be selected.
Why PCM?
This is a format issue and has nothing to do with the Wavelet in particular. As professional studios rely on PCM based equipment such as Pro Tools
to mix, pan and balance recordings, the vast majority of SACDs are in fact mixed in PCM, or mixed analog and recorded in PCM. They may then be
converted to DSD for SACD mastering stages. The PCM format is far more efficient where DSP is in use. Recently a newer studio format, DSD-
wide, has been developed to allow DSP operations that can be down-converted to DSD for SACD production. Pro DAWs such as SADiE are now
using this technology.
PCM is the universal format of studios and digital signal processing. Most
recordings released in other formats were actually recorded in PCM format.

10
Wavelet Preamplifier/DAC/Crossover/Room Correction Processor
Inputs
Analog
Two pairs of Stereo balanced inputs on XLR connectors.
Input sensitivity without attenuation 0 dBFS*1 = 1 dBV*2, input impedance 20 kOhm.
Analog attenuation available in three steps of -3 dB, -6 dB and -12 dB for an input sensitivity of respectively 0 dBFS = 4 dBV, 7 dBV or 12dBV.
Two pairs of Stereo unbalanced inputs on RCA connectors.
Input sensitivity without attenuation 0 dBFS*1 = 1 dBV*2, input impedance 100 kOhm.
Analog attenuation available in three steps of -3 dB, -6 dB and -12 dB for an input sensitivity of respectively 0 dBFS = 4 dBV, 7 dBV or 12dBV.
One XLR Measurement microphone input, 48 Vdc Phantom power.
Digital
Asynchronous USB audio, 24 bit, 44.1 –96 ks.
SPDIF, 24 bit, 44.1-192ks
TosLink, 24 bit, 44.1-96ks

11
Outputs
Analog
8 balanced output channles on 8 XLR connectors. 0 dBFS*1 = 8 dBV*2 , 33 Ohm output impedance. An analog output level increase of 6 dB is
available through internal jumpers offering 0 dBFS = 14 dBV
8 unbalanced output channels on 8 RCA connectors. 0 dBFS*1 = 8 dBV*2, 33 Ohm output impedance.
Digital
SPDIF, 24 bit, 96 kHz
TosLink, 24 bit, 96kHz
Control Interface
Ethernet, TP-Cable & WLAN
Processing
DSP
Analog Devices, internal processing sample rate 96ks, bit depth 56 bits
The Bohmer Correction is a loudspeaker in-room energy-time alignment that optimizes the loudspeaker room acoustic transfer function in
both frequency and predominantly time domain. Working with revolutionary new algorithms is starts with a psychoacoustically based
measurement method. Alignment errors are then optimized individually, not resorting to the common crude bulk correction over the entire
frequency spectra. The Algorithms use psycho acoustic reasoning for alignment and correction of the loudspeaker room transfer function.
The correction improves sound quality in the whole room, provides improved transient response, clarity & soundstaging and gives a relaxed
sound without rough edges or any booming.
Physical
Dimensions
445 mm W x 301 mm D x 95 mm H / 17.52” W x 11.85” D x 3.74 H Weight 6.1 kg / 13.5 lbs

12
Speaker Connections
The standard V system provides two channels of amplification internally for the subwoofer and bass drivers.
You will need to supply two additional channels for the lower midrange (60 watts minimum) and
midrange/treble (30 watts minimum) of each speaker. Additional channels of internal amplification can be
provided by special order. Two professional grade 15 ft. balanced XLR cables are provided for each speaker.
Wavelet processor output connections:
1 Left speaker subwoofer amplifier (internal 1000 watts)
2 Left speaker bass (internal 500 watts)
3 Left lower midrange amplifier (user provided)
4 Left midrange/treble amplifier (user provided)
5 Right speaker subwoofer amplifier (internal 1000 watts)
6 Right speaker bass (internal 500 watts)
7 Right lower midrange amplifier (user provided)
8 Right midrange/treble amplifier (user provided)

13
Ready to take control
of your V system?

14
Your Wavelet processor has a serial number located on the decal adhering to the top of the unit. There is also a permanent sticker on the rear corner of the
unit which indicates this number. The Wavelet can connect to the network via WiFi or Ethernet.
Wavelet features can be remote controlled via iPad, iphone, or other mobile device. In order to perform room correction it is essential that you connect the
unit to the internet. To maximize enjoyment, we recommend dedicating one of these handheld devices to your music system, thus keeping your phone calls,
and messages from interfering directly with your listening and control experience. If you don’t have an extra device, consider picking one up used. We love
controlling the system with an iPad Mini sized screen.
You can also utilize a low cost additional router to enhance or expand local connectivity. Units such us shown are useful for this purpose. Just connect the
internet input of the new router to your modem tied to the incoming cable line.

15

16
This is what the wifi-conf.txt file looks
like. You will enter your network name
and password between the quotes as
shown, and then save over the wifi-
conf.txt file that exists on the
removable SanDisk memory stick.
When you insert the stick into the
Wavelet USB port with the power off
(standby), the unit will load into
memory the new network name and
password after being powered on for 1
minute.

17
Input

18
Settings
Mode

19
DAC
Presets

20
Contour
Channel Levels
Table of contents
Other Legacy Speakers System manuals

Legacy
Legacy Sconce Surround User manual

Legacy
Legacy FOCUS SE User manual

Legacy
Legacy Sconce User manual

Legacy
Legacy Marquis HD User manual

Legacy
Legacy Studio HD User manual

Legacy
Legacy Deco User manual

Legacy
Legacy VALOR User manual

Legacy
Legacy Studio HD User manual

Legacy
Legacy Whisper HD User manual

Legacy
Legacy FOCUS SE User manual

Legacy
Legacy Empire User manual

Legacy
Legacy Helix User manual

Legacy
Legacy Helix User manual

Legacy
Legacy Signature III User manual
Legacy
Legacy Xtreme XD User manual

Legacy
Legacy Skyline User manual

Legacy
Legacy Phantom User manual

Legacy
Legacy Focus HD User manual

Legacy
Legacy Phantom User manual

Legacy
Legacy Focus 20/20 User manual