manuals.online logo
Brands
  1. Home
  2. •
  3. Brands
  4. •
  5. Legacy
  6. •
  7. Speakers System
  8. •
  9. Legacy Whisper XDS User manual

Legacy Whisper XDS User manual

Owners Manual For The
Loudspeaker System
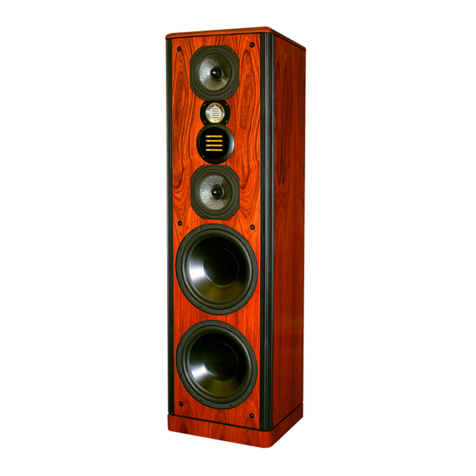
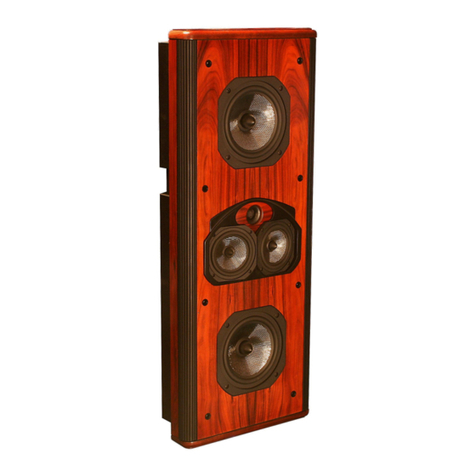
Whisper XDS
2
Registration
Owners Record 3
The Cabinetry Our Commitment 4
Warranty 5
Setup
Speaker Placement 6
Hooking Up Cables 7-8
Amplification 9-11
Speaker Connections 12-13
Installer Calibration Instructions 14
Whisper Wave Launch Processor 15-23
Technology
Designer’s Notes 24-25
Continuing the Pursuit of Perfection 26-27
Specifications 28
Table of Contents
Page
3
The serial number is located on the rear of the unit. Record this
number in the space provided below. Refer to this when calling your
dealer regarding this product.
Thank you for selecting a Legacy Loudspeaker System. These hand-
crafted instruments will provide you with many years of listening en-
joyment.
Owners Record
Model: Whisper XDS
Serial No: _________________________
Date of purchase: ___________________
4
The Cabinetry / Our Commitment
Handcrafted
Beneath the surface of Whisper XDS’s elegant exterior lies rigid MDF
construction. Interlocking joinery maximizes the strength of the cabinet
parts. Polyester fiberfill is selected for internal damping. A sharp rap on
the enclosure will leave you with little more than bruised knuckles.
Each cabinet is impeccably finished on all exposed surfaces with select
veneers. The exquisite finish is hand-rubbed several times to assure a
patina at home with the most elegant decor.
Our Commitment
A great deal of forethought, love and satisfaction is instilled in each piece
of Legacy workmanship. We take pride in getting to know many of our
customers on a first name basis.
Your purchase of this product is backed by the renowned “Legacy
Satisfaction Guarantee”.
5
Legacy Audio supports its customers and products with pride. We cheerfully warrant our loud-
speaker products we manufacture from defects in materials and workmanship for a period of seven
(7) years. Electronic components such as internal amplifiers and digital processors are covered for
three (3)years. Please register your product with Legacy Audio. Should you require service Legacy
will require a proof of purchase in order to honor the warranty - so please keep your receipt.
• The warranty applies to the original owner and is not transferable.
• The warranty applies to products purchased from an “Authorized Legacy Dealer”.
• The warranty on active components such as digital processors or internal amplifiers is limited to three
(3) years of coverage.
• The warranty on dealer stock will extend for a maximum of two years from invoice.
The warranty does not cover transportation costs of product to or from the customer, distributor or
dealer, or related shipping damage.
Exclusions from Warranty
The following situations or conditions are not covered by the Legacy Audio warranty:
• Accidental damage, electrical abuse or associated equipment failure.
• Use inconsistent with recommended operating instructions and specifications
• Damage caused by modification or unauthorized service
• Costs associated with the removal and reinstallation of defective products. Consequential damage to
other products.
• Normal wear such as fading of finishes due to sunlight.
Warranty
6
Positioning Whisper for good performance is quite a bit easier than for most speakers. Remember
that whisper is actually an acoustic gun with a highly controlled directivity pattern. Corner place-
ments are actually quite workable though not necessarily optimal. Whisper will not become
“boomy” like a conventional system and it will not interact strongly with the sidewalls of your room.
imple Guidelines:
1. You may position the Whisper speakers farther apart than most other speakers. This will help to
acoustically shadow the head properly and maintain better channel separation. Experiment with
what works best in your room. As a starting point you might also try the following:
Ideal peaker spread = (0.8 to 1.2) X Distance from speaker plane to listener position
2. Toe the speakers in more than with other speakers. In most circumstances crossing speaker axes
just in front of the listener’s head works best. This will broaden your sweet spot horizontally. If dis-
persing into an L shaped seating arrangement you might find the best results by aiming the left
speaker at the right most seating position, and the right speaker at the left most seating position.
3. Hearing the most ambience in the recording and the least reflection from your room favors a lis-
tener position that is no farther from the plane of the speakers than two thirds the geometric width
of your room. More simply, if the room is 16 feet wide then the sitting no farther than 12 feet will
allow you to hear more of the recording and less of your room.
peaker Placement
7
The ideal conductor would have negligible resistance, inductance
and capacitance. The table below shows how a few actual speaker
cables measure up.
Cable Ωs ft pF ft µH ft
12 ga. 0.0033 24 0.21
14 ga. 0.0048 17 0.13
16 ga. 0.0079 16 0.18
18 ga. 0.0128 28 0.21
Capacitance is considered insignificant in each cable because its ef-
fect is well out of the audio bandwidth; inductance can be de-
creased (at the expense of increased capacitance) by keeping the
conductor pair closely spaced.
How long would a cable have to be before inductance effects would
impinge on the audio spectrum? Approximately 300 feet of 12 gauge
would be required to establish a corner frequency of 20 kHz with an
8 Ohm loudspeaker. As you see, inductance is not a problem for
most of us.
Hooking Up Cables
8
What about phase shift due to frequency dependent travel times down the speaker
cable? Measurements show that 100 Hz waves will be delayed about 20 billionths of a
second behind 10 kHz waves when traveling to the end of a 10 foot speaker cable.
Since the cilia of the ear requires 25,000 times longer than this just to transmit phase
information, phase shifting is obviously not the primary concern when considering
speaker cables.
What about resistance? Finally we are getting somewhere. Resistance is the control-
ling factor of the amplifier loudspeaker interface. Excessive resistance can cause ma-
jor shifts of speaker crossover frequencies. The lower the impedance of the loud-
speaker, the greater the effects of series resistance. A 20 foot run of 18 gauge cable
can cause up to 10% deviations of crossover center frequencies. That same 20 feet
can un-damp your damping factor and reduce your systems’ output by one half deci-
bel.
In summary, there are no perfect cables. The best way to approximate the ideal
would be to keep loudspeaker leads as short as is practical.
Hooking Up Cables
9
Ideally the loudspeaker would be among the first components selected when assembling a play-
back system. This would allow the user to choose an amplifier capable of delivering adequate
amounts of current into the frequency dependent load presented by the loudspeaker. However,
when upgrading a system, audiophiles may find themselves matching their new loudspeakers to
their existing amplification. For this reason, extensive measures have been taken to ensure that
each Legacy speaker system represents a smooth, non-reactive load to virtually any amplifier.
Often there is much confusion regarding amplification and loudness levels. It should be under-
stood that the role of the amplifier goes beyond that of driving loudspeakers to a given sound
pressure level. The amplifier should be able to CONTROL the loudspeakers across the entire mu-
sic spectrum. This means that parameters such as damping factor (values greater than 60 are
acceptable) and dynamic headroom should not be overlooked when comparing amplifiers.
Amplification
10
How much power will your new speakers need? That ultimately depends on
your listening environment and musical tastes. As little as five watts per
channel should drive them to a level satisfactory for background music. A
typical 45 watt per channel receiver may fill a room with the compressed
mid-band energy of “heavy metal,” but seem to lack weight or control with
classical recordings. Some audiophiles feel that 200 watts per channel is the
bare minimum to avoid audible clipping distortion when reproducing music
at “live” playback levels. Your Legacy speakers are designed to take advan-
tage of “high-powered” amplifiers, so don’t be afraid to put them through
their paces.
How much is too much power? Rarely is a drive unit damaged by large
doses of music power. More often than not the villain is amplifier clipping
distortion. Even through decades of refinement, loudspeakers are still noto-
riously inefficient transducers, requiring huge amounts of power to recreate
the impact of the live performance. Typically less that 1% of electrical
power is converted into acoustic output. (For example, an omnidirectional
transducer with an anechoic sensitivity of 90 dB @ 1w 1m has a full space
efficiency of only 0.63%)
Amplification
11
When an amplifier is unable to fulfill your loudspeakers demands, a
damaging harmonic spike may be leaked to the high frequency drivers.
Another important point regarding loudness is that the dB scale is a
logarithmic one. This means that a 150 Watt amplifier will potentially sound
only twice as loud as a 15 Watt amplifier. If all of this discussion of power
and loudness seems a bit abstract, consider the example below.
The average acoustical power developed by a person speaking in a
conversational tone corresponds to a mere 0.00001 Watts. The power that
would be developed by the entire population of the city of New York
speaking at once would barely illuminate a single 100 Watt light bulb.
Amplification
12
The Terminal Plate
At the rear of each of your loudspeakers you will find a terminal plate housing one pair of binding posts and two XLR Con-
nectors.
Hook the high level speaker inputs from the main amplifier to the pair of binding post. Be sure that you observe polarity
when making the connections. The positive (+) terminal of the amplifier should be connected to the positive terminal of the
loudspeaker. The negative (-) terminal of the amplifier should be connected to the negative terminal of the loudspeaker.
The Upper XLR input is fed directly from the processor output (Output #2 for the Left Speaker, Output #6 for the Right
Speaker)
The Lower XLR input is also fed directly from the processor output (Output #1 for the Left Speaker, Output #5 for the Right
Speaker)
peaker Connections
13
Xilica XD Cable Connections
From To
Left channel of preamp output Processor Input 1 & Processor Input 3
USE Y ADAPTER
Right channel of preamp output Processor Input 2 & Processor Input 4
USE Y ADAPTER
Processor Output 1 Left Legacy Whisper
Back
15” Drivers (Bottom XLR)
Processor Output 2 Left Legacy Whisper
Front
15” Drivers (Top XLR)
Processor Output 3 Left Channel of Customer Provided Amplifier Feeds to
Left Legacy Whisper
Processor Output 5 Right Legacy Whisper
Back
15” Drivers (Bottom XLR)
Processor Output 6 Right Legacy Whisper
Front
15” Drivers (Top XLR)
Processor Output 7 Right Channel of Customer Provided Amplifier Feeds
to Right Legacy Whisper
peaker Connections
14
tep 1:
-start with everything muted
-un-mute input 1
-un-mute output 1 and verify the rear left woofers are all playing.
tep 2
-mute output 1
-un-mute output 2 and verify only the front left woofers are all playing
tep 3
-mute output 2
-un-mute output 3 and verify the mids and tweeters are all playing
tep 4
-un-mute output 2, the acoustic energy should increase as it sums with output 3
-un-mute output 1, the signal should increase in deep bass primarily
Now do same for right channel
tep 5
-start with everything muted
-un-mute input 2
-un-mute output 5 and verify the rear right woofers are all playing.
tep 6
-mute output 5
-un-mute output 6 and verify only the front right woofers are all playing
tep 7
-mute output 6
-un-mute output 7 and verify the mids and tweeters are all playing
tep 8
-un-mute output 6, the acoustic energy should increase as it sums with output 7
-un-mute output 5, the signal should increase in deep bass primarily
Installer Calibration Instructions
tep 9
Un-mute inputs 1,2
Un-mute outputs 1,5, the low bass should sum up
Un-mute outputs 2,3,6,7 bass should be solid and not sound phasey
tep 10
Adjust path length to speakers until equidistant. Adjust balance on inputs 1 and
2 until image is centered
tep 11
EQ the left speaker with pink noise using the parametrics on Input 1, followed
by graphic filters if needed.
tep 12
EQ the right speaker with pink noise using the parametrics on Input 2, followed
by graphic filters if needed.
tep 13
Voicing each speaker:
We are looking for a curve that is flat with the following exceptions.
- a gentle 1.5 dB depression from 1khz to 3kHz,
- a 2 dB rise at 20kHz ramping from 5kHz gently upward.
With customer’s approval apply a sharp electrical roll-off below 32 Hz. (Nothing
but mechanical junk down there in 99% of recordings).
tep 14
With both speakers playing music in mono, adjust L, R input levels until perfectly
centered. If there is a 2dB difference that is ok, then
the room is just that
asymmetric in power response.
tep 15
Unmute inputs 3,4 to activate stereo low frequency correction
tep 16
Final voicing: Listen to the full spectrum. Any adjustments should be made care-
fully on each side to retain balance.
Be sure to feed left input to both 1,3 and right input to both 2,4 with XLR splitter cable off preamp
15
The high definition Digital Wavelaunch Processor hosts a LEGACY custom algorithm which automatically loads when the proc-
essor is powered on. Factory settings are ‘plug and play’, and do not require a computer to utilize. Connections between the
preamp, power amplifier, and speakers should be as shown on previous page.
Programs
1 Whspr Normal standard settings for flat response
2 Bass Plus (increases bass, +2 dB)
3 Bass Minus (shelves bass, -2 dB)
electing the Program
1. Press the MENU left arrow
2. Scroll through the programs using the job wheel
3. Press enter to select the program of choice
4. Press enter again to confirm selection. The program will now load.
Users are welcome to load the included software and learn to make individual adjustments as desired. However it is recom-
mended that any changes be saved as Program 6 or higher to avoid overwriting the factory settings.
Whisper Wave Launch Processor
16
Downloading and Installing the XConsole software
Downloading
From Included CD
Your Wave Launch Processor will come with a CD or USB drive containing the XConsole
software. Insert the CD and find the install file. Move Save the install file to your
computer.
From Xilica Website
- Go to www.xilica.com
- Click on the “Downloads” tab at the top of the screen
- Click “XConsole” on the Left and then Click “Software”
- Click “XConsole software” to start the download
- Save and Extract the installation file on your computer
Installing
- Double click on the install file and follow the on– screen instructions to install the software.
Whisper Wave Launch Processor
17
The XD processor will allow you to make adjustments to your system from a laptop computer
from your listener position.
Connecting Your Computer with the Xilica Processor
- Connecting will require a long USB Device cable. These can be found at most electronic or big box stores. It is the
same cable that a USB printer would use. This 16 ft cable is available at Radio Shack.
http://www.radioshack.com/product/index.jsp?productId=3584358&filterName=Length&filterValue=16-20+ft.
- Once the cable is connected, start the XConsole software. It will ask “Do you want to connect to the device?”, answer
“No” for now.
- You now must access the Windows Device Manager. This processes can vary depending on the version of Windows in
use, but typically it is found in the Control Panel. Then click on “System.” On the tabs across the top, click “Hardware”
and then “Device Manager” This will bring up a list, find “Ports (COM & LPT)” and click the plus (+) next to it. You
should then find a device called “Silicon Labs CP210x USB to UART Bridge” with a COM number listed next to it. This
number will change on all computers, but take note of this number.
CONTINUED ON NEXT PAGE
Whisper Wave Launch Processor
18
- Go back to the XConsole software. At the top of the screen click “Setup” then “Port Connections” This bring up a new
dialog box. Select the COM port number you obtained from the device manger and click “OK.” The software will warn
you that you must restart the software for your changes to take effect.
- Restart the XConsole software. This time, when it asked “Do you want to connect to the device?”, answer “Yes”.
- You should now be connected to the device and ready to use.
Room Equalization
Before making adjustments with your processor, a basic understanding of parametric and graphic equalization is needed.
Parametric filters allow you to control the three primary parameters of a useful band-pass filter. These parameters
are amplitude (boost or cut), center frequency (pitch) and bandwidth (tonal range). Bandwidth is typically labeled "Q" on the
unit, which stands for Q factor. The amplitude of each band can be controlled, and the center frequency can be shifted, and
widened or narrowed.
Simpler graphic filters are fixed in frequency and bandwidth, so the music spectrum is divided into uniform third-octave spac-
ings.
Whisper Wave Launch Processor
19
Making Adjustments with Wavelaunch Processor
After installing the included software, connect the processor to the computer via a USB cable.
Launch the XConsole software.
When asked if you want to connect to the device, click yes.
In the Device List, click on the device that is connected. This will launch the program that is currently on the processor.
Whisper Wave Launch Processor
20
In the Device List, click on the device that is connected. This will launch the program that is currently on the processor.
Adjustments to the processor can be made to “Input 1: Left” and “Input 2: Right”.
Clicking on “In 1: Left” opens the controls for the Left speaker.
In this window, you are presented with 31 channels of graphic EQ and 8 channels of parametric EQ.
Whisper Wave Launch Processor

Other Legacy Speakers System manuals

Legacy Silhouette User manual

Legacy

Legacy Silhouette User manual

Legacy Studio HD User manual

Legacy

Legacy Studio HD User manual

Legacy Focus HD User manual

Legacy

Legacy Focus HD User manual

Legacy VALOR User manual

Legacy

Legacy VALOR User manual

Legacy Sconce Surround User manual

Legacy

Legacy Sconce Surround User manual

Legacy Mist User manual

Legacy

Legacy Mist User manual
Legacy Silverscreen II User manual

Legacy

Legacy Silverscreen II User manual

Legacy Focus 20/20 User manual

Legacy

Legacy Focus 20/20 User manual

Legacy FOCUS SE User manual

Legacy

Legacy FOCUS SE User manual

Legacy AERIS User manual

Legacy

Legacy AERIS User manual

Legacy Broadway User manual

Legacy

Legacy Broadway User manual

Legacy Sconce User manual

Legacy

Legacy Sconce User manual
Legacy Empire User manual

Legacy

Legacy Empire User manual

Legacy FOCUS SE User manual

Legacy

Legacy FOCUS SE User manual

Legacy CALIBRE User manual

Legacy

Legacy CALIBRE User manual

Legacy Marquis HD User manual

Legacy

Legacy Marquis HD User manual

Legacy V System Operation manual

Legacy

Legacy V System Operation manual

Legacy Harmony Center User manual

Legacy

Legacy Harmony Center User manual

Legacy FOCUS SE User manual

Legacy

Legacy FOCUS SE User manual

Legacy Classic HD User manual

Legacy

Legacy Classic HD User manual
Legacy Deco User manual

Legacy

Legacy Deco User manual

Legacy Silhouette User manual

Legacy

Legacy Silhouette User manual

Legacy Harmony Center User manual

Legacy

Legacy Harmony Center User manual
Legacy Skyline User manual

Legacy

Legacy Skyline User manual
Popular Speakers System manuals by other brands

Canton Smart Sounddeck 100 Short manual

Canton

Canton Smart Sounddeck 100 Short manual

Yamaha YAS-107 owner's manual

Yamaha

Yamaha YAS-107 owner's manual

Manhattan 150194 user manual

Manhattan

Manhattan 150194 user manual

PSB CustomSound CW180R quick start guide

PSB

PSB CustomSound CW180R quick start guide

Yamaha YAS-105 owner's manual

Yamaha

Yamaha YAS-105 owner's manual

Logitech Z313 installation guide

Logitech

Logitech Z313 installation guide

Onkyo D-N10BX instruction manual

Onkyo

Onkyo D-N10BX instruction manual

AEG BSS 4812 instruction manual

AEG

AEG BSS 4812 instruction manual

Peachtree M24 manual

Peachtree

Peachtree M24 manual

EAW MK5364 Specifications

EAW

EAW MK5364 Specifications

Philips Fidelio HTL9100 user manual

Philips

Philips Fidelio HTL9100 user manual

Nexo PS8 user manual

Nexo

Nexo PS8 user manual

CABASSE Xo SYSTEM owner's manual

CABASSE

CABASSE Xo SYSTEM owner's manual

Pioneer SP-SB23W operating instructions

Pioneer

Pioneer SP-SB23W operating instructions

LG FH6 Simple manual

LG

LG FH6 Simple manual

Zvox Audio ZB550 HSD Installation and operating instructions

Zvox Audio

Zvox Audio ZB550 HSD Installation and operating instructions

Trevi XF 900 CD user guide

Trevi

Trevi XF 900 CD user guide

Bose 601TM owner's guide

Bose

Bose 601TM owner's guide

manuals.online logo
manuals.online logoBrands
  • About & Mission
  • Contact us
  • Privacy Policy
  • Terms and Conditions

Copyright 2025 Manuals.Online. All Rights Reserved.