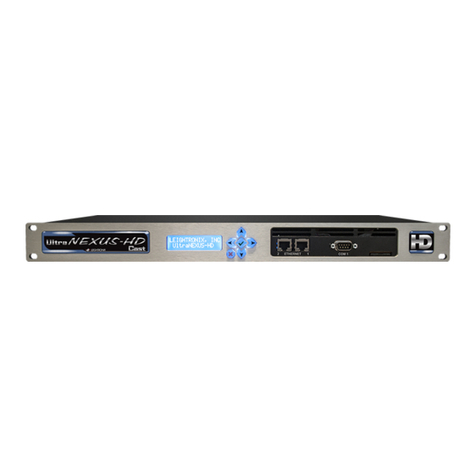
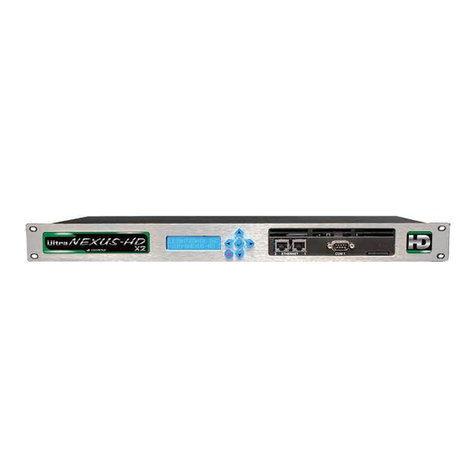
Leightronix UltraNEXUS-HD X5 User manual

LEIGHTRONIX, INC.
1125 N Cedar Rd | Mason, MI 48854
Phone: (800) 243-5589 or (517) 694-8000 | Fax: (517) 694-1600
www.leightronix.com
7/16/19
© 2019 LEIGHTRONIX, INC. All rights reserved.
The information in this manual is subject to change without notice.
UltraNEXUS-HD, WinLGX, and WebNEXUS are
trademarks of LEIGHTRONIX, INC.
At LEIGHTRONIX, every customer of our standard product
line receives technical support at no extra charge. There are
no service contracts, no annual renewals, no allowances, no
deductibles, and no exclusions.
In addition to a 5 year hardware warranty, benets include
access to:
• Priority toll-free telephone support
• Email support
• Online support, desktop to desktop via Webex®
• Software updates
• Firmware updates
• Assistance with updates
Looking for rmware/software or additional documentation? Go
to www.leightronix.com/support.html to download important
updates and full product manuals.
Phone: (800) 243-5589
Email: [email protected]
PRODUCT QUICK GUIDE
Hardware Setup | Network Configuration | WinLGX Software Installation | Web Control
H.264 HD/SD Digital Video Server
Television Automation
Network Configuration
Support
2Web Control
4
How to Properly Shutdown Your UltraNEXUS-HD X5
Press and hold the red X[ ] on the front panel for approximately seven (7) seconds until the front panel display shows
EXECUTING SYSTEM SHUTDOWN. After approximately three (3) seconds, SYSTEM HALTING REMOVE POWER will appear
on the front panel display. At this point, all services will be stopped and the operating system will shut down. Power off the
system by pressing 0on the power switch.
Access your UltraNEXUS-HD X5 from your network with WebNEXUS™, a built-in password-protected web interface.
WebNEXUS provides the ability to manage slides, create and display overlays, create looping playlists for Virtual
Channel between, as, or in place of scheduled programming, transfer video les to specied destinations, and view the
UltraNEXUS-HD X5 system’s status, program guide, and log les.
Accessing WebNEXUS
Open the UltraNEXUS-HD X5 web interface through one of the two following steps:
1. If you already have WinLGX open and are logged into the desired UltraNEXUS-HD X5 unit’s IP address, select
Web interface from the Tools menu or click the [ ] toolbar icon to open the web interface in your default
web browser.
2. Enter your UltraNEXUS-HD X5 unit’s IP address into the address bar of a web browser.
A login prompt will appear. Enter the username and password initially set up in WinLGX to access WebNEXUS.
Refer to the WinLGX Software Installation section of this quick guide for more information.
More Information
Head to the Web Control section of the full manual for more information on WebNEXUS and its functions.
4. Either press right [ ] again to save changes or
left [ ] to abort them.
Gateway Address
5. From the CONFIG MENU screen, press up/
down [ ] and navigate to Set Gateway 1.
6. Press right [ ] to select Set Gateway 1.
7. Press right/left [ ] to position the cursor
under editable elds and press up/down [ ]
to edit values. Press right [ ] at the end of all
editable elds to enter the next screen.
8. Either press right [ ] again to save changes or
left [ ] to abort them.
NOTE: The UltraNEXUS-HD X5 must be rebooted by
holding down the center check mark [ ] for seven (7)
seconds to apply any network address changes.
IP Address
1. From the CONFIG MENU screen, press up/down
[ ] and navigate to Set IP Address.
2. Press right [ ] to select Set IP Address.
3. Press right/left [ ] to position the cursor under
editable elds and press up/down [ ] to edit
values. Press right [ ] at the end of all editable
elds to enter the next screen.
4. Either press right [ ] again to save changes or
left [ ] to abort them.
Subnet Mask Address
1. From the CONFIG MENU screen, press up/down
[ ] to navigate to Set Subnet Mask.
2. Press right [ ] to select Set Subnet Mask.
3. Press right/left [ ] to position the cursor under
editable elds and press up/down [ ] to edit
values. Press right [ ] at the end of all editable
elds to enter the next screen.
Entering the Front Panel Password
From the front panel of your UltraNEXUS-HD X5 server, press right [ ] from any status screen to display the password
entry screen. Press right [ ] ve (5) times to enter the default front panel password and access conguration menus.
NOTE: To replace the unit’s password, refer to the Changing Front Panel Password section in the full manual.
Editing TCP/IP Network Addresses
Obtain network addresses from your technical support personnel or network administrator. TM

2.a COM 2 Port — RS-232 serial port with 9-pin male connector for diagnostic serial communications.
2.b Serial Digital Interface (SDI) Input and Output Connectors — Connect the SDI source and destination signals to the SDI IN and
SDI OUT connectors respectively. NOTE: Use of HD-SDI rated coaxial cable is highly recommended.
2.c Audio Input and Output Terminal Blocks — If used, connect AES or analog audio source and destination signals to the AUDIO
IN and AUDIO OUT terminal blocks. Detailed information regarding wire preparation can be found in the full manual.
2.d Composite Video Output Connector — If used, connect composite video destination signals to the CVBS OUT connector. The
composite video outputs a downscaled version of the high-definition signal.
2.e COM 3 Port — RS-232 serial port with 9-pin male connector for future serial communications.
2.f USB 2.0 Ports — Connect up to two (2) LEIGHTRONIX external hard drive units for up to four terabytes (4TB) of increased digital
media storage capacity.
2.g 2.h Internal Hard Drive — The UltraNEXUS-HD X5 comes equipped
with a two terabyte (5TB) hard drive for digital media storage.
NOTE: The internal hard drive is non-serviceable.
2.i Press 1on the power switch to power on the UltraNEXUS-HD X5.
2.j Connect the included power cable into the power cord receptacle of the UltraNEXUS-HD X5, and then plug the other end into a MAINS
AC power source. NOTE: Use of an uninterruptible power supply (UPS) with the UltraNEXUS-HD X5 is highly recommended.
This section provides instructions for installing the UltraNEXUS-HD X5 system management software, WinLGX™, along
with some basic conguration steps. For more detailed conguration information, refer to the full manual. WinLGX
congurations (particularly for switch type and size) must be completed before a schedule can be created.
1.a Display — View system status, diagnostic information, and current configurations.
1.b Keypad — The UltraNEXUS-HD™X5 has a six-button keypad for navigating system status displays and configuration menus.
1.c 2 Ethernet Ports — Port 1: Using the included Ethernet cable, connect the UltraNEXUS-HD X5 directly to a 100/1000 switch
on your network. Port 2: To be used for specialized network situations.
1.d COM 1 Port — RS-232 serial port with 9-pin male connector for use with LEIGHTRONIX supported audio/video routers with a
maximum supported matrix size of 250 inputs by 250 outputs.
1.e Secured Digital (SD) Card — The UltraNEXUS-HD X5 SD card contains operating system and other system files.
WARNING: Do not remove the SD card during operation. Serious damage may occur.
1
.a 1.b 1.c 1.d 1.e
2.b
2.c
2.d
2.e
2.f
2.g 2.h
2.i
2.j
2.a
Figure 3, UltraNEXUS-HD X5 Audio
Terminal Block Wire Location
(see full manual for details)
Hardware Setup
WinLGX Software Installation
3
1
1. Visit www.leightronix.com/support.html and nd
your UltraNEXUS-HD series product.
2. Click the appropriate link for your product under
the Current Client Software Version column to
download the WinLGX installer.
3. Navigate to where the WinLGX installer (WinLGX_
v7.0.x.x_Installer.exe) is saved on your
computer.
4. Right click the WinLGX installer and choose the
run as administrator option to start the
installation. Follow the prompts to complete setup.
5. As WinLGX installs, two additional windows will be
displayed. NOTE: Refer to Figure 6.a on the right
for a description of each window and installation
guidelines.
6. Click Finish to close the WinLGX setup
wizard and return to Windows.
WinLGX System Management Interface WinLGX Site Manager
Use the WinLGX Controller Site Manager window to store your UltraNEXUS-HD X5 server’s network IP address
information. WinLGX uses each server’s IP address to locate the server and send/receive system information.
Manage the IP address listing of your UltraNEXUS-HD X5 as follows:
WinLGX Minimum
System Requirements
•Microsoft Windows 7 or newer
•1.6 GHz or faster processor
•2 GB of RAM
NOTE: The following steps were written
for Windows 7 and 8, and may vary for
later versions
BNC Cables USB Cable Ethernet Cable (included)Serial Cable Power Cord (included)
Components Key
VLC media player setup wizard: VLC media player
is necessary in order to use the WinLGX software
preview and confidence monitor features (for more
information on these features, refer to the full
manual). If you do not intend to use the WinLGX
software monitor features, you may opt out of the
VLC installation process by clicking Cancel. If you
choose to install VLC media player, but do not want the
player to be automatically chosen for media playback,
deselect Audio Files and Other under the File Type
Associations settings during installation.
Microsoft Visual C++ library window: This
window is used to install the Microsoft Visual C++
runtime components needed to run WinLGX on your
computer or network. Click Repair if you are using
WinLGX version 6 or older (i.e., WinLGX versions
6.0.1.48). If you are already running WinLGX 7 or
greater, click Cancel on the bottom of the popup
window.
NOTE: Choosing Cancel does not stop the WinLGX
installation process, which will continue as a
background operation.
FACTORY-DEFAULT USERNAME AND PASSWORD FOR THE ULTRANEXUS-HD X5
User field: admin
Password field: The last six digits of the UltraNEXUS-HD X5 server’s serial number. NOTE: Enter any letters
in uppercase (example 102A2A).
1. Click Add on the Controller Site
Manager window to open the Add New
Controller window.
2. Enter the IP address displayed on the
UltraNEXUS-HD X5 server’s front panel. This
address can be viewed from the front panel
display by pressing up/down [ ] until
the IP address is shown.
3. Enter username in the User eld.
4. Enter password in the Password eld.
5. Click Find. If the correct IP address has
been added, your server’s site ID, location,
serial number, and time zone display in the
Add New window.
6. Click OK to enter your UltraNEXUS-HD X5
server in the site manager database.
7. If applicable, repeat steps 1-6 for each
additional UltraNEXUS-HD series server in
your system, otherwise click Connect to log
in to the UltraNEXUS-HD X5 server.
NOTE: The username and password are case-sensitive and may only contain letters and numbers.
How to Schedule Your
First Broadcast
Head to the Scheduling Events
section in the full manual to set up
your rst broadcast!
Contact tech support
for additional assistance:
(800) 243-5589
support@leightronix.com
Figure 6.a

LEIGHTRONIX, INC.
1125 N Cedar Rd | Mason, MI 48854
Phone: (800) 243-5589 or (517) 694-8000 | Fax: (517) 694-1600
www.leightronix.com
7/16/19
© 2019 LEIGHTRONIX, INC. All rights reserved.
The information in this manual is subject to change without notice.
UltraNEXUS-HD, WinLGX, and WebNEXUS are
trademarks of LEIGHTRONIX, INC.
At LEIGHTRONIX, every customer of our standard product
line receives technical support at no extra charge. There are
no service contracts, no annual renewals, no allowances, no
deductibles, and no exclusions.
In addition to a 5 year hardware warranty, benets include
access to:
• Priority toll-free telephone support
• Email support
• Online support, desktop to desktop via Webex®
• Software updates
• Firmware updates
• Assistance with updates
Looking for rmware/software or additional documentation? Go
to www.leightronix.com/support.html to download important
updates and full product manuals.
Phone: (800) 243-5589
PRODUCT QUICK GUIDE
Hardware Setup | Network Configuration | WinLGX Software Installation | Web Control
H.264 HD/SD Digital Video Server
Television Automation
Network Configuration
Support
2Web Control
4
How to Properly Shutdown Your UltraNEXUS-HD X5
Press and hold the red X[ ] on the front panel for approximately seven (7) seconds until the front panel display shows
EXECUTING SYSTEM SHUTDOWN. After approximately three (3) seconds, SYSTEM HALTING REMOVE POWER will appear
on the front panel display. At this point, all services will be stopped and the operating system will shut down. Power off the
system by pressing 0on the power switch.
Access your UltraNEXUS-HD X5 from your network with WebNEXUS™, a built-in password-protected web interface.
WebNEXUS provides the ability to manage slides, create and display overlays, create looping playlists for Virtual
Channel between, as, or in place of scheduled programming, transfer video les to specied destinations, and view the
UltraNEXUS-HD X5 system’s status, program guide, and log les.
Accessing WebNEXUS
Open the UltraNEXUS-HD X5 web interface through one of the two following steps:
1. If you already have WinLGX open and are logged into the desired UltraNEXUS-HD X5 unit’s IP address, select
Web interface from the Tools menu or click the [ ] toolbar icon to open the web interface in your default
web browser.
2. Enter your UltraNEXUS-HD X5 unit’s IP address into the address bar of a web browser.
A login prompt will appear. Enter the username and password initially set up in WinLGX to access WebNEXUS.
Refer to the WinLGX Software Installation section of this quick guide for more information.
More Information
Head to the Web Control section of the full manual for more information on WebNEXUS and its functions.
4. Either press right [ ] again to save changes or
left [ ] to abort them.
Gateway Address
5. From the CONFIG MENU screen, press up/
down [ ] and navigate to Set Gateway 1.
6. Press right [ ] to select Set Gateway 1.
7. Press right/left [ ] to position the cursor
under editable elds and press up/down [ ]
to edit values. Press right [ ] at the end of all
editable elds to enter the next screen.
8. Either press right [ ] again to save changes or
left [ ] to abort them.
NOTE: The UltraNEXUS-HD X5 must be rebooted by
holding down the center check mark [ ] for seven (7)
seconds to apply any network address changes.
IP Address
1. From the CONFIG MENU screen, press up/down
[ ] and navigate to Set IP Address.
2. Press right [ ] to select Set IP Address.
3. Press right/left [ ] to position the cursor under
editable elds and press up/down [ ] to edit
values. Press right [ ] at the end of all editable
elds to enter the next screen.
4. Either press right [ ] again to save changes or
left [ ] to abort them.
Subnet Mask Address
1. From the CONFIG MENU screen, press up/down
[ ] to navigate to Set Subnet Mask.
2. Press right [ ] to select Set Subnet Mask.
3. Press right/left [ ] to position the cursor under
editable elds and press up/down [ ] to edit
values. Press right [ ] at the end of all editable
elds to enter the next screen.
Entering the Front Panel Password
From the front panel of your UltraNEXUS-HD X5 server, press right [ ] from any status screen to display the password
entry screen. Press right [ ] ve (5) times to enter the default front panel password and access conguration menus.
NOTE: To replace the unit’s password, refer to the Changing Front Panel Password section in the full manual.
Editing TCP/IP Network Addresses
Obtain network addresses from your technical support personnel or network administrator. TM

2.a COM 2 Port — RS-232 serial port with 9-pin male connector for diagnostic serial communications.
2.b Serial Digital Interface (SDI) Input and Output Connectors — Connect the SDI source and destination signals to the SDI IN and
SDI OUT connectors respectively. NOTE: Use of HD-SDI rated coaxial cable is highly recommended.
2.c Audio Input and Output Terminal Blocks — If used, connect AES or analog audio source and destination signals to the AUDIO
IN and AUDIO OUT terminal blocks. Detailed information regarding wire preparation can be found in the full manual.
2.d Composite Video Output Connector — If used, connect composite video destination signals to the CVBS OUT connector. The
composite video outputs a downscaled version of the high-definition signal.
2.e COM 3 Port — RS-232 serial port with 9-pin male connector for future serial communications.
2.f USB 2.0 Ports — Connect up to two (2) LEIGHTRONIX external hard drive units for up to four terabytes (4TB) of increased digital
media storage capacity.
2.g 2.h Internal Hard Drive — The UltraNEXUS-HD X5 comes equipped
with a two terabyte (5TB) hard drive for digital media storage.
NOTE: The internal hard drive is non-serviceable.
2.i Press 1on the power switch to power on the UltraNEXUS-HD X5.
2.j Connect the included power cable into the power cord receptacle of the UltraNEXUS-HD X5, and then plug the other end into a MAINS
AC power source. NOTE: Use of an uninterruptible power supply (UPS) with the UltraNEXUS-HD X5 is highly recommended.
This section provides instructions for installing the UltraNEXUS-HD X5 system management software, WinLGX™, along
with some basic conguration steps. For more detailed conguration information, refer to the full manual. WinLGX
congurations (particularly for switch type and size) must be completed before a schedule can be created.
1.a Display — View system status, diagnostic information, and current configurations.
1.b Keypad — The UltraNEXUS-HD™X5 has a six-button keypad for navigating system status displays and configuration menus.
1.c 2 Ethernet Ports — Port 1: Using the included Ethernet cable, connect the UltraNEXUS-HD X5 directly to a 100/1000 switch
on your network. Port 2: To be used for specialized network situations.
1.d COM 1 Port — RS-232 serial port with 9-pin male connector for use with LEIGHTRONIX supported audio/video routers with a
maximum supported matrix size of 250 inputs by 250 outputs.
1.e Secured Digital (SD) Card — The UltraNEXUS-HD X5 SD card contains operating system and other system files.
WARNING: Do not remove the SD card during operation. Serious damage may occur.
1
.a 1.b 1.c 1.d 1.e
2.b
2.c
2.d
2.e
2.f
2.g 2.h
2.i
2.j
2.a
Figure 3, UltraNEXUS-HD X5 Audio
Terminal Block Wire Location
(see full manual for details)
Hardware Setup
WinLGX Software Installation
3
1
1. Visit www.leightronix.com/support.html and nd
your UltraNEXUS-HD series product.
2. Click the appropriate link for your product under
the Current Client Software Version column to
download the WinLGX installer.
3. Navigate to where the WinLGX installer (WinLGX_
v7.0.x.x_Installer.exe) is saved on your
computer.
4. Right click the WinLGX installer and choose the
run as administrator option to start the
installation. Follow the prompts to complete setup.
5. As WinLGX installs, two additional windows will be
displayed. NOTE: Refer to Figure 6.a on the right
for a description of each window and installation
guidelines.
6. Click Finish to close the WinLGX setup
wizard and return to Windows.
WinLGX System Management Interface WinLGX Site Manager
Use the WinLGX Controller Site Manager window to store your UltraNEXUS-HD X5 server’s network IP address
information. WinLGX uses each server’s IP address to locate the server and send/receive system information.
Manage the IP address listing of your UltraNEXUS-HD X5 as follows:
WinLGX Minimum
System Requirements
•Microsoft Windows 7 or newer
•1.6 GHz or faster processor
•2 GB of RAM
NOTE: The following steps were written
for Windows 7 and 8, and may vary for
later versions
BNC Cables USB Cable Ethernet Cable (included)Serial Cable Power Cord (included)
Components Key
VLC media player setup wizard: VLC media player
is necessary in order to use the WinLGX software
preview and confidence monitor features (for more
information on these features, refer to the full
manual). If you do not intend to use the WinLGX
software monitor features, you may opt out of the
VLC installation process by clicking Cancel. If you
choose to install VLC media player, but do not want the
player to be automatically chosen for media playback,
deselect Audio Files and Other under the File Type
Associations settings during installation.
Microsoft Visual C++ library window: This
window is used to install the Microsoft Visual C++
runtime components needed to run WinLGX on your
computer or network. Click Repair if you are using
WinLGX version 6 or older (i.e., WinLGX versions
6.0.1.48). If you are already running WinLGX 7 or
greater, click Cancel on the bottom of the popup
window.
NOTE: Choosing Cancel does not stop the WinLGX
installation process, which will continue as a
background operation.
FACTORY-DEFAULT USERNAME AND PASSWORD FOR THE ULTRANEXUS-HD X5
User field: admin
Password field: The last six digits of the UltraNEXUS-HD X5 server’s serial number. NOTE: Enter any letters
in uppercase (example 102A2A).
1. Click Add on the Controller Site
Manager window to open the Add New
Controller window.
2. Enter the IP address displayed on the
UltraNEXUS-HD X5 server’s front panel. This
address can be viewed from the front panel
display by pressing up/down [ ] until
the IP address is shown.
3. Enter username in the User eld.
4. Enter password in the Password eld.
5. Click Find. If the correct IP address has
been added, your server’s site ID, location,
serial number, and time zone display in the
Add New window.
6. Click OK to enter your UltraNEXUS-HD X5
server in the site manager database.
7. If applicable, repeat steps 1-6 for each
additional UltraNEXUS-HD series server in
your system, otherwise click Connect to log
in to the UltraNEXUS-HD X5 server.
NOTE: The username and password are case-sensitive and may only contain letters and numbers.
How to Schedule Your
First Broadcast
Head to the Scheduling Events
section in the full manual to set up
your rst broadcast!
Contact tech support
for additional assistance:
(800) 243-5589
Figure 6.a
LEIGHTRONIX, INC.
1125 N Cedar Rd | Mason, MI 48854
Phone: (800) 243-5589 or (517) 694-8000 | Fax: (517) 694-1600
www.leightronix.com
7/16/19
© 2019 LEIGHTRONIX, INC. All rights reserved.
The information in this manual is subject to change without notice.
UltraNEXUS-HD, WinLGX, and WebNEXUS are
trademarks of LEIGHTRONIX, INC.
At LEIGHTRONIX, every customer of our standard product
line receives technical support at no extra charge. There are
no service contracts, no annual renewals, no allowances, no
deductibles, and no exclusions.
In addition to a 5 year hardware warranty, benets include
access to:
• Priority toll-free telephone support
• Email support
• Online support, desktop to desktop via Webex®
• Software updates
• Firmware updates
• Assistance with updates
Looking for rmware/software or additional documentation? Go
to www.leightronix.com/support.html to download important
updates and full product manuals.
Phone: (800) 243-5589
Email: [email protected]
PRODUCT QUICK GUIDE
Hardware Setup | Network Configuration | WinLGX Software Installation | Web Control
H.264 HD/SD Digital Video Server
Television Automation
Network Configuration
Support
2Web Control
4
How to Properly Shutdown Your UltraNEXUS-HD X5
Press and hold the red X[ ] on the front panel for approximately seven (7) seconds until the front panel display shows
EXECUTING SYSTEM SHUTDOWN. After approximately three (3) seconds, SYSTEM HALTING REMOVE POWER will appear
on the front panel display. At this point, all services will be stopped and the operating system will shut down. Power off the
system by pressing 0on the power switch.
Access your UltraNEXUS-HD X5 from your network with WebNEXUS™, a built-in password-protected web interface.
WebNEXUS provides the ability to manage slides, create and display overlays, create looping playlists for Virtual
Channel between, as, or in place of scheduled programming, transfer video les to specied destinations, and view the
UltraNEXUS-HD X5 system’s status, program guide, and log les.
Accessing WebNEXUS
Open the UltraNEXUS-HD X5 web interface through one of the two following steps:
1. If you already have WinLGX open and are logged into the desired UltraNEXUS-HD X5 unit’s IP address, select
Web interface from the Tools menu or click the [ ] toolbar icon to open the web interface in your default
web browser.
2. Enter your UltraNEXUS-HD X5 unit’s IP address into the address bar of a web browser.
A login prompt will appear. Enter the username and password initially set up in WinLGX to access WebNEXUS.
Refer to the WinLGX Software Installation section of this quick guide for more information.
More Information
Head to the Web Control section of the full manual for more information on WebNEXUS and its functions.
4. Either press right [ ] again to save changes or
left [ ] to abort them.
Gateway Address
5. From the CONFIG MENU screen, press up/
down [ ] and navigate to Set Gateway 1.
6. Press right [ ] to select Set Gateway 1.
7. Press right/left [ ] to position the cursor
under editable elds and press up/down [ ]
to edit values. Press right [ ] at the end of all
editable elds to enter the next screen.
8. Either press right [ ] again to save changes or
left [ ] to abort them.
NOTE: The UltraNEXUS-HD X5 must be rebooted by
holding down the center check mark [ ] for seven (7)
seconds to apply any network address changes.
IP Address
1. From the CONFIG MENU screen, press up/down
[ ] and navigate to Set IP Address.
2. Press right [ ] to select Set IP Address.
3. Press right/left [ ] to position the cursor under
editable elds and press up/down [ ] to edit
values. Press right [ ] at the end of all editable
elds to enter the next screen.
4. Either press right [ ] again to save changes or
left [ ] to abort them.
Subnet Mask Address
1. From the CONFIG MENU screen, press up/down
[ ] to navigate to Set Subnet Mask.
2. Press right [ ] to select Set Subnet Mask.
3. Press right/left [ ] to position the cursor under
editable elds and press up/down [ ] to edit
values. Press right [ ] at the end of all editable
elds to enter the next screen.
Entering the Front Panel Password
From the front panel of your UltraNEXUS-HD X5 server, press right [ ] from any status screen to display the password
entry screen. Press right [ ] ve (5) times to enter the default front panel password and access conguration menus.
NOTE: To replace the unit’s password, refer to the Changing Front Panel Password section in the full manual.
Editing TCP/IP Network Addresses
Obtain network addresses from your technical support personnel or network administrator. TM
Table of contents
Other Leightronix Server manuals

Leightronix
Leightronix UltraNEXUS-SDI User guide

Leightronix
Leightronix UltraNEXUS HD Blade User manual

Leightronix
Leightronix UltraNEXUS User manual

Leightronix
Leightronix UltraNEXUS User guide

Leightronix
Leightronix MINI-T-NX User manual

Leightronix
Leightronix UltraNEXUS-HD Cast User manual

Leightronix
Leightronix UltraNEXUS-HD Flex User manual

Leightronix
Leightronix UltraNEXUS-HD X2 User manual