The Lencarta AtomPower Power pack is designed to power speedlites with external power input ports, including The
Lencarta Atom and hotshoe flashes from Canon, Nikon, Sony etc.With LENCARTA ATOM POWER power pack, it takes just one second to recycle flashes such as Canon 580 EX II, Nikon SB-900, and Sony F58AM at max. power. It can provide up to 1800 full-power flashes with a Canon 580EX II or Nikon SB-900. These flashguns can be used on AtomPower by replacing a plug-in connector cable. In addition, it can charge iPhone, iPad, iPod and other products with a USB interface.With the MCU (Micro-Controller Unit), this product integrates software protection and hardware protection.There are high-voltage components inside the product. Do not carry out disassembly or maintenance by yourself. Any
necesary repairs MUST be carried out by Lencarta
Keep out of the reach of children.Please do not touch the metal part of the plug and the socket.Please do not use this product under flammable conditions (such as areas containing flammable gases or liquid chemicals), or it may result in an accident. Make sure all plugs and sockets are reliably and firmly connected.This product is not water resistant. Please keep it away from rain, snow or humidity.Please do not leave or use this product in a temperature of above 40℃ (104°F).Since this product has a much higher power output than the ordinary built-in battery of the flash, the flash may be damaged when used at high frequency and high power. To avoid overheating the flash, please allow a break of about 10 minutes after 40 continuous full-power flashes.Power off before removing or connecting a plug
When travelling by air, disconnect the battery
With the Lencarta AtomPowerwer power pack, it takes just
one second to recycle the Canon 580EX II, Nikon SB900,
Sony F58AM flashes etc.at maximum power, and provides
1800 full power flashes.
If the battery of the power pack requires replacement, please contact Lencarta
Damage due to unauthorised disassembling of the
power pack will void the warranty.
Damage due use other than in accordance with these
instructions will void the warranty.
Select a connector cable that is compatible with your product.Please charge the battery if indicated by the LEDs.2.
Thank you for choosing the Lencarta AtomPower power pack
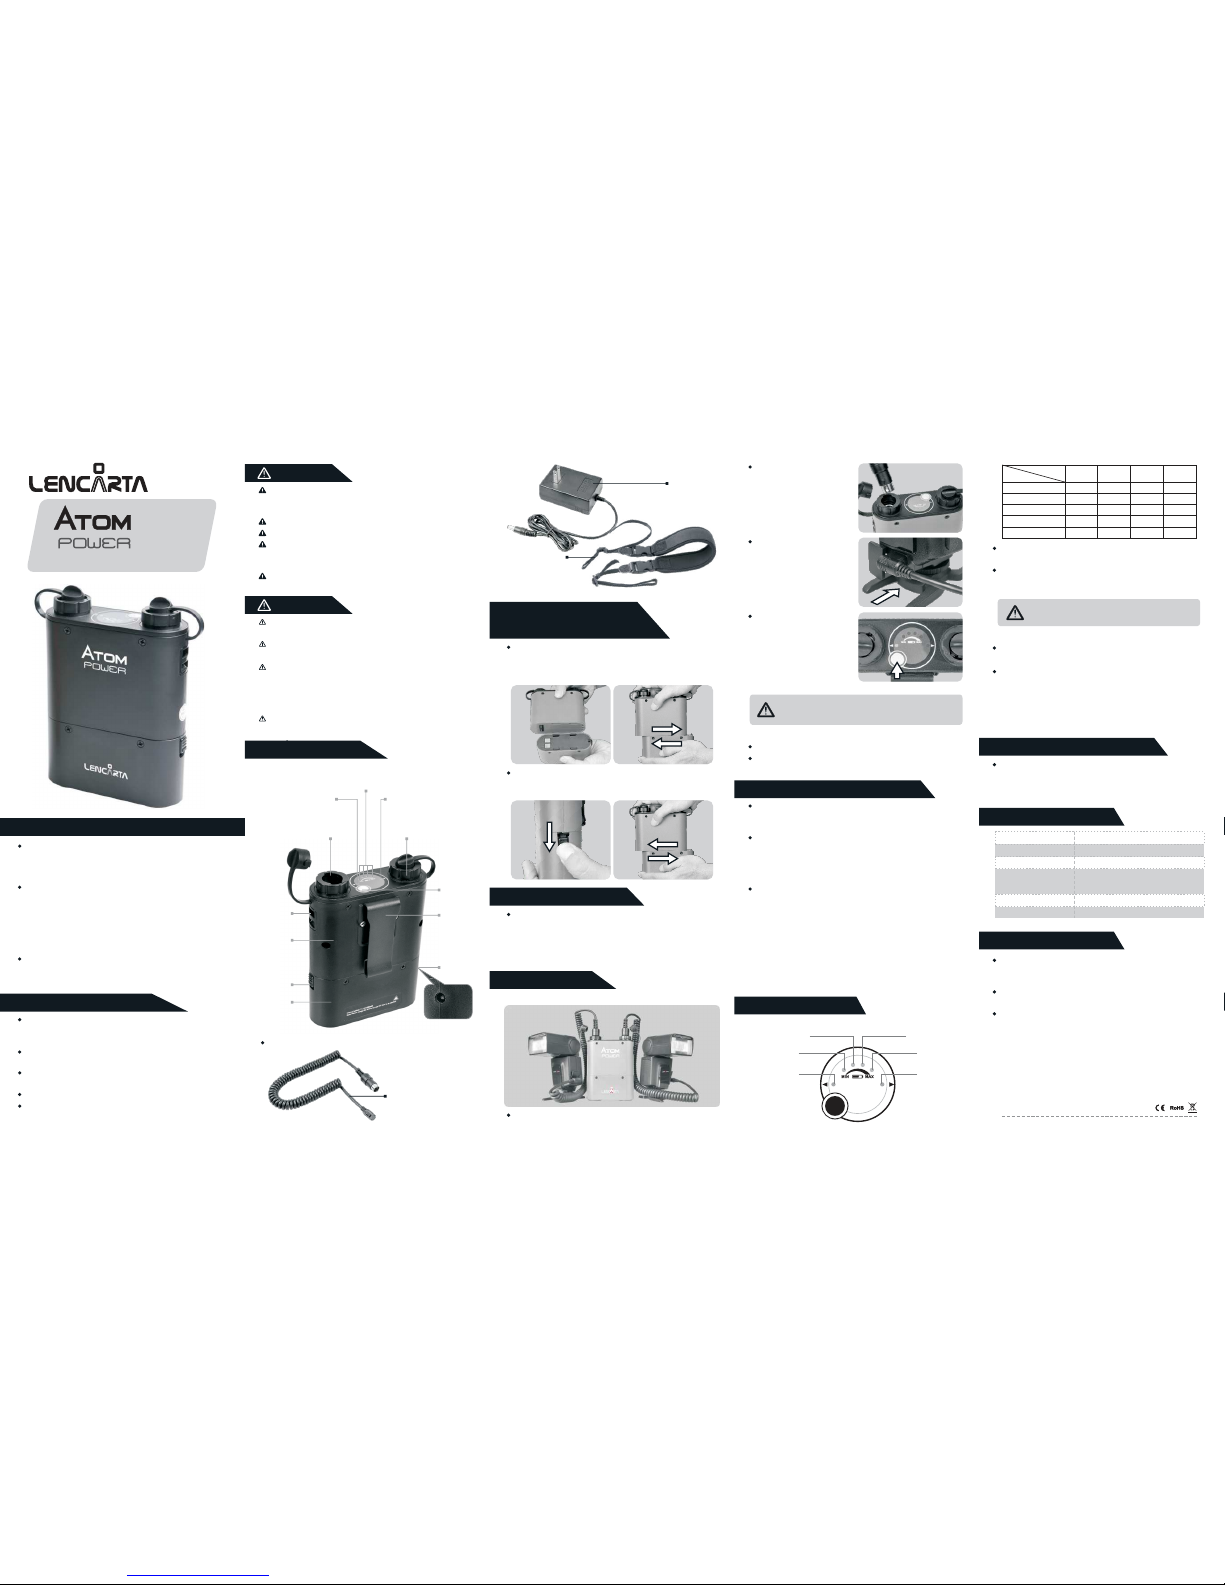
The power behind the Atom flashgunsWarningCautionI.Names of Parts 2. Fitting
the battery Loading: 1. Grip the control unit with the battery chamber; 2. Slide the battery chamber to the left until it locks into place with a “click”.AC ChargerBattery pack Battery charging timeFlash recycling timeNumber of FlashesDimensionWeightLithium battery-11.1V/4500mAHApprox. 3 hoursApprox. 1s (at full power)Approx. 1800 (for one Canon 580EX II at full power)159*133.5*49.2mm
540G8.Technical Data7. Working PerformanceShoulder StrapAssembled In China
FeaturesHigh-capacity lithium battery (11.1V/4500mAH), which can provide up to 1800 full-power flashes with a Canon 580EX II or Nikon SB-900. Dual outputs for powering two separate flashes without reducing recycling timeRemovable and replaceable battery module. Double your flash capacity by purchasing a second module.Concise LED display panel, easy and fast to controlOptimized MCU circuit design, more efficient energy conversion and more flashes.1212Removing: 1. Slide the battery chamber lock downwards;2. Slide the battery chamber to the right.3.Battery ChargingInsert one end of the AC charger into an AC socket (100-240V) and the other end into the charging port of the power pack. If the charger indicator turns red, the battery is being charged. If the charger indicator turns green, the battery is fully charged. It takes about 3 hours to fully charge the battery.Connect the power plug of the connector cable to either socket 1 or 2 on the power pack.Insert the terminal of the connector cable into the flash.Press the On/Off touch button, and the LED battery level indicators wil light up, indicating that the power pack is ready to work.Note: If this product is used for a flash, the flash must be installed with batteries that have sufficient power.Turn the power pack by pressing the On/Off touch button.Turn off the power pack by directly unplugging the connector cable from the power pack. off4..Operation (i)Start-up(2)Power-off
5. Power Pack Status6. .
LED Indicators
1.Battery Level Indicators: LED1, LED2, LED3, LED4LED4LED3LED2LED1Status Indicator2(STATUS2)Status Indicator 1(STATUS1)Battery level LEDWeak LowMiddleTo be fullFull FlickerONONONONLED4LED1LED2OFFOFFONONONLED3OFFOFFOFFONONOFFOFFOFFOFFONWhen LED1 is blinking, the batterhmust be charged before
it can be used again.
Note: Please charge the device for use if it cannot be powered on.Status Indicators: STATUS1, STATUS2STATUS1/STATUS2 indicators are off during flash recycling and will light up when the flash is fully charged.STATUS1/STATUS2 blinks (blinking cycle: 1Hz), indicating that the flash has been overused and is running hot. If it
becomes too hot, the overheat protection will be enabled. Please wait for at least 10 minutes before using it again.9.MaintenancePower-off status: There is no LED indication, and no power output from socket 1 or 2. Energy consumption of the entire unit is so low that any loss of battery power can be ignored.Testing status: When the connector cable is not inserted into socket 1 or 2, press the On/Off test button, and only the battery level indicators light up, indicating that the power pack is in the testing mode. Press the On/Off touch button again or wait for 3 seconds to return to the power-off status.Working status: Insert the connector cable into socket 1 or 2 and press the On/Off touch button, and the LED indicators wil
light up, indicating that the power pack is in working status. Press the On/Off touch button again or unplug the connector cable from socket 1 or 2 to power off.*Automatic Power-off Function: The power pack will be automatically powered off after working for twelve hours, in case shutdown has been overlooked
Power Connector Cable (sold separately)Belt ClipStrap LockControl Unit (Upper)Battery Chamber (Lower)Battery Level Indicator (LED1, LED2, LED3, LED4)Status Indicator 2(STATUS2), for Socket 2On/Off Touch Button Socket 2Status Indicator 1(STATUS1), for Socket 1Battery Chamber LockCharging PortSocket 1Accessories