DIRECTORY
1. Introduction
................................................................................................
.1
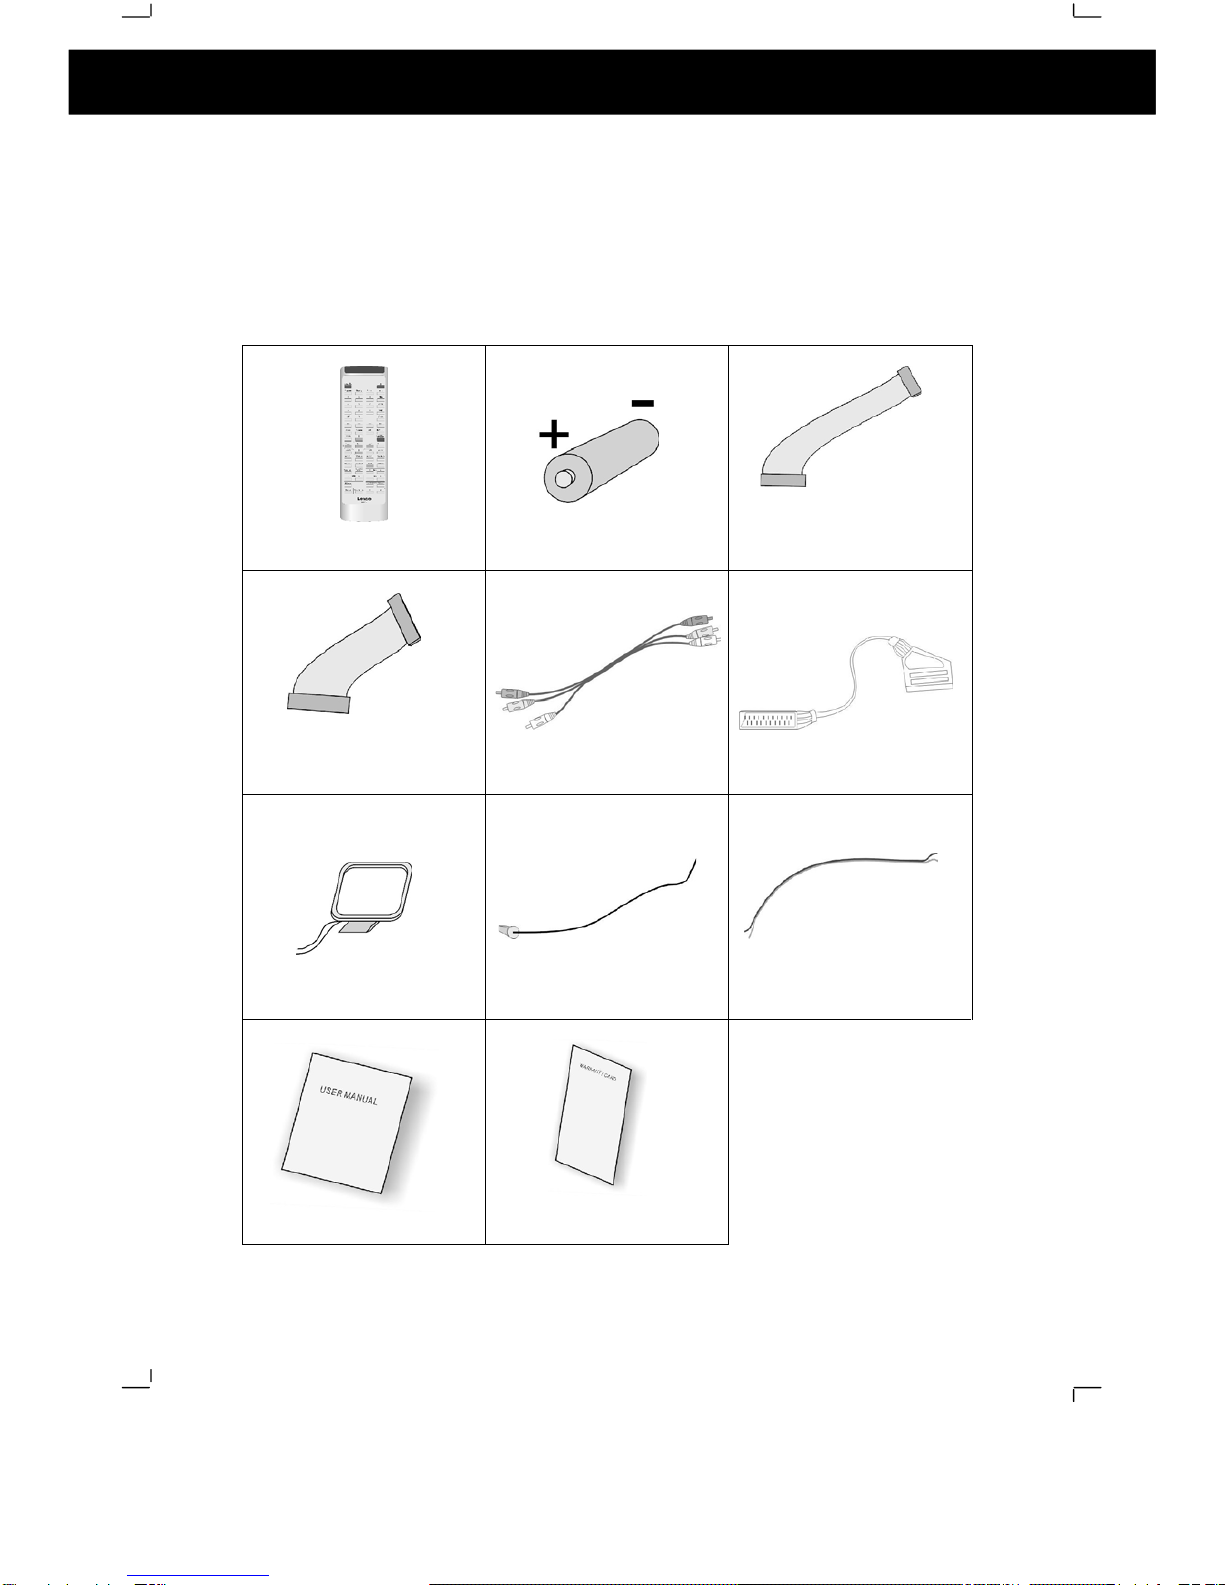
1.1 Pack Contents
...................................................................................
1
1.2 Disc Types
.........................................................................................
2
1.3 DVD Features
....................................................................................
2
1.4 DVD region code
...............................................................................
2
1.5 Glossary of Disc Terms
.....................................................................
2
1.6 Notes on discs
...................................................................................
3
1.7 Inserting Batteries into Remote Control
.............................................
4
2.Location of controls.
.....................................................................................
5
2.1 DVD Component
................................................................................
5
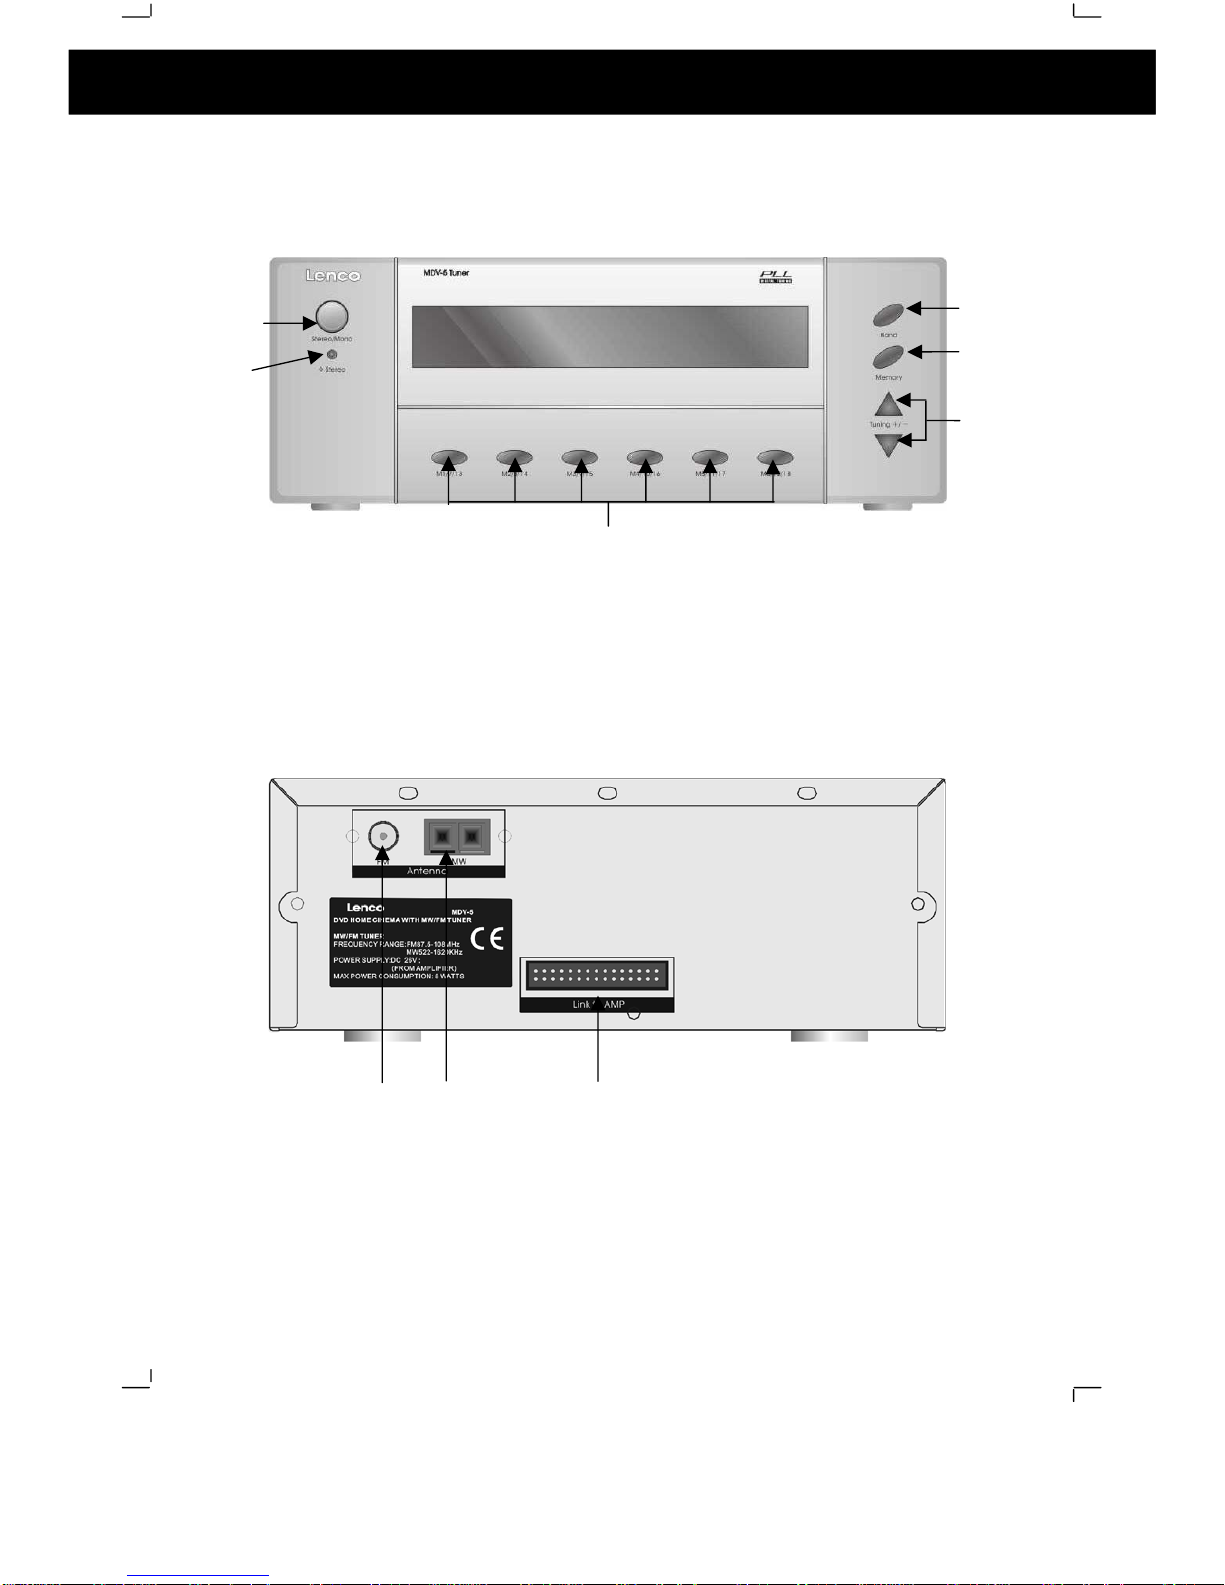
2.2 Stereo Tuner Component
..................................................................
6
2.3 Amplifier Component
.........................................................................
7
2.4 Remote Control
..................................................................................
8
3.Connections.
................................................................................................
9
3.1 Connecting Components
...................................................................
9
3.2 Connections to TV
...........................................................................
10
3.3 Aerial Connections
...........................................................................
11
3.4 Connecting to External Audio Source
..............................................
11
3.5 Speaker Connections
......................................................................
12
4.Basic setup.
...............................................................................................
13
4.1 Setting up the surround sound system
............................................
13
4.2 Master Volume
.................................................................................
14
4.3 Individual Channel Volume
..............................................................
14
4.4 Mute
................................................................................................
.
15
4.5 Virtual Surround Sound
...................................................................
15
4.6 Treble
..............................................................................................
15
4.7 Bass
................................................................................................
.
15
4.8 Default Tone Settings
......................................................................
15
5.Setup Menu.
..............................................................................................
16
5.1 System Setup
..................................................................................
16
5.2
Language Setup
..............................................................................
19
5.3 Audio Setup
.....................................................................................
20
5.4
Video Setup
.....................................................................................
21
5.5 Speaker Setup
.................................................................................
22
5.6 Digital
Setup
....................................................................................
23
6.DVD/CD operation.
....................................................................................
25
6.1 Insert a DVD Disc
............................................................................
25
6.2 Play
..................................................................................................
26
6.3 Pre
-
Stop/Stop
..................................................................................
26
6.4 Pause
..............................................................................................
26
6.5 Previous/Next
..................................................................................
26
6.6 Search Forwards/Backwards
...........................................................
27
6.7 Slow Motion Playback (DVD only)
...................................................
27
6.8 Step (DVD only)
...............................................................................
28
6.9 Repeat/Re
peat A
-B
..........................................................................
28
6.10 Random Playback
..........................................................................
29
6.11 Programmed Playback
..................................................................
29
6.12 Title Menu (DVD only)
...................................................................
29
6.13 Root Menu (DVD only)
...................................................................
29