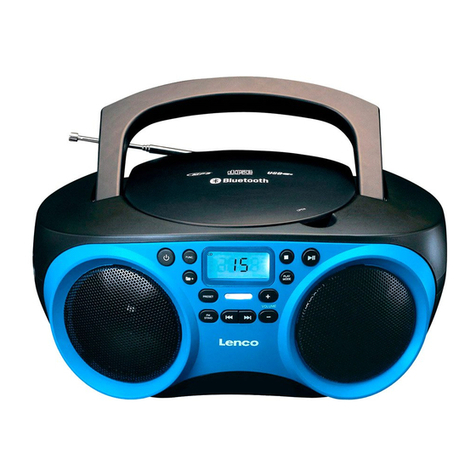
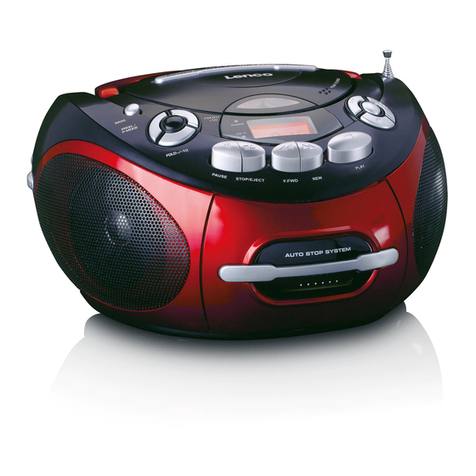
LENCO SCR-970 User manual

PORTABLE STEREO FM RADIO WITH
CD/MP3-PLAYER AND CASSETTE
SCR-970
INSTRUCTION MANUAL
For information and support, www.lenco.com
REVISED DATE : 18 / 10 / 17 , MODEL : CD16 MP3 / MP3 VERSION / ERP2 & RED 2017
LENCO / SCR-970 / ENGLISH FM ONLY , I/M , 230V~50Hz , TCD20ACD
NEW HELPDESK, CD & TAPE after 15 MINS ( LAB REPORT )
Operating temperature range 0°C to 40°C
CD16MP3-LENCO-FM-ENG-TCD20ACD RED + TEMP.indd 1 18/10/2017 11:25:32

WARNING
CLASS 1 LASER PRODUCT
This product contains a low power laser device.
CLASS 1 LASER PRODUCT
APPAREIL Á LASER DE CLASSE 1
PRODUCTO LASER DE CLASE 1
CAUTION
INVISIBLE LASER RADIATION
WHEN OPEN AND INTERLOCKS
DEFEATED.
AVOID EXPOSURE TO BEAM
PRECAUTIONS
Follow the advice below for safe and appropriate operations.
ON PLACEMENT
• Donotusetheunitinplaceswhichareextremelyhot,cold,dusty,orhumid.
• Placetheunitonaatandevensurface.
• Donotrestricttheairowoftheunitbyplacingitinaplacewithpoorairow,bycoveringitwithacloth,orby
placingitonacarpet.
ON SAFETY
• WhenconnectinganddisconnectingtheACcord,griptheplugandnotthecorditself.Pullingthecordmay
damageitandcreatehazard.
• Whenyouarenotgoingtousetheunitforalongperiodoftime,disconnecttheACpowercord.
•Theapplianceisnotintendedforusebypersons(includingchildren)withreducedphysical,sensoryormental
capabilities,orlackofexperienceandknowledge,unlesstheyhavebeengivensupervisionorinstructionsconcerning
theuseoftheappliancebyapersonresponsiblefortheirsafety.
ON AC VOLTAGE
• Beforeuse,checkthattheratedvoltageofyourunitmatchesyourlocalvoltage.
ON CONDENSATION
• Whenleftinaheatedroomwhereitiswarmanddamp,waterdropletsorcondensationmayforminsidetheCDplayer.
• Whenthereiscondensationinsidetheunit,theunitmaynotfunctionnormally.
• Letitstandfor1to2hoursbeforeturningthepoweron,orgraduallyheattheroomupanddrytheunitbeforeuse.
* Ensureaminimumdistanceof5cmaroundtheapparatusforsufcientventilation.
* Ensurethattheventilationisnotimpededbycoveringtheventilationopeningswithitems,suchasnewspapers,
table-cloths, curtains, etc..
* Donotplacenakedamesources,suchaslightedcandlesontheapparatus.
* Takeattentiontotheenvironmentalaspectsofbatterydisposal.
* Usetheapparatusonlyinmoderateclimates(notintropicalclimates).
* Donotexposetheapparatustodrippingorsplashing.
* Donotplaceobjectslledwithliquids,suchasvases,ontheapparatus.
Should any trouble occur, disconnect the AC power cord and refer servicing to qualied personnel.
“Tobecompletelydisconnectthepowerinput,themainsplugofapparatusshallbedisconnectedfromthemains.”asthe
disconnectdevicesisthemainsplugofapparatus.
“ThemainsplugofapparatusshouldnotbeobstructedORshouldbeeasilyaccessedduringintendeduse.”
“Excessivesoundpressurefromearphonesandheadphonescancausehearingloss.”
“Batteryshallnotbeexposedtoexcessiveheatsuchassunshine,reorthelike.”
ATTENTION : To reduce the risk
of electric shock, do not remove the
cover. There are no user serviceable
partsinsidetheunit.Referallservicing
toqualiedpersonnel.
The exclamation point within
thetriangleisawarning sign
alertingtheuser ofimportant
instructions accompanying
the product.
The lightening flash
with arrowhead symbol
within the triangle is a
warning sign alerting
the user of "dangerous
voltage" inside the unit.
Warning: Do not touch the lens.
DO NOT THROW BATTERIES IN FIRE !
Incaseofmalfunctionduetoelectrostaticdischarge,theapparatushastoberesetbydisconnectingitfrommainssupply.
THE MARKING PLATE IS LOCATED AT THE BACK OF ENCLOSURE OF THE APPARATUS
CAUTION
RISK OF ELECTRIC SHOCK
DO NOT OPEN
CD16MP3-LENCO-FM-ENG-TCD20ACD RED + TEMP.indd 2 18/10/2017 11:25:33

1. VOLUME CONTROL
2. FUNCTIONSWITCH
3. CARRYING HANDLE
4. CASSETTE PAUSE
5. CASSETTE STOP/EJECT
6. CASSETTE F.FWD
7. CD DOOR
8. CASSETTE REWIND
9. CASSETTE PLAY
10. CASSETTE RECORD
11. OPEN / CLOSE CD DOOR AREA
12. CDDISPLAY
13. TUNING CONTROL
14. CD PROG/CLK-ADJ./
REPEAT BUTTON
15. SPEAKER
16. CD NEXT BUTTON
17. PLAY/PAUSE BUTTON
18. CASSETTE DOOR
19. CD STOP BUTTON
20. CDBACKBUTTON
21. STANDBYBUTTON
22. PHONESJACK
23. TELESCOPICANTENNA
24. BATTERYCOMPARTMENT
25. ACSOCKET
GB 1
LOCATION OF CONTROLS
USING HOUSE CURRENT
Beforeuse,checkthattheratedvoltage
ofyourunitmatchesyourlocalvoltage.
Note:Plugisusedasthedisconnectdevice.
Thedisconnectdeviceshallremainreadily
operable.
USING BATTERIES
Disconnect the AC power cord from the AC inlet of the
unit.Batterypoweriscutautomaticallyby thecordwhile
it is connected.
InserteightUM-2(sizeC)batteries.
batterydoor
When the volume decrease, or the sound distorts, replace
all of the batteries with new ones.
To AC socket
To AC outlet
POWER SUPPLY
CD16MP3-LENCO-FM-ENG-TCD20ACD RED + TEMP.indd 3 18/10/2017 11:25:33
GB2
ADJUSTING THE SOUND
WHEN RECORDING
TheVOLUMEcontrolmaybeadjustedwithnoeffecton
therecordedsignal.
FOR PRIVATE LISTENING
Plug in headphones (ø3.5 mm stereo mini-plug) to the
PHONES jack.
When headphones are plugged in, the speakers are
automaticallydisconnected.
TO ADJUST THE VOLUME
MIN. MAX.
VOLUME
TURN ON / OFF THE SYSTEM
STANDBY
Press the STANDBY button to turn the audio on.
TochangetheaudiomodebetweenCD,RADIOandTAPE,
set the FUNCTION switch while the power is on.
Theaudiomodeisdisplayed.
TurnofftheunitbypressingtheSTANDBYbutton.
"OFF"wordwillbeshownonthedisplayandthen
resume the current time.
TheclockisdisplayedonLCDdisplayatstandbymode.
1. Press and hold the PROGRAM / CLOCK-ADJ. button.
2. PresstheNEXTorBACKtoselect12hoursor24hoursdisplay.
3. Press the PROGRAM / CLOCK-ADJ. button, thehourdigitash.
4. PresstheNEXTorBACKtoadjusthourdigit.
5. PressthePROGRAM/CLOCK-ADJ.button,theminutedigitash.
6. PresstheNEXTorBACKtoadjustminutedigit.
7. PressthePROGRAM/CLOCK-ADJ.buttonagain,
thecorrecttimeisshownondisplay.
CLOCK ADJUSTMENT
CLOCK-ADJ.
LCDdisplay
LISTENING TO THE RADIO
2. SettoRADIO
FUNCTION
RADIO
1. Turnontheunitby
pressingtheSTANDBYbutton.
STANDBY
CDdisplay
3 . Tune in to a station.
4 . Adjust the sound.
VOLUME
MIN. MAX.
TUNING
FOR BETTER RECEPTION FM
AFTER LISTENING
TurnofftheunitbypressingtheSTANDBYbutton.
CD16MP3-LENCO-FM-ENG-TCD20ACD RED + TEMP.indd 4 18/10/2017 11:25:33
GB 3
6. Press the PLAY/PAUSE button.
Tracknumber"01"&thesymbol""&"CD"
willbeshownduringnormalcompactdiscplayback.
Tracknumber"001",thesymbol""& "MP3"
willbeshownduringMP3playback. .
COMPACT DISC PLAYBACK
2. SettoCD
3 . Open the disc holder by pushing the CD door
open area.
4. Insertadiscwiththelabelsidefacingup.
5 . Close the disc holder.
The disc will rotate and
the total tracks of the disc
willshowonthedisplay.
FUNCTION
CD
MP3display
CDdisplay
1. Turnontheunitby
pressingthe
STANDBY button.
STANDBY
MP3display
CDdisplay
TO INTERRUPT PLAYBACK
PressthePlay/Pausebuttonandthesymbol""will
beashed.Pressthebuttonagaintoresumeplayback.
TO STOP PLAYBACK
PresstheSTOPbuttonandthedisplay
shows the total tracks of the disc.
TO SKIP TO THE BEGINNING OF A TRACK
• Presseitheroneoftheskipbuttonsaccordingtothedesiredskipdirection.
• Play/backresumesfromtheselectedtrack.
• Whenthebuttonispressedonceduringplay,theprevioustrackstartsagain.
• Whenthebuttonispressedonceduringplay,thenexttrackplays.
SEARCHING FOR A PASSAGE WITHIN A TRACK
• Keeptheorbuttonpressedduringplayback,
andreleasethebuttonassoonasyourecognisethe
desiredpassage.ThennormalCDplaybackwillresumefromthispoint.
CDdisplay
PLAY/PAUSE
REPEAT , REPEAT FOLDER , REPEAT ALL PLAYBACK
Press REPEATbuttonduringCDplayback.
CDplayswithasingletrackrepeat,Folder repeat
and all tracks repeat. REPEAT
Unitwillbeautomaticallyoffafter 15 mins without furtheroperation(instopmode/CDdooropen).
CD16MP3-LENCO-FM-ENG-TCD20ACD RED + TEMP.indd 5 18/10/2017 11:25:34

GB 4
PROGRAMMED PLAYBACK
PROGRAMMED PLAYBACK
FOR NORMAL COMPACT DISC PLAYBACK
Programmedplaybackenablestracksonadisctobeplayed
inthedesiredorder.Upto20trackscanbeprogrammed.
1. Press the " PROGRAM " button.
2. Press the " NEXT " and " BACK " buttons to select
the desired track number.
3. Press the " PROGRAM " button again to memorize
the track.
4. Repeat steps 2 and 3 until all desired tracks are
programmed.
5. Press the " PLAY/PAUSE " button to start.
" " , " PROG " & track number are shown on
theCDdisplay.
6. Press the " STOP " button once to stop programmed
playback.
7. Press the " PLAY/PAUSE "button to resume
programmedplayback.
8. OpentheCDdoor,turnofftheCDplayerorpress
the " STOP " button twice to clear the programmed
memory.
Note: Programming can only be made when the player
is in stop mode.
FOR MP3 PLAYBACK
Programmedplaybackenablesfolders/albumsortracksona
disctobeplayedinthedesiredorder.Upto20folders/albums
ortrackscanbeprogrammed.
1. Press the " PROGRAM "button.
2. Press the " NEXT " and " BACK " buttons to select
the desired track number.
3. Repeat steps 2 and 3 until all desired folders or
tracksareprogrammed.
4. Press the " PLAY/PAUSE "button to start.
" ", " PROG "and " MP3 " & track number are
shownontheCDdisplay.
5. Press the " STOP " button once to stop programmed
playback.
6. Press the" PLAY/PAUSE "button to resume
programmedplayback.
7. OpentheCDdoor,turnofftheCDplayerorpress
the " STOP " button twice to clear the programmed
memory.
Note: Programming can only be made when the player
is in stop mode.
MP3display
" PROGRAM "
CDdisplay
" PROGRAM "
Note on CD-R/RW discs
- Becauseofnon-standardizedformatdenition/productionofCD-R/RW,
playbackqualityandperformancearenotguaranteed.
- ManufacturerisnotresponsiblefortheplayabilityofCD-R/RWduetorecordingconditions,suchasPCperformance,
writingsoftware,mediaability,etc.
- DonotattachasealorlabeltoeithersideoftheCD-R/RWdisc.Itmaycauseamalfunction.
- ItisrecommendedtorecordonlyaudiolesonCD-R/RWdiscsforeasyreading.
FOR MP3 PLAYBACK
ModesequenceREPEAT>>REPEATFOLDER>>
REPEATALL>>CLEAR.
DuringRepeat1mode,
displayshows
DuringRepeat2mode,
displayshows
DuringRepeat3mode,
displayshows
FOR NORMAL COMPACT DISC PLAYBACK
ModesequenceREPEAT>>REPEATALL>>CLEAR.
DuringRepeat1mode,
displayshows
DuringRepeat2mode,
displayshows
CDdisplay
MP3display
CD16MP3-LENCO-FM-ENG-TCD20ACD RED + TEMP.indd 6 18/10/2017 11:25:34

RECORDING
USE ONLY NORMAL ( TYPE I ) TAPE FOR RECORDING.
1 . Insert the cassette tape.
2. PressthePAUSEbutton.
PAUSE
4. Preparetoplaythesourcetoberecordedandplayit.
Recording from the radioRecording from a CD
FUNCTION
CD
FUNCTION
RADIO
PLAY THE CD TUNE INTO A STATION
3 . Press the RECORD button.
RECORD
5 . Press the PAUSE button.
TO STOP RECORDING
Press the STOP / EJECT button.
TO INTERRUPT RECORDING
Press the PAUSE button.
Toresumerecording,pressthePAUSEbuttonagain.
TO ERASE A RECORDED TAPE
1. Set the FUNCTION selector to TAPE.
2. Insertatapewiththesideyouwanttoerasefacingyou.
3. PresstheRECORDbuttontostarterasing.
GB 5
PAUSE
TO STOP PLAYBACK
Press the STOP / EJECT button.
TO INTERRUPT PLAYBACK
Press the PAUSE button.
Toresumeplay,pressthePAUSEbuttonagain.
TO FAST WIND
Press the REWIND or F.FWD button. Press the STOP/EJECT
buttontostopwindingatthedesiredposition.
PLAY
3 . Press the PLAY button.
TAPE PLAYBACK
1 . Set to TAPE FUNCTION
TAPE
2. Insertthecassette.
Unitwillbeautomaticallyoff
after 15 mins without further operation.
CLEANING THE UNIT
Do not use volatile chemicals on this unit. Clean by lightly wiping
with a soft cloth.
IMPORTANT NOTE
If an abnormal display indication or an operating problem occurs,
disconnect the AC power cord and remove the batteries. Wait at least 5
seconds, then reconnect the AC power cord or reinstall the batteries.
WARNING
ShouldtheCDdoorbeopenedbeforethereadingoftheCDcompleted,a
jammingnoisemayoccur.ThisisresolvedbyclosingtheCDdoor.
CLEANING THE TAPE HEADS
Tomaintainoptimumsoundquality,cleantheplayback/
recordheads ( a ),erasure head (b),pinch rollers (c),
andcapstans(d)regularly(every10hoursofuse).Use
a cotton swab lightly moistened with cleaning uid or
denatured alcohol.
c d a b
CLEANING CD
IftheCDskipsorwillnotplay,thediscmayneed
cleaning.Beforeplaying,wipethedisc
from the centre out with a
cleaningcloth.Afterplaying,
store the disc in its case.
MAINTENANCE
CLEANING THE CD LENS
IftheCDlensisdusty,cleanitwithabrush-blower.Blowseveral
times on the lens and remove the dust
withthebrush.Fingerprintsmaybe
removed with a cotton swab moistened
with alcohol.
CD16MP3-LENCO-FM-ENG-TCD20ACD RED + TEMP.indd 7 18/10/2017 11:25:35

CASSETTE SECTION
Trackformat: 2trackstereo
Recordingsystem: ACbias
Erasingsystem: Magneticerase6poles
Tape speed: 4.75 cm / sec.
F.F.&REWtime: 170sec.(F-60tapes)
Frequencyresponse: 125Hz-8000Hz(Normaltape)
CD SECTION
Channels: 2channels
S / N ratio: 60 dB
Wow & Flutter: undetectable
Samplingfrequency: 44.1kHz8xoversampling
Quantization: 1bitDAconverter
Pickuplightsource: Semi-conductorlaser
Pickupwavelength 790mm
RADIO SECTION
Tuningranges: FM87.5-108MHz
Antennas: FM Rod antenna
GENERAL
Outputpower: 1.2W+1.2W(RMS)
Power consumption: 13W
Speaker: 3" 8 OHM
Phones jack: 3.5MM
Powersource: AC:230V~50Hz
DC:12V(8x1.5VLR14/"C"/UM2)
Operatingtemperaturerange: 0°C to 40°C
Dimensions: 288(L)x238(D)x155(H)mm
Weight 2.2KGS
Duetocontinuingimprovement,thefeaturesandthedesignaresubjecttochangewithoutnotice.
GB 6
SPECIFICATIONS
Guarantee
LencooffersserviceandwarrantyinaccordancewiththeEuropeanlaw,whichmeansthatincaseofrepairs(bothduringandafterthewarrantyperiod)
youshouldcontactyourlocaldealer.
Important note:ItisnotpossibletosendproductsthatneedrepairstoLencodirectly.
Important note:Ifthisunitisopenedoraccessedbyanon-ofcialservicecenterinanyway,thewarrantyexpires.
Thisdeviceisnotsuitableforprofessionaluse.Incaseofprofessionaluse,allwarrantyobligationsofthemanufacturerwillbevoided.
Disclaimer
UpdatestoFirmwareand/orhardwarecomponentsaremaderegularly.Thereforesomeoftheinstruction,specicationsandpicturesinthisdocumentation
maydifferslightlyfromyourparticularsituation.Allitemsdescribedinthisguideforillustrationpurposesonlyandmaynotapplytoparticularsituation.No
legalrightorentitlementsmaybeobtainedfromthedescriptionmadeinthismanual.
Disposal of the Old Device
Thissymbolindicatesthattherelevantelectricalproductorbatteryshouldnotbedisposedofasgeneral
householdwasteinEurope.Toensurethecorrectwastetreatmentoftheproductandbattery,pleasedispose
theminaccordancetoanyapplicablelocallawsofrequirementfordisposalofelectricalequipmentorbatteries.
Insodoing,youwillhelptoconservenaturalresourcesandimprovestandardsofenvironmentalprotectionin
treatmentanddisposalofelectricalwaste(WasteElectricalandElectronicEquipmentDirective).
WARNING:Prolongedexposuretoloudsoundsfrompersonalmusicplayersmayleadtotemporaryor
permanenthearingloss.
Where to place the item :
Today’sfurnitureiscoatedwithawidevarietyoflacquersandsynthetic-coatingsthataretreatedwithanextensiverangeofcleaningproducts.Therefore,
thepossibilitythatsomeofthesesubstancescontaincomponentsthatreactadverselytotherubberfeetoftheitemandsoftenthem,cannotbecompletely
excluded.Therubberfeetoftheappliancecancausediscoloringtofurnituresurfaces.Ifnecessary,placetheapplianceonanon-slidesurface.
®Allrightsreserved
Service
For more information and helpdesk support, please visit www.lenco.com
LencoBeneluxBV,Thermiekstraat1a,6361HB,Nuth,TheNetherlands
CD16MP3-LENCO-FM-ENG-TCD20ACD RED + TEMP.indd 8 18/10/2017 11:25:35
Table of contents
Other LENCO Portable Radio manuals

LENCO
LENCO SCD-420RD User manual

LENCO
LENCO SCD-330 User manual

LENCO
LENCO IPD-5100 User manual

LENCO
LENCO ODR-150 User manual

LENCO
LENCO SCD-620 User manual

LENCO
LENCO SCD-38 USB User manual

LENCO
LENCO PDR-011BK User manual

LENCO
LENCO PDR-046 User manual

LENCO
LENCO SCD-341BK User manual

LENCO
LENCO SCD-430RD User manual

LENCO
LENCO SCD-200 User manual

LENCO
LENCO SCD-580 User manual

LENCO
LENCO DAR-017 User manual

LENCO
LENCO PDR-045 User manual

LENCO
LENCO PR2700 User manual

LENCO
LENCO PDR-03 User manual

LENCO
LENCO PDR-031 User manual

LENCO
LENCO PDR-045BK User manual

LENCO
LENCO SCD-580SI User manual

LENCO
LENCO SCD-501 User manual