manuals.online logo
Brands
  1. Home
  2. •
  3. Brands
  4. •
  5. Lennox
  6. •
  7. Indoor Fireplace
  8. •
  9. Lennox Signature Montebello DLX Series User manual

Lennox Signature Montebello DLX Series User manual

NOTE: DIAGRAMS & ILLUSTRATIONS ARE NOT TO SCALE
INSTALLATION INSTRUCTIONS FOR GAS CONVERSION KITS
FOR USE WITH MONTEBELLO®DLX DIRECT-VENT GAS FIREPLACES
[FIREPLACE MODELS MDLX40, MDLX45]
P/N 506019-99
Rev. NC 06/2012
HEARTH PRODUCTS
KITS AND ACCESSORIES
GAS CONVERSION KITS
CAUTION
RISK OF PERSONAL INJURY OR PROPERTY DAMAGE.
•Never operate fireplace without liner panels installed.
•These appliances are NOT approved for operation without
liner panels.
•Do NOT abuse glass doors by striking or slamming shut.
•Never operate fireplace with glass door assembly removed.
•Handle glass door assembly with extreme care. Replace
damaged glass door assembly with approved replacement
assembly only.
•Use only media approved for use with these fireplaces (as
applicable). Failure to use approved media may result in sooting,
delayed ignition, or other improper fireplace operation, and may
void the warranty.
WARNING
HOT GLASS WILL CAUSE BURNS.
DO NOT TOUCH GLASS UNTIL COOLED.
NEVER ALLOW CHILDREN TO TOUCH GLASS.
•Install only when fireplace is OFF and COLD.
•Fireplace surfaces get EXTREMELY HOT!
•The glass on the front of the fireplace reaches EXTREMELY HIGH
temperatures and can cause severe burns if touched. Even after
the gas is turned off, fireplace surfaces remain extremely hot.
•Keep children away from an operating fireplace. Closely
supervise children in any room where a fireplace is operating to
prevent contact with glass.
NOTICE
•READ ALL STEPS BEFORE STARTING INSTALLATION.
•LEAVE THESE INSTRUCTIONS WITH THE APPLIANCE.
•All warnings, precautions, and instructions in the Installation
Instructions and Care and Operation Instructions provided with the
appliance also apply to these instructions.
•If you encounter any problems, need clarification of these
instructions, or are not qualified to properly install this kit, contact
your local distributor or dealer.
1
AVERTISSEMENT
Cette trousse de conversion doit être installée
par un technicien agréé, selon les instructions
du fabricant et selon toutes les exigences et tous
les codes pertinents de l’autorité compétente.
Assurez-vous de bien suivre les instructions
dans cette notice pour réduire au minimum le
risque d’incendie, d’explosion ou la production
de monoxyde de carbone pouvant causer des
dommages matériels, des blessures ou la mort. Le
tecnicien agréé est responsable de l’installation
de cette trousse. L’installation n’est pas adéquate
ni complète tant que le bon fonctionnement de
l’appareil converti n’a pas été vérifié selon les
instructions du fabricant fournies avec la trousse.
Le fournisseur de service qualifié ayant réalisé
l'installation assume les responsabilités liées à
la conversion.
WARNING
This conversion kit shall be installed by a
qualified service agency in accordance with the
manufacturer’s instructions and all applicable
codes and requirements of the authority having
jurisdiction. If the information in these instruction
is not followed exactly, a fire, explosion or
production of carbon monoxide may result causing
property damage, personal injury or loss of life.
The qualified service agency is responsible for
the proper installation of this kit. The installation
is not proper and complete until the operation of
the converted appliance is checked as specified
in the manufacturer’s instructions supplied with
the kit.The qualified service agency performing
this installation assumes responsibility for
this conversion.
2
General Information
Gas conversion kits are available to adapt your appliance
from the use of natural gas to propane, or propane to natural
gas. These kits contain all the necessary components needed
to complete the task including labeling that must be affixed
to ensure safe operation. The information provided must be
used in conjunction with the Care and Operation Instructions
(P/N 506025-07). Please read the instructions completely before
performing the procedures detailed in this document.
Deration
These appliances are tested and approved for installations at
elevations of 0–4500 ft (0–1372 m) above sea level using the
standard burner orifice sizes (see Table 1).
At higher elevations, the amount of BTU fuel value delivered
must be reduced by either using gas that has been derated by
the gas company or by changing the burner orifice to a smaller
size as regulated by the local Authorities Having Jurisdiction and
by the (USA) National Fuel Gas Code NFPA 54/ANSI Z223.1—
latest edition or, in Canada, the CAN/CSA-B149.1 codes—
latest edition.
Model Natural Gas Propane
MDLX40 0.1405in.(#28)*•H2286 0.086in.(#44)*•H2287
MDLX45 0.154in.(#23)*•H8808 0.093in.(#42)*•H4816
* Standard size installed at factory
•Part/CatalogNumber
Table 1: Burner Orifice Sizes, Elevation 0–4500 ft ( 0–1372 m)
NOTE: Turn off the appliance and allow it to completely cool
before proceeding.
Required Tools
• Torx T20 Driver
• 5/32 in. Allen wrench
• Manometer
• 1/2 in. Deep socket or
open ended wrench
• 5/16 in. Hex-head nut driver
• 5/8 in. Open ended wrench
Kit Contents
• Orifice, Brass (1)
• SIT Regulator LP or NG
Conversion Kit (1)
• Label, Valve
Identification (1)
• Injector, Pilot Orifice (1)
• Label, Conversion (1)
Fireplace
Model No. Conversion Kit
Model No. Conversion Kit Cat. No.
MDLX40IN GCK-MDLX40NP H8668
MDLX45IN GCK-MDLX45NP H8669
Table 2: Natural Gas to Propane Gas Conversion Kits
Fireplace
Model No. Conversion Kit
Model No. Conversion Kit Cat. No.
MDLX40IP GCK-MDLX40PN H8670
MDLX45IP GCK-MDLX45PN H8671
Table 3: Propane Gas to Natural Gas Conversion Kits
NOTE: For contemporary LP burner setups, use the orifice and
conversion label shipped with the burner kit.
Before Installing the Kit
Step 1. Turn off the gas supply to the appliance and
disconnect the power supply at the circuit breaker.
Step 2. Remove the kit contents from the packaging carefully
to prevent breakage.
Step 3. Remove the modesty shield above the appliance front
door to expose the door screws.
Step 4. Remove the fireplace screen and screen rod, if installed.
Step 5. Remove the appliance front door before installing the
gas conversion kit. Refer to the appliance Installation
Instructions (P/N 506023-15).
Step 6. Carefully remove the logs and the grate assembly /
contemporary media, if installed.
CAUTION: THE GAS SUPPLY SHALL BE SHUT OFF PRIOR
TO DISCONNECTING THE ELECTRICAL POWER, BEFORE
PROCEEDING WITH THE CONVERSION.
ATTENTION. AVANT D’EFFECTUER LA CONVERSION,
COUPEZ D’ABORD L’ALIMENTATION EN GAZ,
ENSUITE, COUPEZ L’ALIMENTATION ÉLECTRIQUE.
Kit Installation Instructions
NOTE: In Canada, the conversion shall be carried out in
accordance with the requirements of the provincial authorities
having jurisdiction and in accordance with the requirements of
the CAN/CGA-B149.1 installation code.
La conversion devra être effectuée conformément
aux recommandations des autorités provinciales
ayant juridiction et conformément aux exigences du
code d’installation CAN/CGA-B149.1.
Step 1. Ensure all steps of “Before Installing the Kit” have been
completed, and that the appliance is cold.
Step 2. Refer to Figure 1. Remove the two (2) 5/16 in.
hex-head screws securing the burner to the burner
brackets. Carefully slide the burner to the left to clear
the venturi from the orifice. Set aside the screws
and burner assembly in a secure location for later
reinstallation.
Burner Assembly
Gas Valve Assembly
Burner Orifice
Venturi
Figure 1: Burner / Gas Assembly Removal
3
Step 3. Using a 5/16 in. hex-head nut driver, remove the
two (2) screws securing the control compartment door
to the right side of the appliance.
Step 4. Rotate the control compartment door into the control
compartment and lift it away from the appliance. Set
aside the screws and control compartment door in a
secure location for later reinstallation.
NOTE: For Step 6 through Step 8, refer to the
instructions provided with the SIT valve for more
information.
Step 5. Using a Torx T20 driver, remove and discard the two
pressure regulator mounting screws, the stepper
motor pressure regulator tower, the spring, and
the diaphragm assembly. Properly dispose of all
removed components.
Wire
(from DFC
Wire Harness)
Stepper
Motor
Pressure
Regulator
Tower
Main Gas Inlet
3/8 in. NPT
Green Wire
(from DFC Wire Harness)
Inlet (IN) Test Port
Manifold (OUT) Test Port
Connect
GTMS wire
harness
Yellow Ground Wire
(from DFC Wire
Harness)
Figure 2: SIT Electronic Valve
Step 6. Confirm the rubber gasket is firmly attached and
properly positioned on the back of the replacement
stepper motor pressure regulator. Install the new
stepper motor pressure regulator assembly using the
supplied screws. Securely tighten the screws (25 lb-in).
Step 7. Attach the enclosed valve identification label to the
valve body where it can be easily seen.
Step 8. Make stepper motor pressure regulator and valve
electrical connections.
Step 9. Refer to Figure 3 and remove the pilot hood assembly
to access the hex-head pilot orifice. Pull up sharply on
the pilot hood to remove it.
NOTE: Use care to avoid damaging the
igniter assembly. The pilot hood is secured with a
spring clip; do not remove this spring clip.
Pilot
Orifice
Pilot
Hood
Figure 3: Pilot Orifice Replacement
Step 10. Using a 5/32 in. Allen wrench, remove the pilot orifice
from the pilot burner and replace it with the pilot orifice
provided in the kit.
Pilot Hood
Igniter Rod
Flame
Sensor Pilot
Nozzles
Figure 4: Completed Pilot Assembly
Step 11. Reinstall the pilot hood by orienting it over the pilot
orifice and pressing down until it snaps into place.
Step 12. Using a 1/2 in. deep socket or open ended wrench,
remove the main burner orifice.
NOTE: Use a 5/8 in. open ended wrench to secure the
orifice holder while removing the main burner orifice.
Step 13. Verify the proper burner orifice size needed
(see Table 1).
Step 14. Using a small amount of pipe thread joint compound
and a 1/2 in. deep socket / open ended wrench, install
the new burner orifice.
NOTE: Ensure propane resistant compounds are
used in propane applications. Do not use pipe joint
compounds on flare fittings. Do not get any pipe joint
compound in the burner orifice.
Step 15. Replace the burner assembly, and ensure the venturi
tube slides onto the main burner orifice.
Step 16. Reinstall the two 5/16 in. screws removed in Step 2.
Printed in U.S.A. © 2012 Lennox Hearth Products LLC
P/N 506019-99 Rev. NC 06/2012 1508ElmHillPike,Suite108•Nashville,TN37210
Lennox Hearth Products reserves the right to make changes at any time, without notice, in design,
materials, specifications, prices and also to discontinue colors, styles and products. Consult your local
distributor for fireplace code information.
LENNOX®, the LENNOX design, DAVE LENNOX, the image of DAVE LENNOX and other related LENNOX
marks are registered or common law trademarks of Lennox Industries Inc. and are used with permission.
4
Step 7. Adjust the air shutter as necessary.
NOTE: Refer to the Care and Operation Instructions
provided with the appliance for more information.
Amount of Primary Air Flame Color Air Shutter
Adjustment
If air shutter is closed too far Flame will be orange Air shutter gap should
be increased
If air shutter is open too far Flame will be blue Air shutter gap should
be decreased
Table 6: Air Shutter Adjustment Guidelines:
After Installing the Kit
Step 1. Reinstall the logs and the grate assembly /
contemporary media, if applicable.
Step 2. Reinstall the appliance front door. Refer to the
appliance Installation Instructions (P/N 506023-15).
Step 3. Reassemble the remaining components by reversing
the procedures outlined in the preceding steps.
Step 4. Attach the conversion label provided in the conversion
kit to the rating plate on the appliance.
Step 5. The BTU input for these appliances is shown in
Table 7.
Model No. Input (BTU/Hr)
Natural Gas
MDLX40IN 32,000 to 50,000
MDLX45IN 38,500 to 60,000
Propane Gas
MDLX40IP 32,000 to 50,000
MDLX45IP 38,500 to 60,000
Table 7: Input (BTU/HrR)
Testing
Step 1. Reconnect the power supply at the circuit breaker.
Step 2. Return gas to the system and relight the appliance.
Step 3. With the main burner “ON”, test the new pressure
regulator assembly and all gas line joints for leaks
using a gas leak test solution.
NOTE: The lighting instructions can be found on
the lighting label in the control compartment or in
the Care and Operation Instructions provided with
the appliance.
Step 4. Inspect the pilot system for proper flame appearance.
The pilot flame should engulf the flame sensor as
shown in Figure 4.
Step 5. Inspect the burner for proper flame appearance
(Figure 5).
Figure 5: Burner Flame Appearance
Step 6. Using a manometer, test the inlet and manifold
gas pressures by cycling the appliance with the remote
control. Refer to Table 4 and Table 5 for optimal gas
supply pressures.
NOTE: Always test pressures with the valve regulator
control at the highest setting.
Fuel # Minimum Maximum
Natural Gas 5.5 in. WC (1.37 kPa) 10.5 in. WC (2.61 kPa)
Propane 11.0 in. WC (2.74 kPa) 13.0 in. WC (3.23 kPa)
Table 4: Inlet Gas Supply Pressure
Fuel # Low High
Natural Gas 1.6 in. WC (0.4 kPa) 3.5 in. WC (0.87 kPa)
Propane 6.3 in. WC (1.57 kPa) 10.0 in. WC (2.49 kPa)
Table 5: Manifold Gas Supply Pressure

This manual suits for next models

2

Other Lennox Indoor Fireplace manuals

Lennox Country Winslow PI40 User manual

Lennox

Lennox Country Winslow PI40 User manual

Lennox MPB3328CNM-B User manual

Lennox

Lennox MPB3328CNM-B User manual

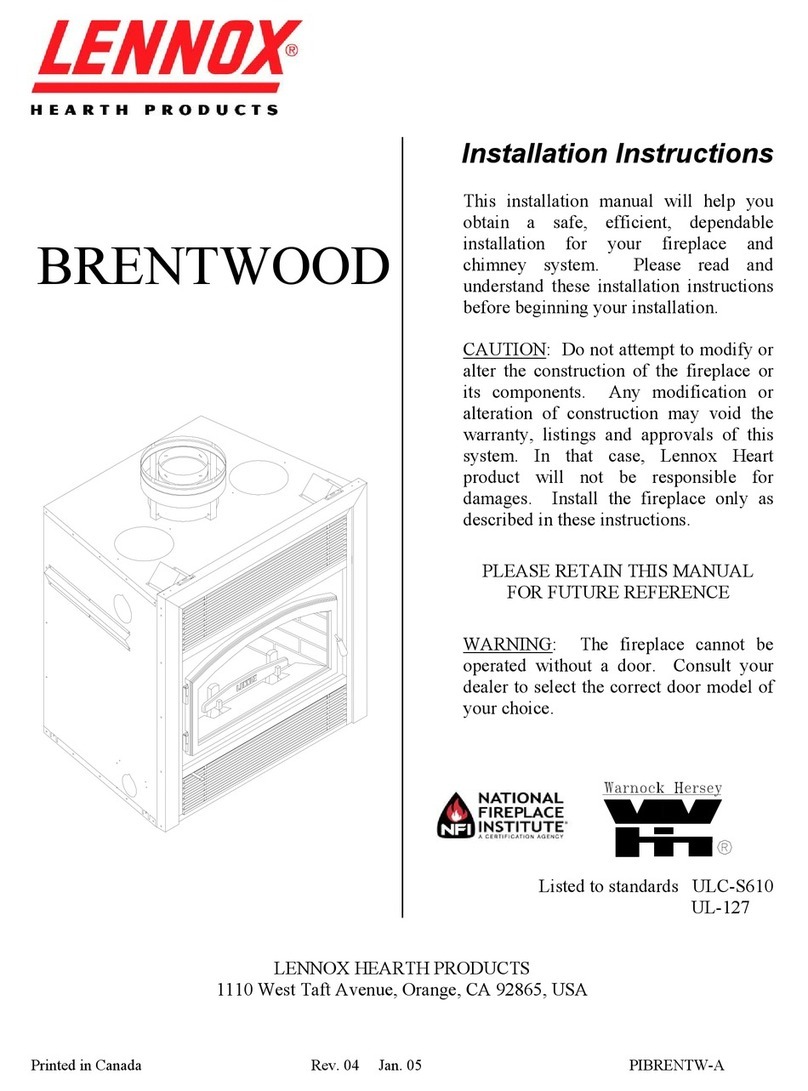
Lennox BRENTWOOD SP User manual

Lennox

Lennox BRENTWOOD SP User manual
Lennox B-VENT METIT Series User manual

Lennox

Lennox B-VENT METIT Series User manual

Lennox ESTATE EST-36 User manual

Lennox

Lennox ESTATE EST-36 User manual

Lennox ELITE ME43BKSP User manual

Lennox

Lennox ELITE ME43BKSP User manual

Lennox MPD-3328 Series User manual

Lennox

Lennox MPD-3328 Series User manual

Lennox Elite CVF - NG User manual

Lennox

Lennox Elite CVF - NG User manual

Lennox MERIT Plus MPDP35IN User manual

Lennox

Lennox MERIT Plus MPDP35IN User manual

Lennox ESTATE EST-36 User manual

Lennox

Lennox ESTATE EST-36 User manual

Lennox MPB35ST-NM-B User manual

Lennox

Lennox MPB35ST-NM-B User manual

Lennox Elite ELDV-35NM User manual

Lennox

Lennox Elite ELDV-35NM User manual

Lennox Merit lmbv-36rmn User manual

Lennox

Lennox Merit lmbv-36rmn User manual

Lennox Crestline LSBV-3628MN User manual

Lennox

Lennox Crestline LSBV-3628MN User manual

Lennox EDV3530CNM-B User manual

Lennox

Lennox EDV3530CNM-B User manual

Lennox MPB35ST-NM User manual

Lennox

Lennox MPB35ST-NM User manual

Lennox MPB35ST-NM-B User manual

Lennox

Lennox MPB35ST-NM-B User manual

Lennox P1BRENTW-A User manual

Lennox

Lennox P1BRENTW-A User manual

Lennox H6963 User manual

Lennox

Lennox H6963 User manual

Lennox Elite ELDV-35NM User manual

Lennox

Lennox Elite ELDV-35NM User manual

Lennox PI40-HK User manual

Lennox

Lennox PI40-HK User manual

Lennox EBVSTNM-B User manual

Lennox

Lennox EBVSTNM-B User manual

Lennox MLDVTCD-35NM User manual

Lennox

Lennox MLDVTCD-35NM User manual
Lennox RD-42 User manual

Lennox

Lennox RD-42 User manual

Popular Indoor Fireplace manuals by other brands

superior fires CLARA LED INSET ELECTRIC FIRE Installation & user's instructions

superior fires

superior fires CLARA LED INSET ELECTRIC FIRE Installation & user's instructions

Dovre Attityd 200 Installation instructions & operating manual

Dovre

Dovre Attityd 200 Installation instructions & operating manual

Majestic B36LA Installation, operation and maintenance instructions

Majestic

Majestic B36LA Installation, operation and maintenance instructions

Napoleon NEFP24HT Installation and operation manual

Napoleon

Napoleon NEFP24HT Installation and operation manual

Quadra-Fire EXPEDITIONII-AU installation manual

Quadra-Fire

Quadra-Fire EXPEDITIONII-AU installation manual

Palazzetti GISELLE 66 PRODUCT TECHNICAL DETAILS

Palazzetti

Palazzetti GISELLE 66 PRODUCT TECHNICAL DETAILS

Enviro 1200-C Insert owner's manual

Enviro

Enviro 1200-C Insert owner's manual

Lennox Hearth Products Radium-NG Installation and operation manual

Lennox Hearth Products

Lennox Hearth Products Radium-NG Installation and operation manual

superior fires LCD ELECTRIC FIRE Installation & user's instructions

superior fires

superior fires LCD ELECTRIC FIRE Installation & user's instructions

Charnwood FIREPIT Operating and installation instructions

Charnwood

Charnwood FIREPIT Operating and installation instructions

MHSC Savannah SSI30 owner's manual

MHSC

MHSC Savannah SSI30 owner's manual

Valor Heartbeat OXYSAFE 2 owner's guide

Valor

Valor Heartbeat OXYSAFE 2 owner's guide

Continental Fireplaces CHD35NT Installation and operating instructions

Continental Fireplaces

Continental Fireplaces CHD35NT Installation and operating instructions

Valor LT2 2700K manual

Valor

Valor LT2 2700K manual

Dimplex BLF7451 Service manual

Dimplex

Dimplex BLF7451 Service manual

Miles Industries Valor Portrait 922ECN/ECP Installation & operating instructions
Miles Industries

Miles Industries Valor Portrait 922ECN/ECP Installation & operating instructions
Riello 40 GS20 Installation, use and maintenance instructions

Riello

Riello 40 GS20 Installation, use and maintenance instructions

Firegear Nightfire NFOD42-N Owners & installation manual

Firegear

Firegear Nightfire NFOD42-N Owners & installation manual

manuals.online logo
manuals.online logoBrands
  • About & Mission
  • Contact us
  • Privacy Policy
  • Terms and Conditions

Copyright 2025 Manuals.Online. All Rights Reserved.