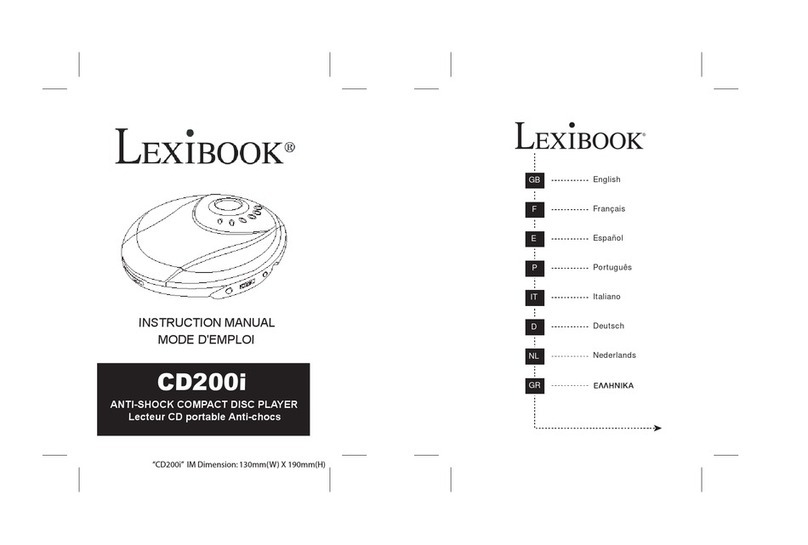
LEXIBOOK CD200I User manual

“CD200i” IM Dimension: 130mm(W) X 190mm(H)
GB
F
E
P
IT
D
NL
GR
English
Français
Español
Português
Italiano
Deutsch
Nederlands
INSTRUCTION MANUAL
MODE D'EMPLOI
CD200i
ANTI-SHOCK COMPACT DISC PLAYER
Lecteur CD portable Anti-chocs

Congratulations on the purchase of your Lexibook CD200i!
This document is a brief guide, which illustrates CD200i main features and functions. It
will also help and guide you with the usage of the product.
Please read carefully and follow these instructions before using the functions offered
with this unit to their full potential.
CAUTIONS FOR SAFETY
Do not take the unit apart. The laser beam used in the unit could harm your eyes.
1. Do not insert needles or other objects inside the unit. This unit is equipped with a
safety device which automatically turns the laser beam off when the disc
compartmentis opened. However, if a needle or another qobject should get inside the
unit, this safety device could be deactivated.
2.Do not drop the unit or subject it to strong shocks. Doing so could result in damage.
Do not place the unit in the following locations:
1.Places where temperature is high. The unit's cabinet may warp or the unit could
otherwise be damaged if placed in direct sunlight, near heaters or radiators (where
temperature is 140º F/60º C or higher) or inside cars with all windows up. (In the
summer, temperature may get as high as 212º F/110º C or more.)
2.Use the unit within a temperature range of 41º F/5 ºC to 95º F/35º C.
3.In humid or dusty places.
4.In places exposed to heavy vibrations.
5.On unstable or tilted surfaces.
CONDENSATION
If cold water is poured into a glass, water droplets will form on the outside of the glass.
This is called condensation. Condensation may appear on internal operating parts of the
laser pickup.
Condensation appears:
● When the unit is brought from outdoors into a warm room, or if it stays in a cold room
which is heated up quickly.
● During the summer, if the unit is transferred from an air-conditioned room or car to a
hot or humid place.
Should condensation appear, please do the following:
The unit may not operate properly if condensation is formed inside it. Wait for 1 to 2
hours (to allow the internal parts to adjust to the surrounding temperature) before using
the unit.
Warning regarding exposure to water: The product shall not be exposed to water
spillage or splashing, and no objects containing liquids, such as vases, should be placed
on top of the product.
Warning regarding ventilation: The ventilation openings of the product should not be
obstructed on purpose.
3
[1] CD DOOR
[2].BACKWARD SKIP/SEARCH BUTTON
[3] FORWARD SKIP/SEARCH BUTTON
[4] LCD (Liquid Crystal Display)
[5] PLAY/PAUSE BUTTON
[6]PLAYBACK MODE BUTTON
[7] PROGRAM BUTTON
[8] STOP/ POWER OFF BUTTON
[9] LINE OUT JACK
[10] VOLUME CONTROL
[11] HEADPHONES JACK
[12] BATTERY COMPARTMENT
[13] CD DOOR OPEN SWITCH
[14] DC INPUT JACK (adaptor)
[15] HOLD SWITCH (OPTIONAL)
[16] BASS BOOST SWITCH
[17] CHARGE INDICATOR (OPTIONAL)
[18] CHARGE SWITCH (OPTIONAL)
POWER SUPPLY
Plug one end of the AC adaptor (optional) into the DC INPUT jack [14], and then plug
the other end into an AC wall outlet.
NOTE:
If the AC plug of this unit does not fit in your AC outlet, an adaptor plug (not included)
should be used. Consult your local dealer on the type of adaptor plug required.
Precautions when using the AC Adaptor (optional).
1.Do not touch the AC adaptor with wet hands. Doing so is dangerous, as you could
receive an electrical shock.
2.If the AC adaptor is connected while the batteries are installed, the power supply
automatically switches to the AC power source and the power input from the batteries
will be switched off.
4

ALKALINE BATTERY INSTALLATION (NOT SUPPLIED)
Open the battery cover sliding the CD door opening switch [13].
Open the battery compartment [12].
Insert two AA batteries (not supplied) into the battery compartment. Be sure to observe
the proper polarity (the "+" and "-" signs) as indicated inside the battery compartment.
Close back the battery compartment [12] until your hear a “click” sound.
NOTE ON ALKALINE BATTERIES
1.When replacing the alkaline batteries, use two new batteries of the same type. Do not
mix new and used batteries or mix different types of batteries.
2.When inserting the batteries, even if you mistakenly insert one with the wrong polarity,
it will cause the batteries to leak.
3.Does not recharge, heat, disassemble or throw batteries into a fire.
REMEMBER
1.If the symbol " " flashes in the display, the batteries are weak, replace them or use
the AC adaptor.
2.If the Display is blank, i.e. no numbers show when the PLAY/PAUSE button [5] is
pressed, the batteries are dead. Replace them, use AC Adapter or Cigarette Lighter
Adapter (Also check if you have inserted the batteries according to the + and – polarity
as shown).
IMPORTANT NOTE:
Dead or discharged batteries must be recycled or disposed of properly in compliance
with all applicable laws. For detailed information, contact your local solid waste recycling
authority.
RECHARGING AND USING RECHARGEABLE BATTERIES (OPTIONAL)
The rechargeable batteries (Not supplied) should must be fully recharged before being
used for the first time because they may beare low in power or they may have not been
used for a long perido of time (over 60 days)"
1.Open the battery compartment cover and insert two rechargeable batteries of the
recommended type, matching the polarity. (1.2V 650mA)
5 6
ALL BATTERIES MUST BE RECHARGEABLE OF THE NICKEL-CADMIUM TYPE,
OTHERWISE THE BATTERIES MAY EXPLODE OR LEAK.
2.Plug in the AC adaptor [14] and set the Chargeing switch [18] to the ON position to
start recommended type, matching the polarity. (1.2V 650mA)harging the batteries.
WHEN CHARGING THE BATTERIES, PLEASE USE ONLY THE AC ADAPTOR
(OPTIONAL) WITH THE UNIT.
3. After 15 hours, please unplug the AC adaptor and switch the charge. Charging switch
[18] back to the OFF position.
DO NOT CHARGE CONTINUOUSLY FOR 24 HOURS OR MORE. DOING SO CAN
SERIOUSLY AFFECT THE PERFORMANCE OF THE RECHARGEABLE
BATTERIES.
NOTE: you may play a CD while the batteries are being recharged.
4.If the operating time decreases drastically even after the rechargeable nickel-cadmium
batteries have been fully charged, please purchase a new set of rechargeable
nickel-cadmium batteries.
5.When charging for the first time or after a long period of charge, playing time
may be reduced. In this case, recharge and discharge the batteries several times.
HANDLING COMPACT DISCS
This unit is designed to play compact discs bearing the
identification logo shown on the right.
Discs that do not carry this logo may not comply with CD
standard and may not play properly.
Dirty, scratched or warped discs may cause the player to
skip or to make noise. Please handle the disc only by the
edges. To keep the disc clean, do not touch its surface.
1.Disc should be returned to their cases after use so as to avoid receiving serious
scratches which could cause the laser pickup to skip.
2.Do not expose discs to direct sunlight, high humidity, or high temperatures for
extended periods of time. Prolonged exposure to high temperatures can warp the disc.
3. Do not apply paper or write anything on either side of the compact disc. Sharp writing
instruments, or the inks used in some felt-tip pens, may damage the surfaces of the
disc.

7 8
CLEANING COMPACT DISCS
1.Fingerprints should be wiped from the surface of the disc with
a soft cloth. Unlike conventional vinyl records, compact discs
have no grooves to collect dust and microscopic debris, so
gently wiping them with cloth should remove most of the
particles. Wipe in a straight motion from the centre to the outer
edge of the disc.
2.Never use chemicals such as record cleaning sprays, antistatic
sprays, benzene or thinner to clean compact discs. Such
chemicals can damage the plastic of the disc.
● The unit will not play a disc that has been inserted upside down, or discs that
do not comply with Compact Disc standards. Also, the unit may not play discs
that are scratched, soiled or have fingerprints on them.
● 3" (8cm) CDs can be played without an adaptor.
PLAYING A CD
Be sure to reduce the volume before plugging or unplugging the headphones/earphones.
1. Plug the cord from a pair of headphones/earphones into the HEADPHONES jack [11].
2. Slide the OPEN switch [13] to open the CD door.
3. Hold the disc with the label facing up and press it onto the spindle until it "snaps" in
place.
Close the CD compartment, press the PLAY/PAUSE button [5], the disc will begin to
spin, and after several seconds the total number of tracks in the CD, and the total
playing time will show on the display, the player will start playing track number 1
automatically.
5. Adjust the volume as desired using volume control knob [10].
6. Set the Bass Boost function [16] as desired (see page 9).
7. To temporarily stop, press the PLAY/PAUSE button [5]
● The elapsed playing time flashes in the display.
● Press the PLAY/PAUSE button [5] again to resume play.
8. To stop play, press the STOP button [8]. The total number of tracks and total playing
time will appear in the display. Press the STOP button [8] once again and power of the
unit will be immediately turned off.
TRACK SEARCH
With the unit switched on, press the 9 [2] or
9
[3] button during play to skip to the
desired track
1.Press the
9
button [3] to skip to the next track on the disc.
2.Press the 9 button [2] to skip to the beginning of the track currently playing.
3.Press the 9 button [2] twice or more to skip to previous tracks.
SKIP BACKWARDS / FORWARD SEARCH
Press and hold the 9 [2] or
9
[3]button during playback to scan the disc at high
speed. When the desired section of the disc is found, release the button.
Normal play will resume.
9
FWD ................................... FORWARD
9 BACK ................................ REVERSE
1. If you press and hold the
9
button [3] during playback, it will scan the current track
forward at high speed.
2. If you press and hold the 9 button [2] while playing, it will scan the current playing
track backward at high speed.

9 10
ELECTRONIC SHOCK PROTECTION SYSTEM
The digital ELECTRONIC-SHOCK PROTECTION function uses semiconductor memory
in order to prevent the sound from skipping when the unit is subjected to impacts and
vibration during playback.
● While the disc begins to play, the " " indicator appears in the
display and the digital ELECTRONIC-SHOCK PROTECTION
function turns on automatically. The digital music data is stored
in a "read-ahead" memory buffer before it is decoded and
played. The " " symbol changes to a " " symbol,
indicating that the data buffer is full.
● When the unit is subjected to an impact during playback, the
data stored in the memory continues to be decoded and played.
This gives the pickup time to stabilize and continue reading new
data. As the data is being read from the memory the indicator
changes to " ".
● Once the pickup returns to its original position, new data is
stored in the memory and the display changes back to the
" " symbol.
NOTE: The ESP function (ELECTRONIC-SHOCK PROTECTION) will start automatically
as soon as the player begins to play the CD and it cannot be cancelled.
HOLD SWITCH [15] - HOLD ALL BUTTONS (OPTIONAL)
Once all adjustments/selections are finished, slide the HOLD SWITCH [15] button to the
directionindicated by the arrow. This locks all s functions from the buttons and eliminates
the possibility of accidentally pressing any button. Slide the HOLD SWITCH [15] button
to the opposite direction indicated by the arrow to unlock all buttons.
BASS BOOST [16]
Use the Bass Boost function to increase the bass output when listening to CDs using
headphones/earphones, by sliding the bass boost switch [16] to the ON position.
AUTO POWER ON FUNCTION
AThe power turns on automatically when the PLAY/PAUSE button [5] is pressed.
AUTO POWER OFF FUNCTION
The power turns off automatically when all tracks on a disc have been played or when
the STOP button [8] is pressed after 30 seconds.
The power turns off immediately when the STOP button [8] is pressed for a second time.
PROGRAMMED PLAYBACK
The tracks on the disc can be programmed to be played in any given order. (Up to 20
tracks can be programmed.)
1. Press the PROGRAM button [7] during playback or in stop mode (STOP), " ” and
the track “ " will flash, and the program number " " will show in the display.
2. Press the 9 [2] or [3]
9
button to select the first track to be programmed.
3. Press the PROGRAM button [7]. The first track number is now stored in the memory,
the program number changes to " ", waiting for your next selection.
4. Repeat steps 2 and 3 to program additional tracks.
Note: during programming “ ” will flash in the display.
5. After programming is finished, press the PLAY/PAUSE button [5].
" " will stop flashing in the display and programmed playback will begin from the
first programmed track.
● The player stops automatically after all programmed tracks have been played. The
programmed tracks are stored in memory until the CD deck is opened or power is
turned off.
● Programming is also possible in PAUSE mode.
Program Number
1 2
3
Track Number
3 5
9

11 12
REPEATING A SINGLE TRACK
Press the PLAYBACK MODE button [6] once during playback or in stop mode, “ ”
will appear in the display. (While in stop mode, you will need to press the PLAY/PAUSE
button [5] one more time)
This plays one song over and over until you press the STOP button [8].
REPEATING ALL TRACKS
Press the PLAYBACK MODE button [6] twice during playback or in stop mode, “ ”
will show in the display. (While in stop mode, you will need to press the PLAY/PAUSE
button [5] one more time).
All songs will keep playing in sequence 1. 2. 3 etc. and all songs will keep playing over
and over again until you press the STOP button [8].
INTRO SCAN PLAYBACK
For this function to operate, you must ensure that you are not in PLAYBACK mode.
Press the PLAY MODE button [6] three times while in stop mode or during playback,
“ ” will show in the display (while in stop mode, you will need to press the
PLAY/PAUSE button [5] one more time).
The first 10 seconds of each track will be played in order starting from track 1.
RANDOM PLAY
Press the PLAY MODE button [6] four times while in stop mode or during playback,
“ ” will show in the display (While in stop mode, you will need to press the
PLAY/PAUSE button [5] one more time).
This allows the player a few seconds to start reading the first track. Please be patient.
All tracks on the disc will be played in random order selected by CD player, and then the
unit will shut off automatically.
RECORDING FROM THE LINE OUT JACK
The output from the CD player can be recorded.
Connect a lead (not supplied) from the LINE OUT jack [9] on the CD player to the LINE
INPUT jacks on a cassette recorder.
The sound from the CD can be heard through a pair of speakers.
Connect a lead (not supplied) from the LINE OUT jack [9] on the CD player to the AUX
or CD INPUT jacks of a HI-FI system.
CLEANING
CLEANING THE PICKUP LENS
Dust on the pickup lens can lead to erratic operation of the player and interruption of the
sound during playback.
To clean the pickup lens, open the disc compartment. Blow the dust off the lens using a
camera lens blower (available from most photograph equipment stores). Do not touch
the surface of the lens with your hands.
CLEANING THE CABINET
Use a soft cloth moistened with clear lukewarm water and wipe dry. Never use petrol,
benzene or other strong chemical cleaners, as these could damage the surface of the
unit. It is important that no liquid gets inside the unit.

13 14
TROUBLE SHOOTING GUIDE
SYMPTOM
CD Player will not turn on.
The CD does not play.
No sound from
headphones.
Sound is skipping.
Sound is distorted.
Tracks do not change or
unit does not play
normally.
Buttons do not work.
CAUSE
Dead or weak batteries.
The AC adaptor is not
connected properly.
Disc inserted incorrectly.
Defective or wrong type of
compact disc.
CD door not closed.
Moisture has formed inside
the CD deck.
Headphone plug not
inserted properly.
Headphones plugged into
the line out jack.
The volume control is set to
minimum.
Weak batteries.
Defective compact disc.
The compact disc or lens is
dirty.
Too much movement of the
CD player.
Music is too loud.
Weak batteries.
Bass boost is ON and
music is too loud.
Batteries are too weak and
the battery symbol will show
in the display.
Electronic or static error
caused circuitry to lock.
SOLUTION
Replace both batteries.
Check the AC adaptor connection at
AC socket and on the side of the
unit.
Re-Insert back the disc with label side
facing up.
Try another audio compact disc (DVD
or data disc will not work).
Close lid securely (press down right
side of door).
Take out the CD and leave the CD
door open for about an hour to allow
moisture and condensation to dry
out.
Insert back the headphones plug into
the headphones jack.
Plug headphone into the headphones
jack (not in the line out jack).
Increase the volume.
Replace with new batteries or use the
AC adaptor.
Try another compact disc.
Clean or replace the compact disc or
clean the lens using a camera
brush/blower.
Reduce movement of CD player.
Decrease the volume control level.
Batteries are getting weak, replace
both batteries or use the AC adaptor.
Lower volume control or slide bass
boost switch to OFF.
Replace both batteries with new
alkaline batteries. Battery life for new
batteries is about 4-8 hours.
Remove batteries and AC adaptor.
Wait a few seconds and insert the
batteries back. Make sure batteries
are new or adaptor is powered.
Warranty
This product is covered by our 2-year warranty.
To make use of the warranty or after-sales service, please contact your retailer and
supply proof of purchase. Our warranty covers material or installation-related defects
attributable to the manufacturer, with the exception of wear caused by failure to respect
the instructions for use or any unauthorised work on the equipment (such as dismantling,
exposure to heat or damp etc).
Note: It is recommended that all packaging be kept for future reference. Keep this
instruction manual in a safe place as it contains important information.
In our constant concern for improvement, the colours and details of the product may
differ slightly from those shown on the packaging.
Customer Service:
For technical assistance call our freephone helpline: 0808 100 3015
Lexibook UK Limited
Unit 10 Petersfield Industrial Estate
Bedford Road, Petersfield
Hampshire, GU32 3QA
United Kingdom
Web: http://www.lexibook.com
● The contents of this manual are subject to change without notice.
● No part of this manual may be reproduced in any form without the express written
consent of the manufacturer.
Other manuals for CD200I
1
Table of contents
Other LEXIBOOK CD Player manuals

LEXIBOOK
LEXIBOOK Barbie RCD160BB User manual

LEXIBOOK
LEXIBOOK RCD200DC User manual

LEXIBOOK
LEXIBOOK IT006 User manual

LEXIBOOK
LEXIBOOK RCD108 Series User manual

LEXIBOOK
LEXIBOOK CD200I User manual

LEXIBOOK
LEXIBOOK RCD102 Series User manual

LEXIBOOK
LEXIBOOK RCD102 Series User manual

LEXIBOOK
LEXIBOOK Spider-Sense Spider-Man K11SP User manual

LEXIBOOK
LEXIBOOK RCD102series User manual

LEXIBOOK
LEXIBOOK RCD200TS User manual